Do you want to learn how to set a required video watch time, and stop students from skimming through your carefully crafted course content?
Do you wish there was a way to make sure they fully engage with your material and actually absorb the knowledge you're sharing? Well, you're in luck!
Setting a minimum video watch time is a game-changing strategy that can transform the way your students interact with your course.
But that's not all – we'll also reveal other key strategies to create a truly engaging learning experience that keeps your students hooked from start to finish.
In this blog post, we'll walk you through the step-by-step process of implementing the minimum video watch time feature and show you how to combine it with other powerful engagement techniques to skyrocket your course's success.
Say goodbye to disengaged learners and hello to a student base committed to online learning. Let’s dive in.
Your Course Won't Be Memorable if Students Skip Content
Creating an unforgettable course isn't just about packing it with tons of valuable information. You need to make sure your students actually dive in and soak up everything you’ve created.
When your students skip parts of your course, they're missing out on the e-learning experience you've designed for them.
And let's be real, that can put a damper on the impact of all your hard work. It can also cost you future sales.

Why Engagement Is Key
Engagement is a key part of the student learning experience (and your online course business) for the following reasons:
Comprehensive Understanding:
When your students explore every nook and cranny of your content, they gain a deeper, more well-rounded understanding of the subject. Each section of your course is like a building block, stacking up to create a seamless learning journey.
Retention and Recall:
Students who are fully engaged are more likely to remember the information and whip it out when they need it most. This is absolutely essential for applying what they've learned in real-world situations and for their long-term success.
Positive Feedback and Reviews:
When students feel like they've had a true "aha!" moment, they're more likely to shout your praises from the rooftops (or, you know, leave a glowing review). This, in turn, attracts more eager learners and boosts your reputation as a Rockstar educator.
Keeping Your Learners Hooked
Let's chat about a clever and easy-peasy way to win over your students’ attention spans and keep them glued to their screens: setting a required watch time on your online videos.
By making sure your students watch the entire video length, you're giving their understanding and retention of the material a major boost. But hey, don't stop there!
Think about what else you can do to make your coursework truly unforgettable.
Interactive elements, engaging content, and fostering a sense of community can all make a world of difference.
How to Create Your Course, Set a Minimum Watch Time, and Boost Student Engagement
Setting a minimum watch time is a super effective way to get your students to complete your video lessons.
However, not every LMS tool includes this feature, and some only offer it as an expensive add-on. When you think about retaining your students' attention, don’t just focus on specific features to engage them. Think of the entire course experience.

A course is only as good as the tools you use. As an independent course creator, you need a high-quality solution that doesn’t break the bank.
In this section, you'll learn how to create an engaging course and set a minimum watch time for your video lessons using Thrive Apprentice, the best LMS plugin for independent course creators. Thrive Apprentice offers powerful features and great value, making it easier for you to deliver a memorable and effective learning experience.
1. Download and Install Thrive Apprentice
To get started with creating an engaging course that includes a "minimum watch time" feature, download and install Thrive Apprentice.
This powerful LMS plugin not only includes this essential feature but also provides a suite of tools to help you create high-quality, engaging, and informative online classes—all at an affordable price with no need for expensive add-ons. It’s truly “your course, your way” and on a budget, too.
Here’s Why You'll Love Thrive Apprentice
Get Started in a Snap
Say goodbye to complicated setups and hello to the Thrive Apprentice setup wizard. It's like having a magic wand that helps you get your course up and running in no time. No coding skills? No problem! Whether you’re a WordPress beginner or a technical expert, this is the perfect tool for you.
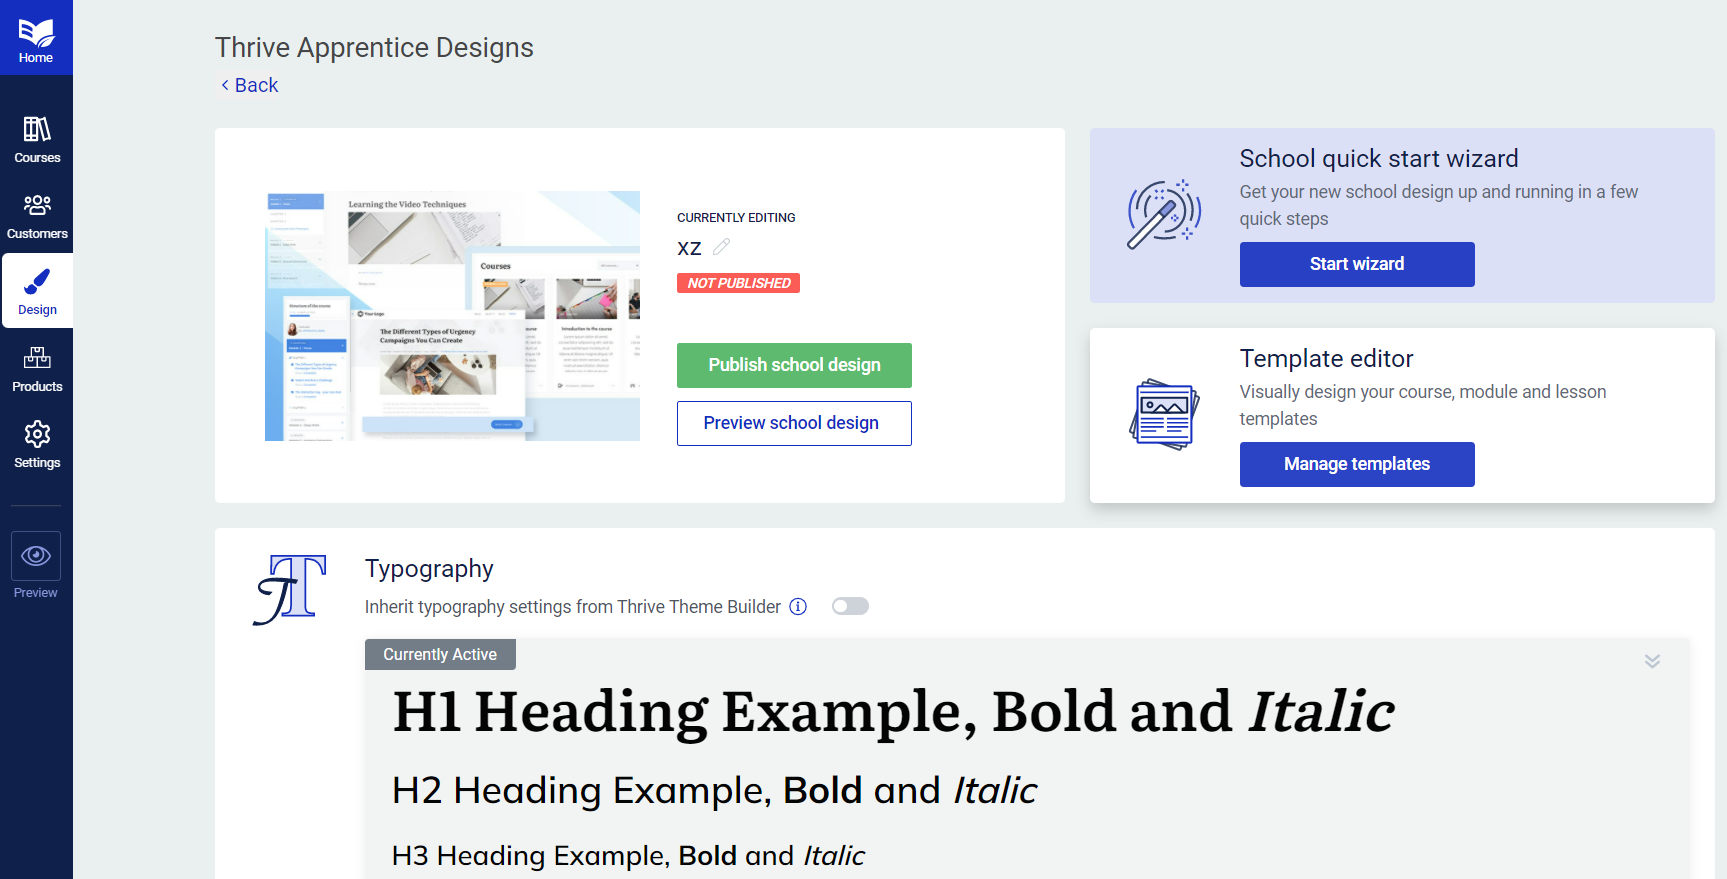
Just follow the easy-peasy steps, and you'll be ready to welcome your students in a flash.
Your Course, Your Way
With Thrive Apprentice, you're the boss. Host your entire course right on your WordPress site, giving you complete control over its look and feel.
Whether you want to have on-demand courses, asynchronous lessons, or even cohort-based sessions, you get to build your platform your way.
Your students will love the seamless, professional experience from the moment they enroll to the final celebration of their success. And you get to keep all your course sales — we don’t take a single cut!
Wow! Just wow. I've been a Thrive user for a long time and I'm building (Almost finished) a course with apprentice now. TT has always been the best on the web. Hands down. Adding apprentice into the family, especially with all the marketing solutions is a real winner for me. Love all the excellent teaching material available as well. Thanks for an absolutely excellent product.
David S
Thrive Apprentice + WooCommerce is a dream come true to me too. Now I can get rid of the membership plugin and move forward.
FENG YIN TSENG
Woo-commerce and Thrive Apprentice -> Love it! Perfect! Will try it soon. Happy Easter ✅
Ansgar
Brand It Like a Pro
Want to make your course stand out?
Thrive Apprentice's got you covered with customizable templates that you can tweak to perfection. With just a click, you can change colors to match your brand, creating a visually stunning course that's uniquely yours.
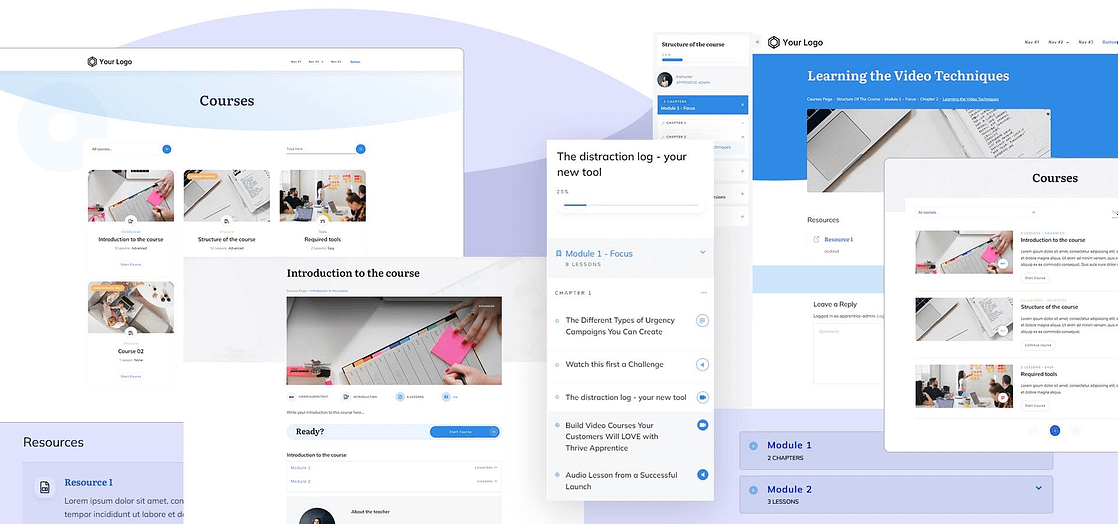
Engage and Delight Your Students
Want to keep your students coming back for more? Thrive Apprentice has got your back with interactive features that'll make learning a blast.
From assessments that test their knowledge to certificates that celebrate their achievements, your students will be grinning from ear to ear.

And here's the best part: with personalized course completion pages, you can not only make your students feel like superstars, but also guide them towards their next steps. It's the perfect opportunity to promote your other courses or products, keeping them engaged and hungry for more!
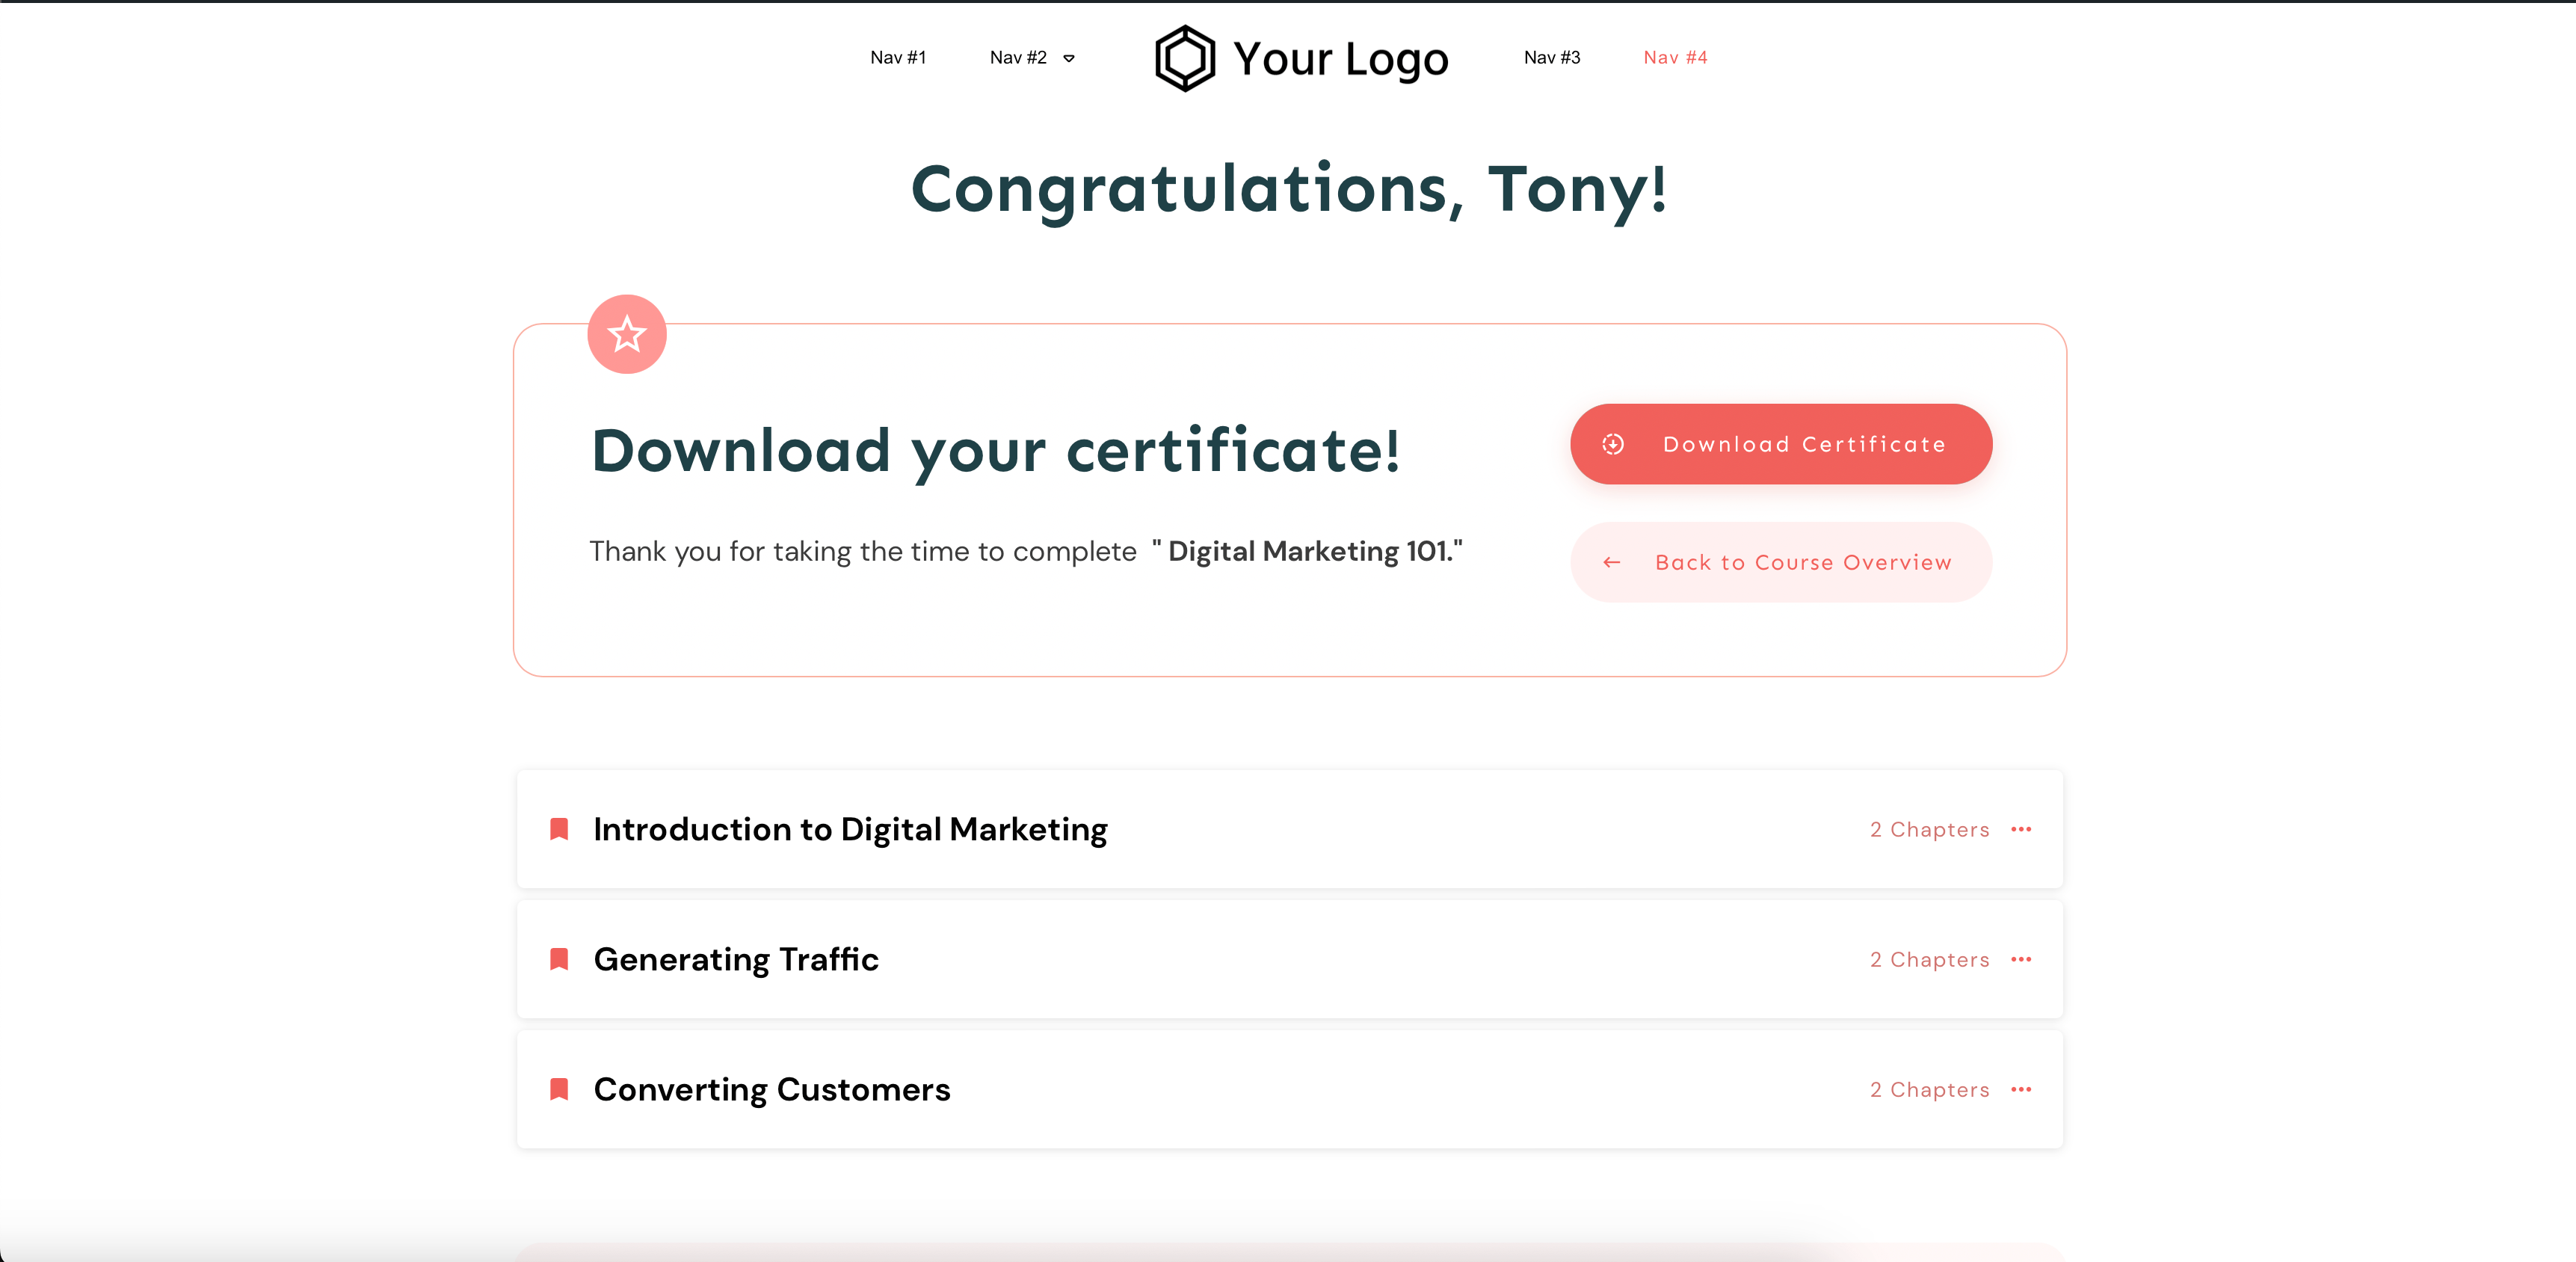
Use a WordPress course building plugin like Thrive Apprentice to design a customized course completion page for your students.
Stay Organized At All Times
Nobody likes a course that feels like a maze. With Thrive Apprentice, you can keep your students focused and motivated with features like drip content, access restrictions, and the all-important minimum watch time.
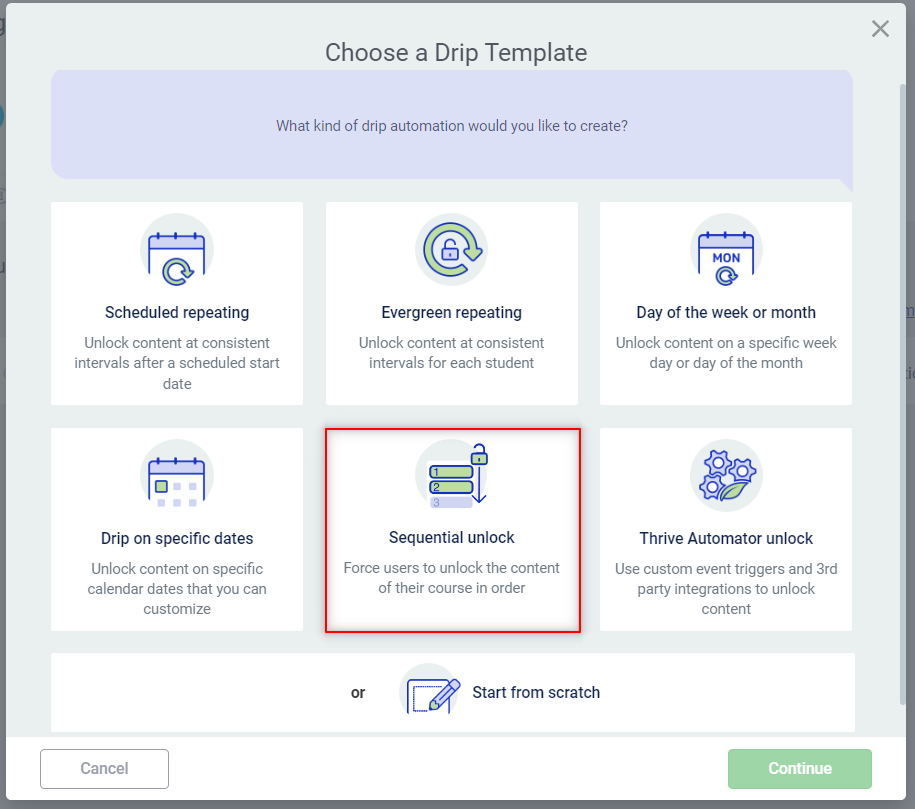
You won’t find all these features in another course-building plugin on WordPress.org or WordPress.com – and for the same price as what Thrive Apprentice offers.
Once you get this plugin, you get everything you need. No free version with limiting features. No expensive add-ons.
2. Set Up Your Online Course
Next, you need to plan and build your course:
Outline your online course: This is the roadmap for your course content. Use this outline to define learning objectives, flesh out the learning outcomes, plan every course module, and list the topics each lesson will cover.
If you plan to include assessments in your course, don’t forget to add these to your outline.
Create your course content: Use different types of media (text, video, and audio) to make your lessons engaging.
We also recommend adding real-life examples to make your content relatable and easier for your students to understand.
Think of adding interactive activities like mini-quizzes or discussion topics to make your lessons engaging.
Upload your course content in Thrive Apprentice: Once you’ve created your course material, launch Thrive Apprentice, add your content, and organize your modules and lessons.
3. Create Your First Video Lesson
Courses are organized as modules, chapters, and lessons in Thrive Apprentice. For each lesson, you can add different types of content such as text, images, videos, and downloadable files.
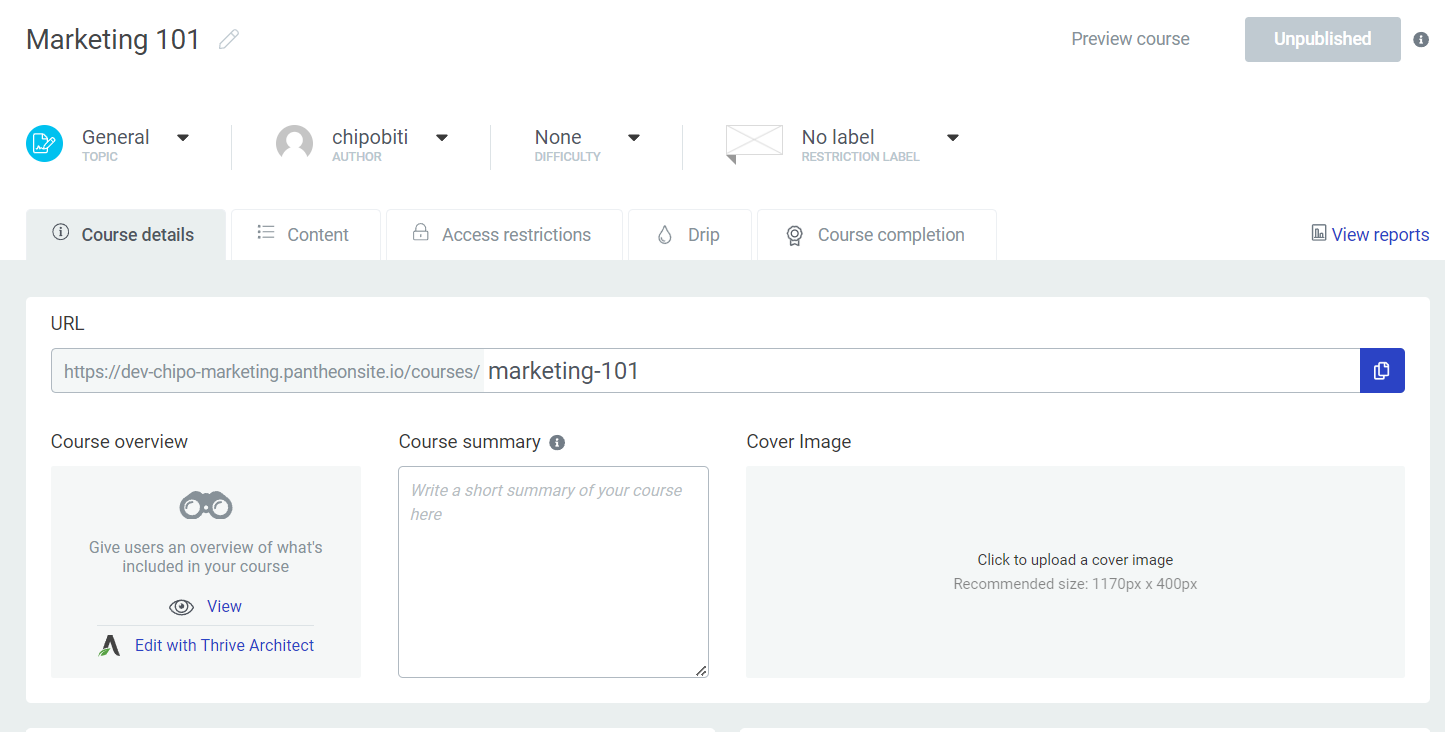
Thrive Apprentice Lesson Dashboard
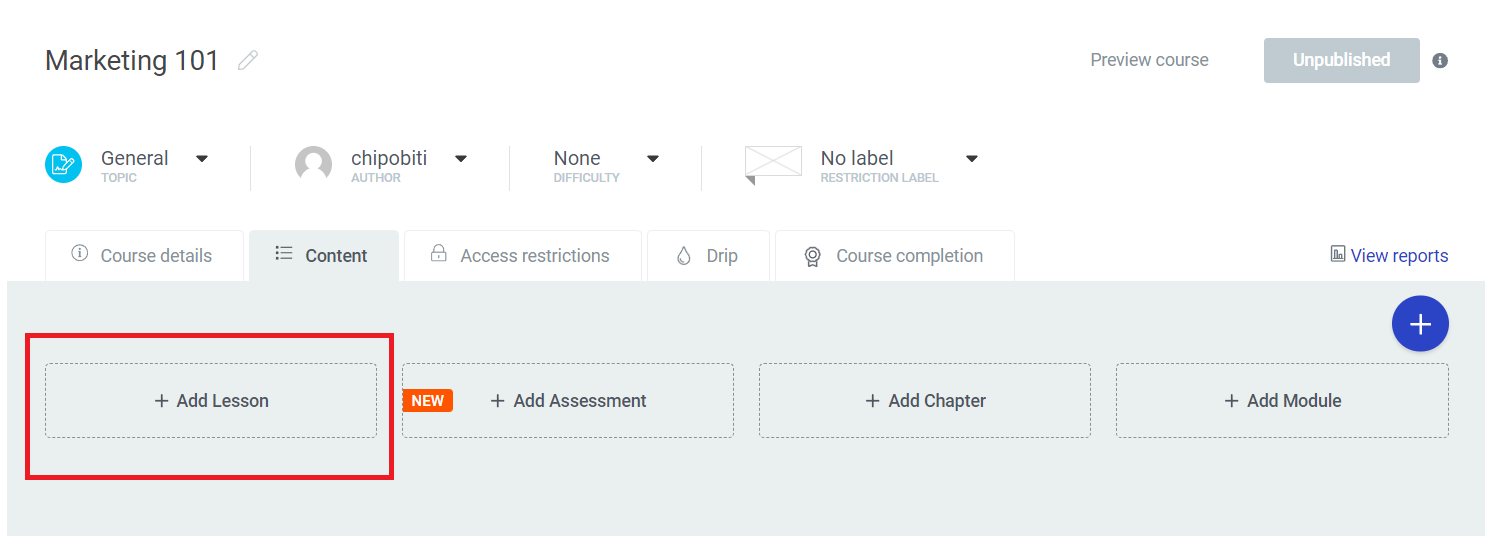
To create a video lesson, first select the “Lesson” option in your course dashboard.
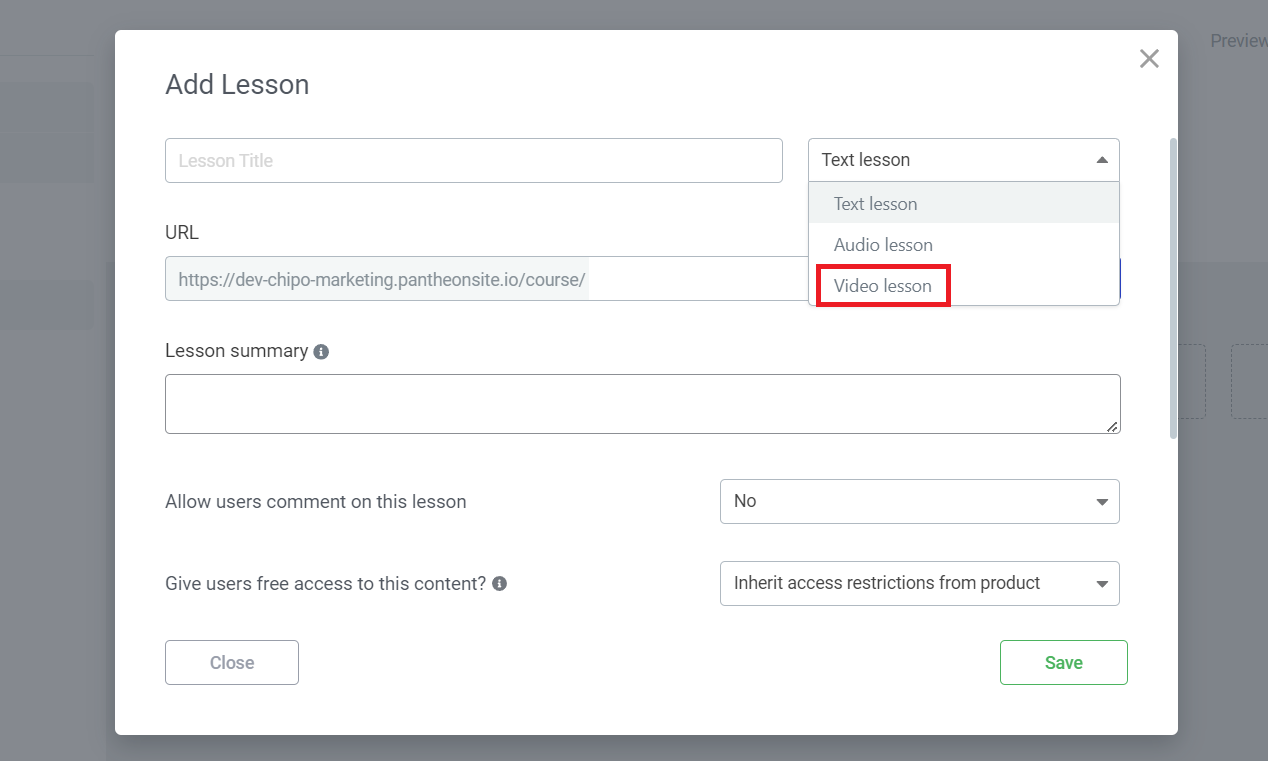
Change the lesson type to “Video Lesson” and fill out the required information.
Choose the source for your video and insert the URL if you’ve already created your interactive video content. This could be to a YouTube video of a pre-recorded webinar, podcast episode, or dedicated course video lesson.
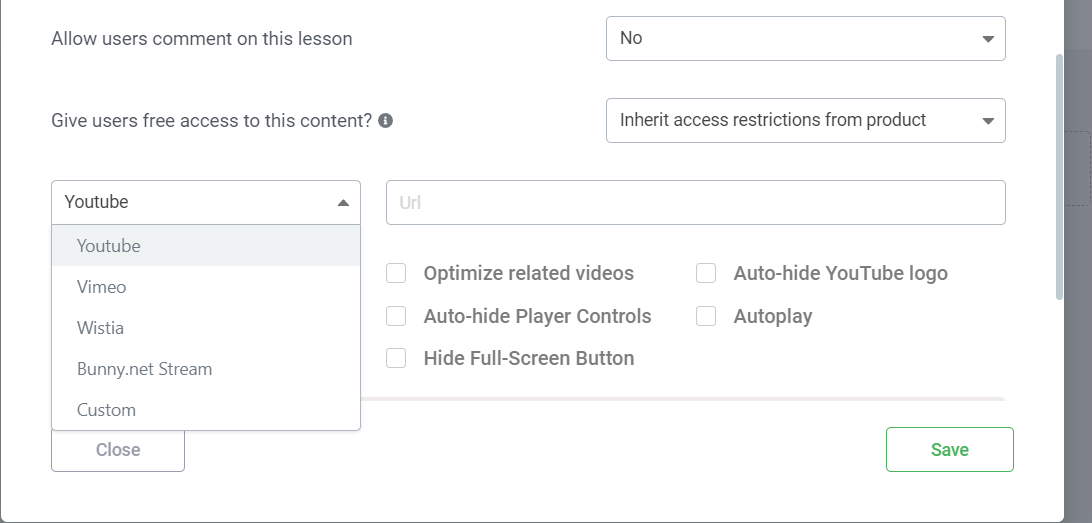
Configure the other options below, like whether to hide player controls or not, enabling autoplay, etc.
4. Set Your Minimum Video Watch Time
Setting the minimum video watch is super simple in Thrive Apprentice.
In the same “Add Lesson” video you’re working on, scroll to the bottom of the window.
You'll see a toggle to restrict course progression until the lesson has been watched. Enable this toggle and choose what percentage of the video lecture is required before the student can proceed.

Pro Tip
This setting applies to the specific lesson you're working on. So, if you have a course video that runs for a longer amount of time (e.g., a 45-minute video) and want the minimum watch time to be 75%, but prefer a different required watch timeframe for the shorter videos, you can easily set that up.
5. Complete Your Course Setup
Now that you've got the basics down, it's time to take your course to the next level!
Thrive Apprentice offers a wealth of features designed to stimulate your students' minds and keep them engaged from start to finish.
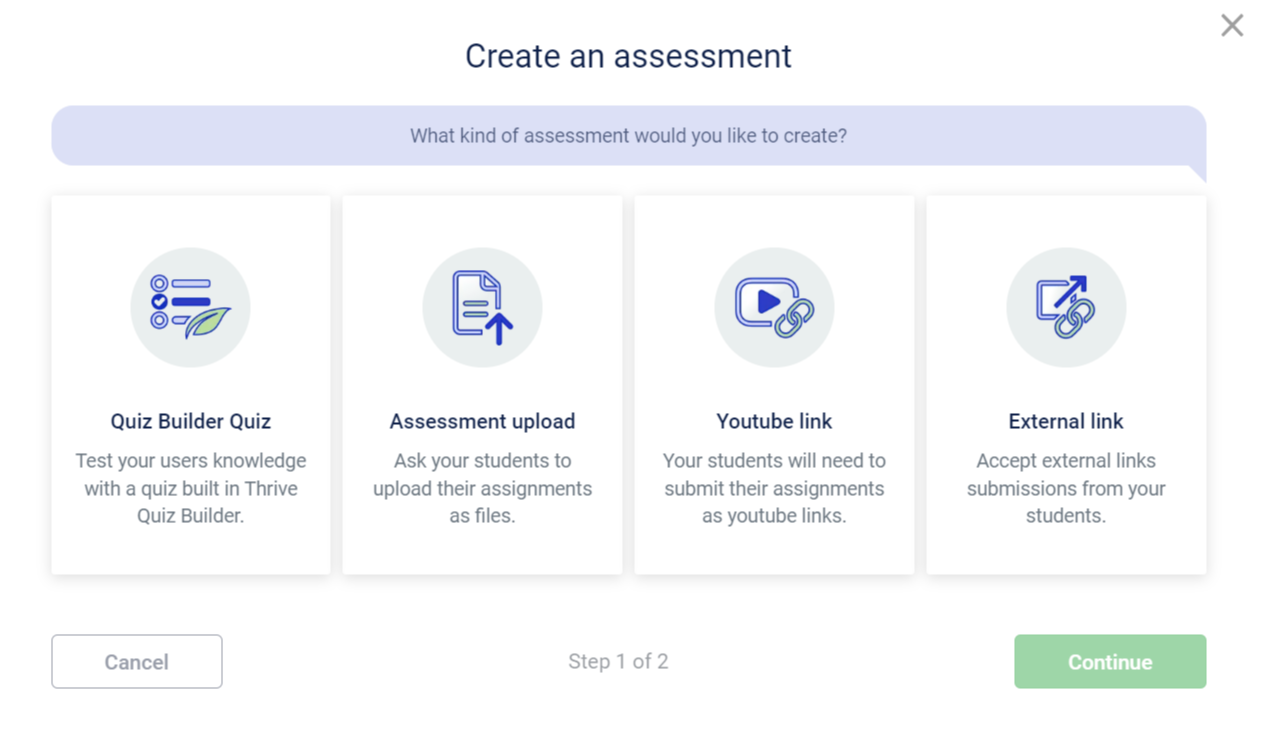
Assessments That Make Learning Fun: Want to make sure your students are really absorbing your course material?
Use Thrive Apprentice's built-in assessment feature to create quizzes, in-class tests, and even interactive challenges. Not only will this help you gauge their progress, but it'll also make online education feel more like a game than a chore. Your students will love putting their knowledge to the test and seeing how far they've come!
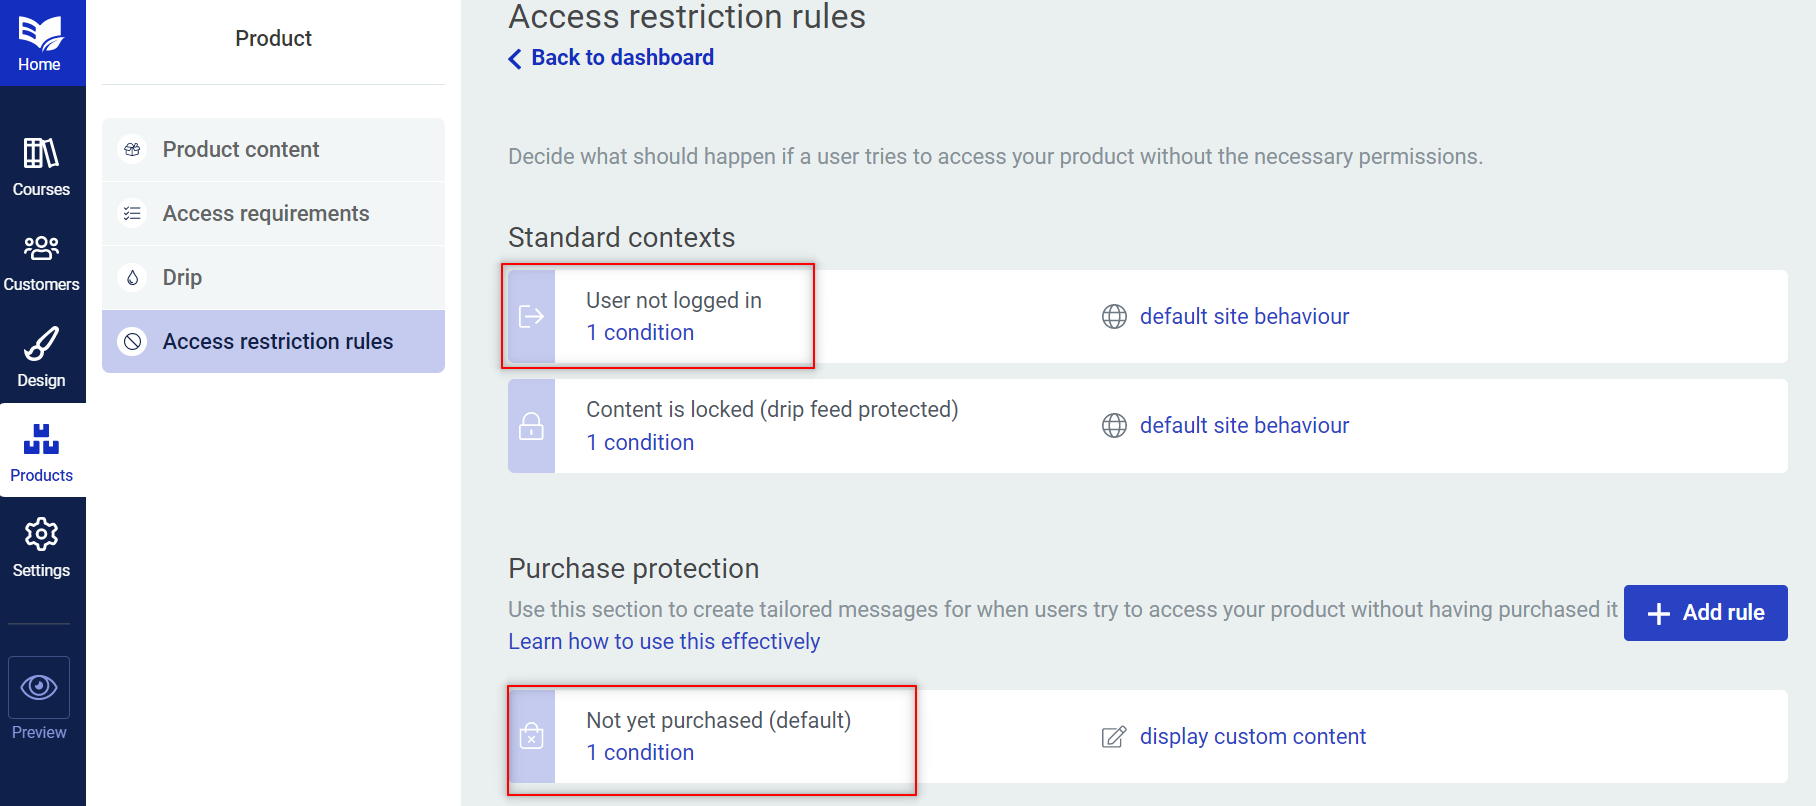
Guide Their Journey: Want to keep your students engaged and prevent them from feeling overwhelmed? Thrive Apprentice's drip content feature is your new best friend.
By releasing your course material gradually, you can create a structured learning path that keeps your students focused and motivated. Plus, with access restrictions, you can ensure that your students complete each lesson before moving on to the next.
Remember, a well-crafted course is one that not only educates, but also inspires and motivates. With Thrive Apprentice's powerful features at your fingertips, you have everything you need to create a course that your students will rave about. So go ahead, let your creativity run wild, and build the course of your dreams.
Next Steps: Market Your Online Course the Right Way
Congratulations, you've created an amazing course that's ready to transform lives! But hold up, your work isn't quite done yet. It's time to get your course in front of the right people and make sure it gets the attention it deserves.
Here's the thing: even the most incredible course won't sell itself. That's where smart marketing comes in.
Don't worry, though, you don't need to be a marketing guru to get the word out. With a few simple strategies, you can attract your ideal students (through social media, email, ads, etc.) and watch your enrollment numbers soar.
We’ve shared four tutorials to help you set up your marketing funnels the right way:
Ready to Get Started with Our Top LMS Plugin?
You now have everything you need to create successful online courses that your students will actually follow and finish.
But, remember: your online courses are only as effective as the platform they’re hosted on.
Thrive Apprentice is your key to building a profitable online course business your students will love. You just need to get started.
So, what are you waiting for?
Give Thrive Apprentice a try today and start creating online courses that bring in sales.


