Looking to learn how to create a music website on WordPress?
You've come to the right place.
We know the challenges. Spending hours figuring out web design tools, learning code, or hiring an expensive developer isn't ideal.
You want to build a professional, attractive music website yourself — and we're here to help you do just that.
This guide will walk you through the process, from choosing a theme to customizing the design to wow your audience and grow your fanbase.
We'll show you user-friendly tools that will help you build your site efficiently, without overspending or getting lost in technicalities.
Ready to get started on your WordPress music website? Let's begin.
What Do You Need to Build Your WordPress Website?
This is our recommended list of items you’ll need to build a website. Some of these tools are optional (e.g. using a page builder, or choosing WordPress as your CMS), but we strongly recommend them if you want to create a site that will perform well:
Domain name for your website (e.g. www.musicbandexample.com)
Reliable WordPress hosting to “house” your site (start here if you’re still searching for a hosting provider)
Install WordPress as your content management system (where you’ll manage all your site content)
WordPress theme for your site’s structure, look, and feel.
Reliable WordPress page builder to create and customize your webpages (without coding)
WordPress plugins to expand your website’s functionality (e.g. adding a social media feed to your site)
Email marketing service to capture leads and turn them into clients
Checkout tool to safely and securely process payments made through your site
We’ll help you get the right plugins to build a top tier website fit for a musician or band. Just keep reading to follow.
How to Make a Standout Music or Band Website for Your Brand
After you’ve purchased or set up a domain name, chosen a web hosting plan, and completed the WordPress installation process -- it’s time to start working on your actual website.
This step-by-step guide will show you how to do this:
Step 1: Download & Install Thrive Theme Builder + Thrive Architect
Want to create an impressive website for your music brand without the hassle of coding?
Thrive Theme Builder and Thrive Architect, the ultimate website builder duo, make it easy to create a website that looks exactly how you want it to.
Thrive Theme Builder helps you make a custom WordPress theme in a few minutes. You have complete control over every aspect of your own website's design, from colors and fonts to page layout and styles.
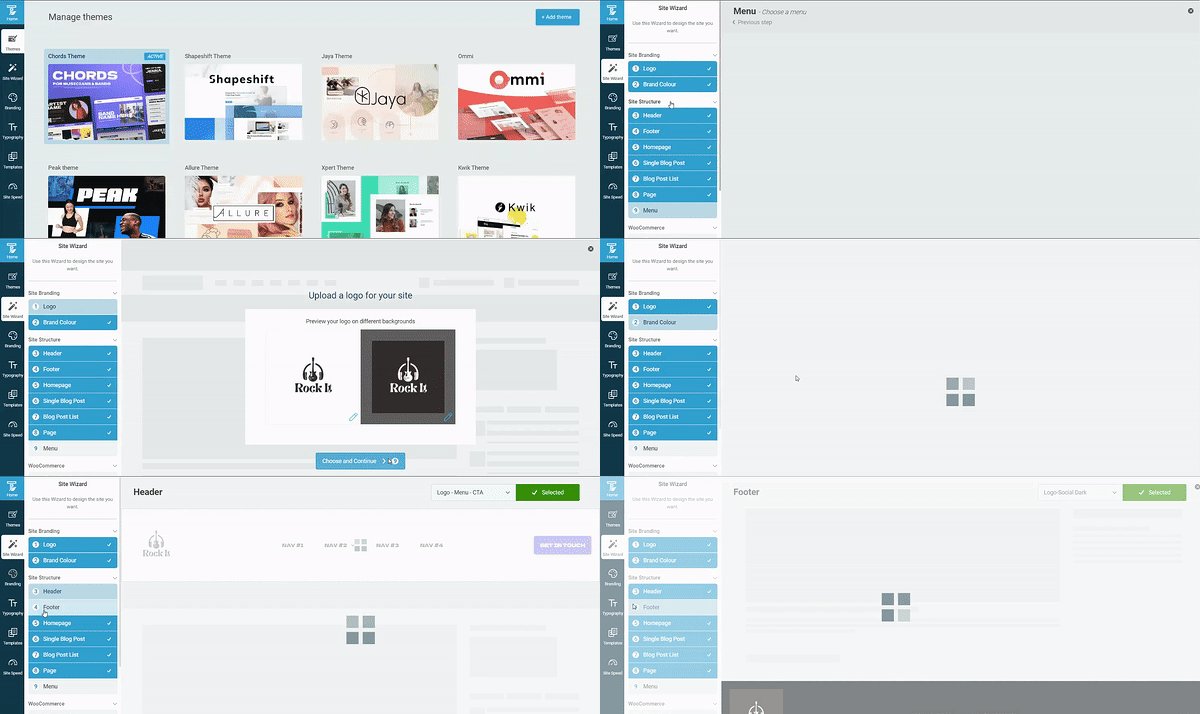
Thrive Theme Builder in action
Thrive Architect lets you drag and drop elements to create eye-catching pages in minutes. No coding required! You can easily add a variety of design elements to show off your brand, promote your music, and sell your merch.

Thrive Architect in action
The best part? You don't need any technical skills to use these tools. They're designed with you, the creator, in mind. Whether you’re a WordPress beginner or a pro who needs a time-saving tool, you can create a professional-looking website that stands out from the competition, all on your own.
Take control of your brand's online presence with Thrive Theme Builder and Thrive Architect.
These tools make it easy to build a website that looks amazing and helps your band or solo career grow.
Step 2: Activate & Launch Thrive Theme Builder
Thrive Theme Builder helps you create your website’s structure real fast. Think, less than an hour.
Once you’ve installed and activated Thrive Theme Builder, you’ll need to select a theme for your website.
Each theme comes with a set of fully-customizable, professionally-designed templates that are perfect for your music brand.
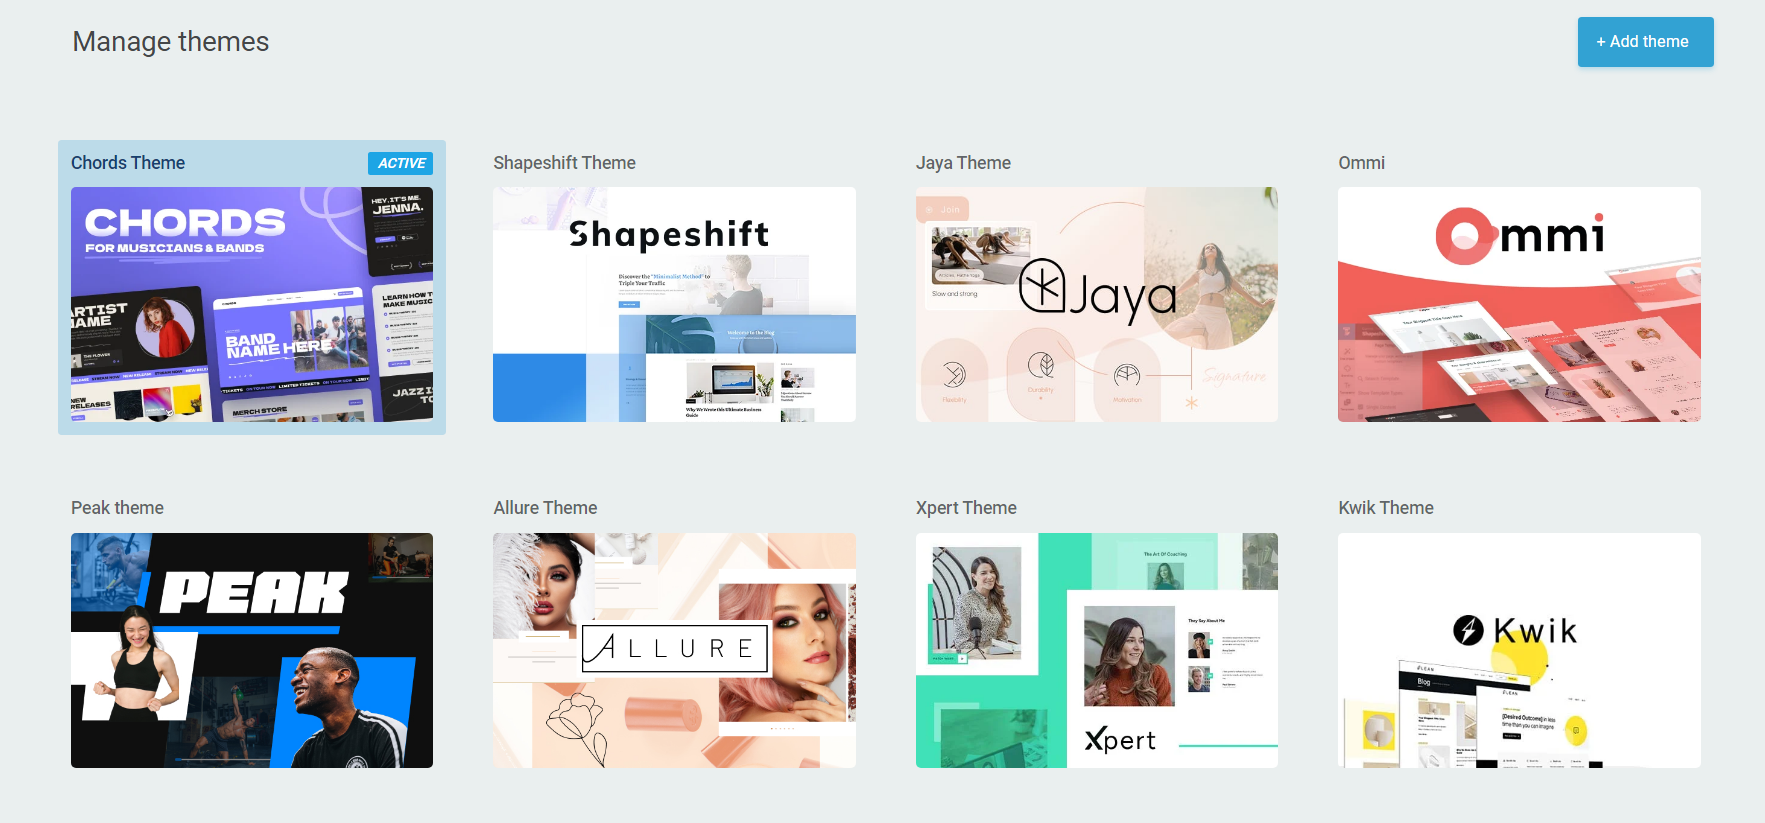
And we’ve got the perfect one for you.
Step 3: Select Chords Music Theme: For Bands and Solo Musicians
Chords is designed to help you create an impressive music website without breaking the bank or spending endless hours trying to figure out the tech.
This is the theme you need to show off your talent, engage with your audience, and grow your music career.
Its intuitive layout and dynamic design let you share your latest tracks, promote upcoming gigs, and give fans a backstage pass to your creative world.
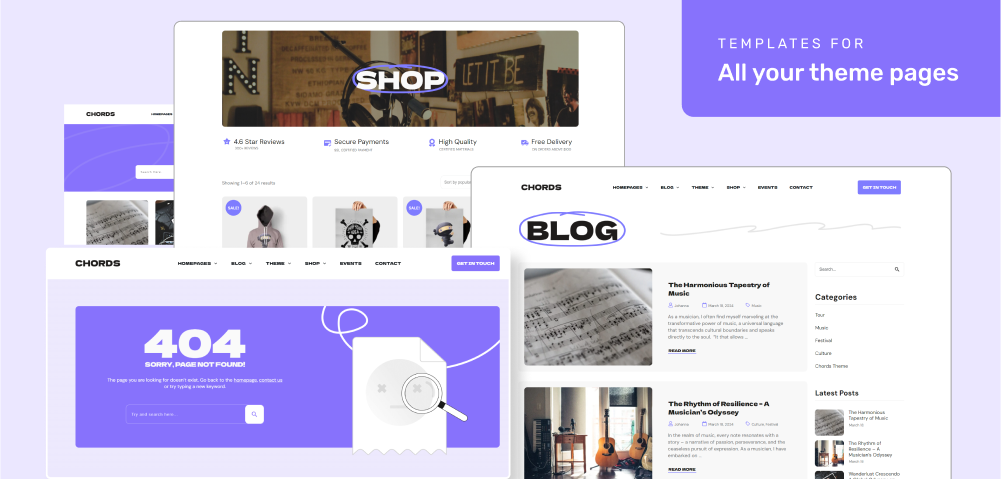
With striking visuals and bold typography, Chords makes your content take center stage. The vibrant color scheme and eye-catching design elements create a memorable visual experience, to match the audio you've spent so much time crafting.
From attention-grabbing hero images to the integrated music player/space to share your playlists, every aspect is crafted to keep fans engaged.
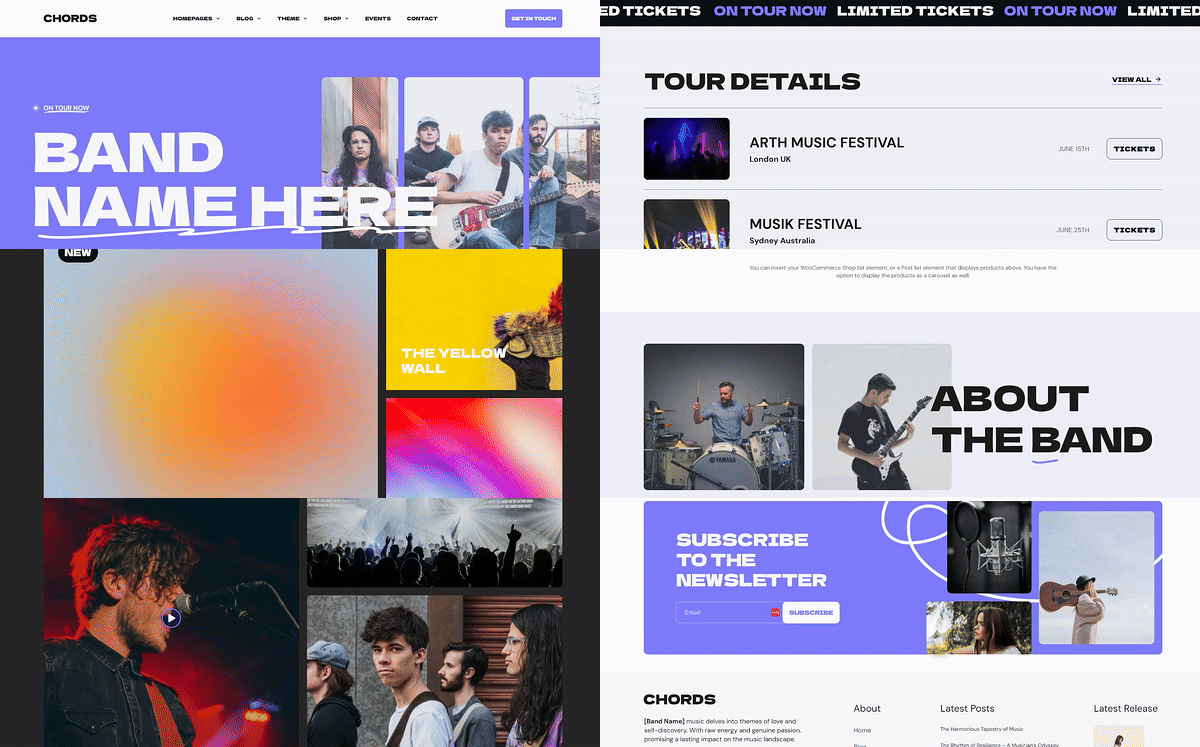
Whether you're a rising star or a seasoned performer, Chords provides the tools to build a powerful online presence that reflects your unique style — and a memorable user experience that encourages your fans to keep coming back. Plug in, turn up the volume, and let Chords help you rock your way to the top.
No need to spend hours trying to figure out the perfect design for your website – we’ve done that for you.
You get all the important page templates you need to create a professional website for your music band or solo career – from your homepage to your blog layout and shop setup (if you’re selling with WooCommerce).
And to give your website a truly custom feel, you also get 32 high-quality block templates to add to your pages and tailor to match your brand.
Block Templates Explained
Block templates are pre-designed sections you can easily add to your pages with just a click. These templates are made up of various elements like text boxes, images, contact forms, and buttons, all arranged in visually appealing layouts.
You can quickly customize these templates to match your brand, saving you time and effort in designing your website pages from scratch.
In a couple of clicks, you can drag and drop, re-order, and edit your custom landing pages – all while inheriting your chosen theme fonts, heading formats, and colors.
And if you have Thrive Architect, our professional page builder, you can change the color of individual blocks to add variety to your pages.
But we’ll dive into that later. For now, let’s focus on setting up your website’s structure.
Step 4: Set Up Your WordPress Site Structure in a Few Clicks
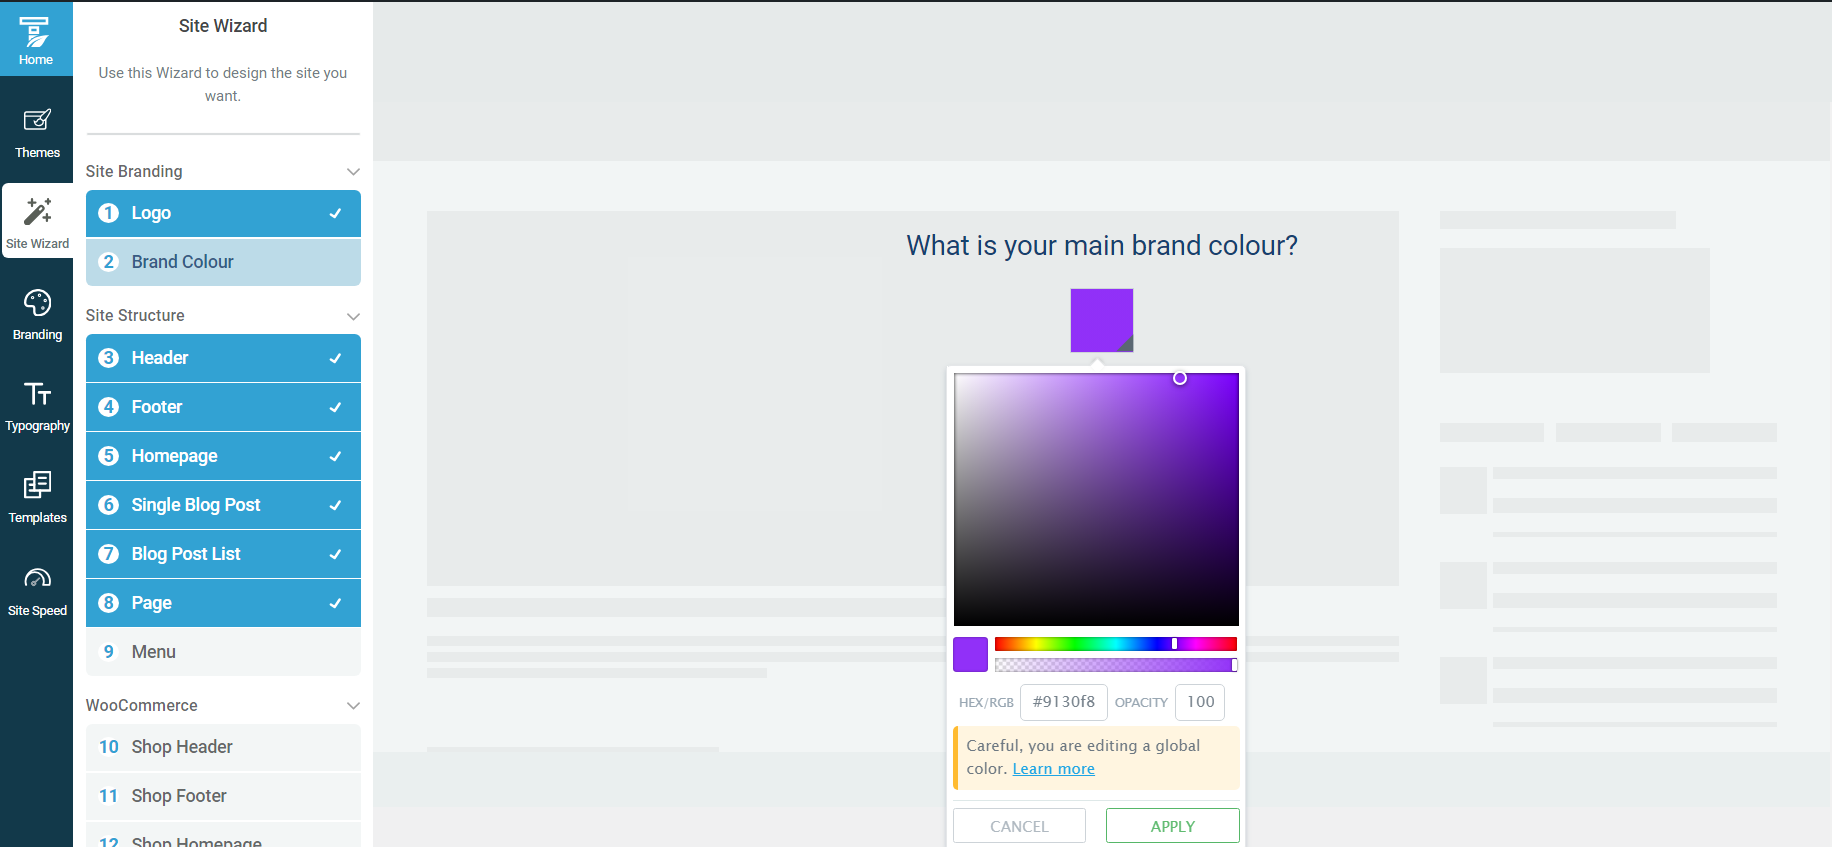
The Thrive Theme Builder Setup Wizard helps you select all the web page templates, a color palette, and fonts you need for your clean web design—and it only takes a few minutes to do this.
This wizard walks you through setting up the following:
A sitewide logo for light and dark modes

Create your entire site’s color scheme by choosing your primary brand color. (This color scheme will automatically appear on all your website templates, fonts, blocks, etc.)
A conversion-focused header for easy site navigation.

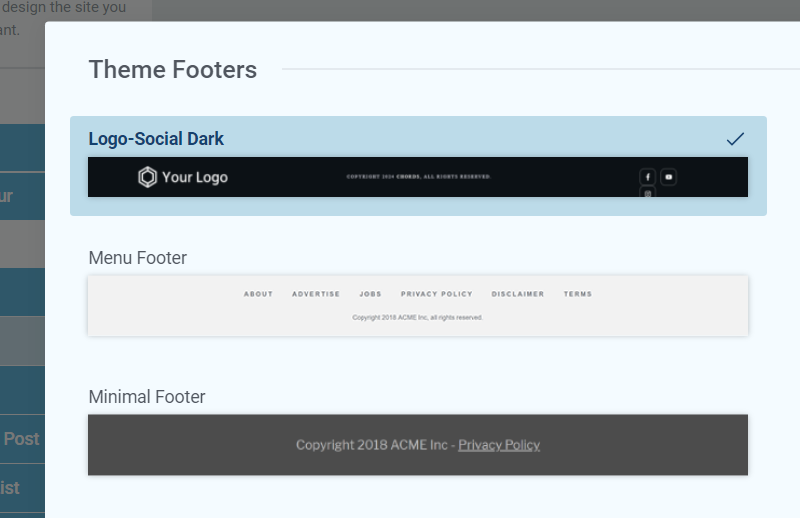
A focused footer to add contact information, your business address, links to social media platforms, etc.
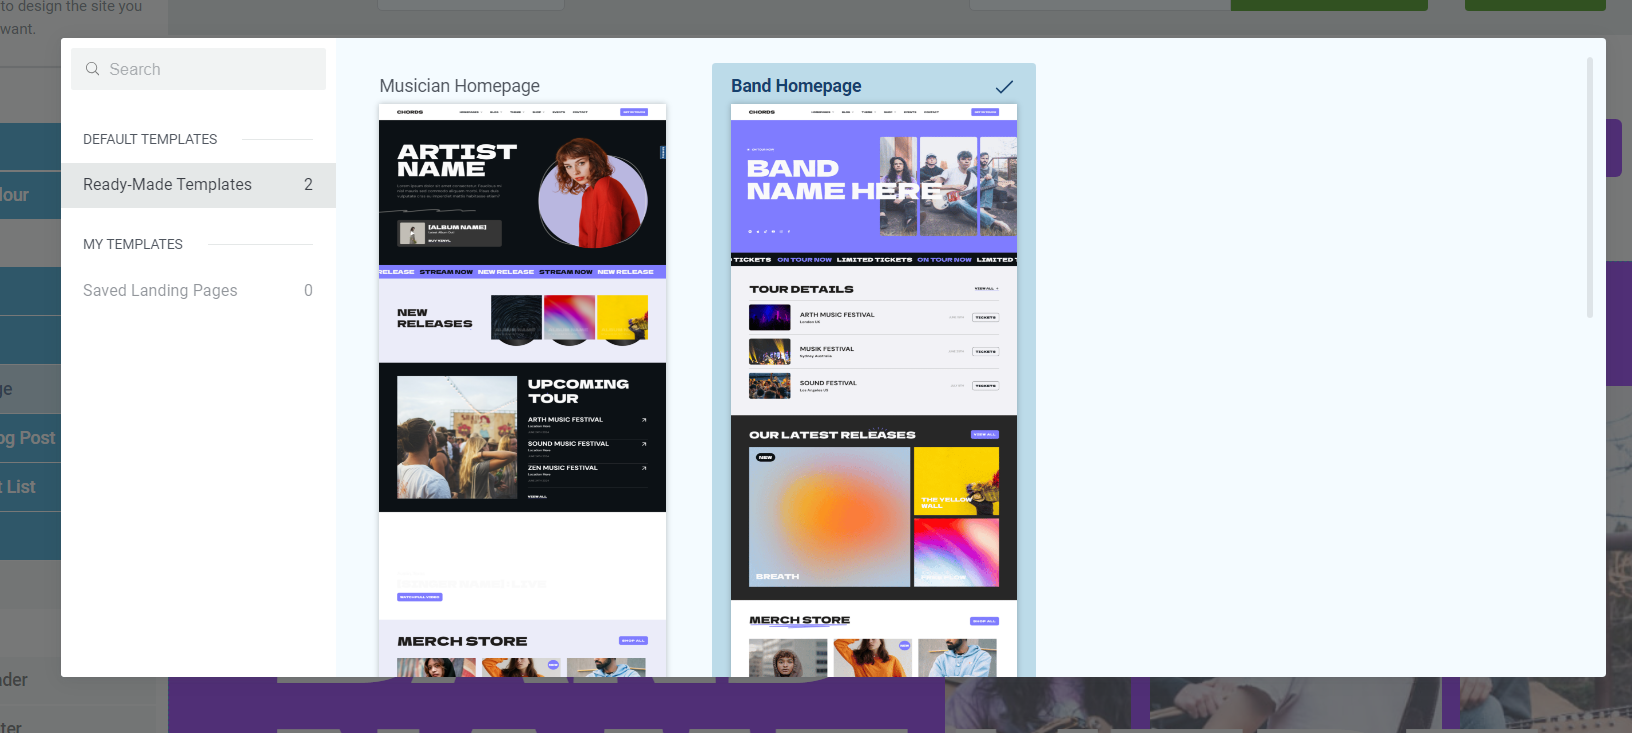
The perfect homepage
template for your site.
You also get access to several WooCommerce theme pages for you (shop page, checkout page, etc.) to help you set up your store website quickly.
By the end of the Setup Wizard, you will have created a clean website layout that you can customize using Thrive Architect.
Chords also comes with other default page templates – 404 page, about page, etc. You can find them in the “Templates” section in Thrive Theme Builder.

See how easy it is to create your site structure? No complex code, no struggling to figure out which step is which…
Just a straightforward, user-friendly process to help you get started fast.
Step 5: Create and Customize Your Core Pages with Thrive Architect
Next, you need to create the rest of your site’s pages with Thrive Architect, our landing page builder.
This tool gives you total control over your website’s look and the design flexibility to turn any template into a unique page. You also get a drag-and-drop editor to customize your pages with ease.
Our page templates are there to help you build pages quickly. They all look great and can easily be customized with a few clicks, drags and drops.
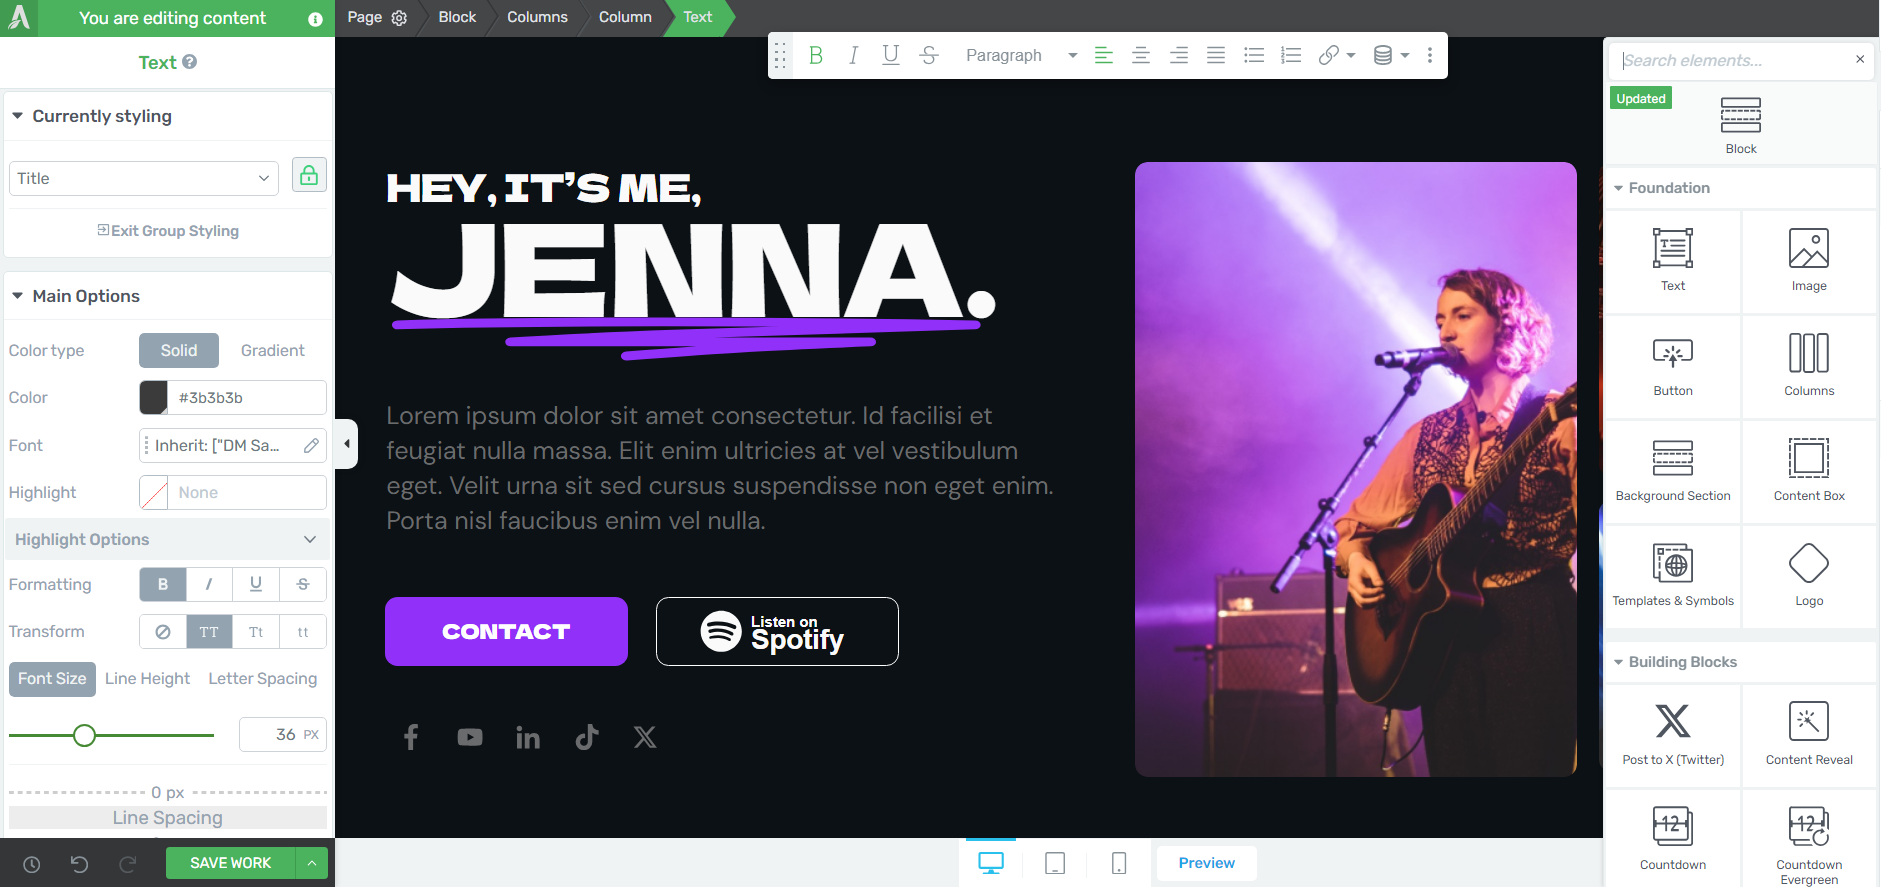
Snapshot of the Thrive Architect editor
But the real design magic is in our block templates. You can add new blocks to your pages if you feel like something’s missing, or delete the ones you don’t want – in one click.
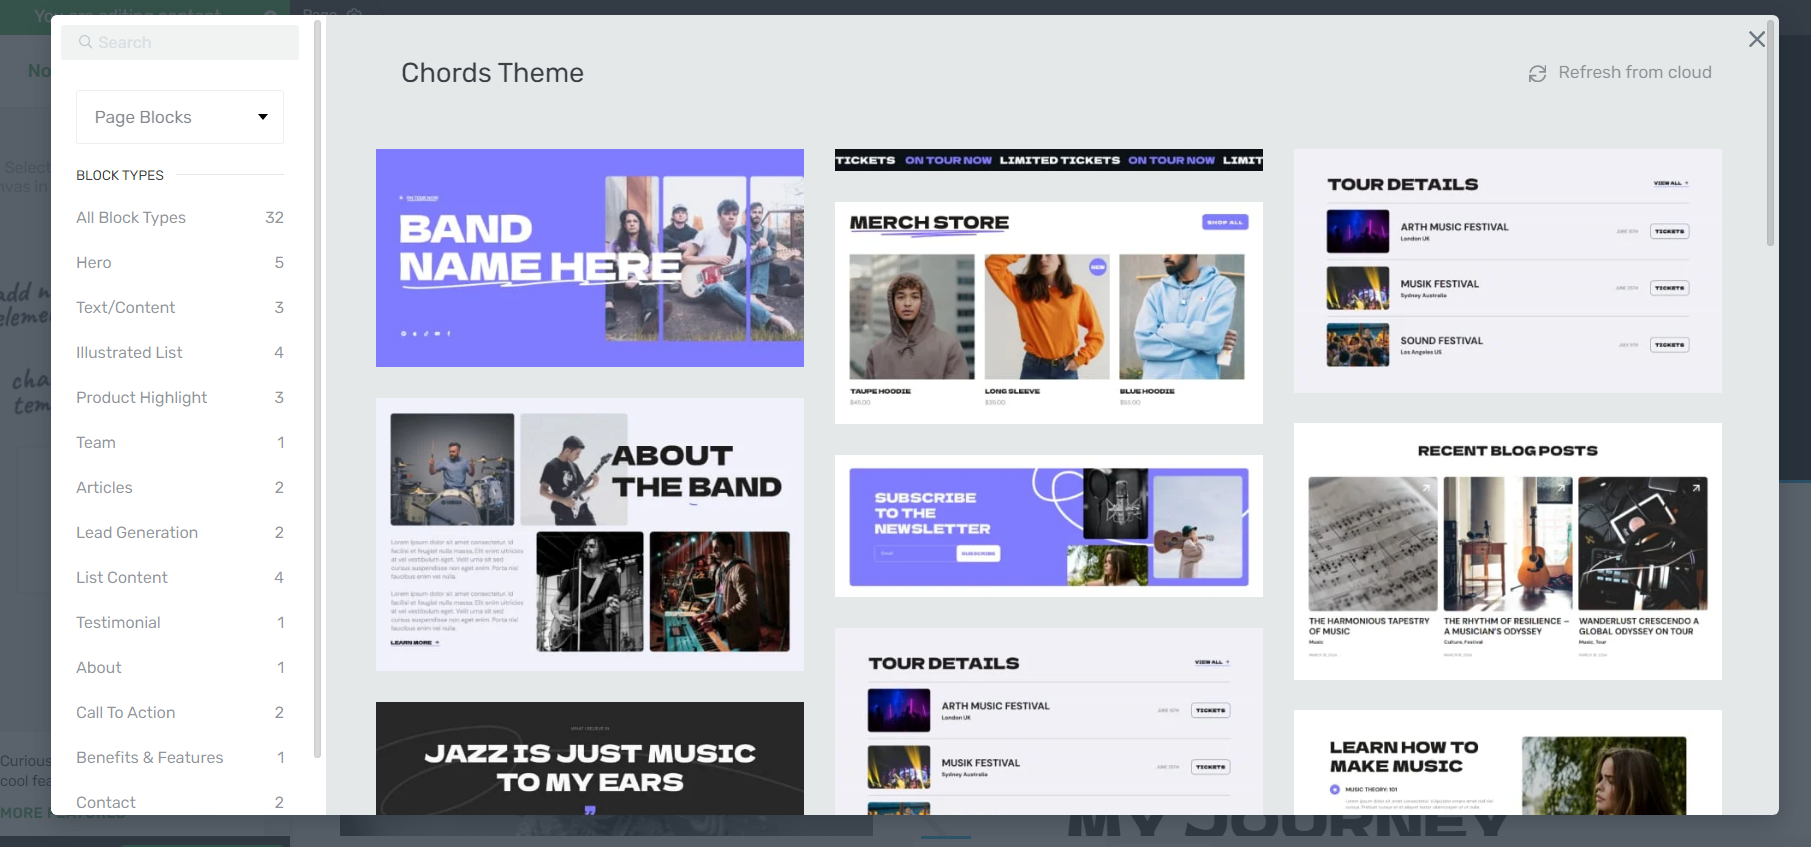
Your site’s design is in your hands – without any stress.
And in case you need more design elements, just take a look at the right sidebar in the Thrive Architect editor:

These elements give you further granular control over your site’s appearance. You also get more ways to customize different aspects of your pages to make them more interactive and win over you audience.
For example, let’s say you need a countdown timer to promote an upcoming ticket sale. Look for the countdown timer element in the right sidebar and drop it onto your page.
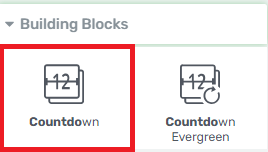
The moment it lands on your page, a library of more countdown timer templates will appear.
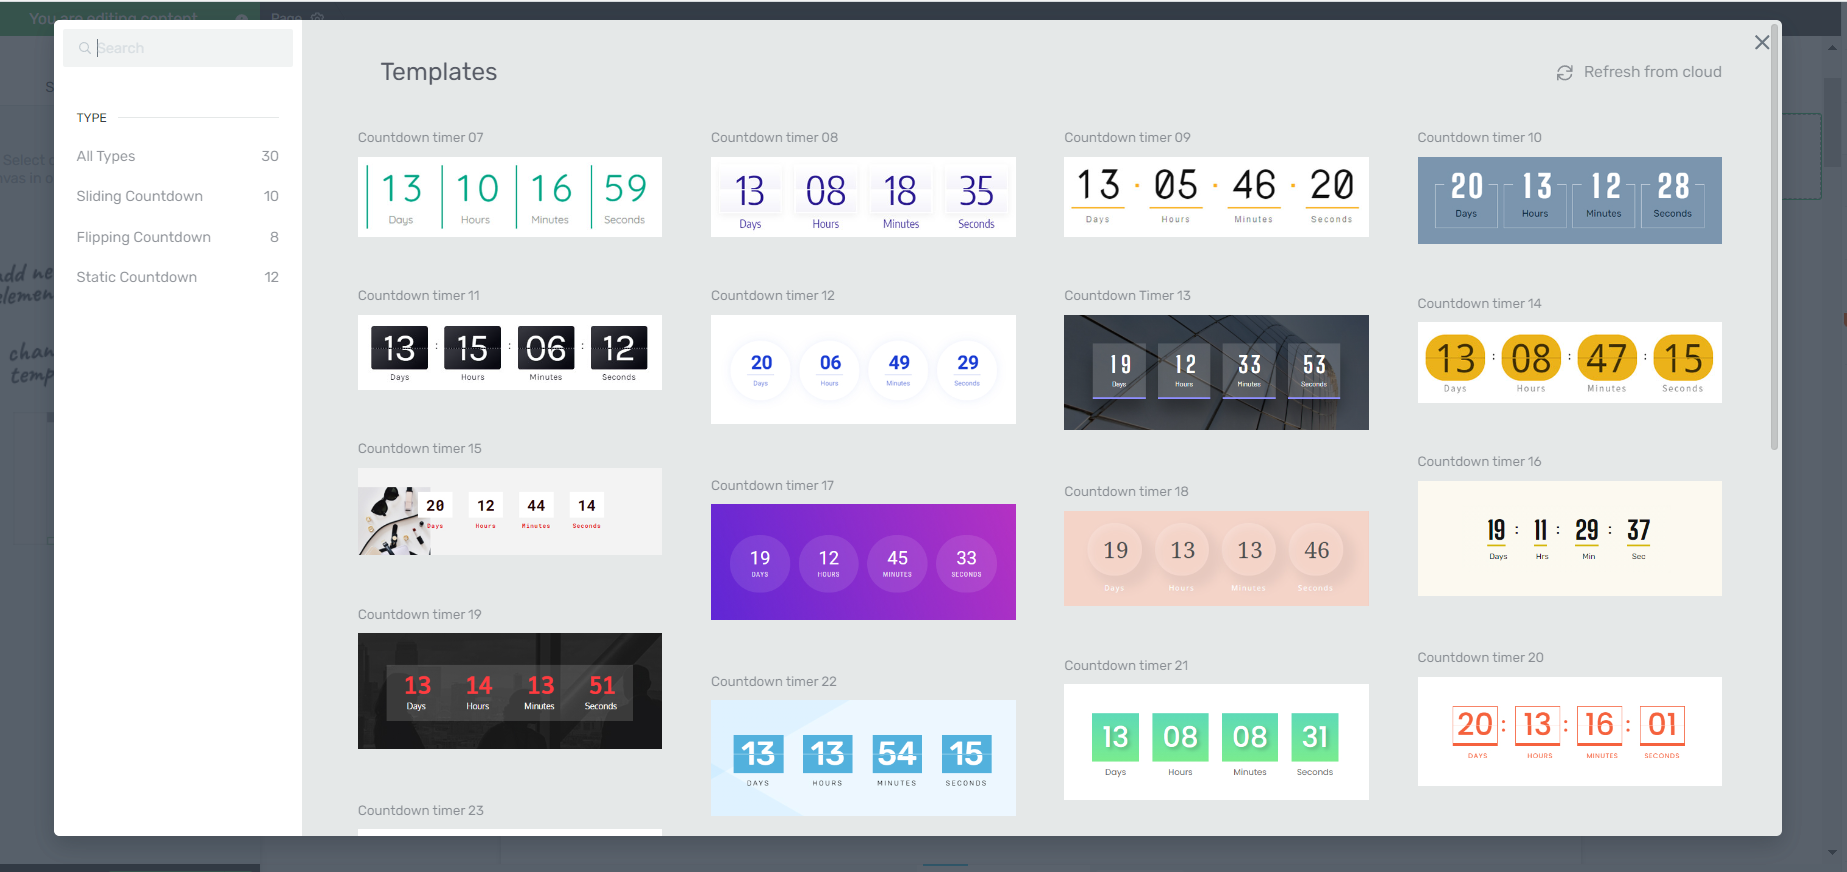
Countdown Timers in Thrive Architect
The same applies for most of the elements you’ll find in the right sidebar. We give you enough options to choose from without making you feel overwhelmed — including options to embed an audio player, link to music streaming platforms your songs are available on (Spotify, Soundcloud, etc.), and more.
Step 6: Finalize Your Homepage
Once you’ve created your custom pages, we recommend finalizing your homepage next.
When you were working through the Thrive Theme Builder Setup Wizard, you got started creating your Homepage template…
A homepage is automatically generated for you, so you don’t need to create a new page or configure any other homepage settings.
You’ll find it in the "Pages" section in the WordPress Admin Dashboard.
Search for the page titled "Generated Homepage".
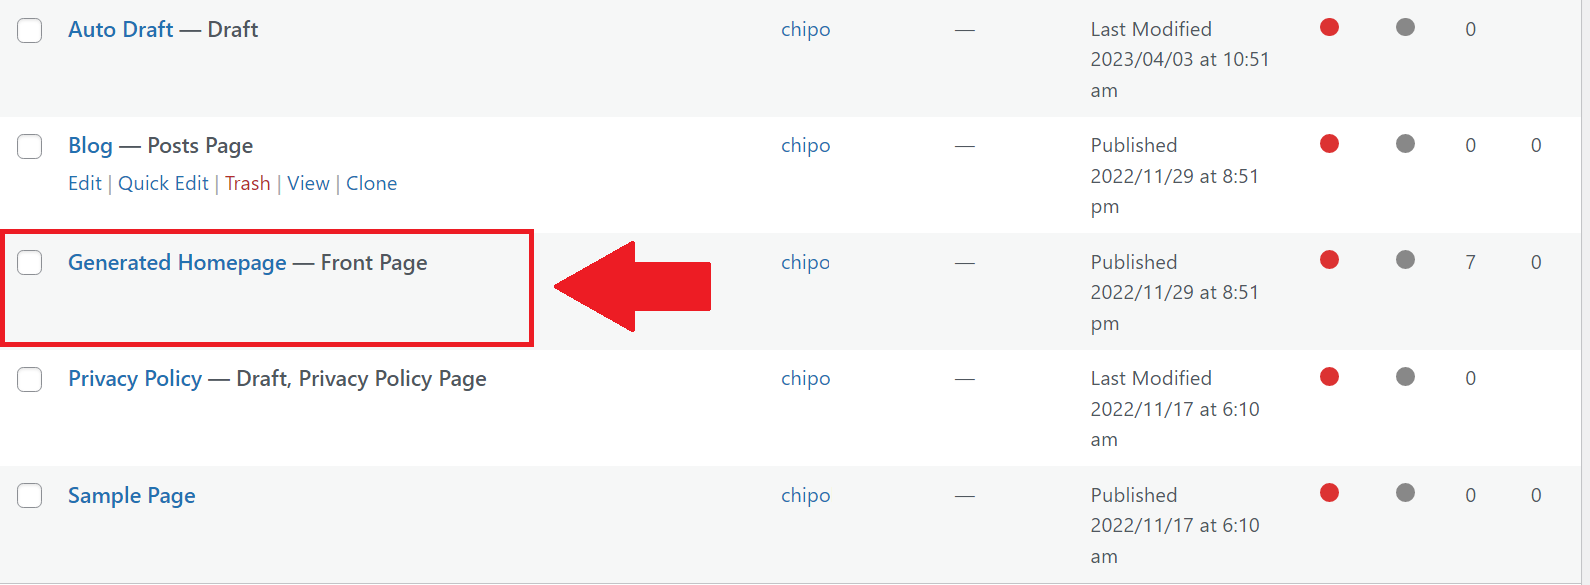
Click on the link, and you’ll be taken to the WordPress Block Editor (Gutenberg) space from the WordPress Dashboard.
In the Editor, click “Launch Thrive Architect”.
As you work on your page design, you may need to add new sections (e.g., a drop-down menu, widgets area, or FAQ section) or remove a few. You can go right ahead and use the block templates and design elements to customize your homepage’s look.
Thrive Tip: Want to learn how to create a high-quality homepage that will grab your audience’s attention and push them to convert? Check out this handy guide.
Step 7: Connect Your Site to Your Email Marketing Service
Connect your email service through the Thrive API. You will only need to do this once for the first opt-in form you set up.
You can find tutorials for all major email providers here.
Go to your homepage or landing page and click on the opt-in form (if you have one on your page). In the sidebar, click on "Connect form with service" and follow the setup wizard.
You'll be able to configure the fields you want to show (yes or no first name field), and you will also select the action after opt-in.
Pro tip
Setting up your email marketing tool is one step. But, do you have a clear idea on how to grow your email list and generate leads? This detailed guide can help.
Step 8: Connect Your Site to Your Checkout Tool
If you plan on selling merch or music through an online store then this step is for you.
You should be able to accept payments for new purchases made through your eCommerce website.
There are a lot of WordPress checkout tools to choose from, including:
Your eCommerce payment tool of choice will have instructions or tutorials on how to create a product, set a price and pricing frequency, and add it to your site’s beauty or cosmetics product page.
After you’ve completed this step, sit back and admire your new website
Pro tip
Speaking of selling, if you need a tutorial on how to start an eCommerce store the right way — this guide can help.
Get Ahead with These Growth Tools
With this tutorial, you’ll set up a rocking website to start your brand on the right note. But if you’re serious about growth, we recommend installing the following tools:
- All in One SEO: Get your website in front of your target audience by ranking higher in search engine results.
- MonsterInsights: Make smart decisions based on real data to improve your website and grow your brand.
- Smash Balloon: Build trust and engage your fan base by showing off your social media presence on your website.
To succeed online, you need the right tools. These plugins work together to help you get found, understand your audience, and build a strong online presence.
Next Steps: Start Driving Traffic to Your New Website
You've got your plan for building your website. Next, you must focus on getting it in front of the right eyes.
Here are 4 free resources/tutorials to help you drive the right traffic to your website and grow your brand:
Ready to Build a Website for Your Beauty Brand?
Now you’ve seen how easy it is to go from blank page to a groovy, high-quality music website using Thrive Architect and Thrive Theme Builder.
As you learn how to use our user-friendly tools, you'll start refining every detail to turn your simple design into an impressive website that offers your visitors an amazing experience — and also gets them to buy your merch and listen to your music.
But most of all, make sure to build a website you're proud of.


