Back in July, we released a game-changing improvement to Thrive Theme Builder: our integration with WooCommerce.
In terms of flexibility, this was leagues ahead of the average WordPress theme. Instead of stiff and limited styles, Thrive Theme Builder gave you the power to customize sidebars, footers, and templates across all of your ecommerce pages.
But we wanted to make it even more flexible.
In our latest update, we've rolled out a huge improvement to our WooCommerce integration...
...along with a few other (unexpected) improvements. Read on to find out what's new!
More...
1. WooCommerce Shop Element Styling
Your WooCommerce shop page operates like a homepage for an ecommerce store.
It's where you list your products, prices and descriptions, and allow visitors to apply filters, search and add items to their cart.
To bring you up to speed, your shop page has a shop element embedded in the middle of any surrounding content such as sidebars, footers, menus, etc. With Thrive Theme builder, it will look like this:
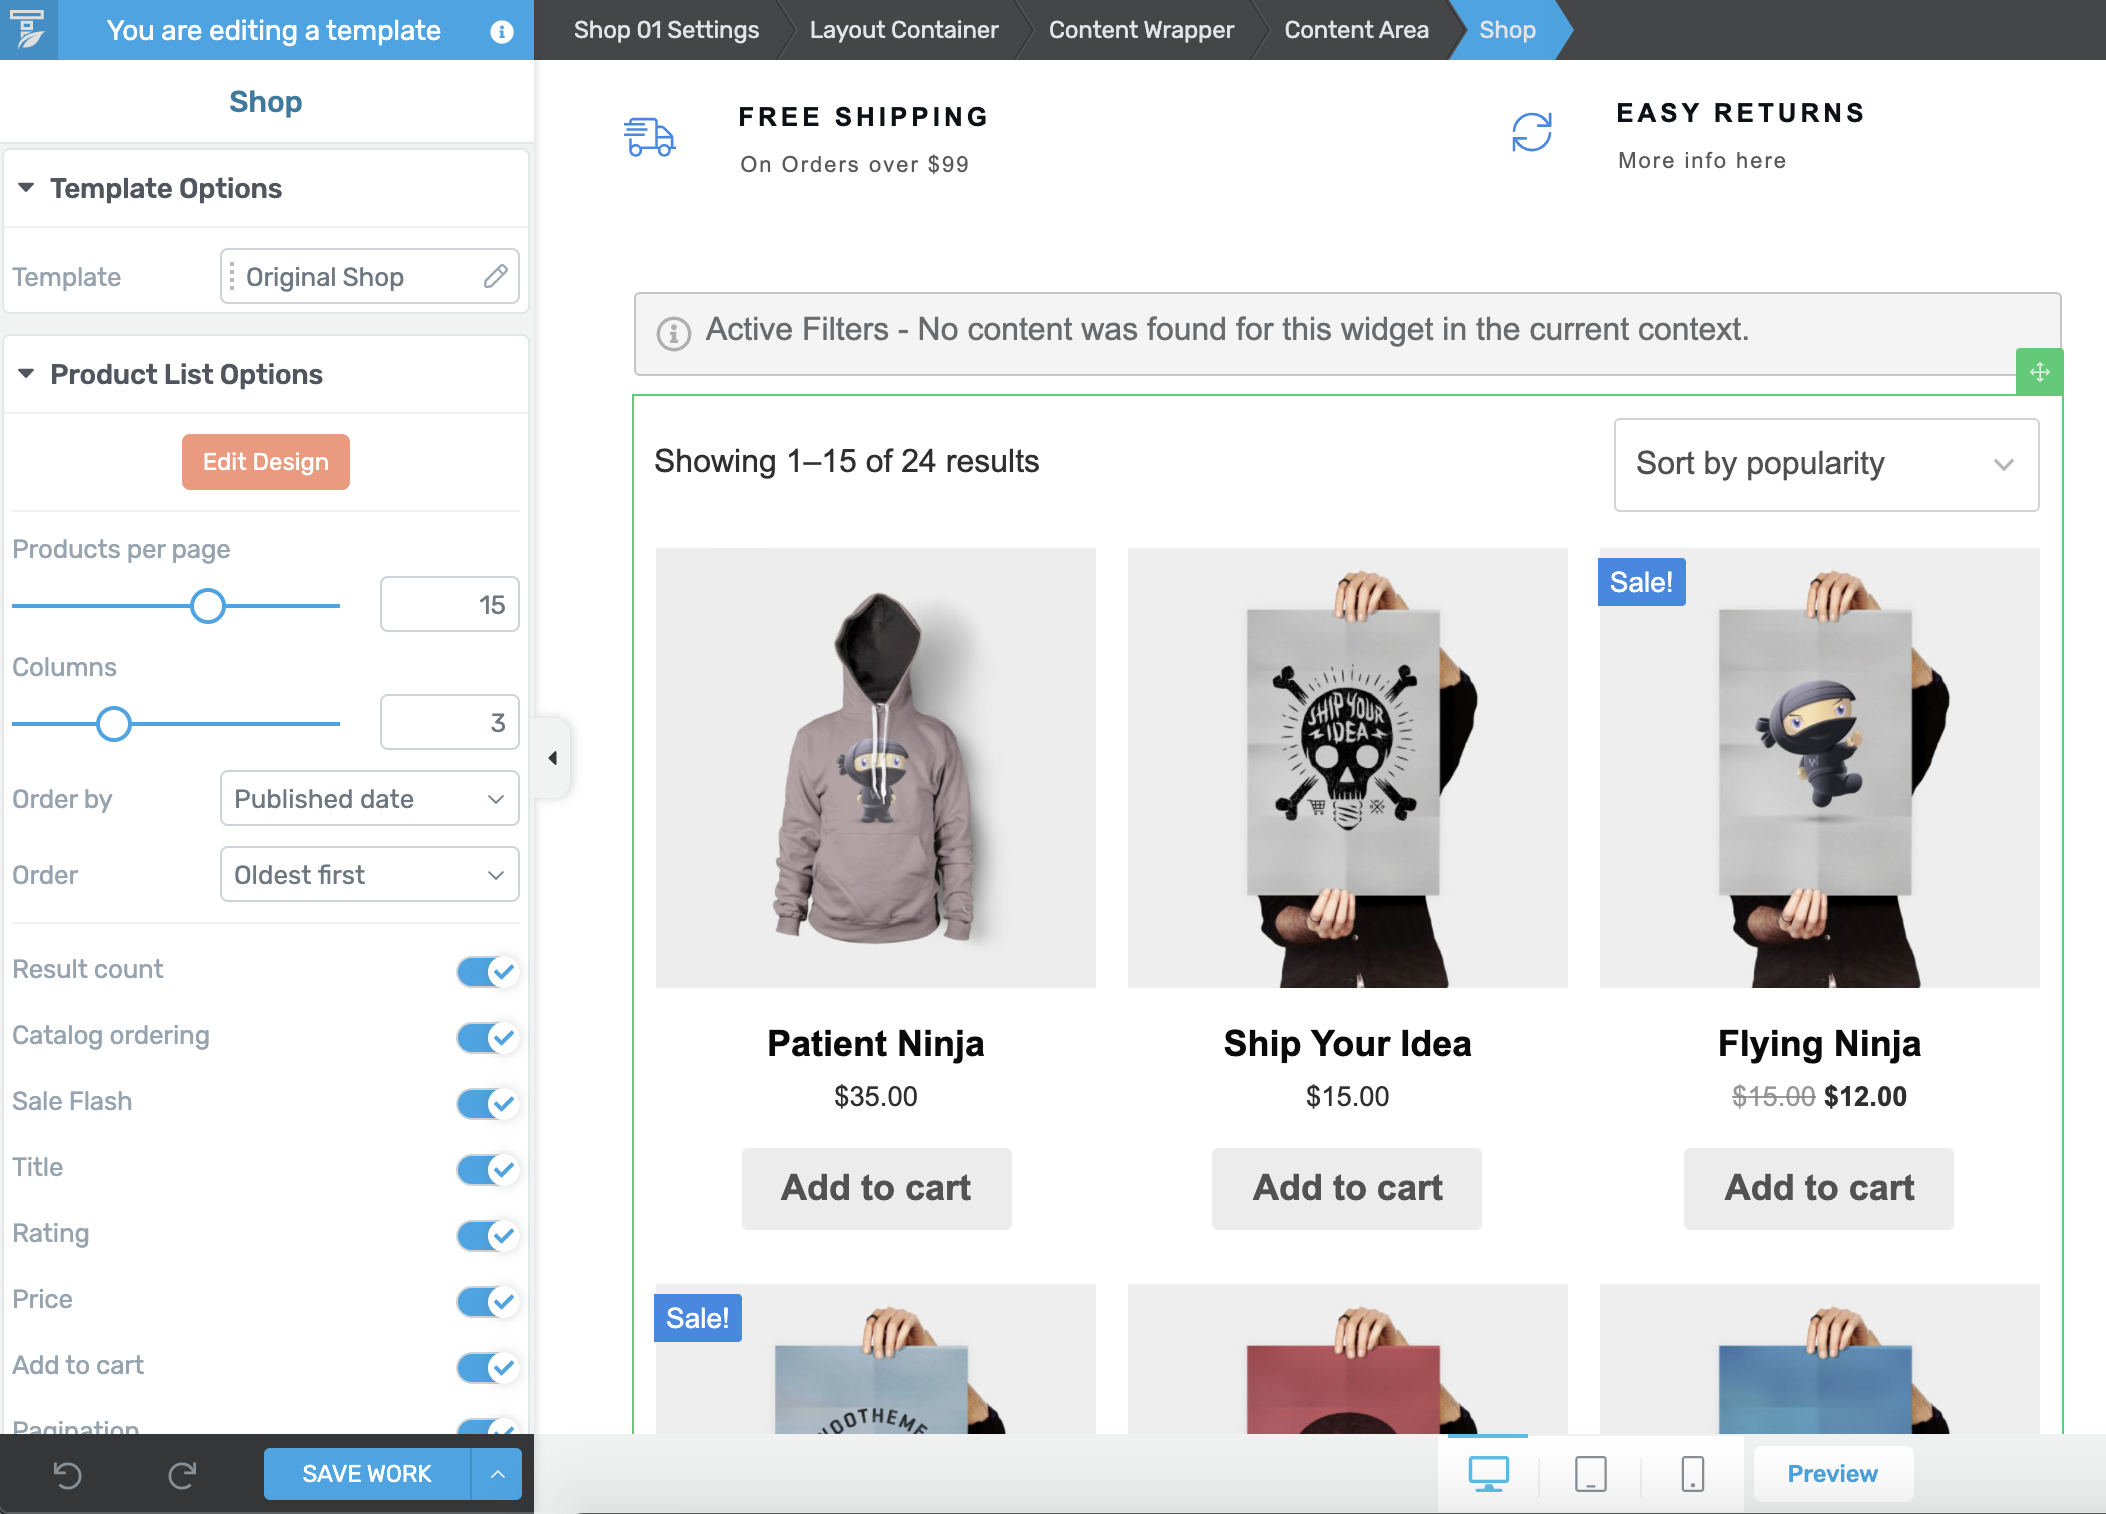
The default WooCommerce shop template in Thrive Theme Builder
Our integration with WooCommerce doesn't just allow you to style the content around your shop, but it also allows you to pick from a number of beautiful, designer-made shop page templates.
Take a look at this selection.
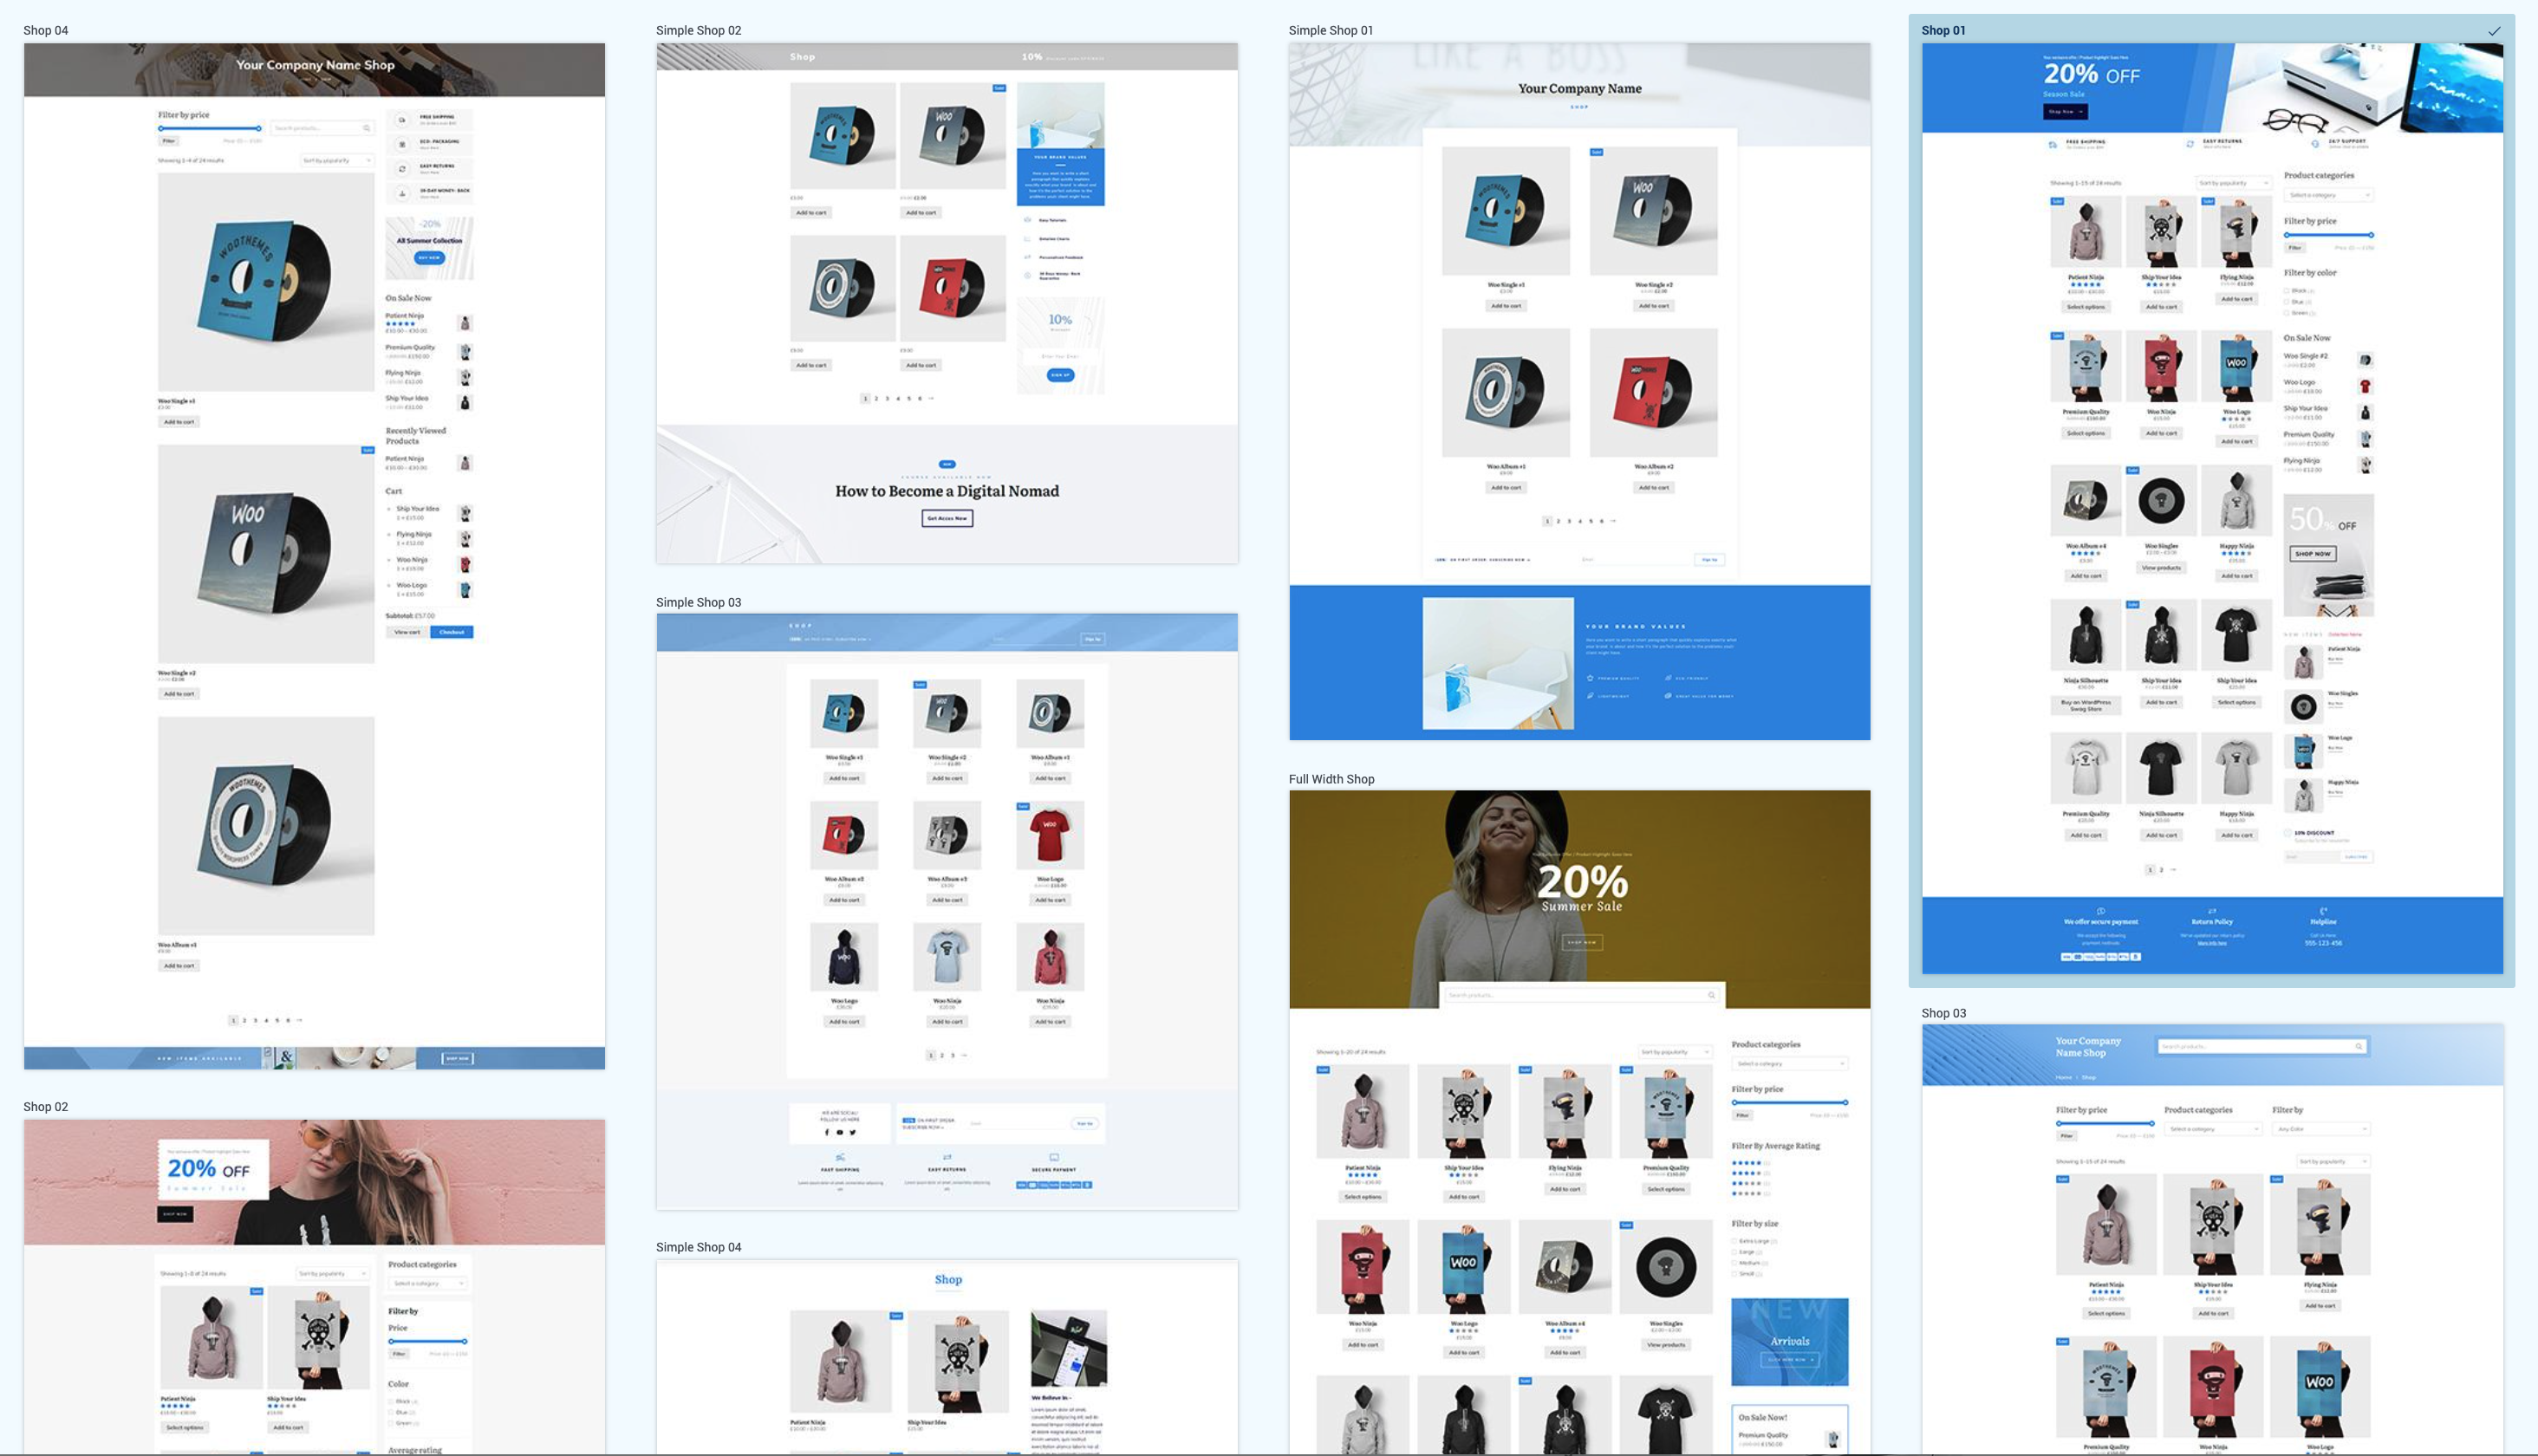
Pre-made WooCommerce shop page templates.
This is where our WooCommerce integration was already at.
You could style the content around your shop easily, but you couldn't directly apply styles to the appearance of the products inside your shop.
In our latest update, we've changed that. You now have incredible granular control of the styling and appearance of your shop items.
Let me walk you through it.
When you have WooCommerce installed, you'll find a Shop element available in your Thrive elements tray:
Add the Shop element to any page
By default, the shop element is already embedded right in the middle of your WooCommerce shop page, but you can also embed it onto any page you want.
That means customized shop templates on landing pages, WordPress pages... even blog posts if you want!
There are two stand-out new features of this Shop element:
- 1Templates that change the appearance of the shop content.
- 2An 'Edit Design' mode.
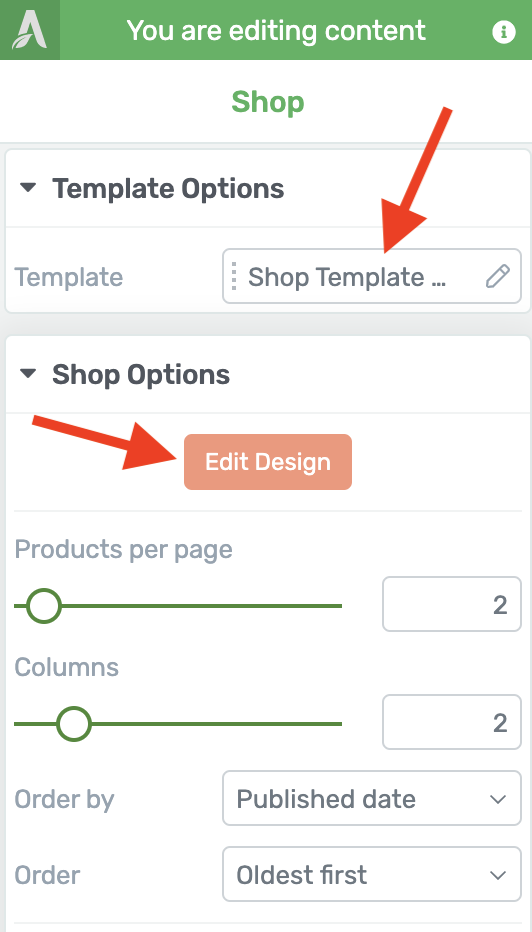
Choose your template and edit your design
When you click to apply a new template to your shop element, you'll see that our designers have already built a library of templates you can choose from.
If you're confused so far, here's the main difference:
Thrive Theme Builder already had templates for your core shop page... but now we also have templates for the appearance of the product listing inside of the shop element which you can embed anywhere on your website.
You'll see options with dark backgrounds, light backgrounds, square images and round images, one or two rows (or more), etc.
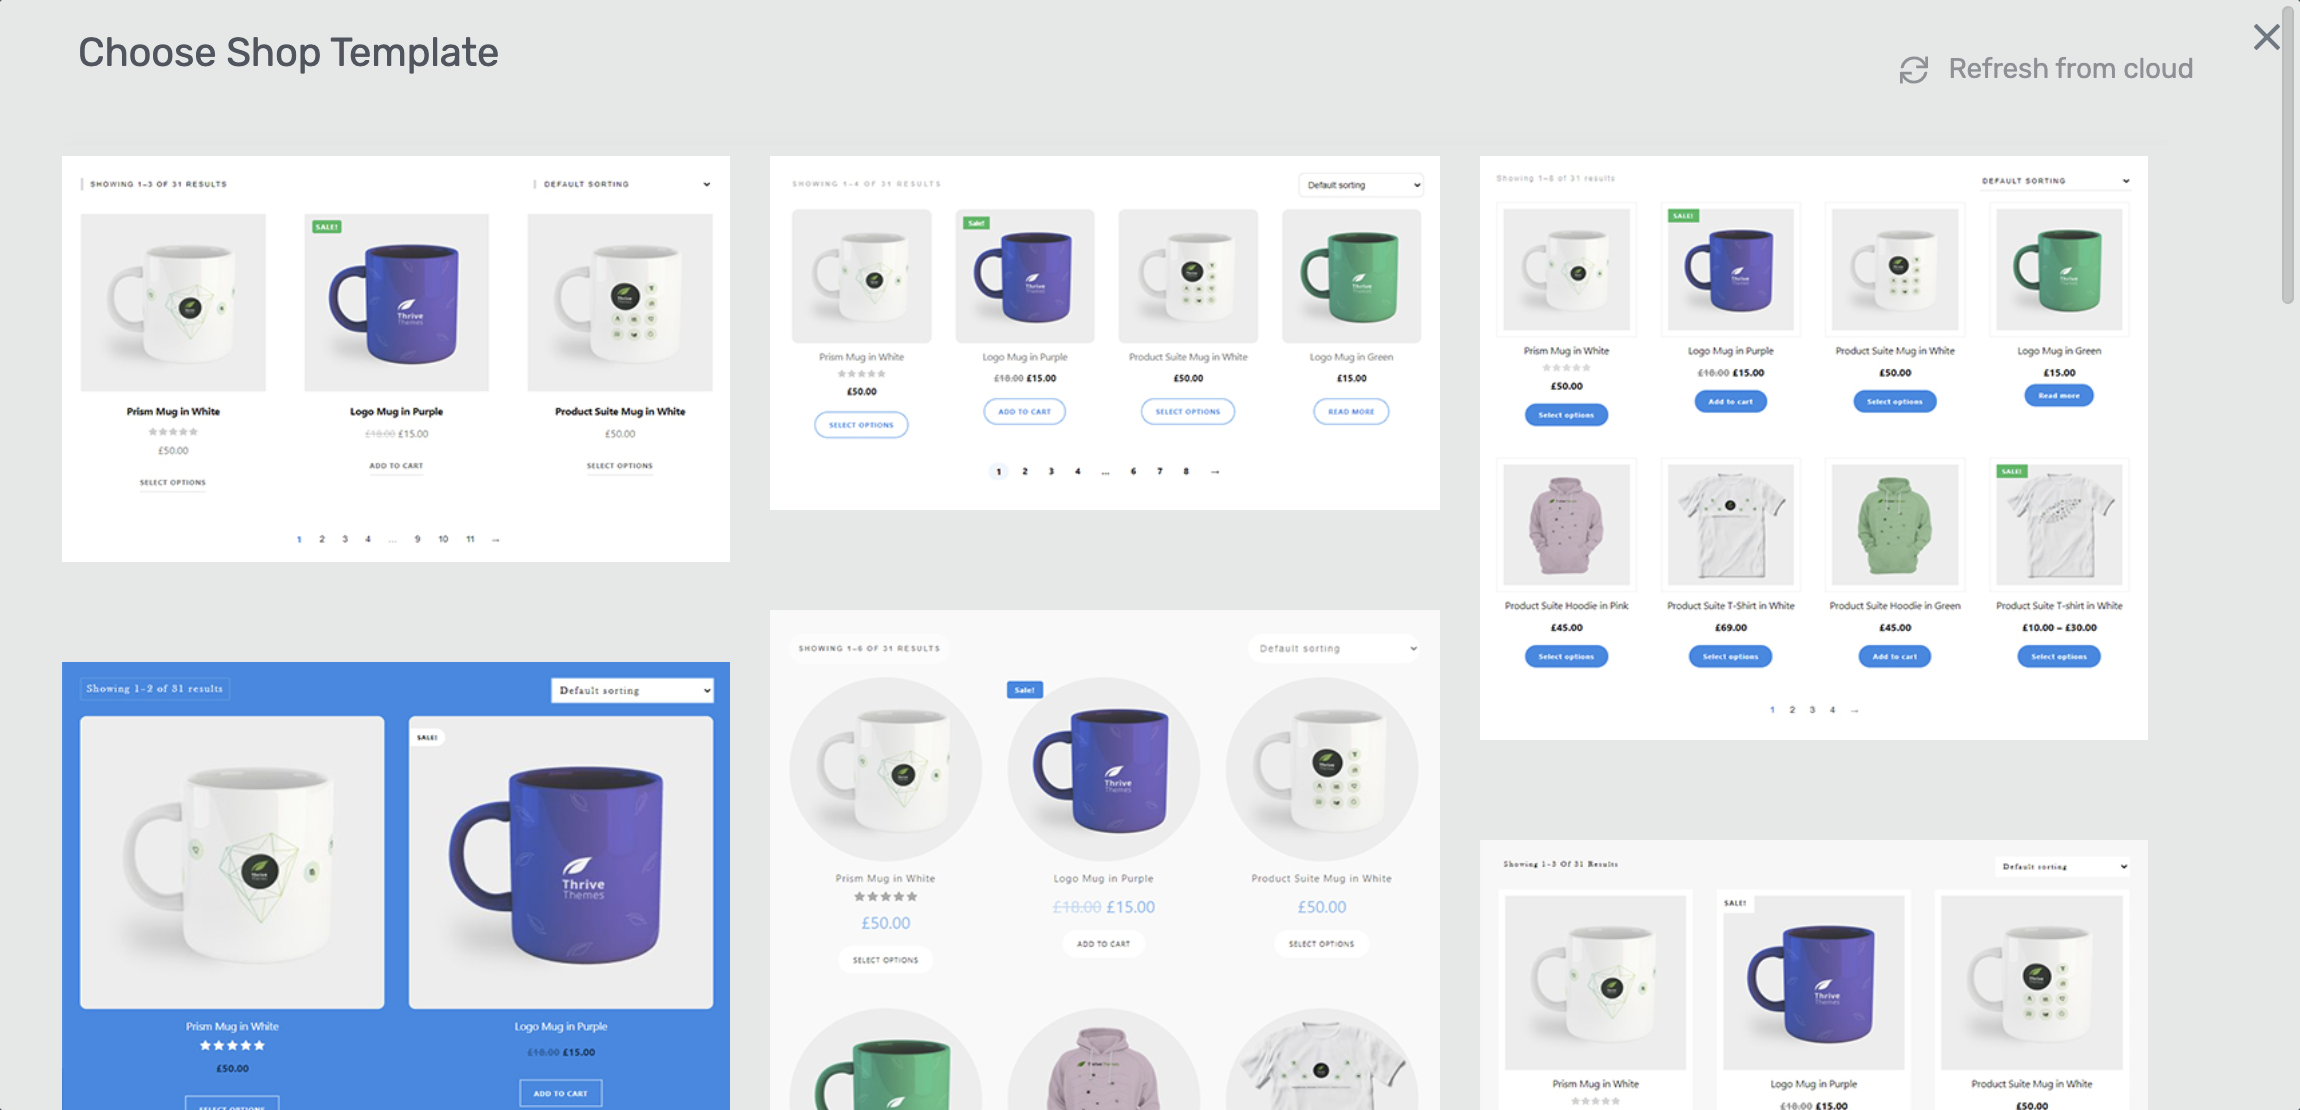
Pre-made shop layouts you can add to any page
Although you'll still have your main shop at yourdomain.com/shop, you can embed this shop element anywhere you want and configure it to your heart's content.
In the Thrive Architect sidebar, you can select specific products or filters that apply to the shop, and enable/disable features such as pagination, rating, sales flash labels and more.
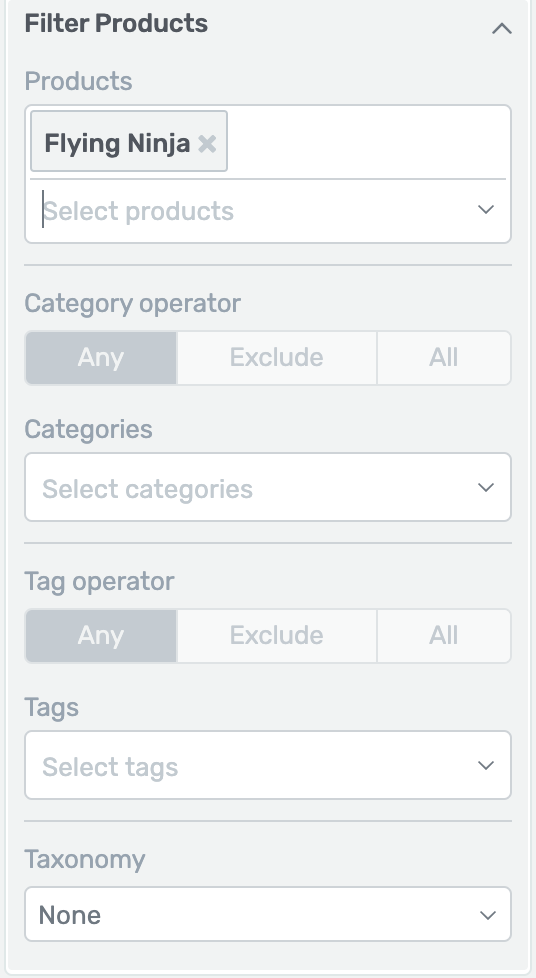
Apply a product filter
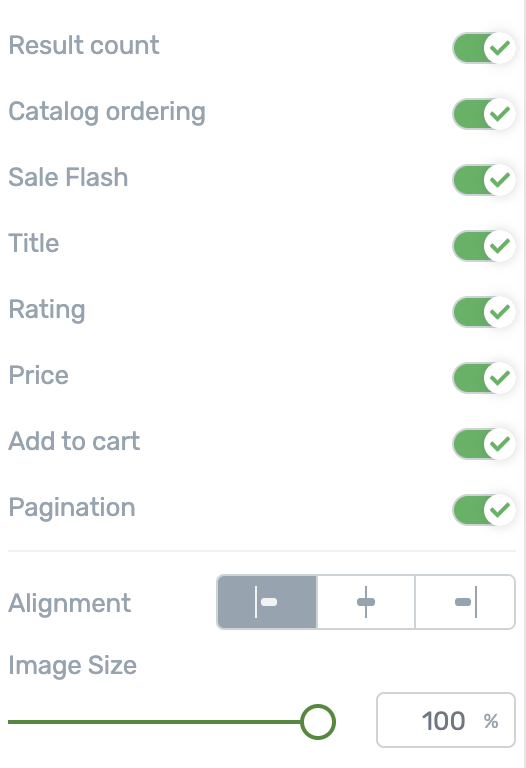
Add or remove display features
Where this element gets really powerful is when you combine it with the Edit Design mode.
By entering Edit Design mode, you'll be able to change eeeeeverything, including:
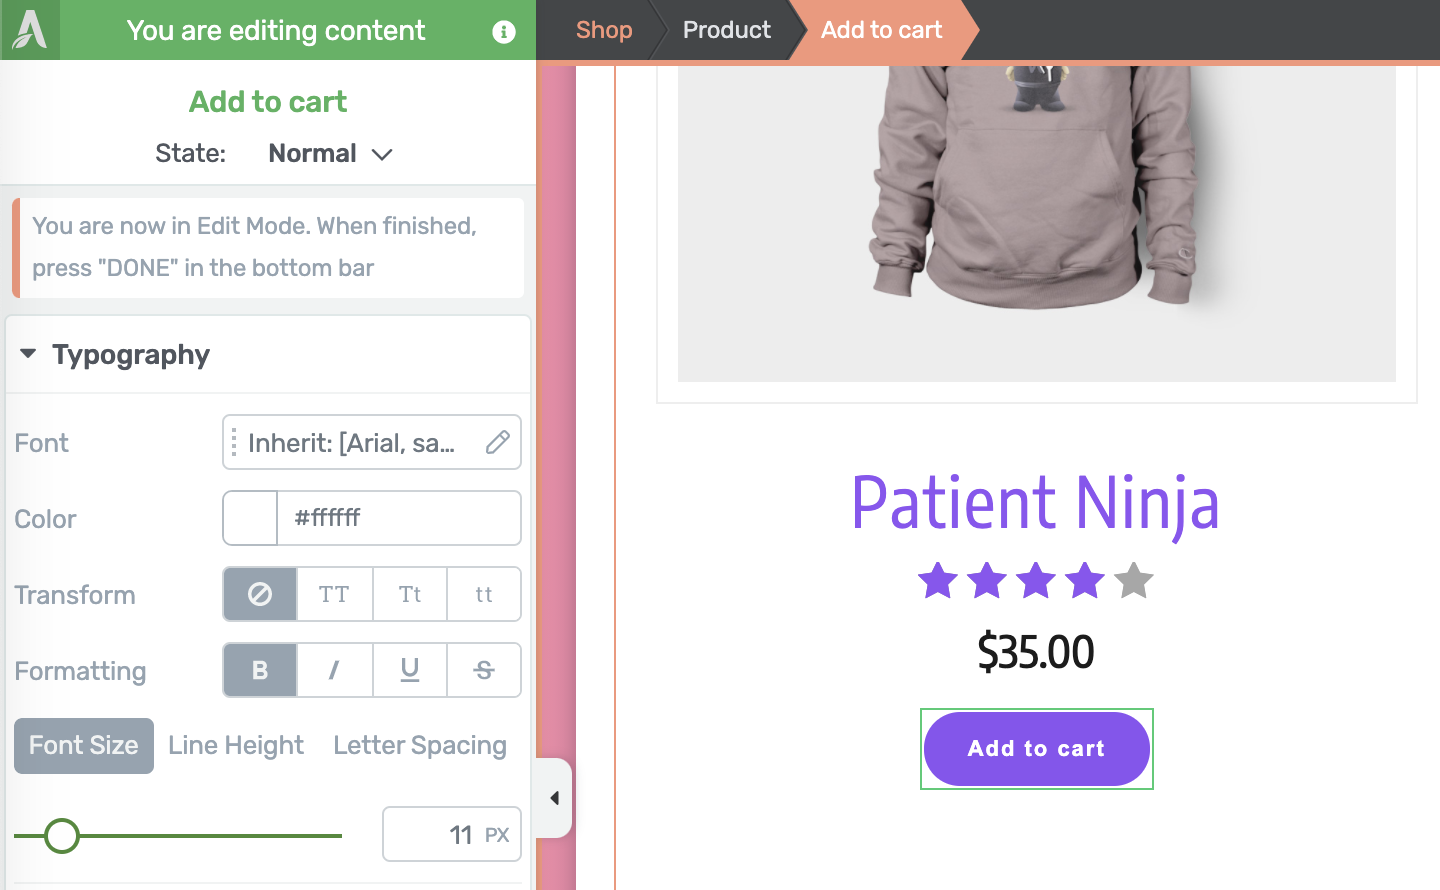
The 'Add to Cart' button can be styled just how you want it
Inside of Edit Design mode, you can just click on anything inside the shop, make your changes, and it will apply like a template. That means that as your visitors browse through products in your shop, your new design style will apply to all products.
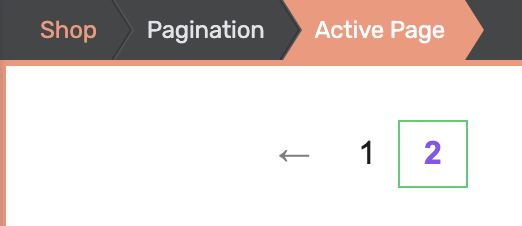
Select your pagination and style it
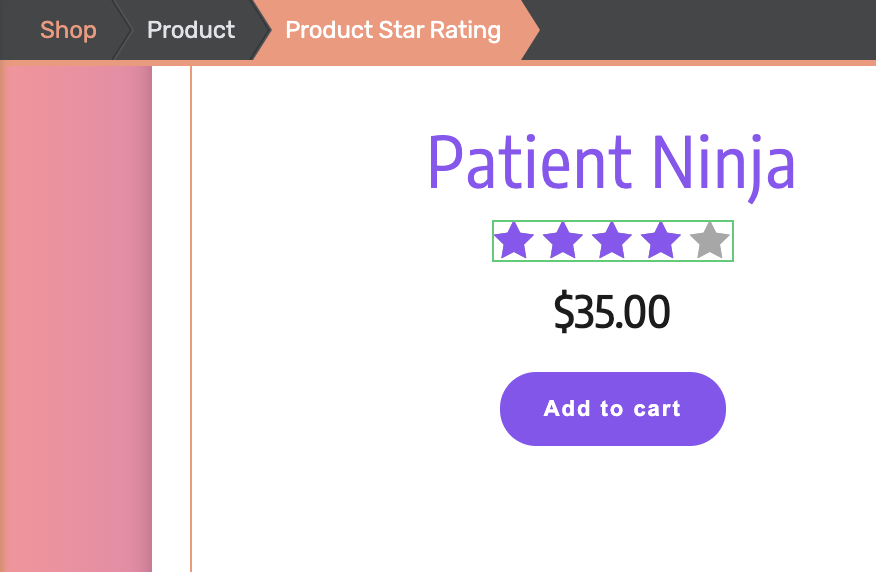
Resize or color Star ratings
Spend a few minutes modifying the Shop styling and you can end up with a professional, attractive shop embedded on any landing page or WordPress page of your choosing.
Here's one I made and embedded on the eBook Smart Landing Page set.
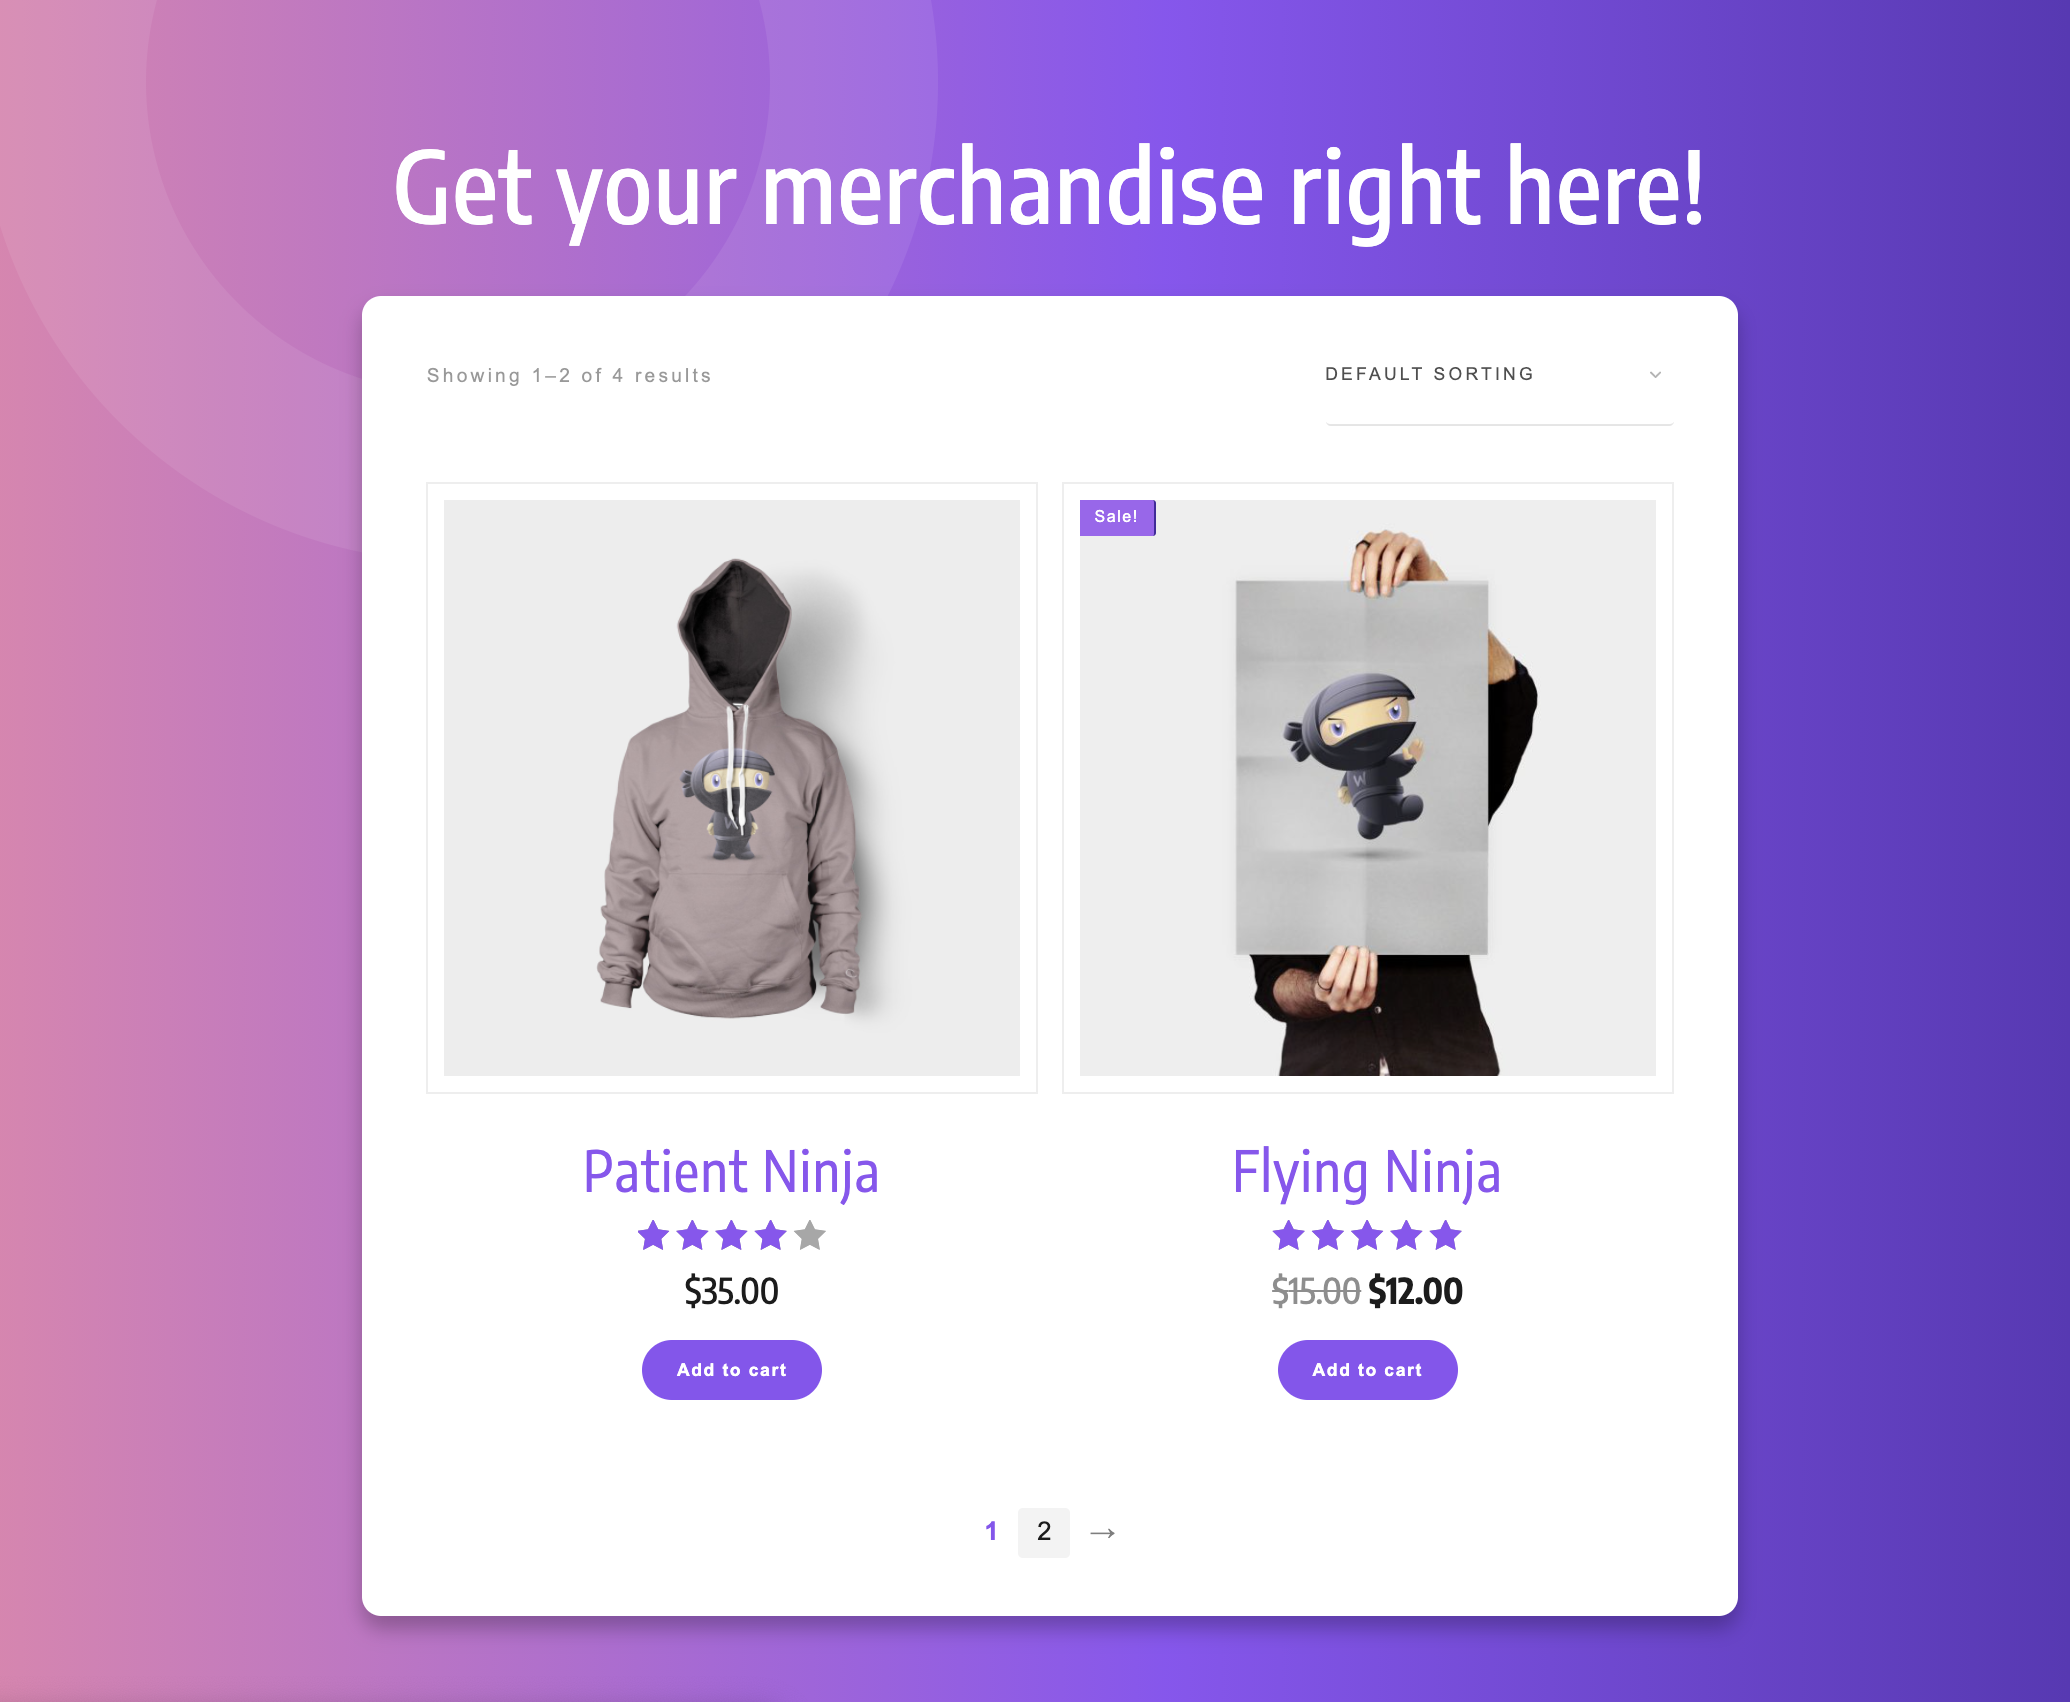
That's a nice looking, simple 2-product shop!
Editing Styles not Content
It's important to note that you are editing the appearance of the shop, without changing the content itself. The content of your WooCommerce shop is loaded dynamically from the products you've created in the backend of your website.
This means your edits will be compatible with a host of WooCommerce extensions that add new functionality to your shop.
It's a win-win.
2. WooCommerce Headers
If you want to scale an eCommerce business, you'll want to build out a content-driven website that lives alongside your shop and can funnel traffic from Google search results and social media towards your products.
This means both a content-site and an eCommerce shop living in harmony.
In our latest update, we've added new eCommerce focused website headers that you can apply to just your eCommerce pages, leaving your standard website header across the rest of your site.
In the Thrive Theme Builder website wizard, spot the new Step 12: 'Shop Header'.
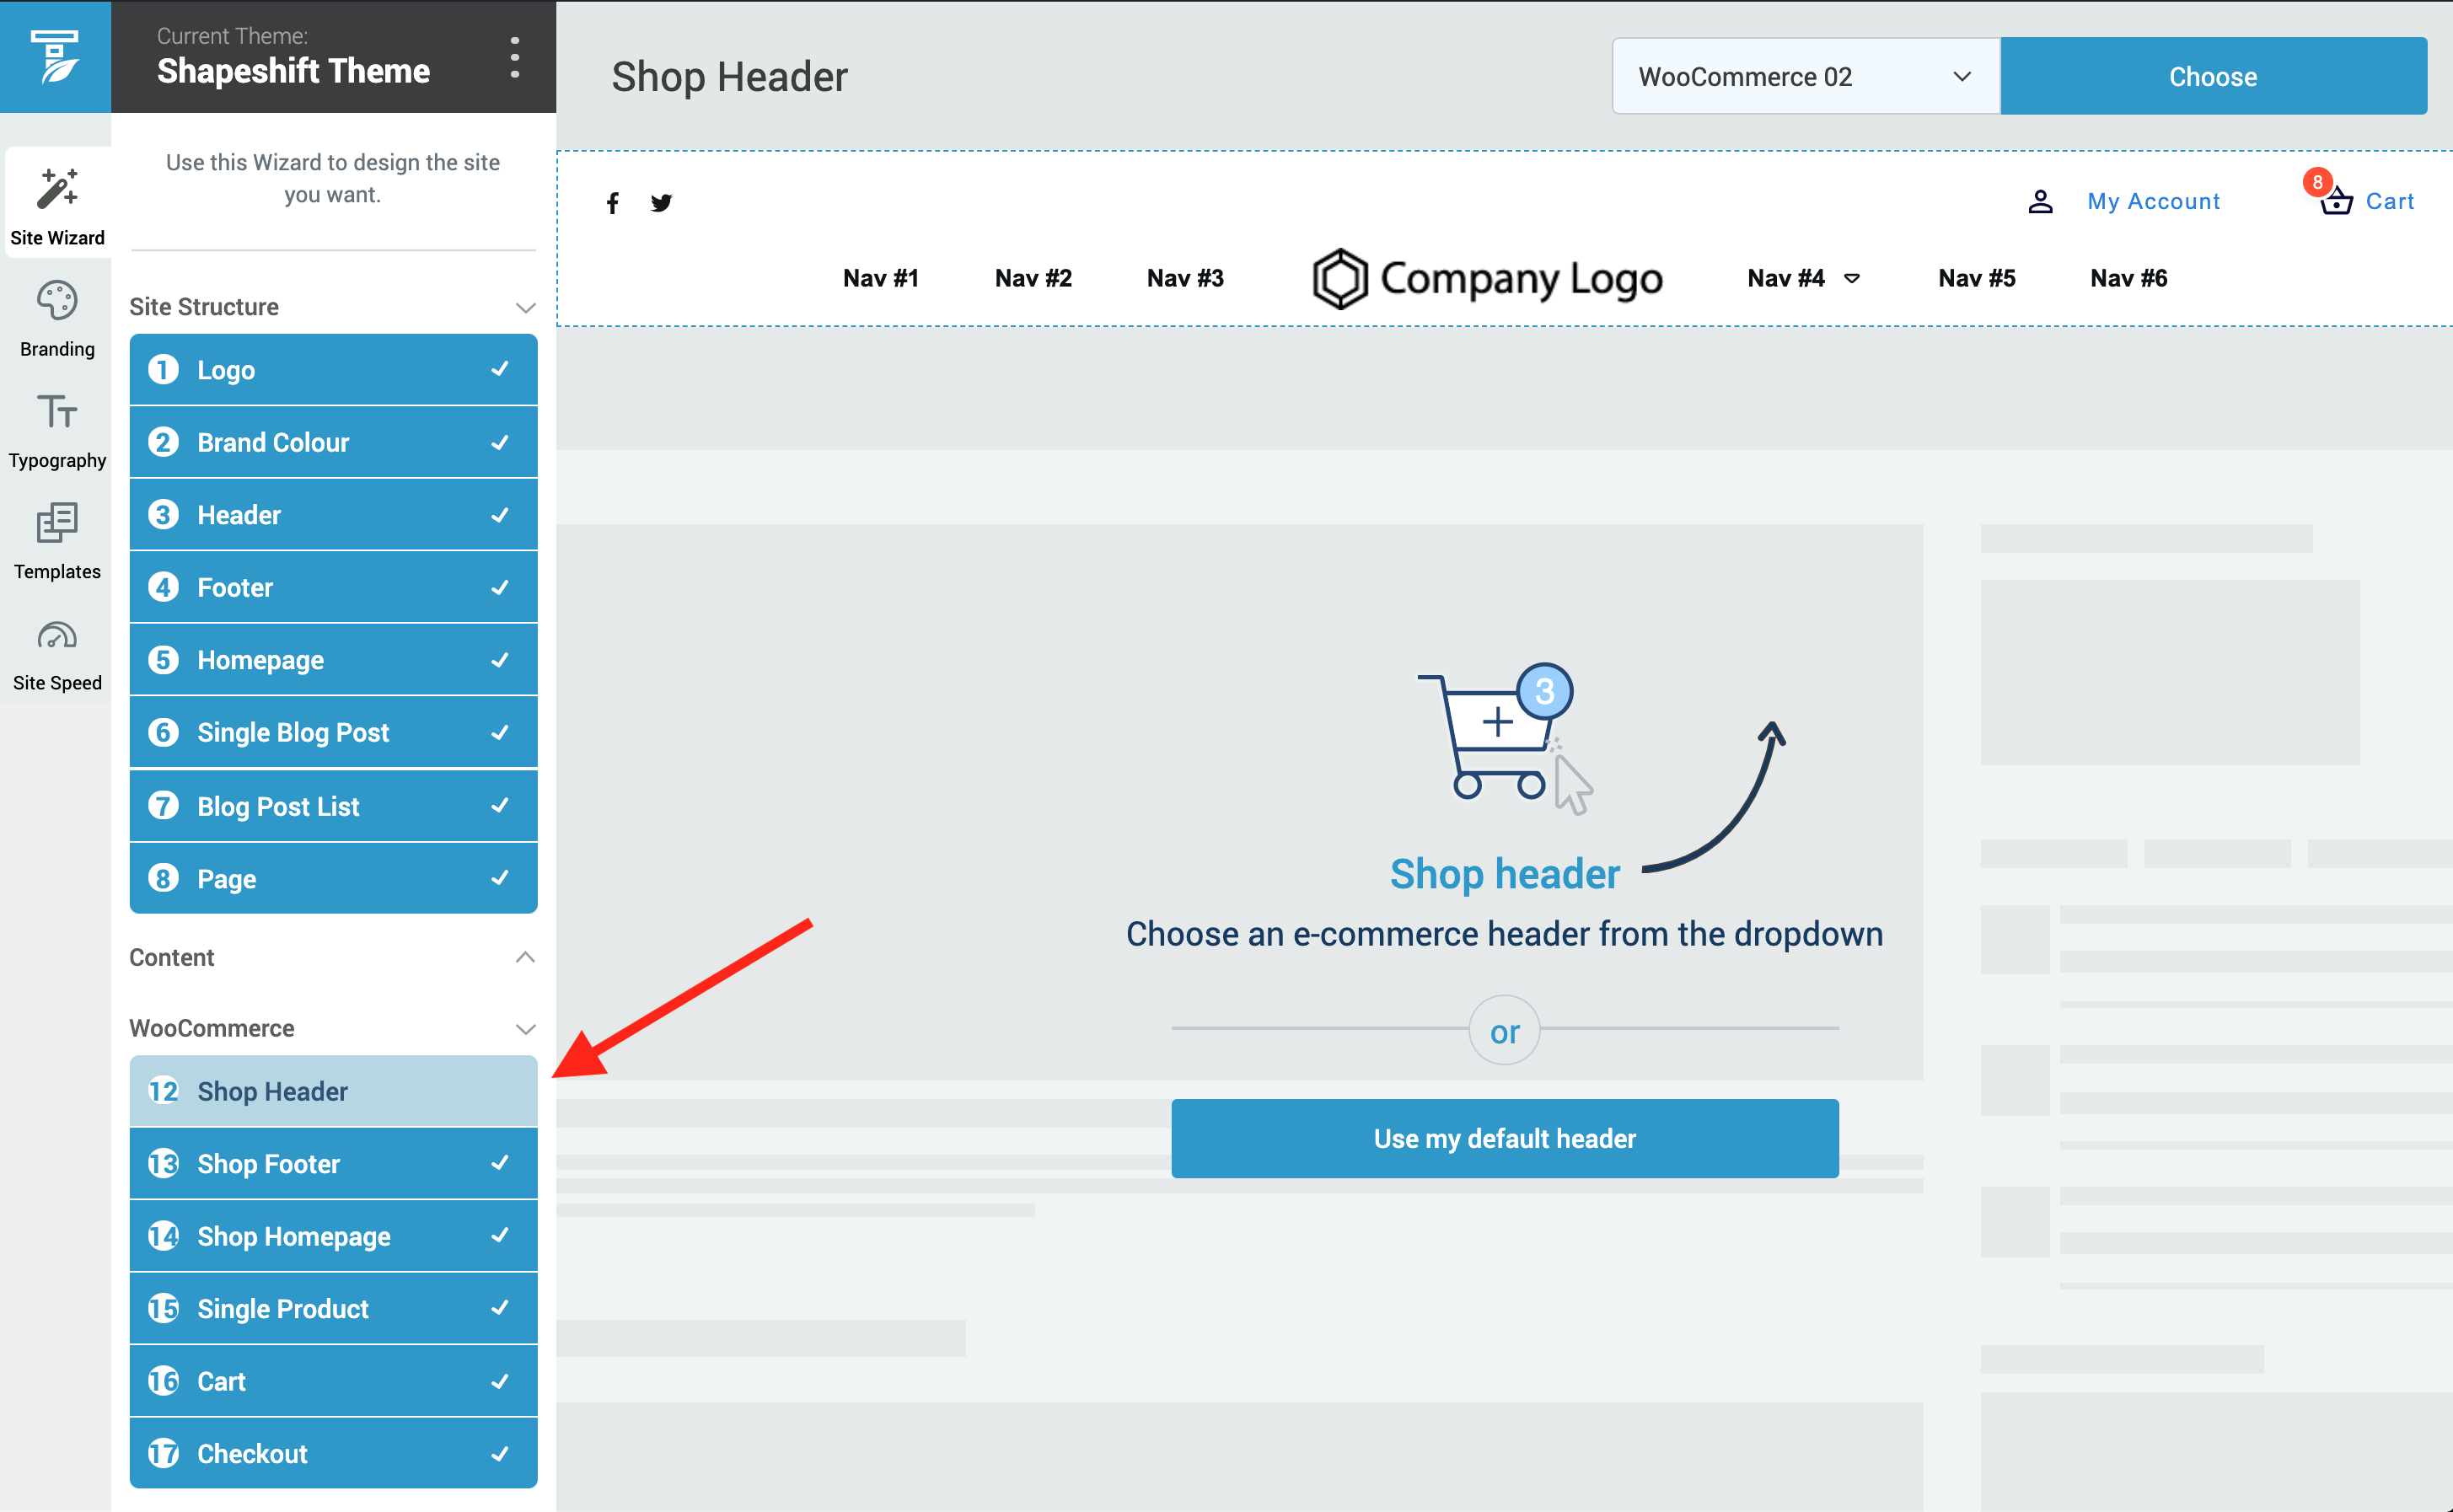
Jump straight to Step 12 to add a WooCommerce header
Once again, our talented design team have put together a selection of conversion-focused, eCommerce-friendly header templates that you can pick from.
These templates will automatically inherit your brand colors, include calls-to-action, search bars, and My Account + Cart links in the header... even using our popular mini-cart element.
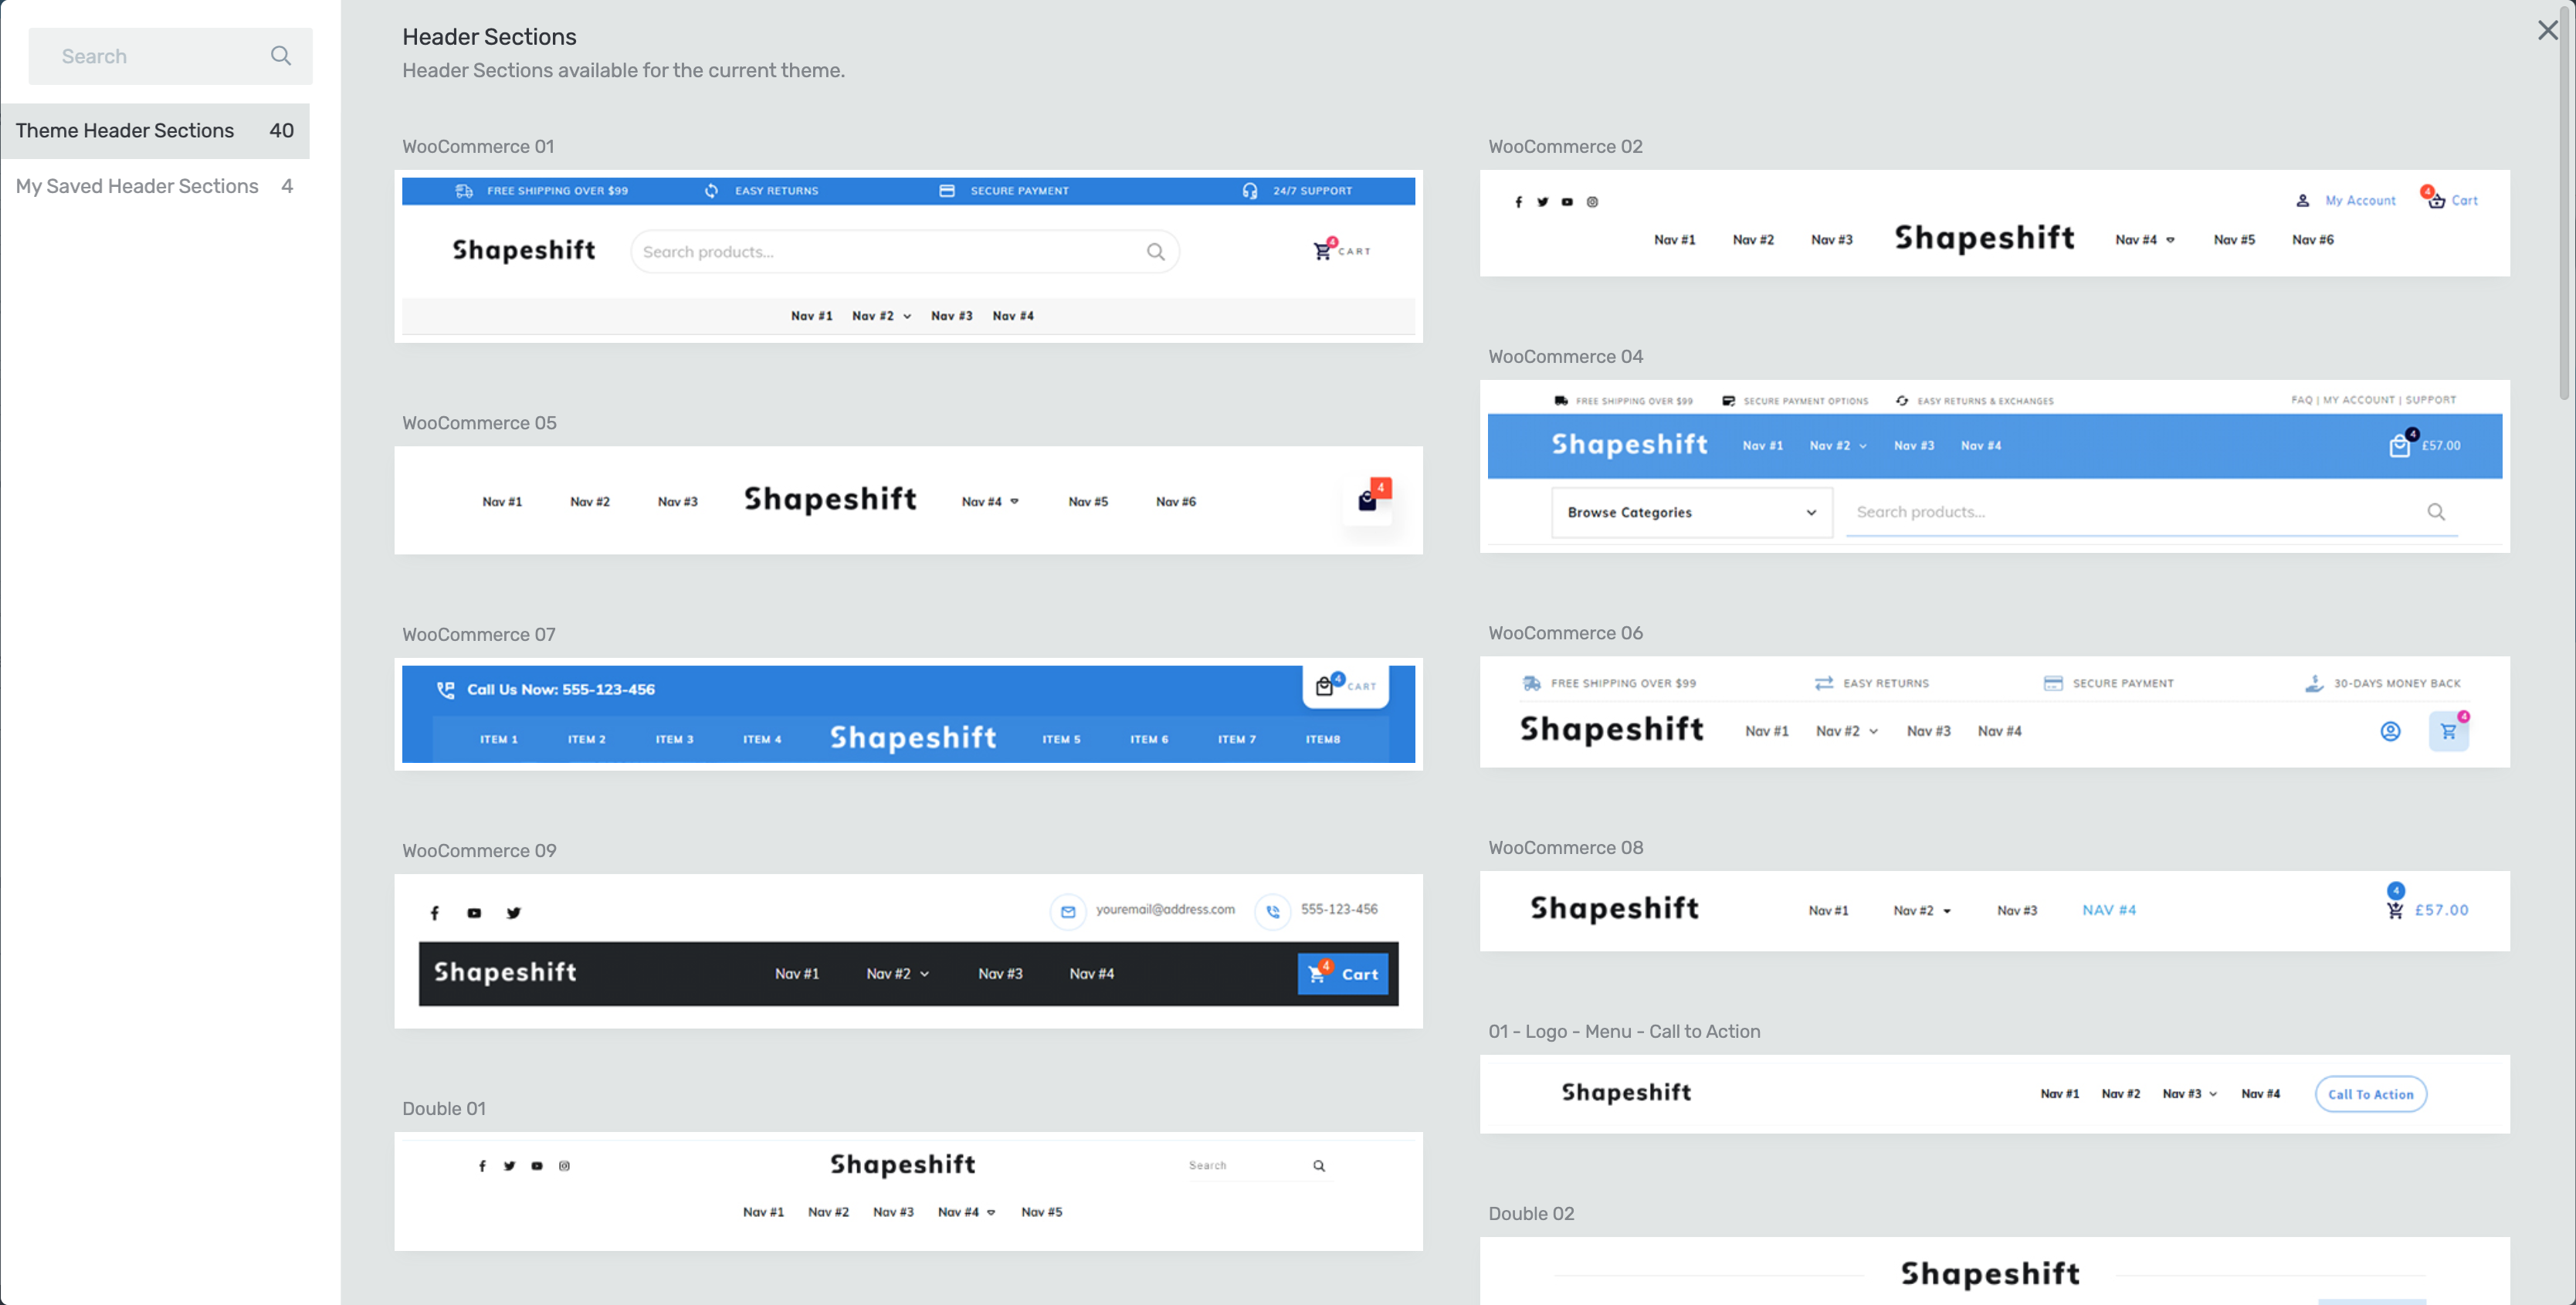
Lots of different eCommerce headers to choose from!
Here's an example of a WooCommerce header below.
Take note of the 4 shop-related notices across the top and the My Account and Cart icons on the right.

WooCommerce headers will apply to key eCommerce pages including:
If your visitors arrive at any of those pages, it's fair to say that they are interested in your eCommerce options, so the appropriate header will be displayed.
As for the rest of your website, customize the header to exactly what you want!
Remember, you can always change these headers from the Thrive Theme Builder sidebar here.
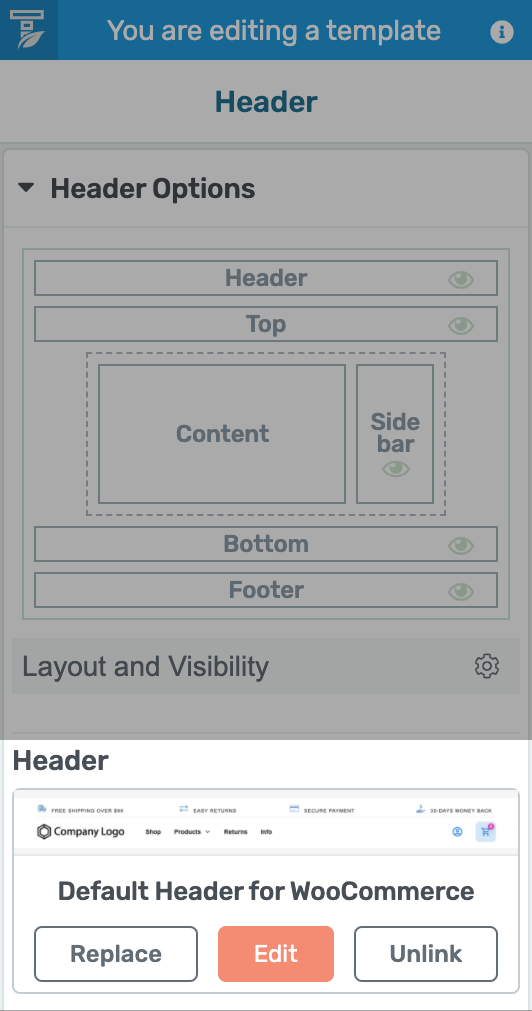
Change your templates with a click
3. New Social Follow Element
Thrive Architect users, there's a new element in your element tray called Social Follow.
This is a vastly improved version of the now-renamed 'Business Social Links' element that existed for Thrive Theme Builder only, and is now available across both tools.
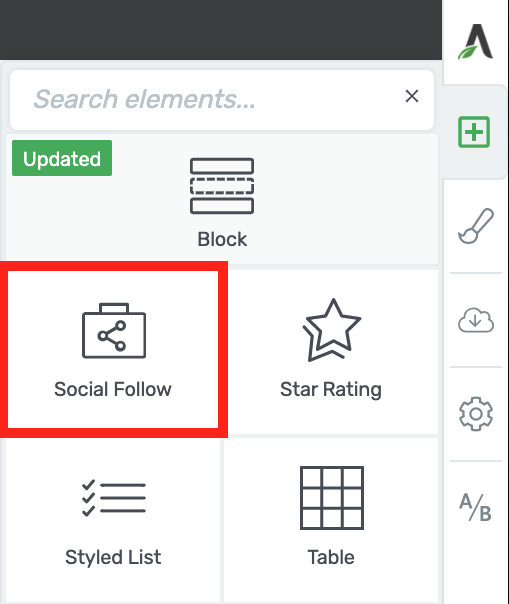
Look for the new Social Follow element
The purpose of this element is in the name: to help your website visitors follow you on social media.
The Social Follow element makes it ridiculously easy to drop a series of social icons on the page that link out to your social media accounts.
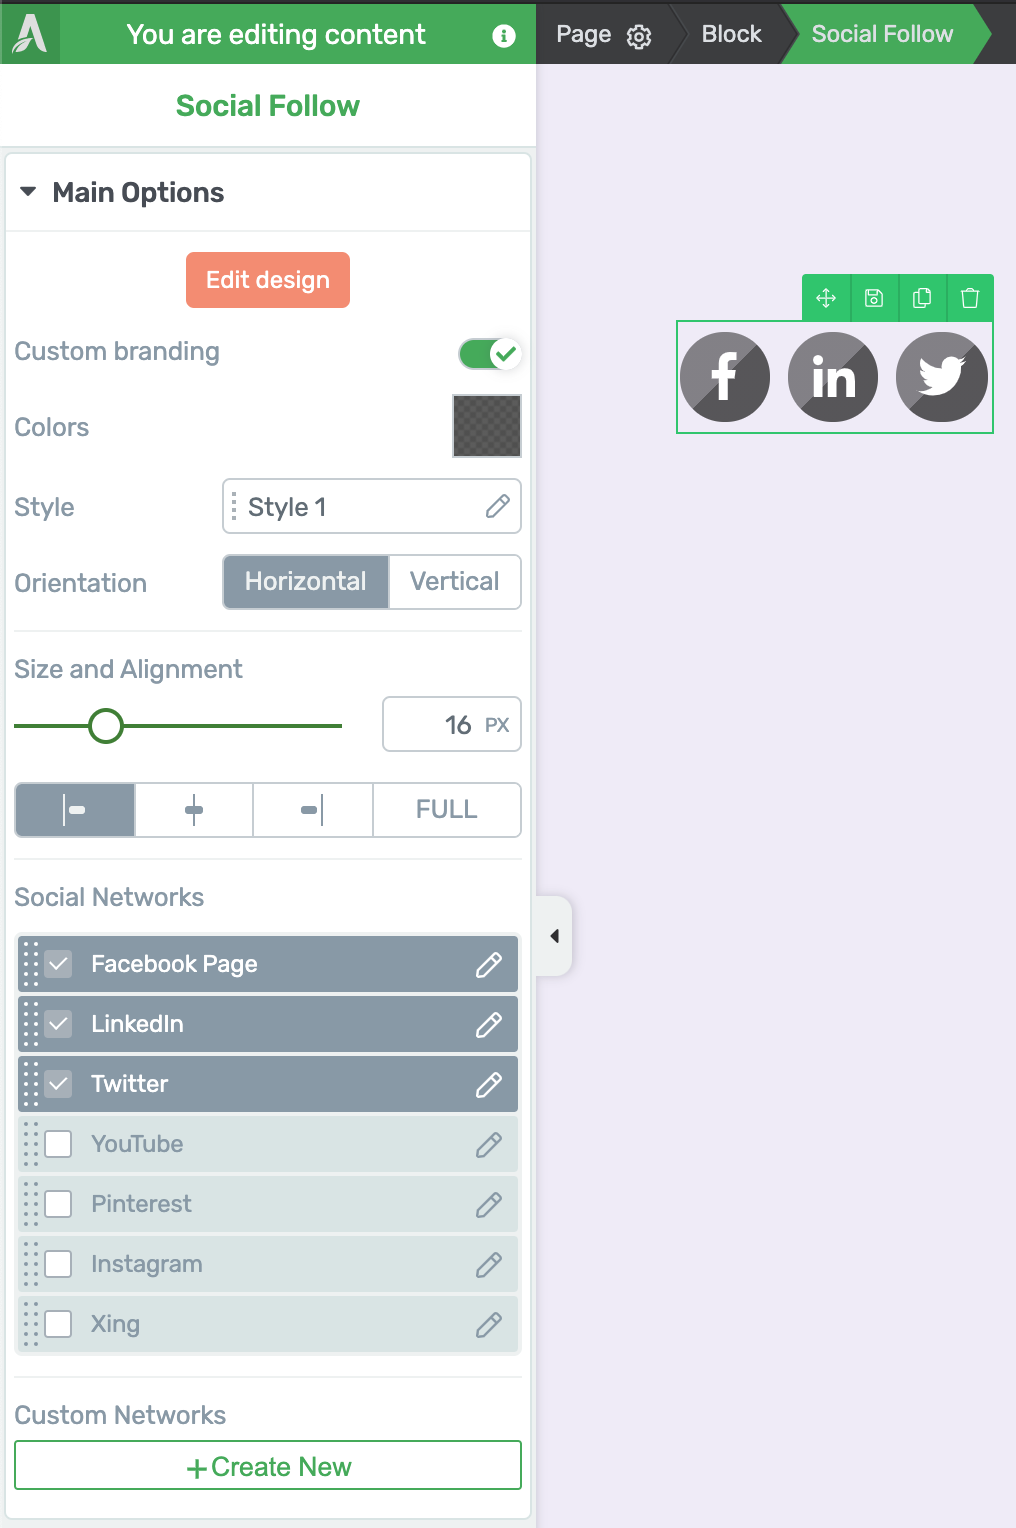
Social Follow settings when you first place it on the page
Smart Site Social Links
By default, the Social Follow element will be pre-populated with popular social accounts and will encourage you to set up Global Social fields.
Global Social fields allow you to manage the many, many different links you'll find yourself reusing again and again as your website grows... including links to your social accounts.
Inside the settings for each social icon, you'll see a link to your 'Smart site dashboard'.
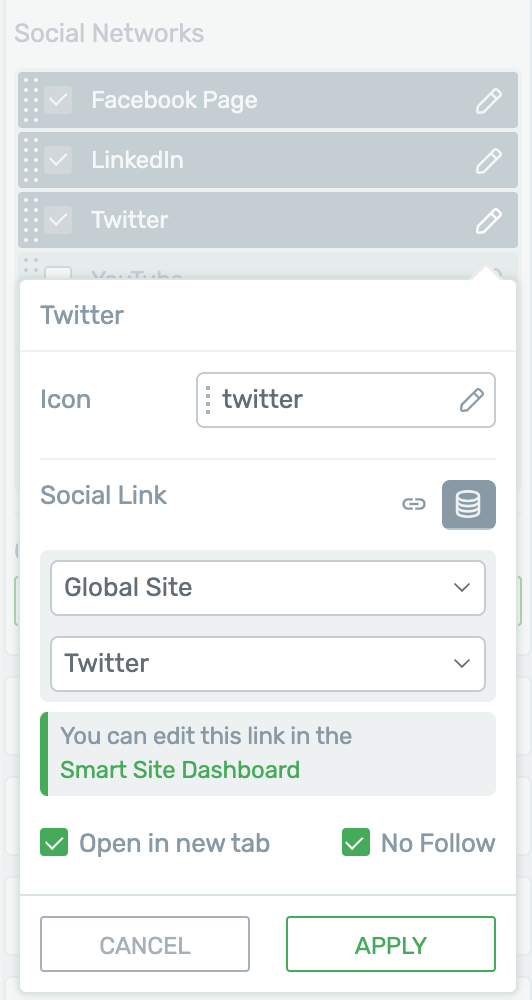
Click the link to open the Smart Site Dashboard
Your Smart Site dashboard is a central place to create and store links for Social media accounts, privacy policy pages, contact email addresses, phone numbers, etc.
We encourage you to use these global fields because if you ever change your social profiles, addresses or contact information, it can be very frustrating to update your whole website one link at a time.
With Smart Site, it updates everywhere at once.
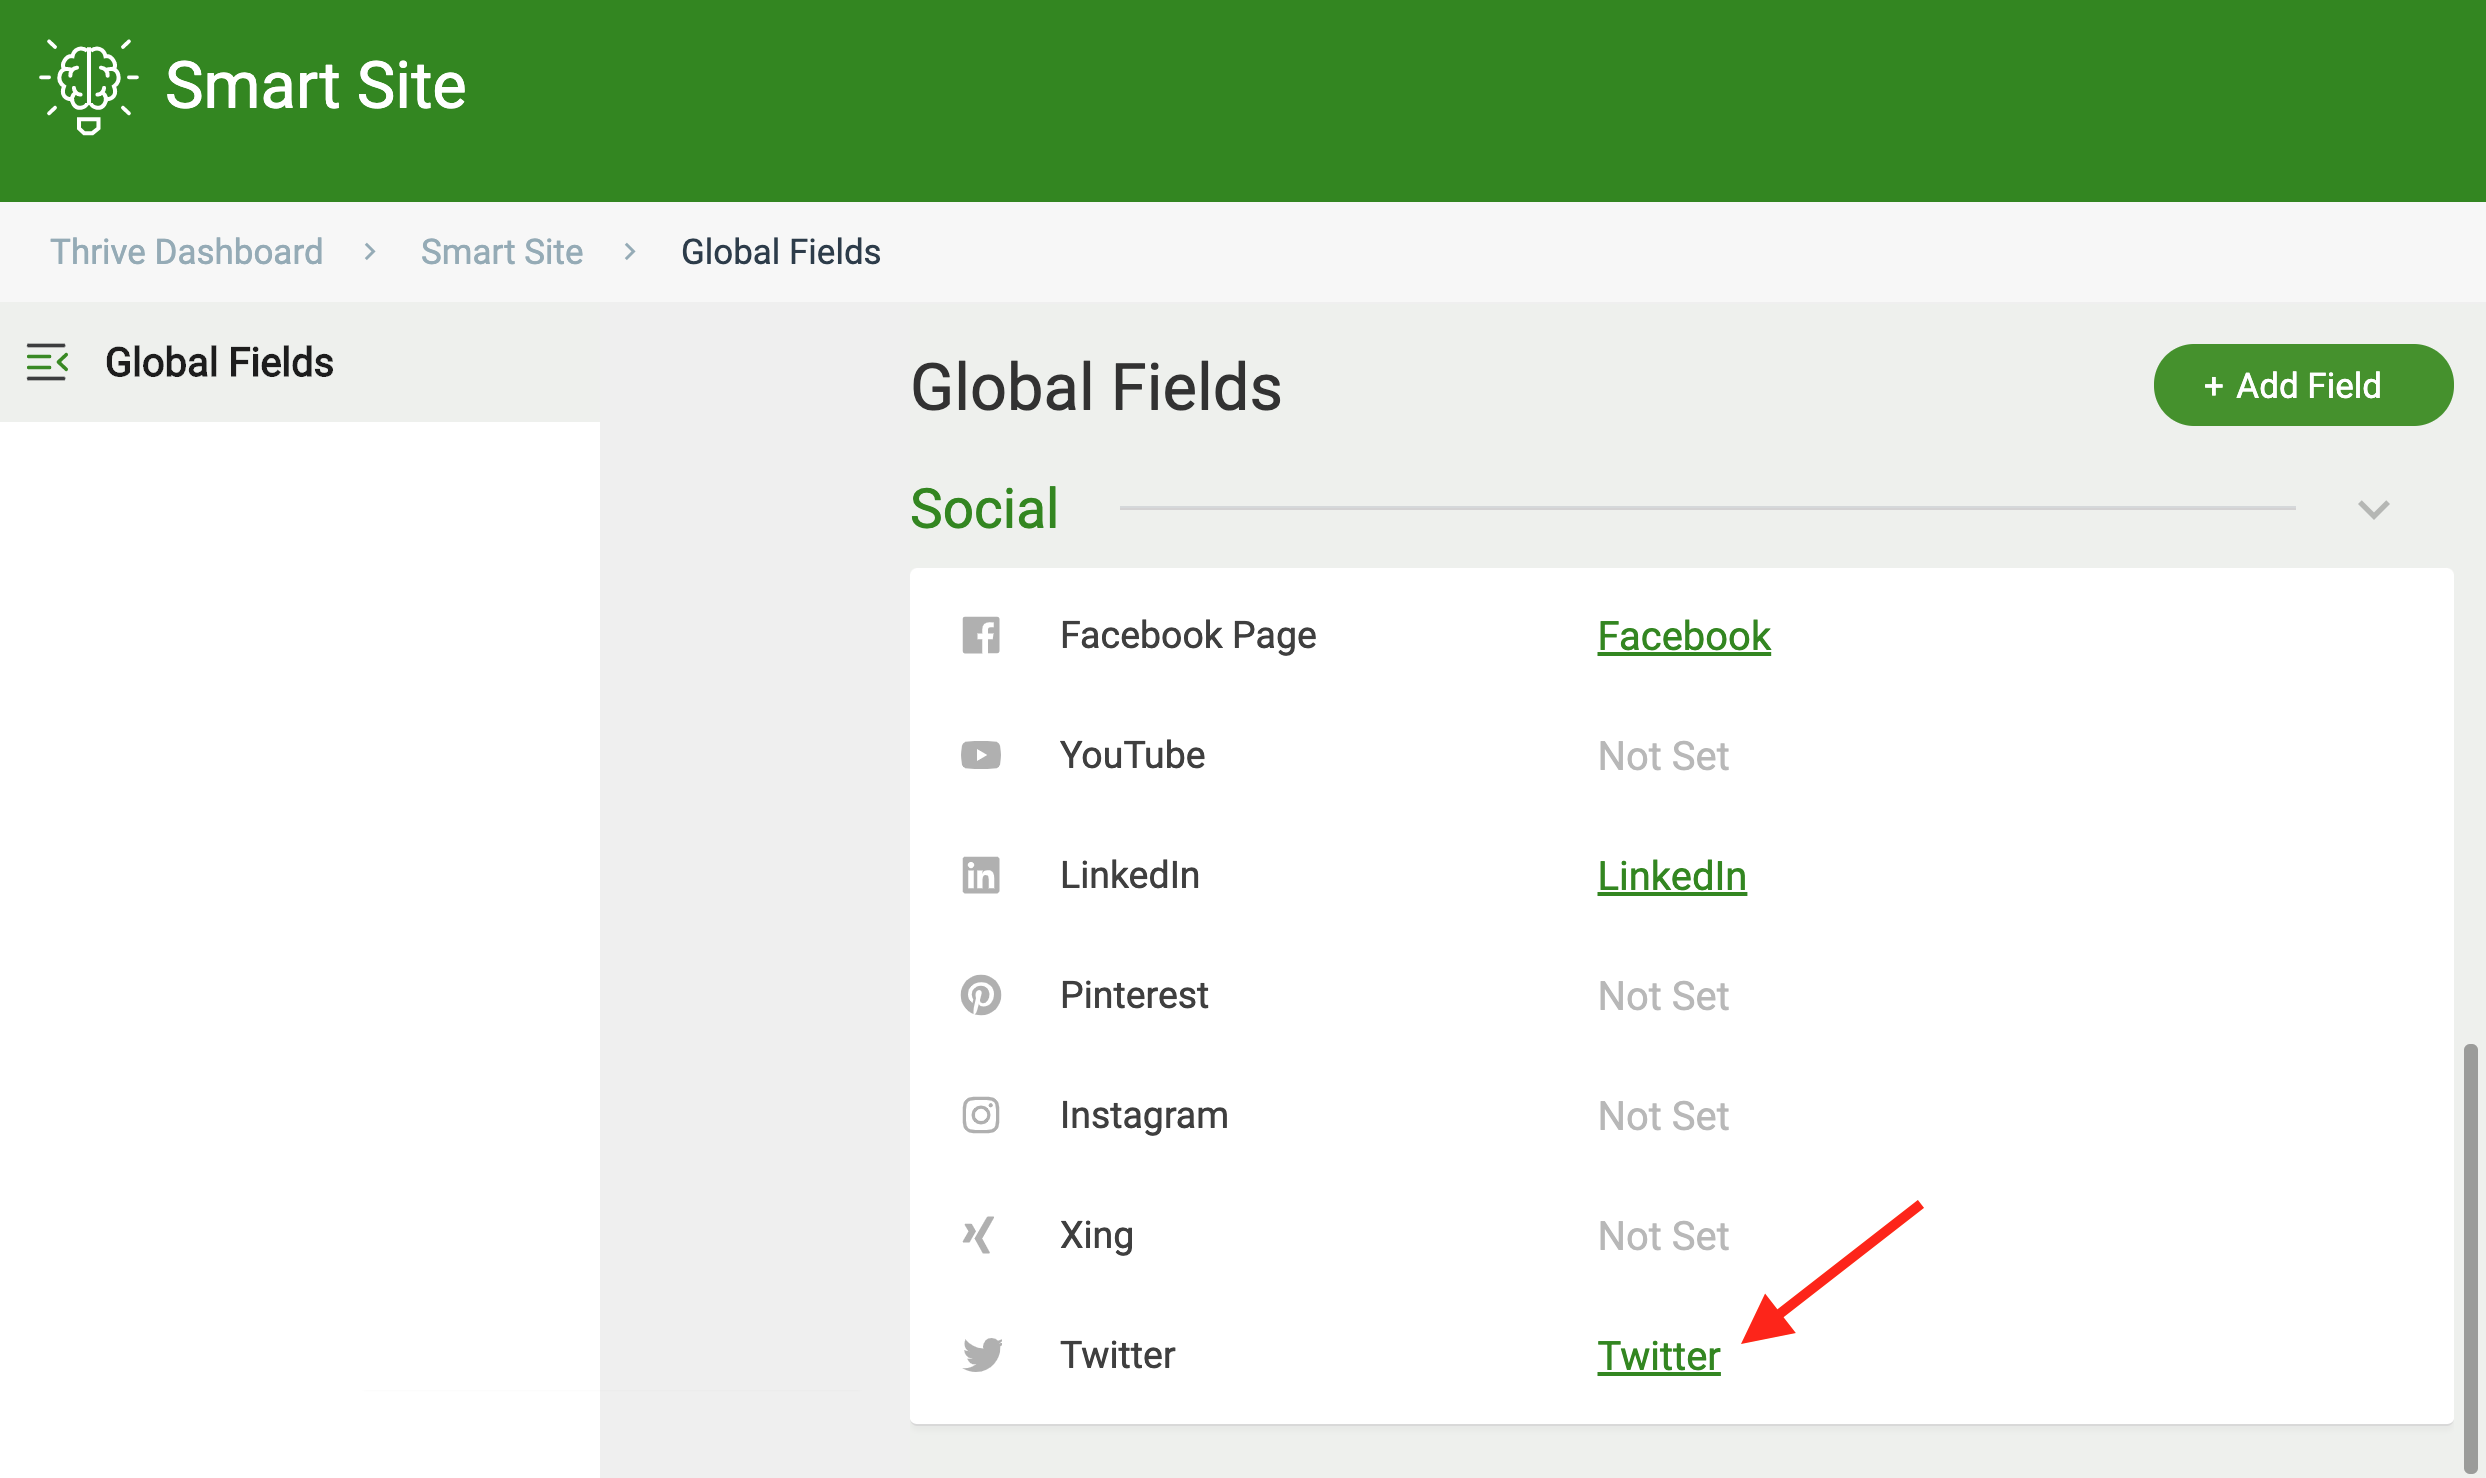
Under Global Fields, add all of your social account URLs.
Whatever Social links you've configured in this dashboard will be automatically assigned to icons in the Social Follow element
Adding Custom Social Accounts
You don't have to use Global Social fields.
You can add any custom accounts of your choosing just by clicking 'Create New' on the Social Follow element
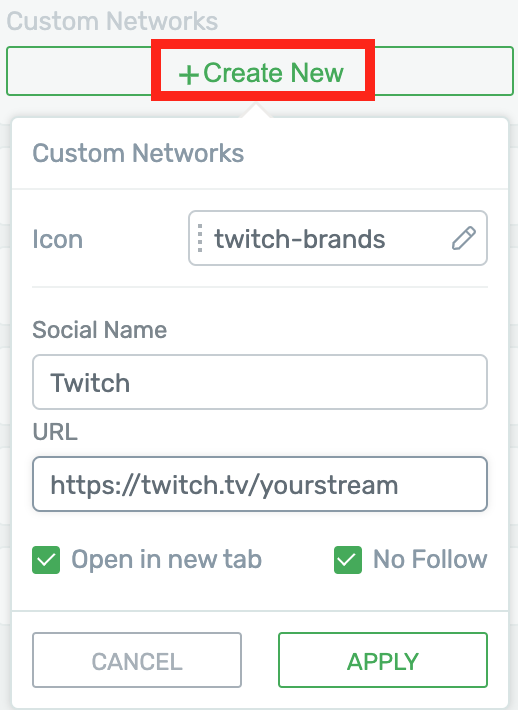
Add a custom social URL directly to the element
Here you can set a non-global URL and pick the appropriate icon from our vastly growing icon library:
The Brands tab in the Icon Library now has 655 free brand icons.
Once you've added your icon, it'll appear enabled in the list Social Follow list.
But there's one problem... you'll see that it's just dark grey.
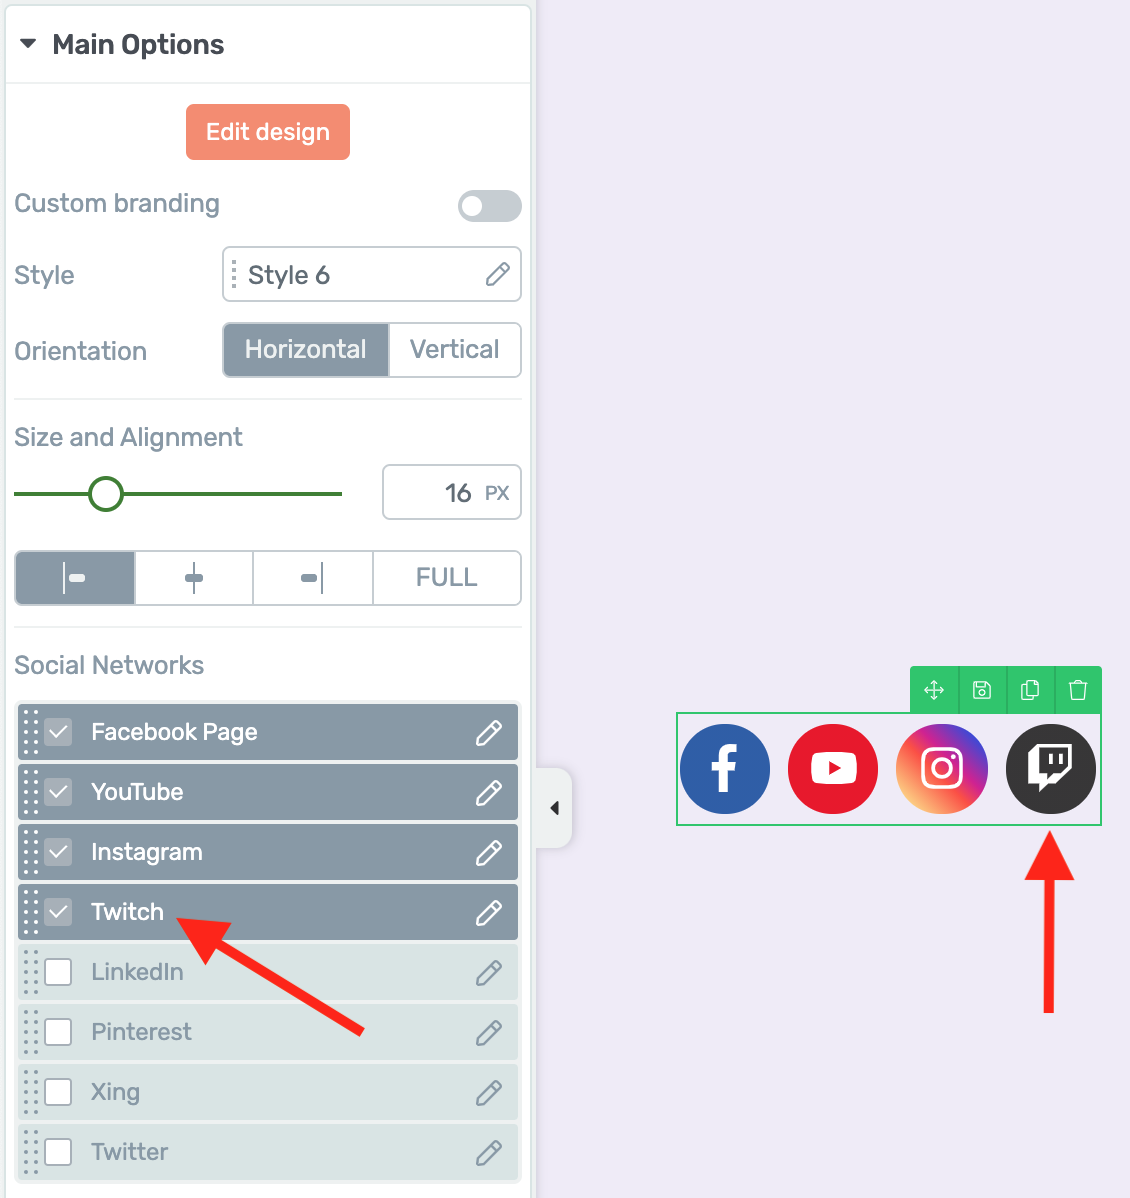
Your custom social icon won't have a color value yet.
To assign a network color, simply enter the edit mode, select your new icon and define a color value under 'Network Color'. Your icon will be updated.
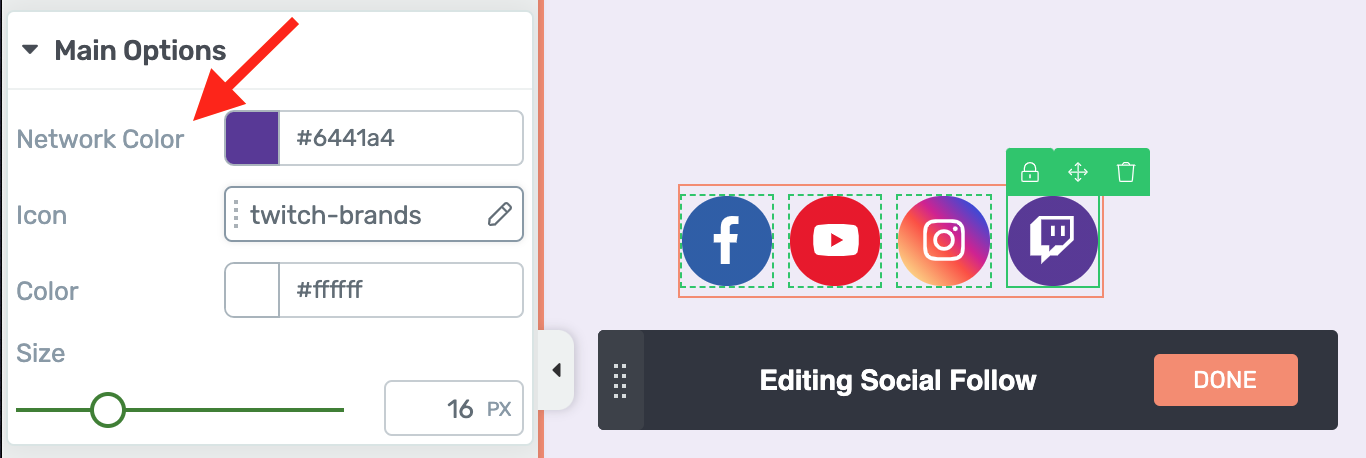
Apply a Network Color to your new icon and it's ready to go!
A Network Color is a shared value between different styles, and will apply to the icon, background or border as defined by the style.
This means if you change the look of your Social Follow, the network color information will be retained.
Applying Styles
You didn't think it was only going to come with 1 style, did you?
Of course not. This element comes with 8 social follow styles!
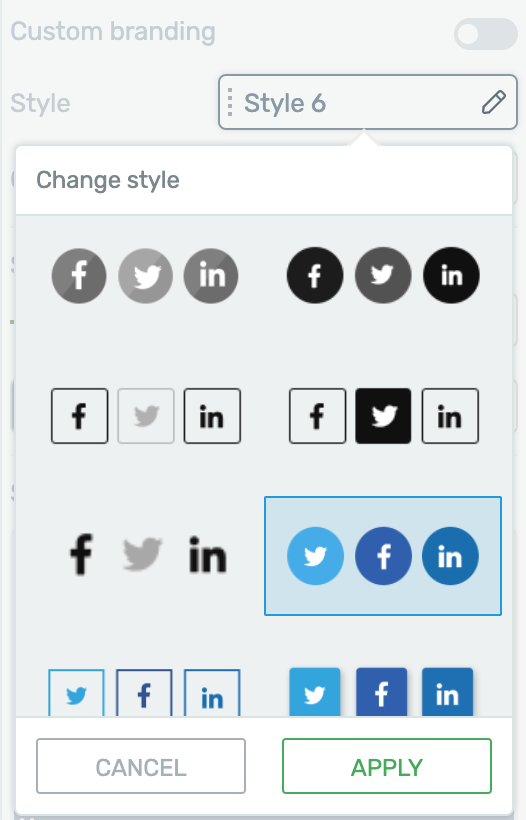
Swap between styles without losing the links you've saved to your icons.
Some are monochrome, others are colored, but they all have the appropriate network colors saved behind the scenes.
You can also override network colors with your custom branding. (Yeah, we've thought of everything!)
For example, if you have a colored style like this one below:
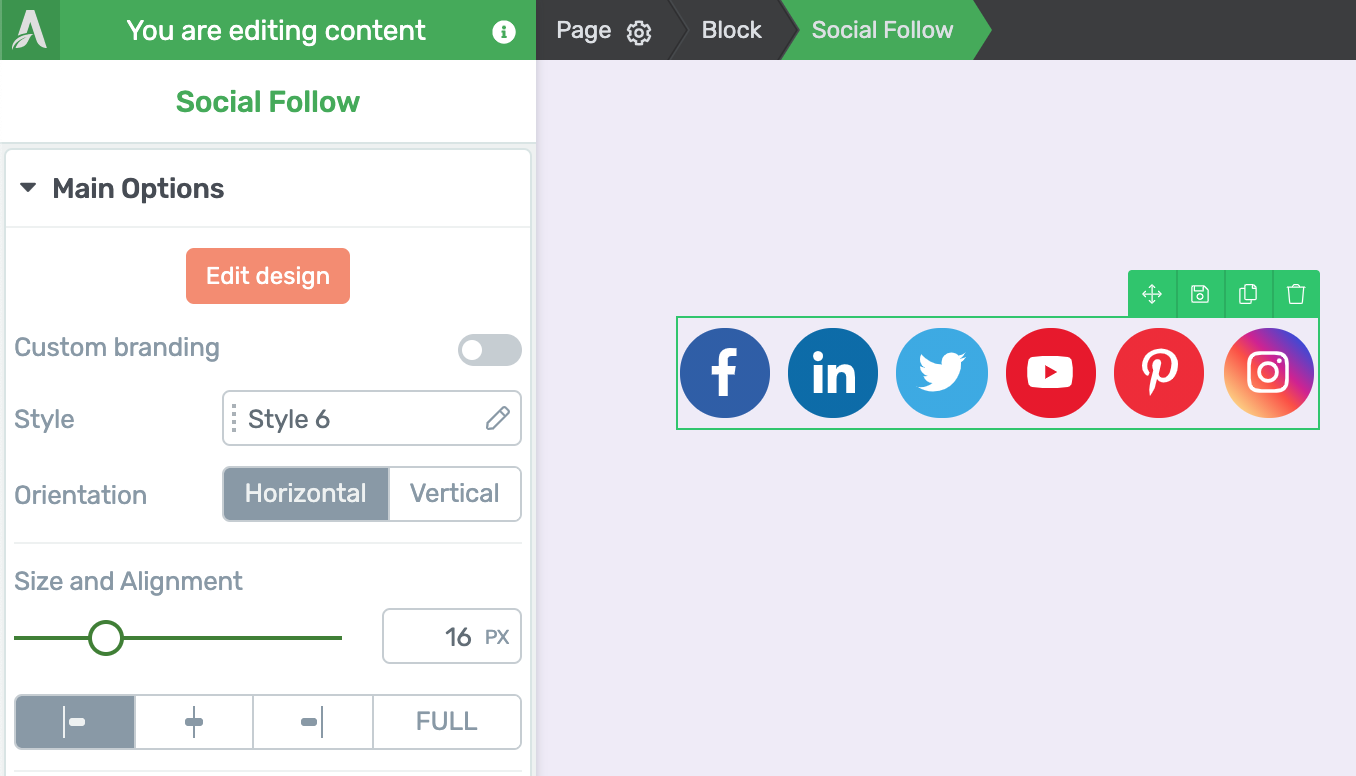
Note how each icon has the network color displayed.
...and you would prefer to re-color all the icons to seamlessly blend in to your page, you can enable the 'Custom branding' icon and apply a single color that will override the network colors of all icons.
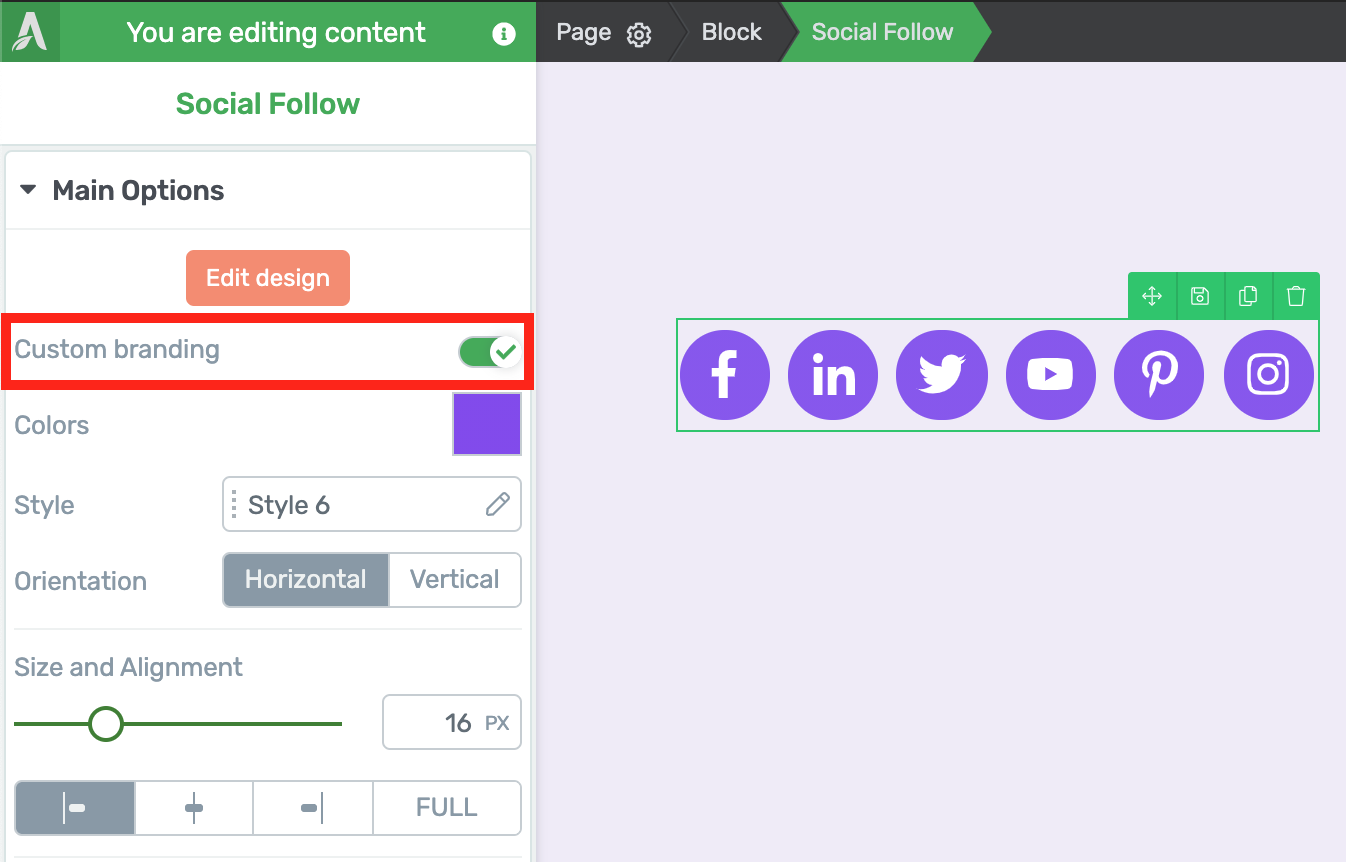
Enable custom branding and choose a color that applies to all icons!
Author Links
But wait... there's more!
Your Global social links are for you and your business. However, on occasion you may have blog posts written by a contributor that wants to link out to their own social accounts.
Can you do that? Of course you can.
You can add the Social Follow element to a blog post template made in Thrive Theme Builder and create an author box. Then, instead of choosing 'Global site' links, you can select 'Author Links'.
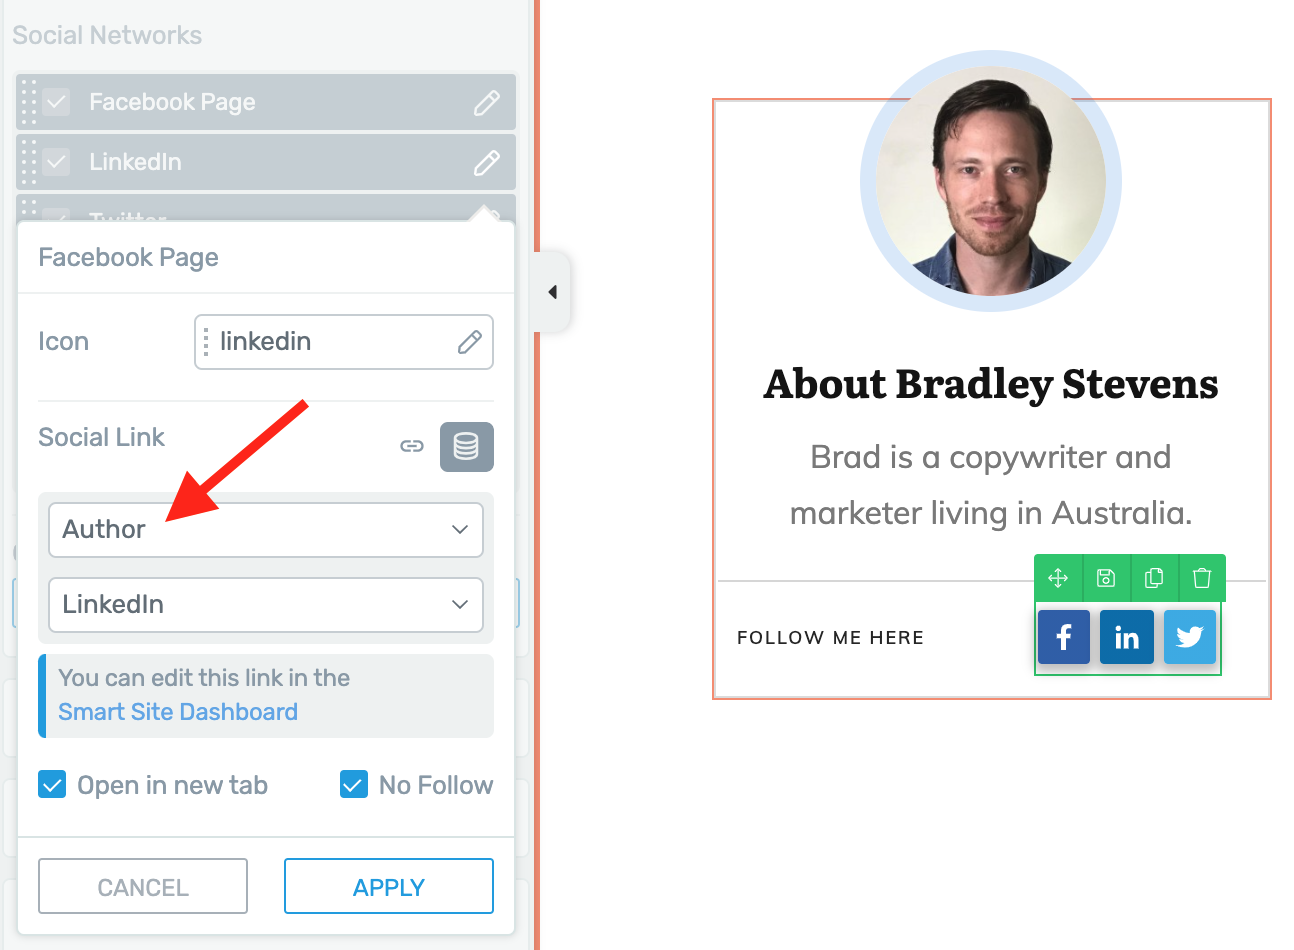
Choose 'Author' for your dynamic link source.
This will mean that the Social Icon links will be dynamically updated to match the Author of the accompanying blog post. You'll have one template that will modify itself to suit the content of your website. Amazing!
Author Links are attributed to the WordPress author. To edit these, in your WordPress dashboard, navigate to Users >> Profile:
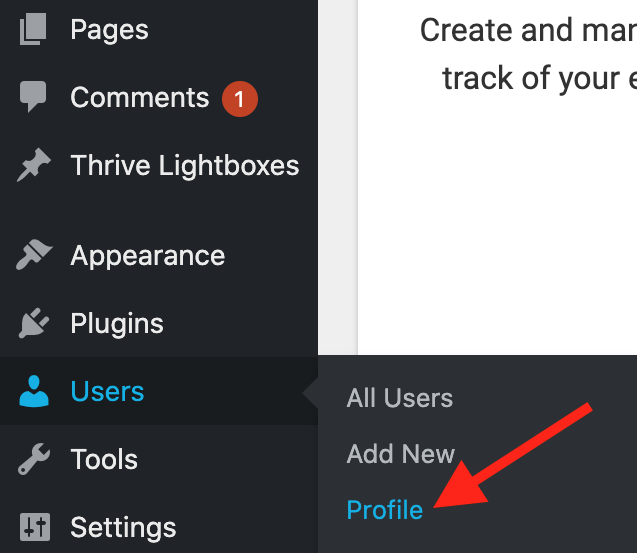
Your Author links are set at the WordPress user profile
Inside of your profile, you'll see a list of Thrive Social URL Settings, where each author can define their own personal social media links that will be applied to the Social Follow icons on the posts they write.
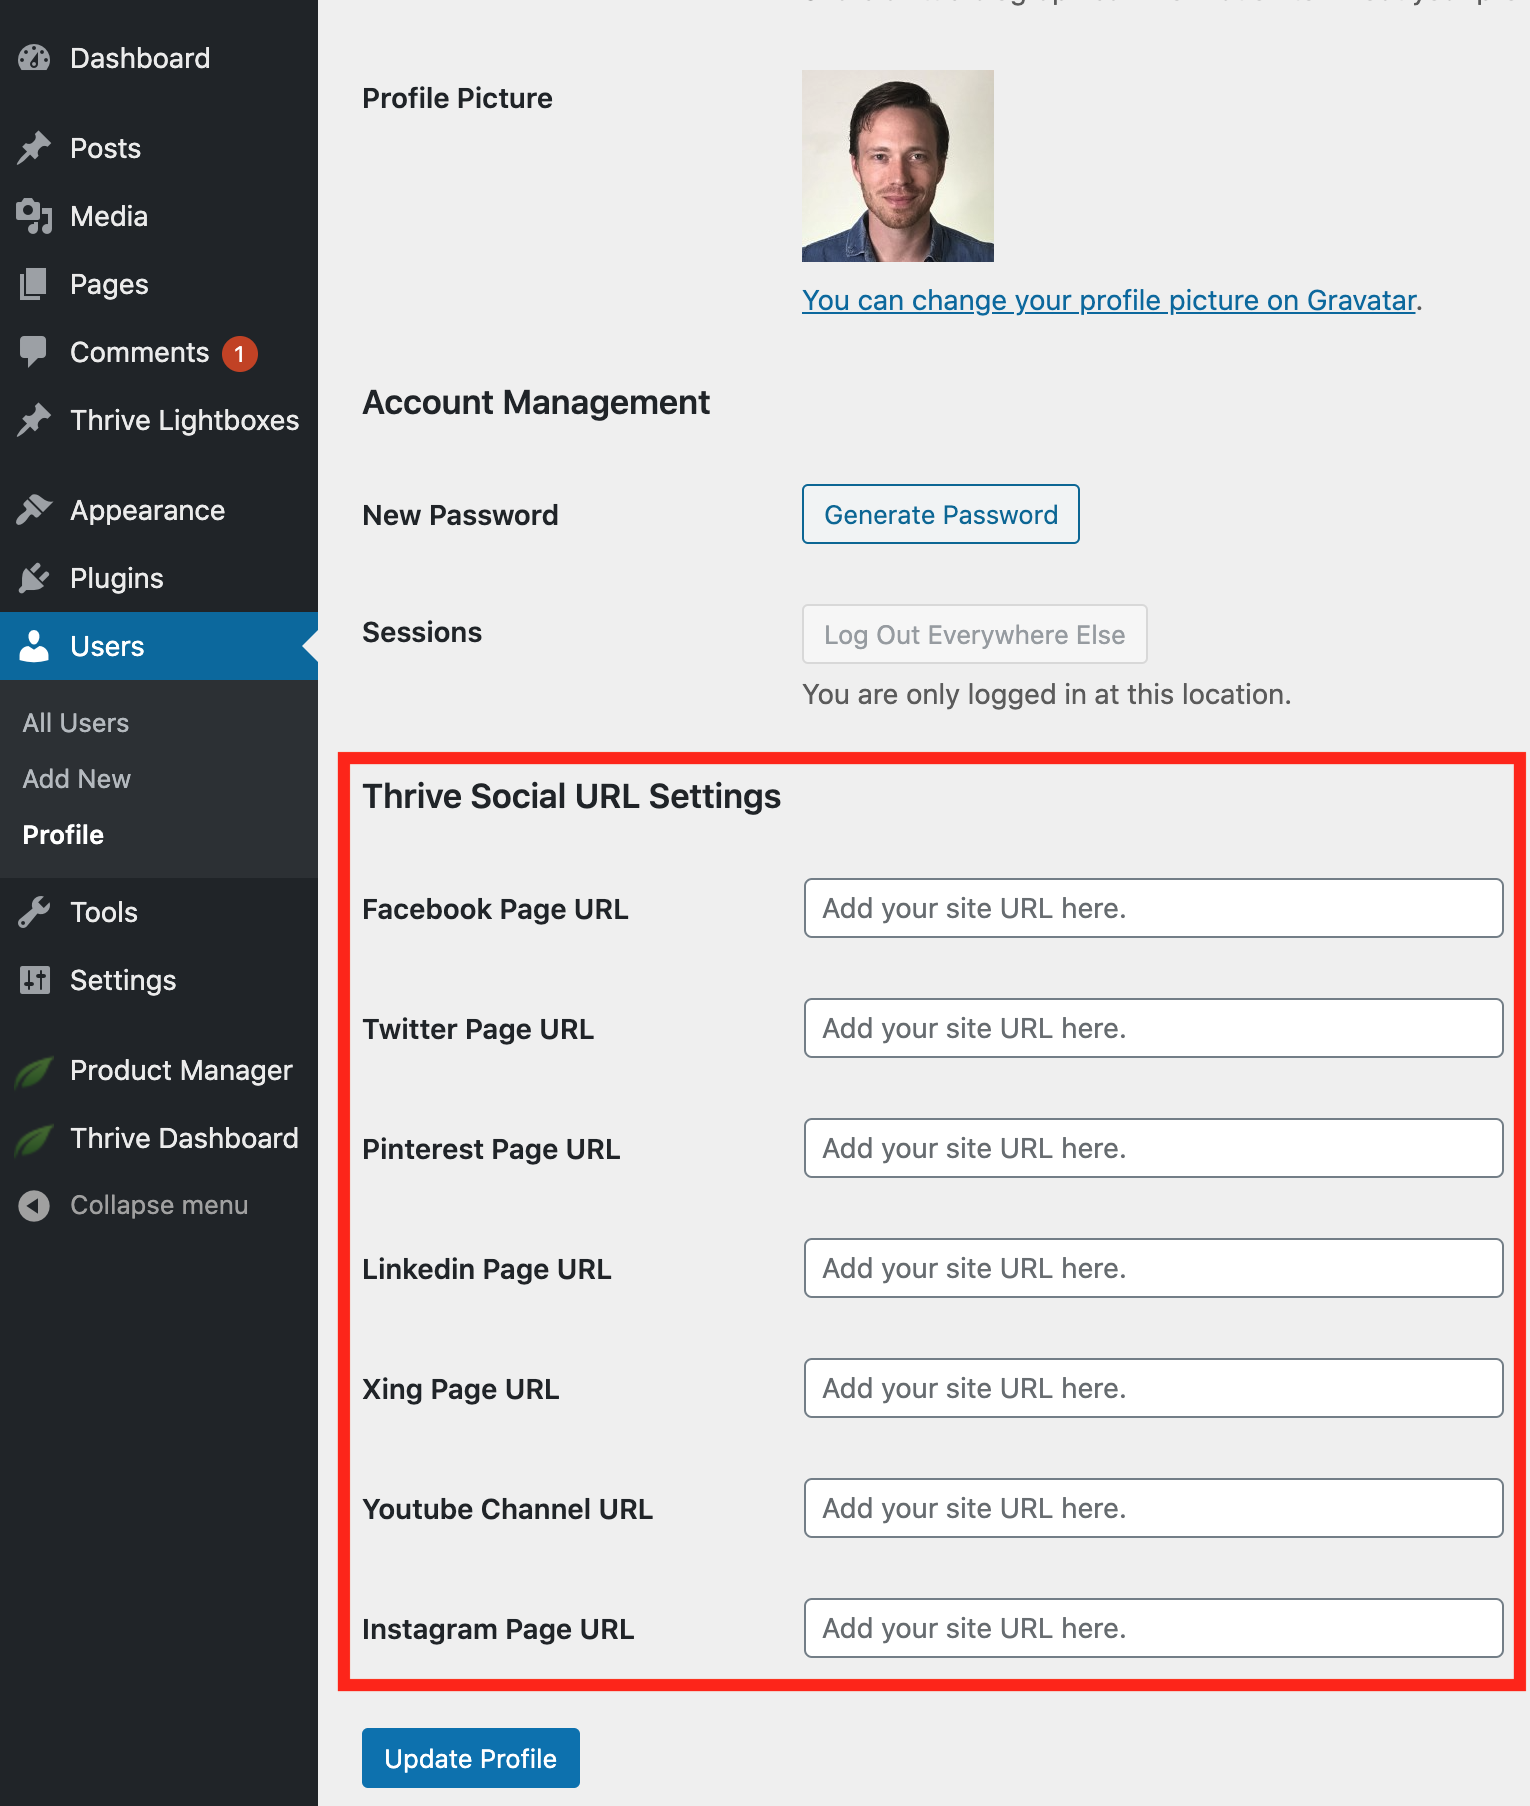
These Thrive Social URLs are applied per-author.
Note: The Social Follow element is smart enough that if it can see an Author does not have a specific social account setup, it will intelligently hide that icon from being displayed on their blog posts.
Impressive, right?
4. Thrive Ultimatum Gets Shorter Evergreen Campaigns
I bet you didn't see this one coming...
Thrive Ultimatum got an update!
Just like a father shouldn't pick a favorite child, I probably shouldn't pick a favorite Thrive plugin. But I'm going to anyway (just don't tell the others, it'll hurt their feelings).
Thrive Ultimatum is the unsung hero of the Thrive Themes suite and I think it's incredibly over-powered when placed in the hands of a knowledgeable marketer.
To bring you up to speed: Thrive Ultimatum isn't just a countdown timer... It's a website-wide scarcity marketing tool that let's you build out timelines, triggers and conversions for time-limited campaigns.
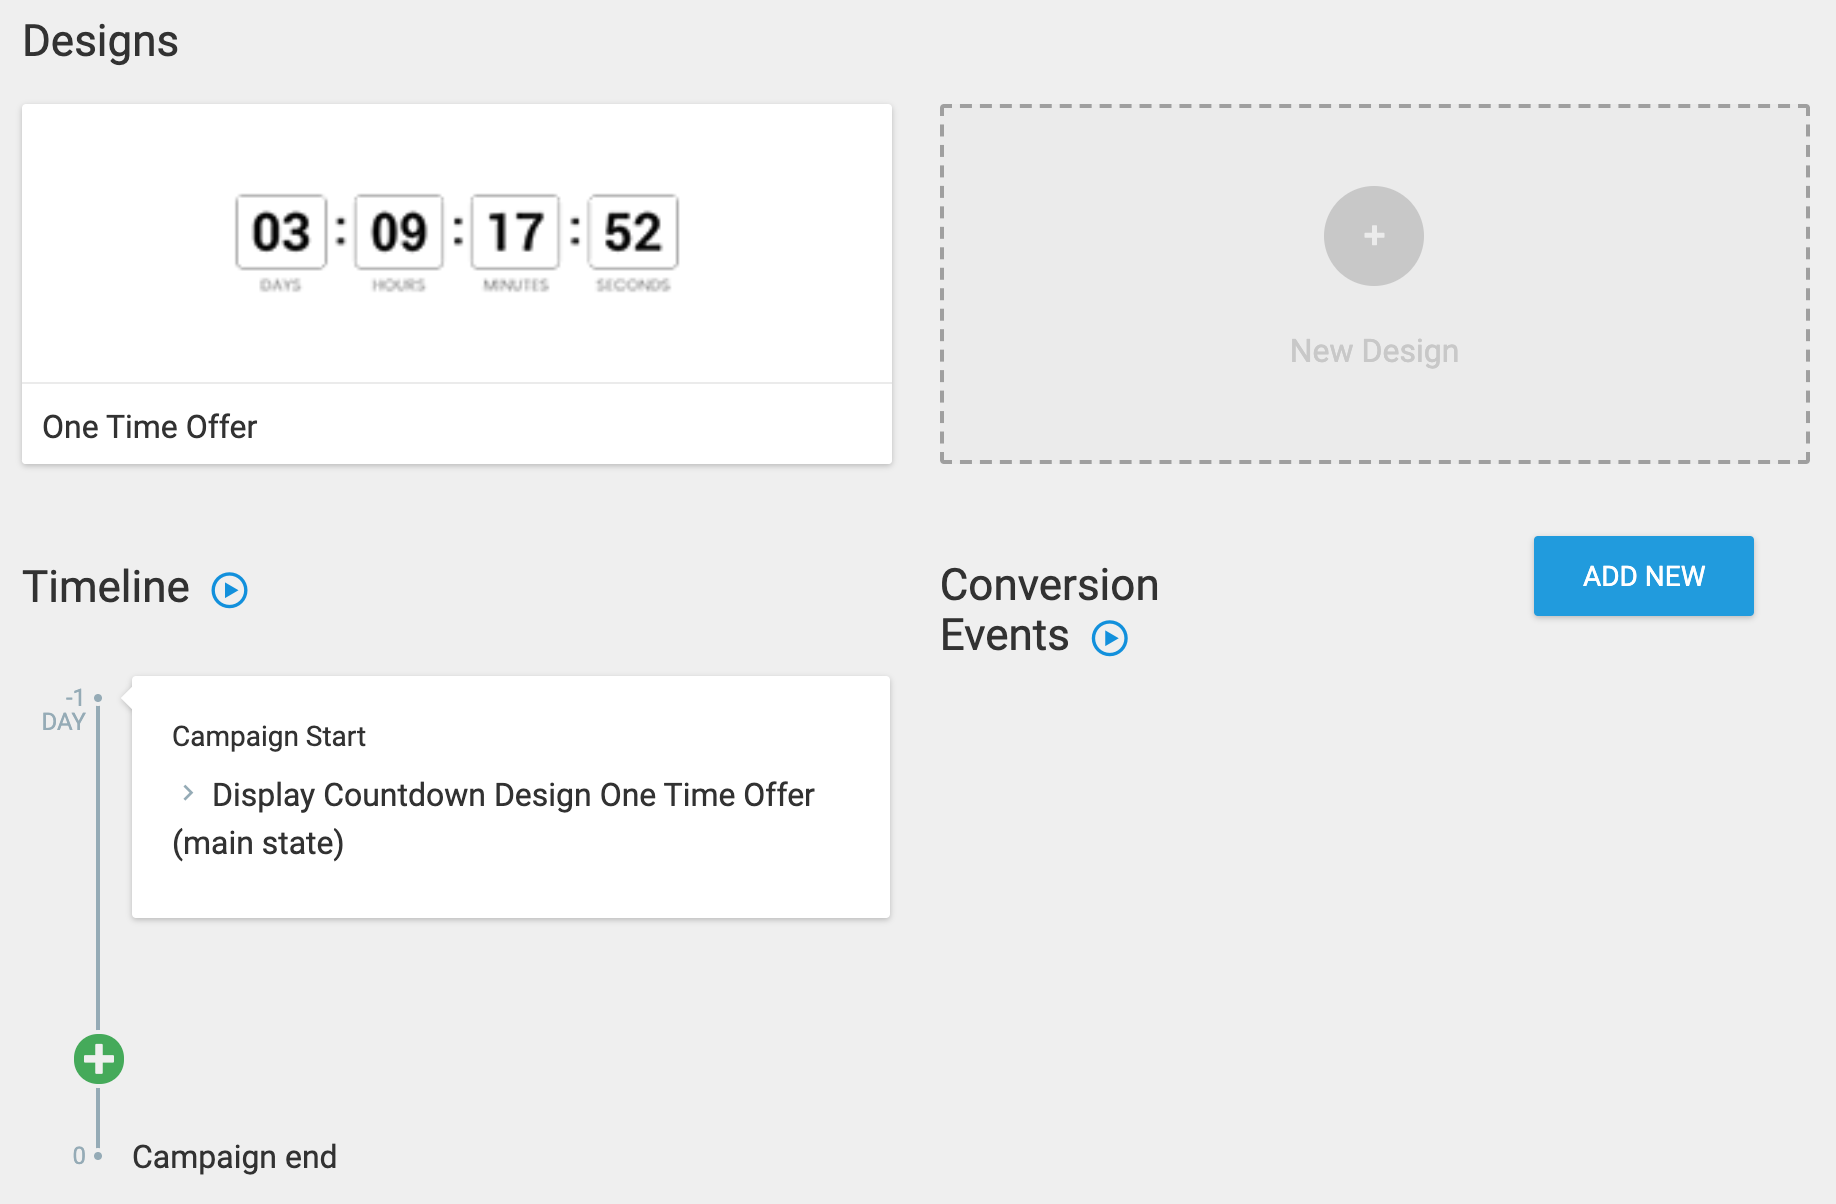
Thrive Ultimatum's default timeline overview for a single campaign.
The new feature we've just added is support for shorter evergreen scarcity campaigns.
You can now create countdown durations that are hours... or minutes long, that will start from an un-hackable evergreen lockdown trigger.
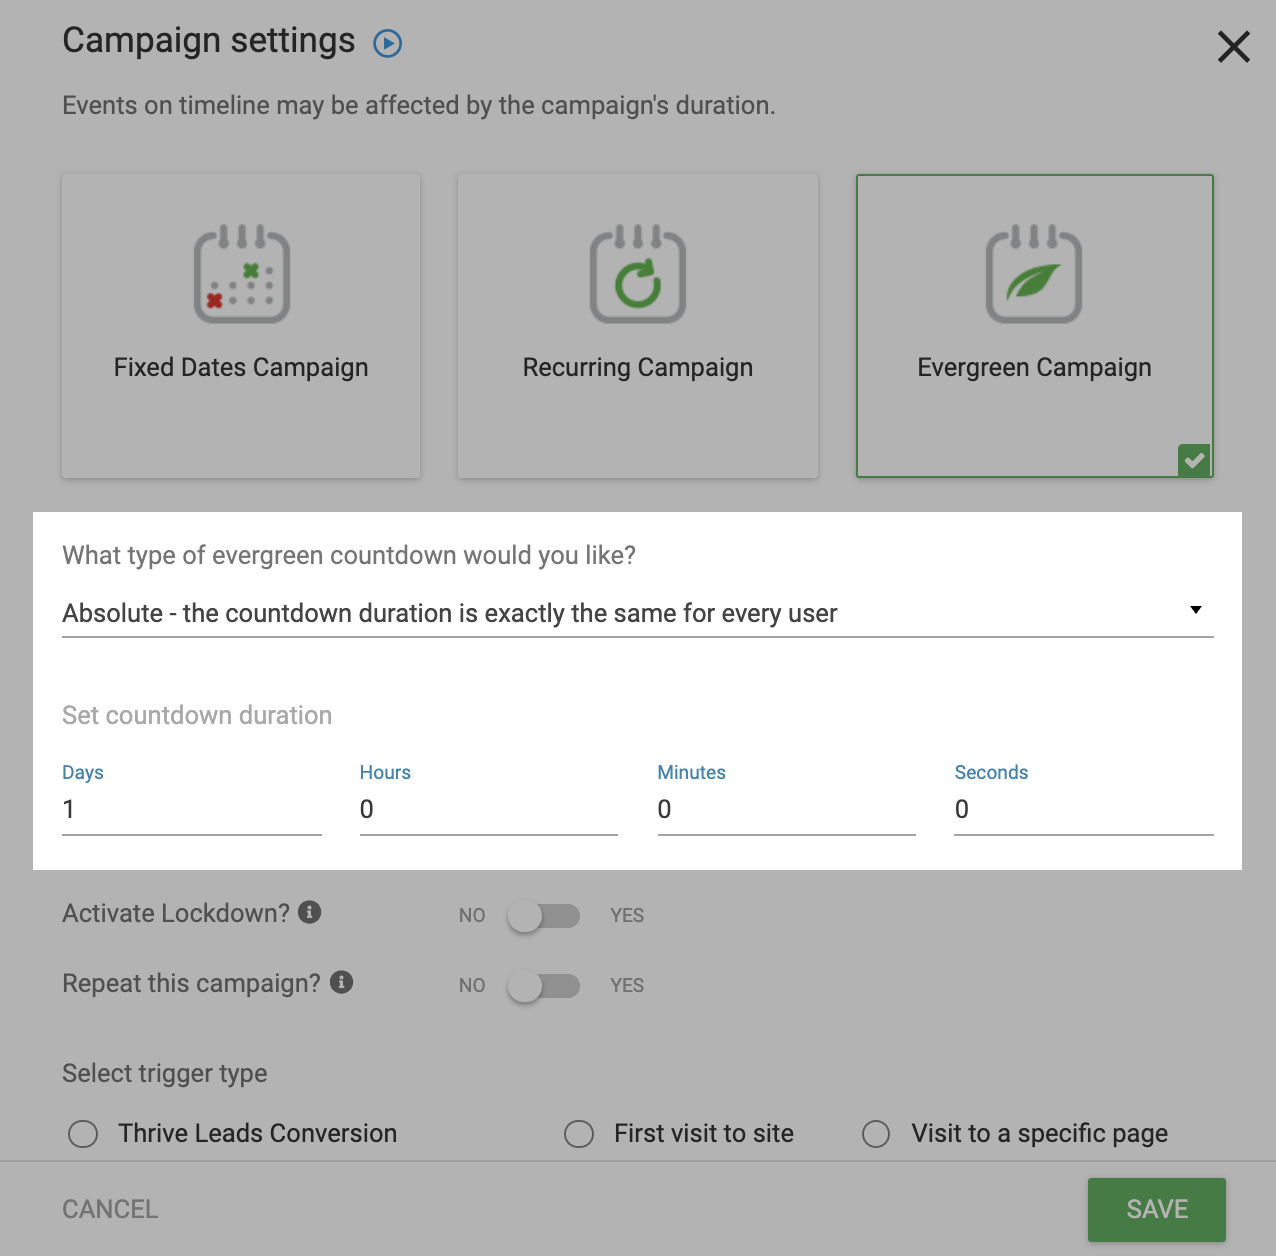
Set your evergreen countdown duration by days, hours, minutes and seconds.
Perhaps you're wondering: "Why on earth would I want to do that?"
The answer is because One-Time-Offers (aka: OTOs or Tripwire funnels) are known to convert very well.
To set one up, all you'd do is set a short countdown durations such as 20 minutes, activate 'lockdown' (which means no-one will get access to the offer unless they meet strict criteria) and tie the evergreen timer to a Thrive Leads conversion.
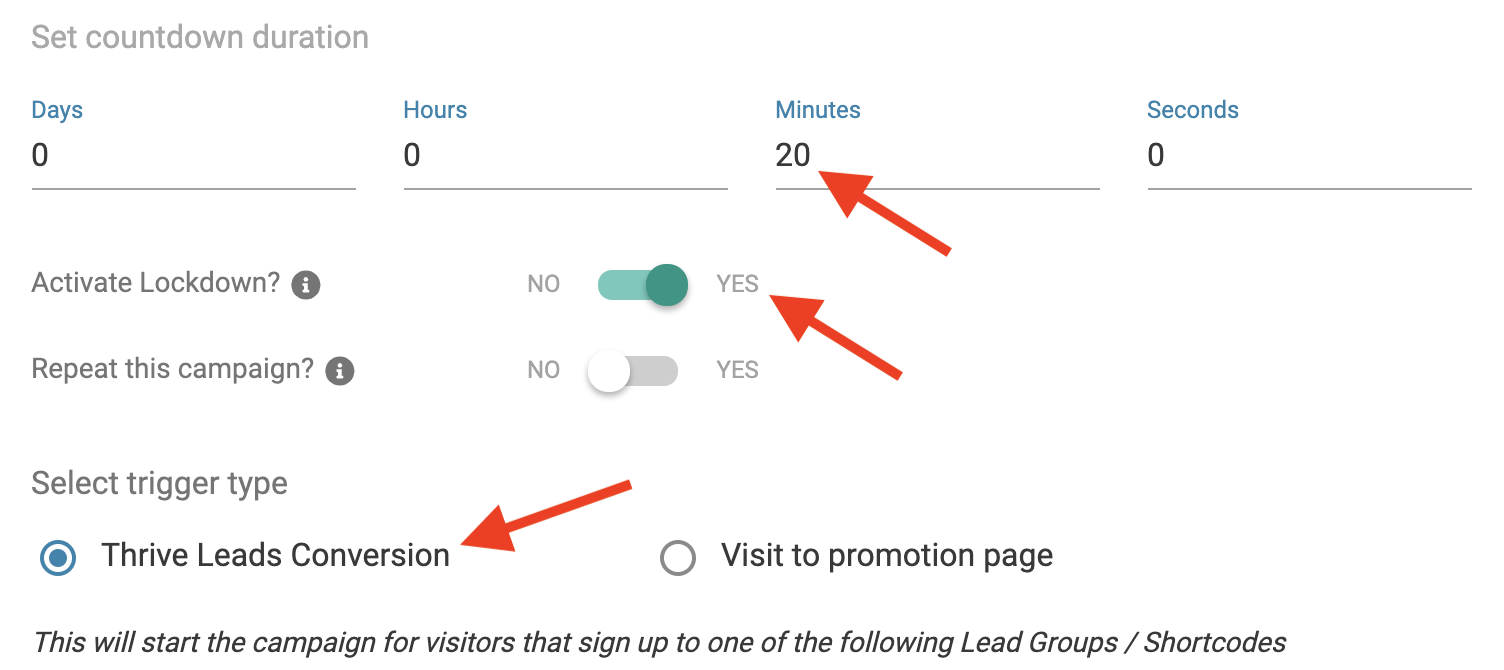
This is a campaign that would trigger on mailing list sign-up.
Then, style your Thrive Ultimatum countdown and embed it on your 'Thank you' page with a promotion for your one-time-offer, something like this:
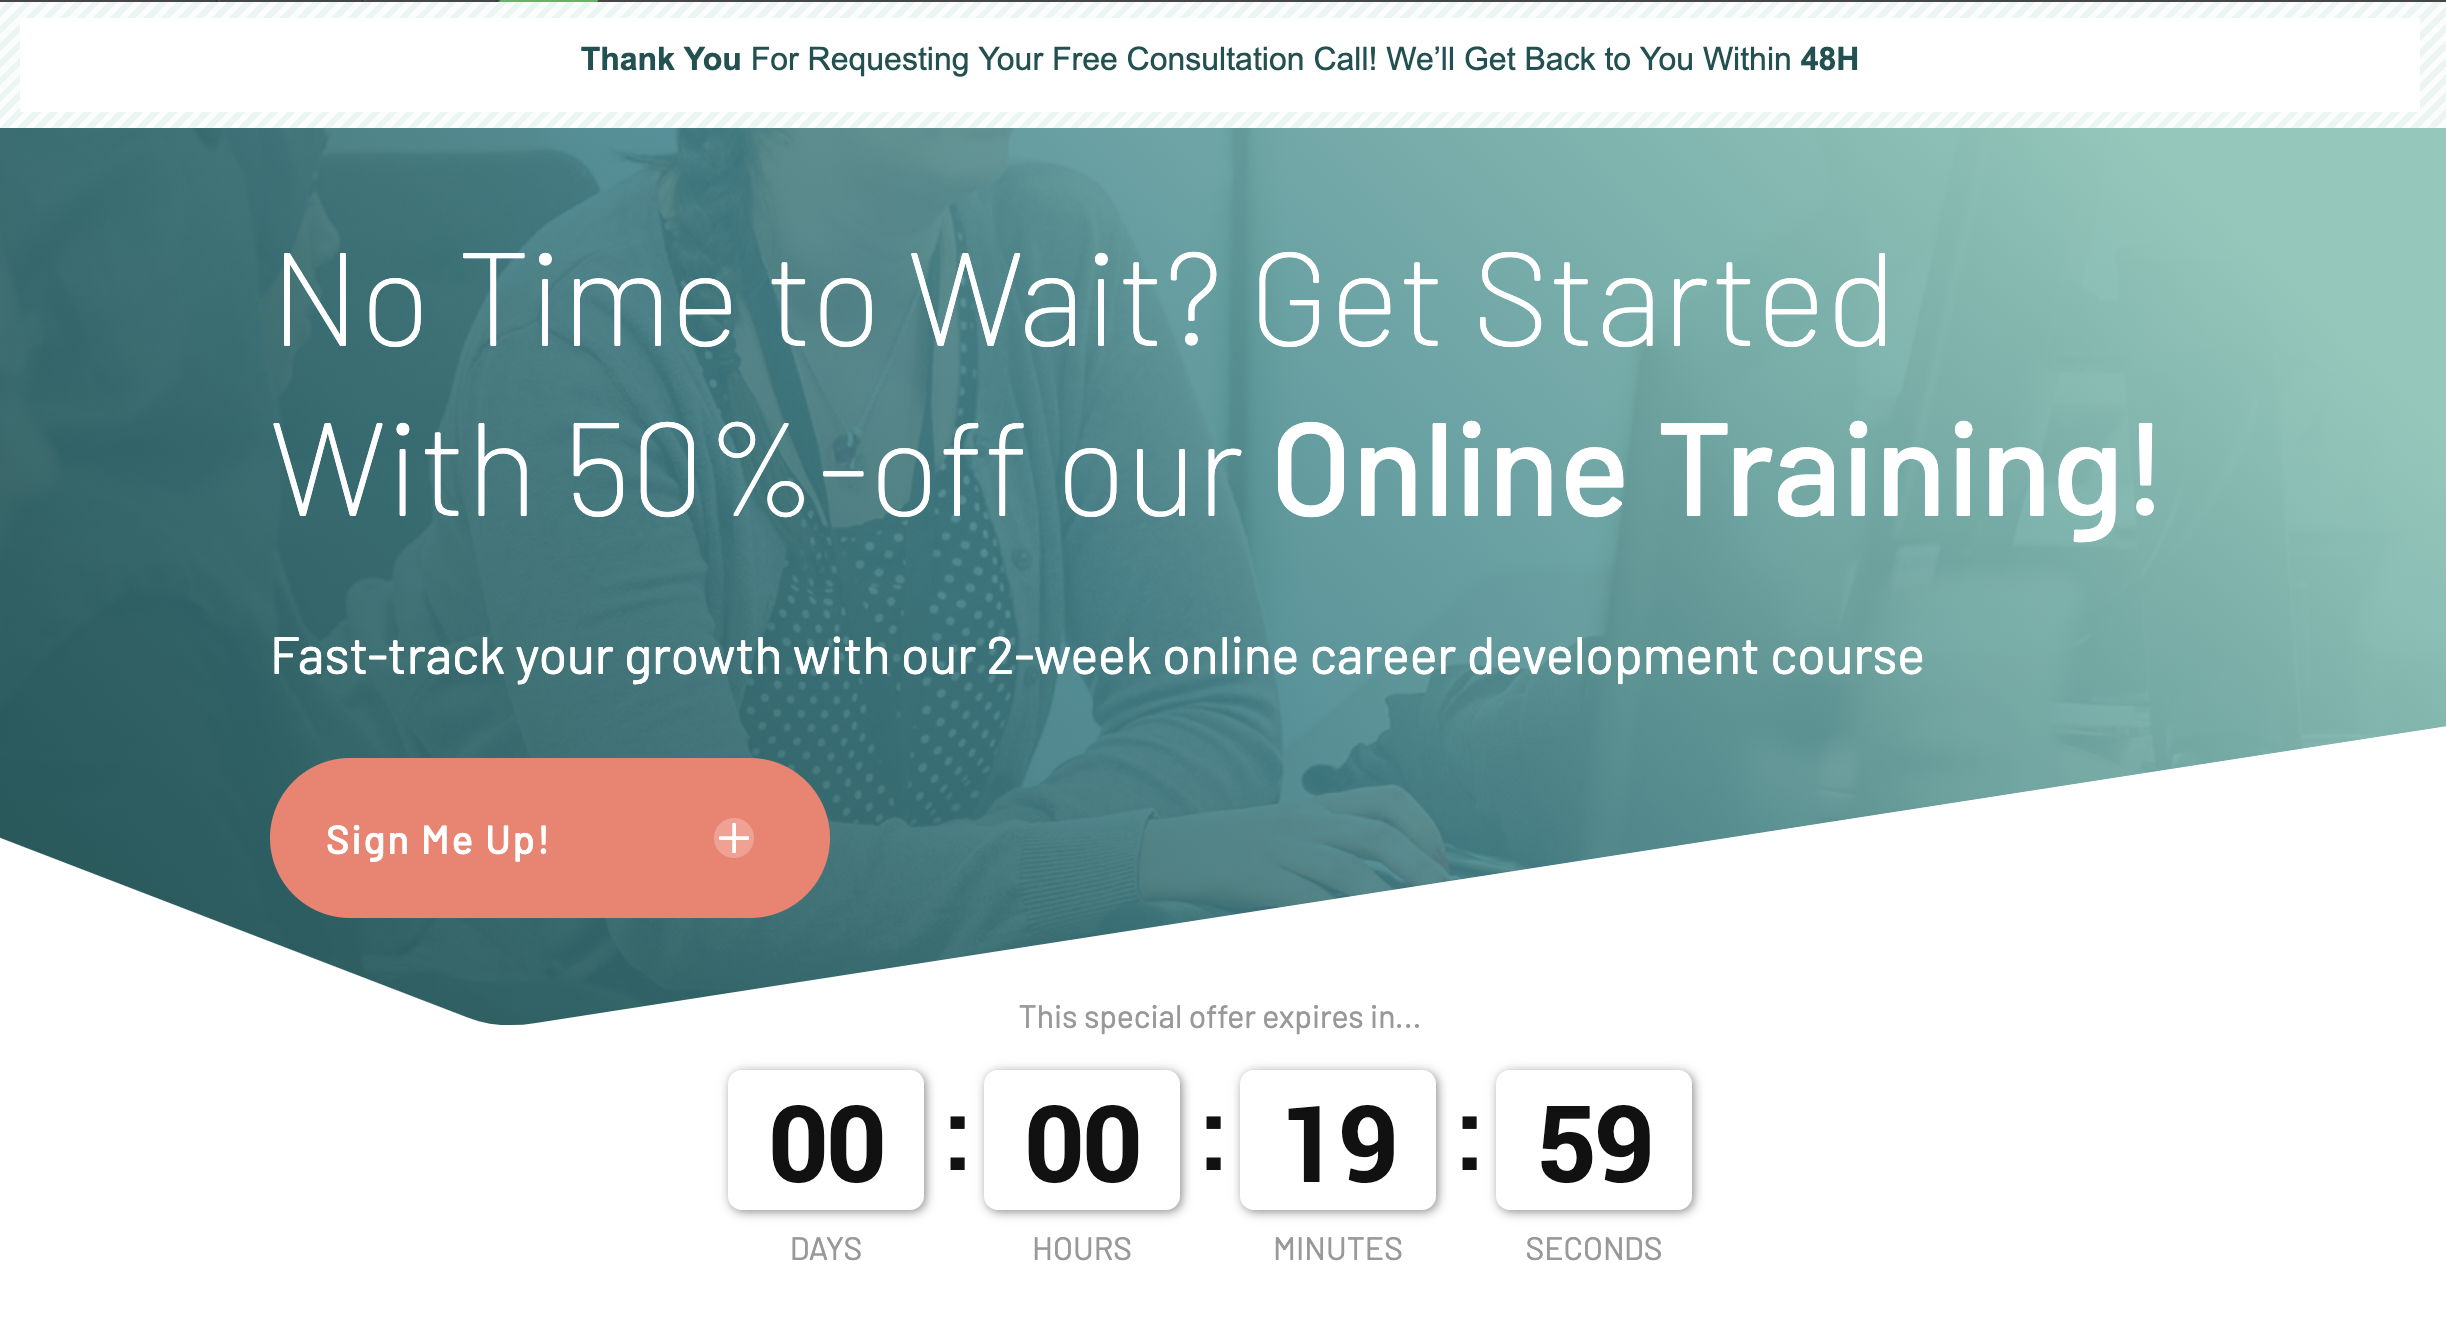
The promotion page that only shows until the counter hits zero.
The result?
Visitors that sign up through specific Thrive Leads forms are immediately offered a special one-time-offer that lasts only 20 minutes, and they won't ever get access to it again.
It's intelligently tied to their email address and cookies so if they try to get access to the promotion again... too bad buster, it's gone!
Capturing visitors in this frozen 20-minute offer is a great way to say "Here's something special but you have to take us up on it right now" - hence why it converts.
Minimum Duration
We've also consolidated a 'Minimum duration' feature into this evergreen countdown settings area.
If you choose the minimum duration option in Thrive Ultimatum, you'll be able to set a specific time of day and timezone for the countdown to expire.
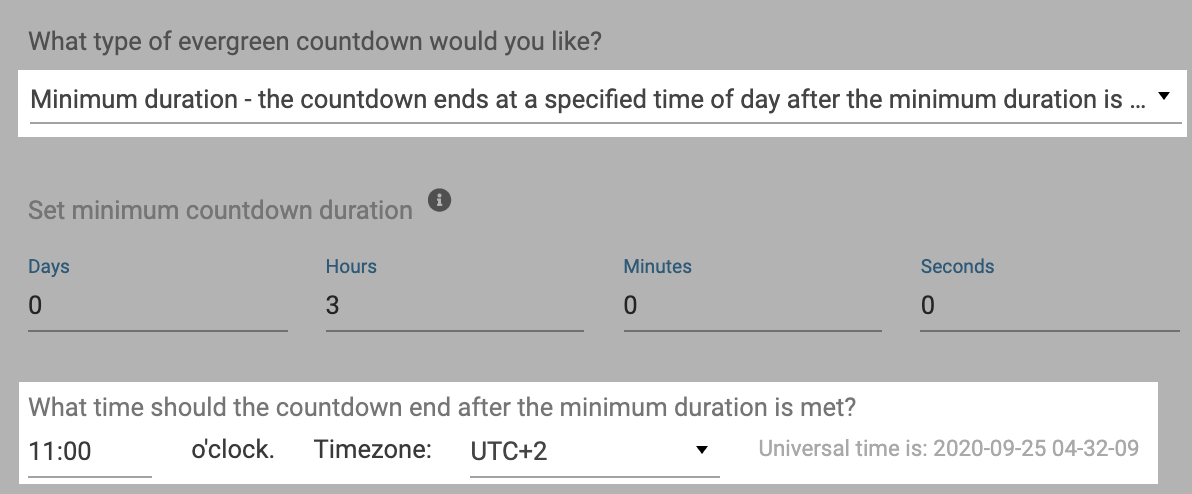
Minimum Durations let's you set a time of day to end the campaign.
What this means is you can have your evergreen campaigns end at a realistic time of the day.
You set the minimum duration that must pass before the countdown expires and Thrive Ultimatum will then count to your nominated time of day after that duration has passed for each visitor.
An example would be setting your minimum duration to 3 days and the time to 11 am.
Rather than expiring exactly 3 days after the trigger occurs, which could be an unusual time of day such as 10:14 am, the timer will count to exactly 11 am on the 3rd day after the trigger event.
Making your evergreen timers finish on-the-hour adds believability to your automated scarcity funnels.
Now are you starting to understand why Thrive Ultimatum is my favorite?
(Ps: There are more updates coming for Thrive Ultimatum soon too!)
5. Custom Page Scripts
For years now, we've had a Custom Page Scripts feature that has been buried a few menu-items deep in Thrive Architect.
We've now made it more accessible in Thrive Architect and we've made it available at the WordPress post/page level for those of you that prefer to blog with the Gutenberg editor.
In Thrive Architect, you'll find it as a new option from the Page level breadcrumb here:
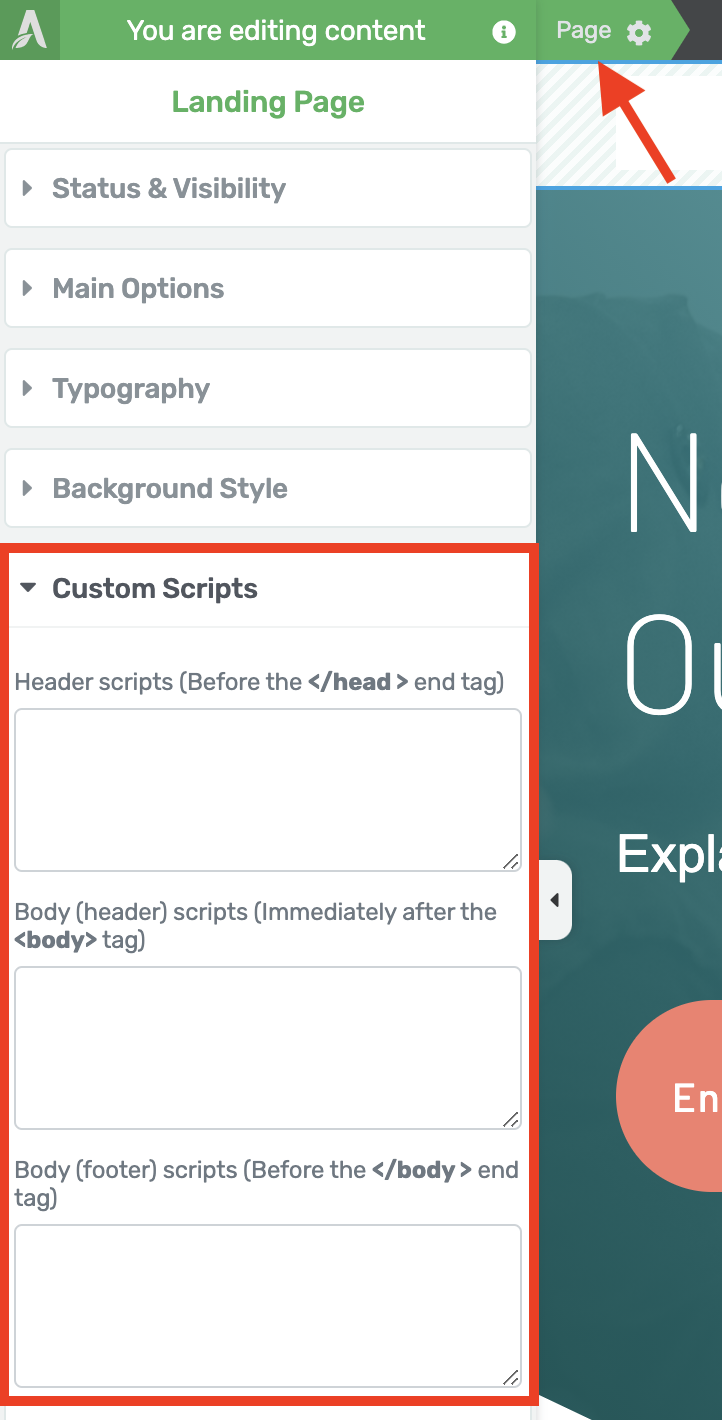
Navigate to the page level breadcrumb to find your custom script boxes.
If you have Thrive Theme Builder installed, you'll find it available in the WordPress editor from the right-hand menu here.
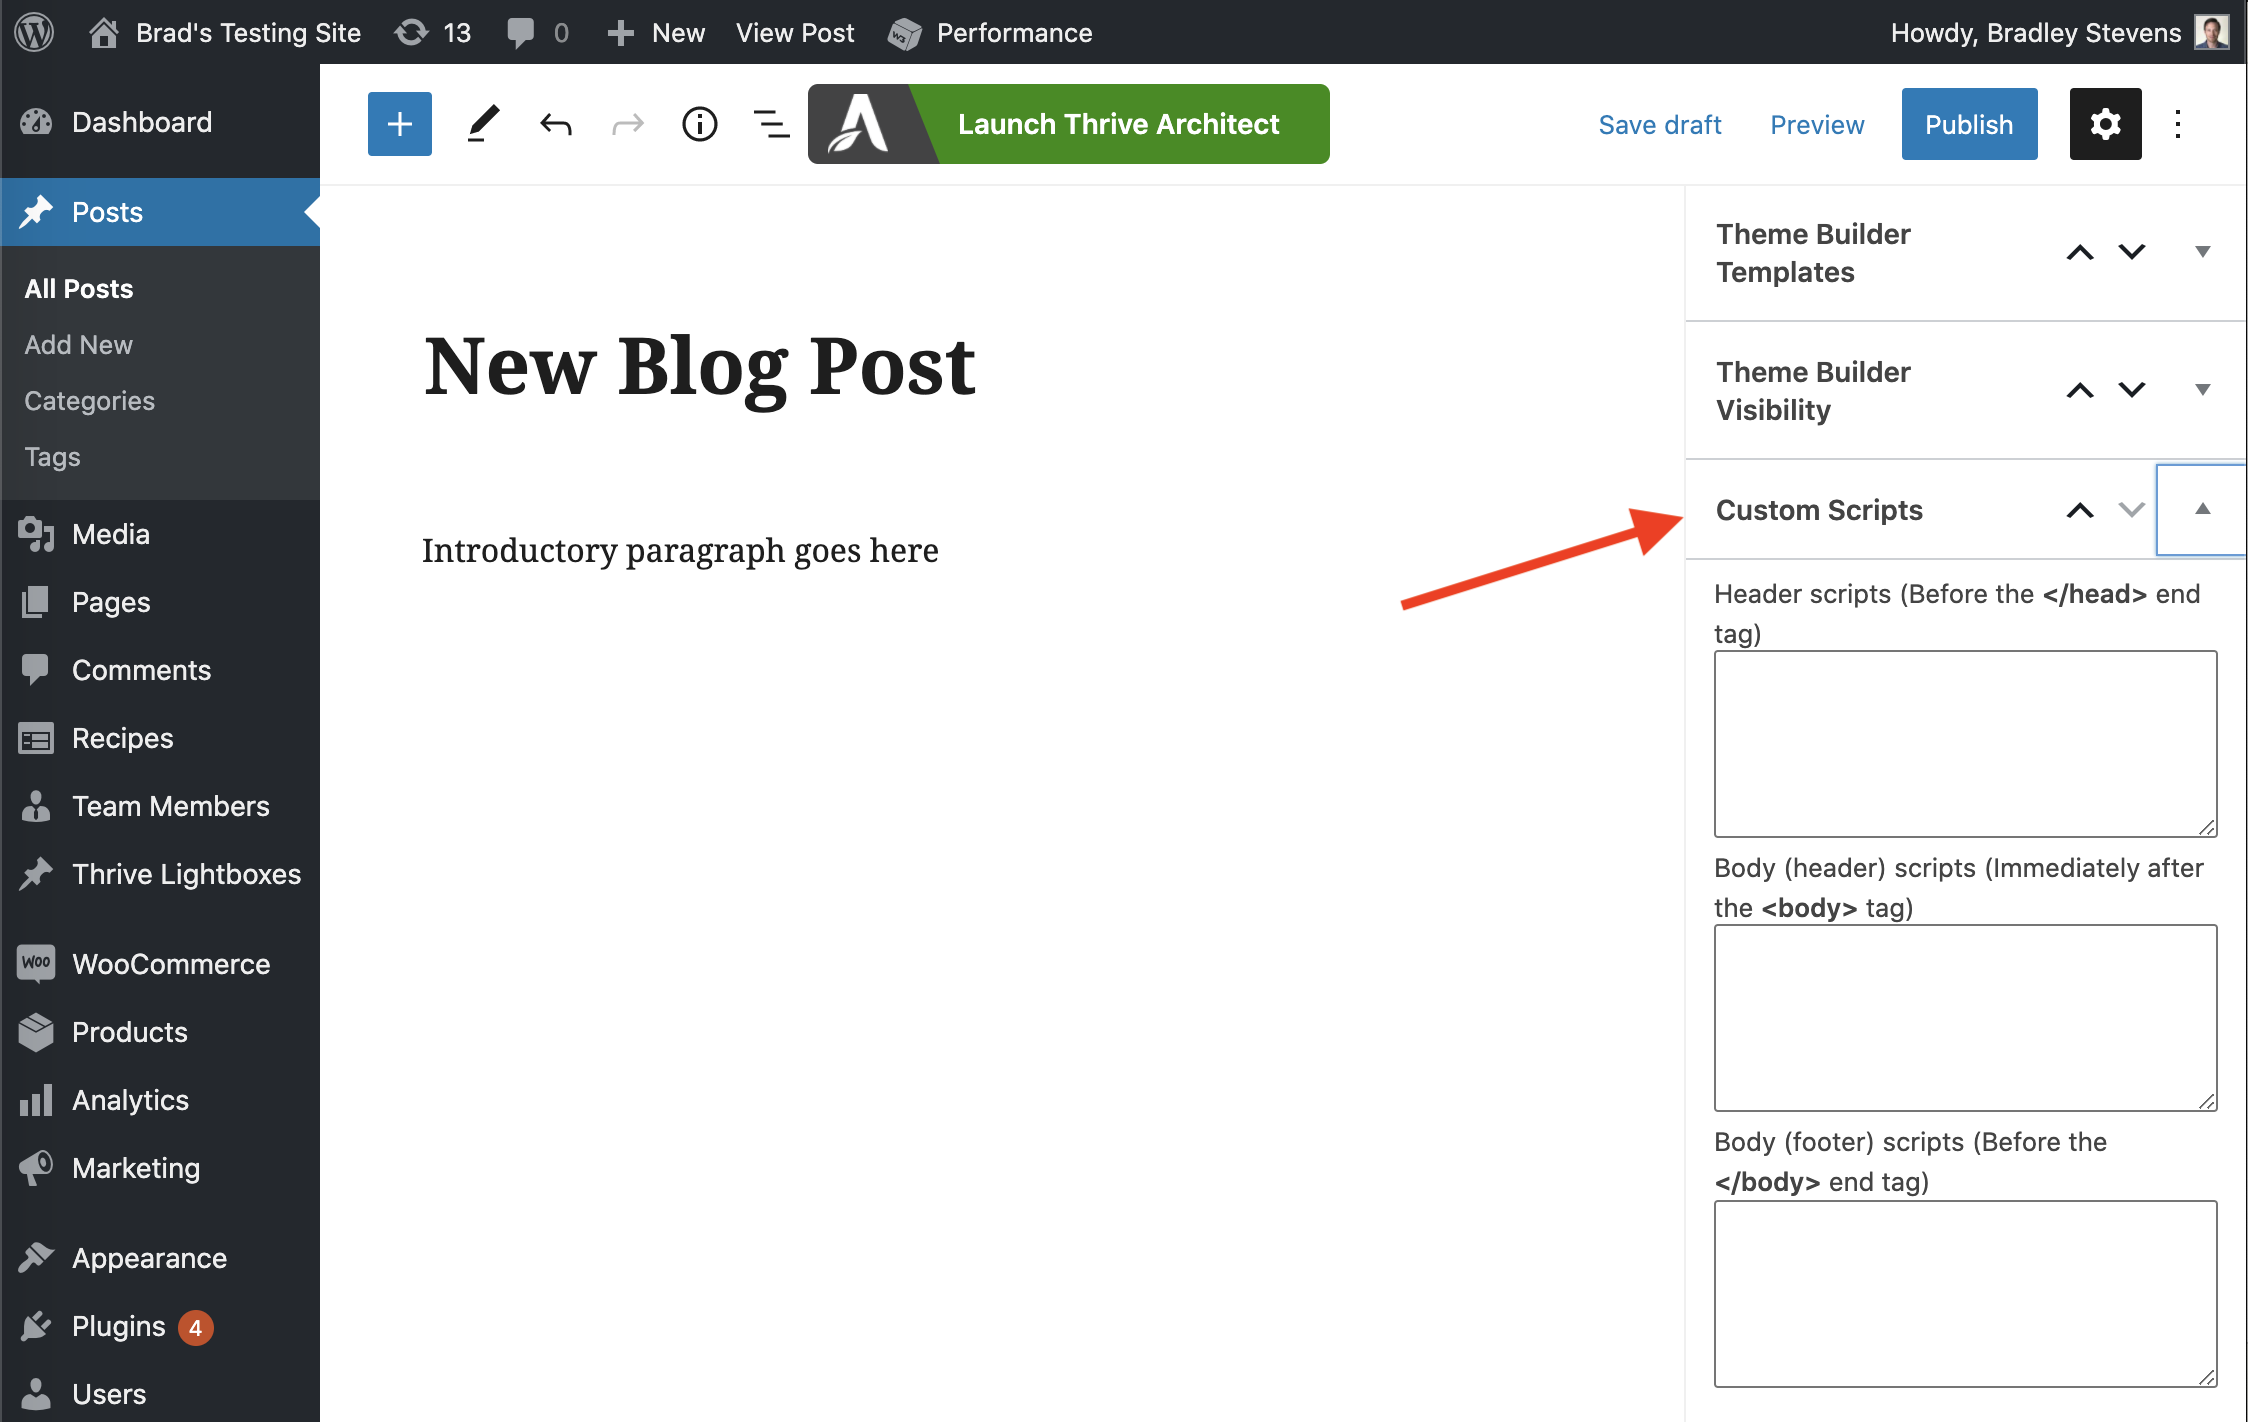
Custom scripts can be added in the WordPress editor too.
These script areas are where you would paste custom tracking scripts, advertising scripts, affiliate marketing scripts or any other type of script.
Whatever you paste here will only be relevant for that specific page.
If you're looking to add scripts website-wide, then don't forget that we already have a custom scripts manager for you whole site located under Thrive Dashboard >> Analytics and Scripts.
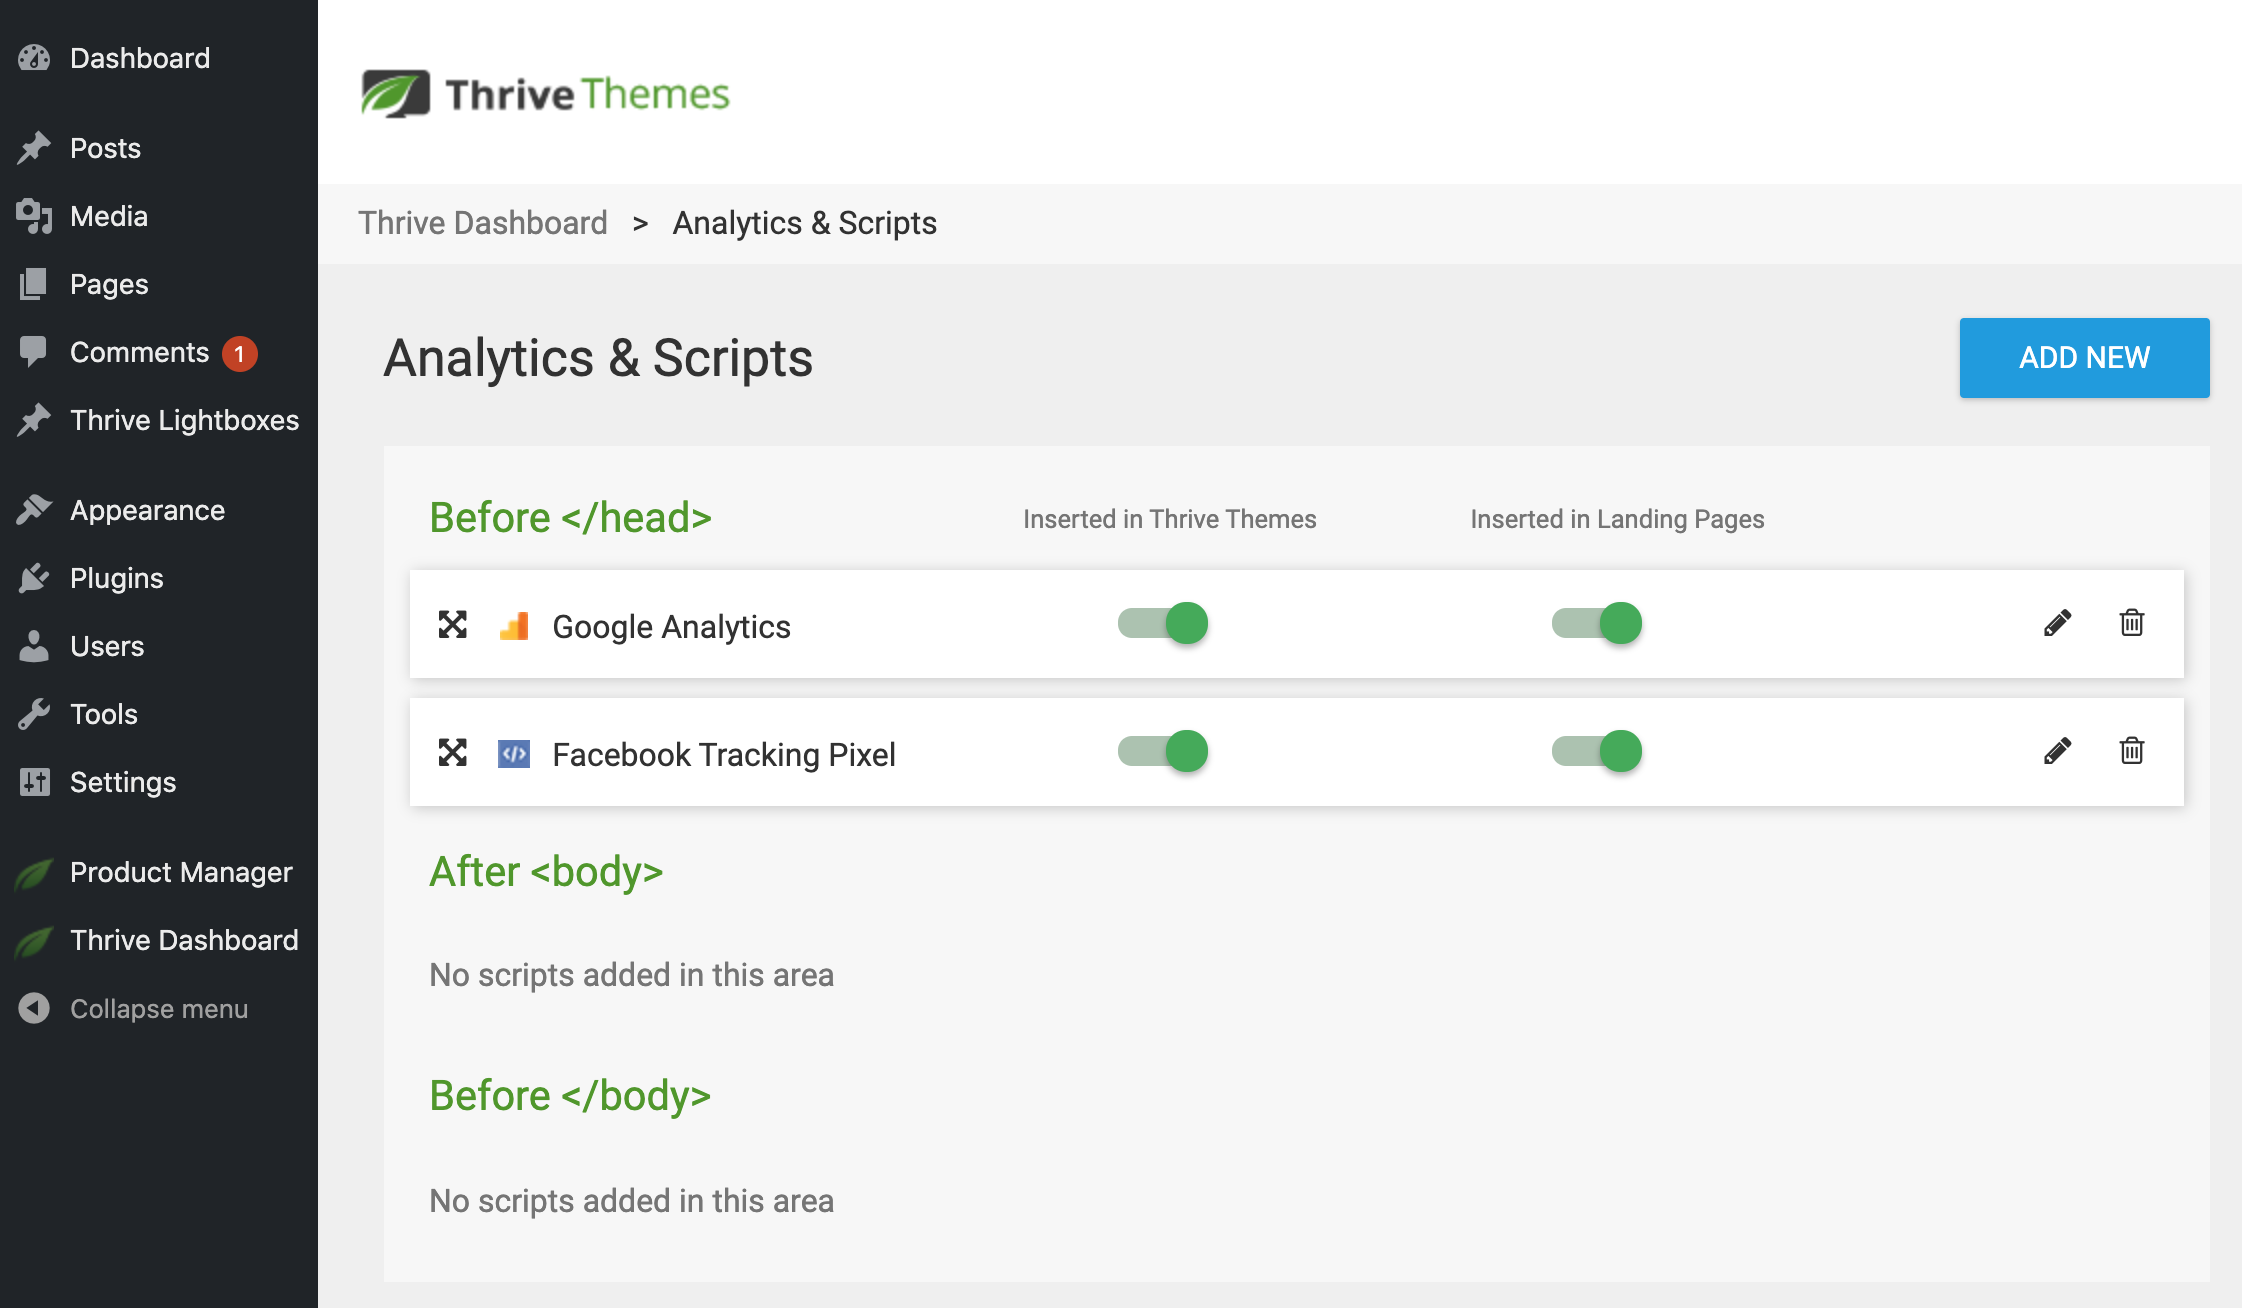
Website wide scripts are managed from your Thrive dashboard.
Leave Your Comments Below!
You know we always love hearing from you and what troubles you are having with your business. It helps us keep our finger on the pulse.
So drop a comment below and let us know what you like, don't like, or what you want next.
Your comments are read and discussed by our product team and go towards making our software better and your websites more powerful.


Ah ! You heard me for thrive ultimatum ! Thank you 😀 Just a quick question for the “minimum duration”. I don’t understand. What happen if the visitor land to the page at 11.10 am for example ? The countdown will display “stay 23.50 hours” ? thanks 🙂
Hey Richard, I’ve just edited the example to make it clearer. It’s more for use with campaigns of 1 or more days in length. It’s like setting the time of day + the number of days until that deadline should end.
Ah yes, it is clearer 🙂 Thank you 🙂
Bradley, just another quick question : you say in the post that thrive ultimatum use IP adress for the tracking. Is it a new functionnality ? Because normally TU just use cookies and email adress.
You are right, Richard. I checked again with our developers and I had misunderstood. I’ve corrected the blog post. Lockdown campaigns use cookies and email address to identify the visitor.
Oh my god…
1. Danielius was having problems with shop page and social icons menu…
2. Next week – update gives easy solution for both of the problems 😀
Reading my minds :))
I guess templates/builder for Cart and Checkout forms will come out soon too?
Perfect timing! It appears you are reading our minds too. We’re not 100% sure about the cart though, since it’s more functional and may not require the whole range of styling like a shop does. But we’ll see.
What benefit is lurking with the custom page script that I am ignoring and ignorant to? What examples and services can be provided with this level of control? Clueless here.
I, too, would love to see some examples of custom scripts. Those of us who love Thrive because we are not coders are kind of left out of this one…
Hi Lewis,
If you never had the need to add a script to a page, no worries this update is not for you and you can run your site without ever needing this 🙂 You won’t need to use it. But sometimes it can be handy (like the example of the chat script on a specific page)
Yes, I understand, and thanks for your quick reply. I just guess I am not finding out about that kind of functionality, so I don’t know what kind of thing I could be doing, and I don’t have time for a second career as a coder! :0) No worries though. There’s plenty to discover and you bring out wonderful new features at a rate I can hardly keep up with any way!
Hi Lewis,
Got it 🙂 The custom script option is not really for people to write their own code, but more for when third party tools require to add code to a page 🙂 So no worries, no need to become a coder! (Worst case you need to learn how to copy/paste code 😉 )
Ah – copy and paste. I think I can manage that!
Hi Mark an example of this would be to add a chat widget only to a sales page.
For 80% of use cases, you won’t need to add a script to a page ever (you’ll want to add scripts on site level such as Google Analytics or other tracking scripts) but sometimes it can be really handy 🙂
This is why I am more than happy to pay the extra currency conversion for my membership year over year. You guys keep improving thing. Awesome!
Thank you for your continued support, Erik! It’s support from members like you that help us deliver these kinds of updates too.
Thank you. Thank you. Thank you for the new shop element!
if I understand it correctly, then one of the biggest problems with my shop is now solved! I have contacted support a few times about being able to properly create collection pages for my store. I wasn’t able to really do it the way I wanted to because I couldn’t apply a shop element to those pages. I was extremely disappointed and was forced to use WooCommerce short codes for those collection pages.
I can’t wait to get back in there and edit my collection pages with this new shop element! Again thank you so much for this improvement.
Hi Melodye,
That’s exactly why the shop element is there 🙂 Happy it will help you!
You are great guys! Do you plan to implement custom post formats for the theme builder?
That’s already availiable 😀 https://help.thrivethemes.com/en/articles/4426206-how-to-create-a-specific-template-for-a-custom-post-type
The Thrive Ultimatum update was exactly what I needed! 🙂 How’d you read my mind?
We invest heavily in Chrystal balls 😉 Happy you like it Mica!
Great updates as always! Regarding Thrive Ultimatum, have you guys considered allowing for more flexibility in terms of design& size options? The current options seem to be a little rigid and limited.
Yes 😀 Keep an eye on future updates 😉
I’d love to see Ultimatum integrate with WooCommerce and control pricing……..
You know, we’ve been discussing this recently. Wouldn’t that be a game-changer?
Currently I’m using WP Finale to manage this stuff – I used to use Deadline Funnel. However, tying multiple plugins together to create an evergreen funnel is tricky, at best. If it could be done all under the Ultimatum roof, that would be incredible. I would love to see ActiveCampaign webhook triggers too, if so.
We’ve had a backlog of features and improvements we’ve been wanting to add to Ultimatum for years, but have always had to prioritize other things. Fortunately there’s a few new features I think you’ll like on the horizon.
Can the Woo header also be the header for the rest of the site?
Yep, sure can. The WooCommerce header templates are available for the regular site header step in Thrive Theme Builder (step 3 in the wizard) if you’d prefer to use it website-wide.
Still no checkout plugin. Heartbreaking! And no option to export leads from thrive leads.
It seems you guys are moving away from digital products and moving towards the physical product side.
Hi Himanshu,
Not at all… WooComm is actually pretty good solution for digital products too…
We’re not planning on building our own checkout plugin anytime soon (which is why integrating with other solutions that offer checkout is high on our priority list)
For Thrive Leads, we’ll look into that, but so far demand for bringing back this feature has been rather low as the lead generation forms are usually connected to an email provider and you can simply download your leads from there. Or you can hook up your forms with Zapier and send leads to a Google Sheet automatically (and for free).
Hey Himanshu, may I ask: Why are you looking to manually export leads from Thrive Leads without going via API? If I can better understand what it is you’re trying to achieve, we’ll see if it’s something worth prioritizing.
Hey, @Brad and @Hanne. Thanks a lot. I love these guys.
But Zapier doesn’t know which form I am using. It only recognizes the blog. This is a problem. How would I filter based on funnel?
And with Woo-commerce, there is no upsell feature. And it’s not connected with Thrive Apprentice.
I don’t think I have any other complaint ever about Thrive. It’s the best thing I have ever found online. So I love promoting it as well 🙂
Any thoughts on it?
Thrive Themes has cluster navigation?
Hi Marcelo, can you show what you mean with cluster navigation? I’m not familiar with this term.
https://www.youtube.com/watch?time_continue=5&v=q94Wkil44wk&feature=emb_logo
That was an interesting video. Yes, you could build this with Thrive Theme Builder. Our Post List element is perfect for dynamically updating pillar content and can be placed towards to the top of your blog template layout. We have a hamburger navigation button that opens a side-bar menu on mobile, and we have a sticky-to-bottom setting you can apply to it.
All of this can be achieved with our tools.
Nice!
Are there any plans to add more landing page templates? E.g. for SaaS companies, one product sales pages, etc.?
The plan all along was to create lots more templates, and that’s still our intention. But our design team have been preoccupied with other tasks. I’ll add your vote for more niche-specific landing pages.
Hi Bradley, I’ll second David’s suggestion for more niche-specific landing pages and templates.
Another vote counted! What function are you specifically looking for? Homepages, lead gen pages, sales pages?
Most likely landing pages for ebooks, white papers, etc. Also some “clean” designs typical for apps and SaaS products would be good.
Also, are there any plans for improving the quiz builder, specifically the category results?
I think it would be great to add more complexity to how we can link answers to outcomes. One example is that if we want to have several criteria combined to form a result.
E.g.
Category 1 = man/woman
Category 2 = pass/fail
So the outcome would be a combination of these 2 categories and variables (e.g. men + pass). In my use case, people could for example just answer one or a couple of defining questions which would automatically add them to the category and then complete other questions to add them to another category. E.g. Q1 – gender? and Q1,2,3,N the actual quiz. So answer from Q1 would “tag” them and stay to form the end result.
At the moment this isn’t possible, so the results are not really granular and I can get only one category (e.g. pass or fail). I tried to work on some solutions with support but it’s what it is right now!
Hi David, Thanks for the suggestion. It’s always helpful to know how users want to use our products.
We have some improvements in queue but what you are asking for is not part of it.
What I could suggest to help you out right now is having 2 quizzes (one for women, one for men) and make that first question not part of the quiz but two different buttons on a landing page. So you would have 3 pages, one with the 2 buttons (men or women) then one page with the male quiz which would then be points based to pass or fail and a third page with the female quiz. That way you could obtain the exact result you’re looking for today.
I am a professional photographer and would like to see more templates along the lines of ‘hire me’ and ‘services’.
It’s hard to describe, but with not being a designer myself, your templates are invaluable and I would like to see more of them. Maybe some photography niche templates?
Hi Richard,
Thanks for your suggestions. Have you seen the blocks that are included in our landing page sets (look for the little blocks icon: https://share.getcloudapp.com/8LurJP4z This means that the landing page set actually has tons of blocks available for you to build out the exact page you want 🙂
I am also voting for a specific niche Landing Page: For Online Summits with predesigned tables of the speakers along with tags (asked or approved)
That’s a good idea!
For Thrive Ultimatum, the one big feature that is missing IMO is a synchronized countdown timer to insert into the emails. Would be fantastic if you could add that!
We have always wanted to add this, and we still do! One day…
Great job you guys on enhancing the SHOP element! In particular, giving us the option to change the design elements (typography, colors, etc.)
Are you planning to introduce the same capabilities to the – Product, Cart and CheckOut elements? Tx!
We are still figuring that out. It makes a lot of sense of Product and would be nice for Checkout. But we’re not too sure how much design is really necessary for a Cart, since that’s mainly for function rather than design.
What are your thoughts on design for the Cart?
Bradley,
What I’m primarily interested in is being able to change the font settings (size, color) for labels, such as
– order items
– ‘subtotal’, ‘coupon’, address, etc
Right now those are inherent from theme default Title settings (H2, H3, etc). I usually keep my H fonts a pretty big size like 42 – 48 – so my cart/check out pages looks gigantic.
I have to fix this with css, but it takes forever to find the right ID or class.
What you did with the Shop element makes it a non-issue at all
As to the ‘function’ – I think current templates/elements look good. There are dedicated plugins that can change it if needed (wishlist, custom checkout fields etc)
In the future i would rather see more emphasis on dynamic content/conditions, like for example visibility control etc. Heck, maybe integrating Shop/Products elements with T-Leads, Quizzes, Ultimatum Or SmartLinks?
Your explanation of the issue there is actually super helpful for us. That gives us a concrete problem we can take to the product team and explore, so thank you for taking the time to share that. We’ll discuss it and see what we can do.
This is a great update! I’m particularly excited about the update to Ultimatum! We’ve been waiting and hoping for a shorter timer because our most successful campaign is one that offers a deal of $20 for 20 minutes and after that it’s gone. We’ve had to use a less powerful plug-in to achieve it. Now we can do it all with Thrive!
Proof that one-time-offers convert! Glad we’re able to help you do that with Thrive Ultimatum
Hi Guys,
Amazing Progress! Cannot wait to update my shopping pages!
Many thanks!
Cheers Christiaan
You’re welcome, Christiaan.
We still need the native ability to hide “Days” and “weeks” for the countdown 🙁
All I’ll say is… stay tuned 🙂
Wow. Some great updates this time around.
Just wondering if you amazing guys could do this.
I used to use a theme called bimber. On the blog roll you could show a number of blog posts then an item form woocommerce then a few more blog posts and another product.
Is this a feature you could add?
Also in this mix they also inserted ads.
This was also on the blog category pages.
I haven’t been in to the backend of my site to play yet. I’d the shop head only on shop pages or site wide? I hope site wide.
Can we add thrive ultimatum to woocommerce Products?
Keep up the great work.
Hi Adam,
You can already create that 🙂
You can use the post list to filter the blog posts you want to show and then use the shop element to add the products you want to show!
Atm Ultimatum is not Woocomm specific so no you can’t do that yet, but it’s something we’re looking into (no promises though).
Hallo Brad, the Custom Page Scripts is still not available on my site. All my plugins are updated. David
This is in Thrive Theme Builder, make sure to update the theme to the latest version under appearances >> Themes
Hallo Hanne,
that’s what you wrote:
“For years now, we’ve had a Custom Page Scripts feature that has been buried a few menu-items deep in Thrive Architect.
We’ve now made it more accessible in Thrive Architect and we’ve made it available at the WordPress post/page level for those of you that prefer to blog with the Gutenberg editor.
In Thrive Architect, you’ll find it as a new option from the Page level breadcrumb here:”
No word about Thrive Theme Builder…so I can expect that this change will appeare in Thrive Archtitect also, can’t I?
David
Hi David,
Sorry for the confusion:
In Thrive Architect, this option has always been available and now we made it more accessible. This will allow you to add the script to LANDINGPAGES or STANDALONE PAGES even if you use a 3rd party theme.
If you’re using Thrive Theme Builder, the option is also available (which is new). You can find it either in the page breadcrumbs if you are editing a page with Thrive Architect or in the WP backend editor (in case you are not building your page with our visual editor)
So to answer your question, it IS available when you use Thrive Theme Builder 😀 EVEN if you create your content in the WP editor.
Thank you Hanne.
But I still don’t see it in Thrive Architect….
If you have Thrive Architect activated and NOT Thrive Theme Builder, you’ll find it here: https://share.getcloudapp.com/jkuDJdQl for landing pages.
And if you are using Thrive Architect on theme pages of a non Thrive Theme Builder website, you’ll need to check with your theme developer.
Regarding Smart Site Social Links this is a great improvement. I am promoting our podcast and have set up Smart Links in the dashboard under a new group, but I can’t choose this group only the Social links… it would be great if you could choose a group 🙂
Hi Malene,
That’s great feedback. Indeed at the moment, only the links that are added to the “social” smart links will show.
For now, you can add your podcast link in the Social global links (https://share.getcloudapp.com/9ZuBGKOb) and then it will show as a possible element https://share.getcloudapp.com/2NujkbZQ
GUYS, EXCELENTE!!!
It’s gorgeous to work with Thrive! Thank you for doing this 😉
I have one question for this moment. Is it possible for users from Thrive to create a template from our custom-made Social Follows with our brand colors and the icons? This would be great. Is this possible already?
Hey Carla, yes it is. When you select an element on the canvas, you’ll see a small save icon pinned to the top edge of the element. Click that and you can save anything as a template for re-use. There’s an element called ‘templates and symbols’ you can add to any page where you can load whatever it is you’ve saved. Hope that helps!
I’ve not stated a shop yet but excited with the idea to fully utilize as many of Thrive Themes features as I can. I’m a massive fan and the opportunities you’re providing are life changing for me. Just hope what I’m offering will work! I’m almost ready to launch and promote! Wish me luck ????!
Good luck Jenn 🙂
great . I miss something about the “single product template”. it needs the posibility of more customization .
Yes, that’s in the works 🙂
You made a good work guys. I like the new features.
I’m thinking… is there a way now to customize the appearance of Thrive Apprentice?
Not yet… You have some basic options but no full customizability yet.