We recently added a small but significant feature to Thrive Leads, that will take your Facebook retargeting to the next level.
With our latest custom HTML feature upgrade, you can add Facebook pixels directly to the states of your opt-in forms to track your visitors’ actions. From now on, this means you can retarget your leads on Facebook even if you don’t use a thank you page.
Check out the video above or read this article to learn how this feature can make a real difference if you’re using Facebook retargeting pixels.
More...
Disclaimer:
This video isn’t a beginner's guide to Facebook pixels. We assume that you are already familiar with the basics, and the full Facebook pixel code is already installed in your website’s header. If you are new to pixels, here you’ll find all the info you need to you start your first Facebook ad.
About the New ‘Choose the Moment’ Feature
To start off, you need to create a Thrive Leads opt-in form with multiple states.
Having multiple states is necessary, because that’s where you’ll insert different Facebook pixels inside an HTML element.
When adding an HTML element to your page, you can now specify when the code snippet should be loaded:
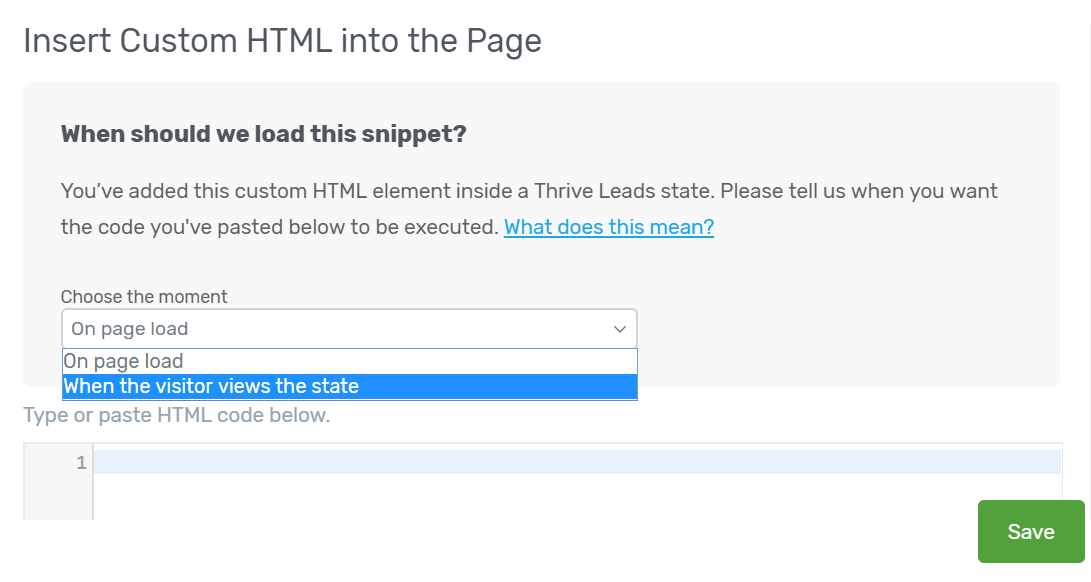
The new 'When the visitor views the state' option
The ‘on page load’ option is self-explanatory. When someone visits the page, the code snippet will be executed immediately.
With the ‘when the visitor views the state’ option, you can postpone running your code snippet for when the visitor has engaged with your opt-in and reached another state. When you use this option to trigger a Facebook retargeting pixel, it will allow you to create more personalized ads based on how your audience interacted with your opt-in forms.
If you want to learn more about when to load an HTML code, read this Thrive Knowledge Base article.
How to add a lead pixel to your opt-in form?
Adding a Facebook pixel to your opt-in form is a 2-minute process, after which you can retarget your audience in a much more granular way. Let’s go through the steps together:
1. Add a new form to your website with Thrive Leads (you can also use an existing form if you already have one)
2. Pick a template (multiple choice form)
3. Click on ‘add a new state’
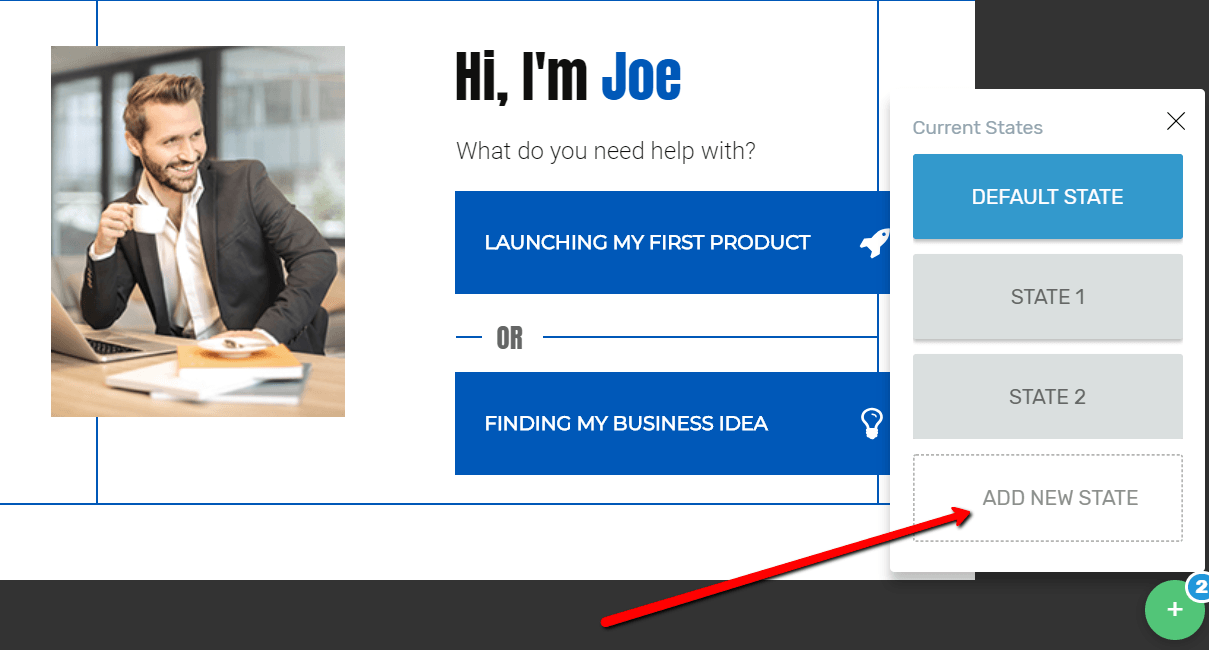
Add a new state to your opt-in form
4. Design your Thank You State

Design your 'thank you' state as you like
5. Drag a custom HTML element on to the new ‘thank you’ state
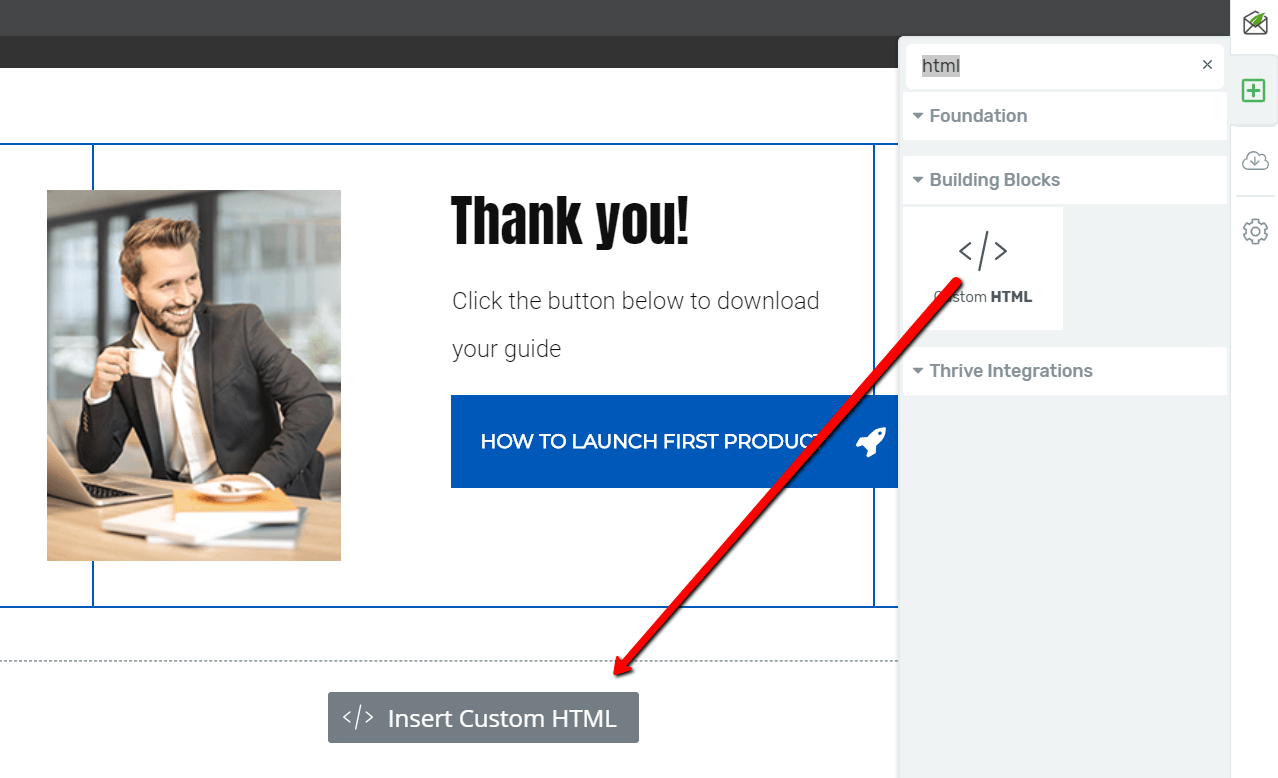
Drag the 'custom HTML' element on your opt-in form
6. Specify when to load the code snippet: When the visitor views the state
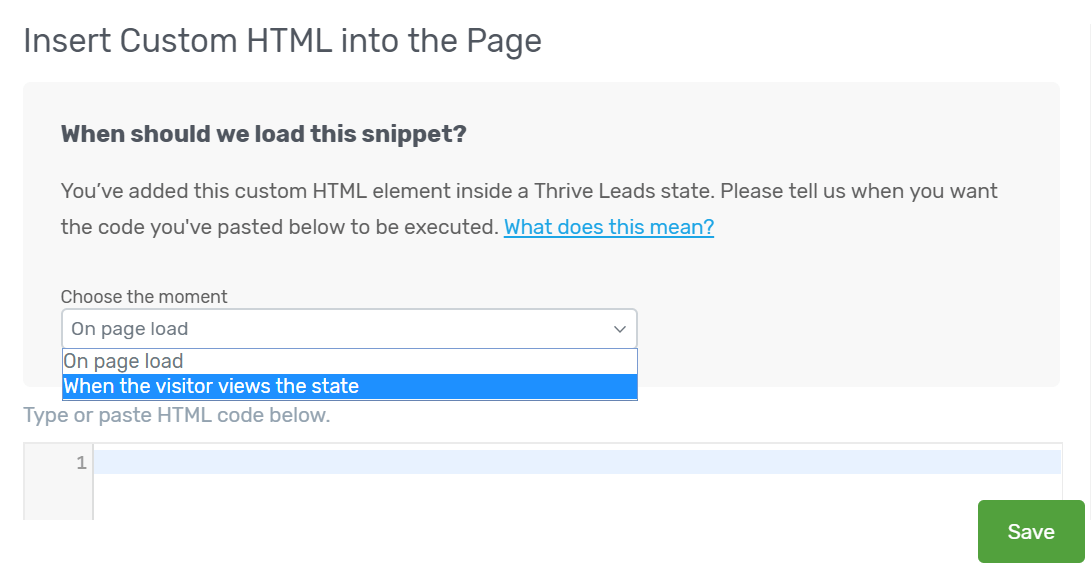
Select: 'When the visitor views the state'
7. Collect the ‘Lead Pixel’ from your Facebook Event Manager
8. Add the Facebook pixel to the custom HTML element
9. Add a custom parameter to your snippet. This will help you identify your leads.
Once all your states are ready, connect your opt-in forms to the correct thank you state. You can do this by picking an opt-in state, clicking to the ‘connect your form to service’ button, go through the connection steps you see there, and then in the ‘post signup action’, select the corresponding thank you state for your opt-ins.
The Structure of Your Multiple Choice Opt-On Form
The default form has two options: ‘Launching my first product’, and ‘finding my business idea’.
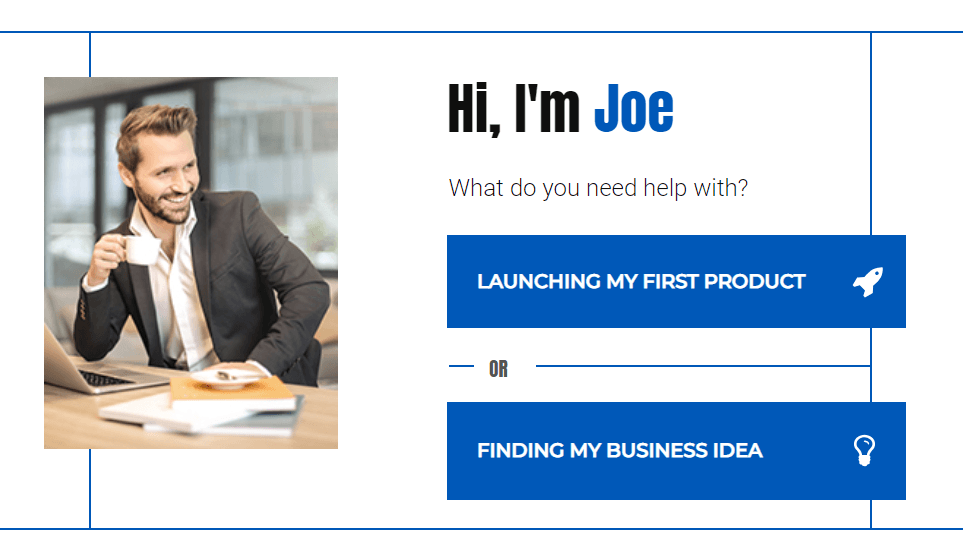
The default form
Visitors can pick which suits them better, then each of the buttons leads through to an opt-in form (State 1-2) where visitors can enter their email. Each of these leads to a thank you state (State 3-4), where you place the HTML elements with the Facebook Lead Pixels. Here’s a diagram illustrating this simple lead gen funnel:
The structure of our multiple choice funnel
This strategy enables us to retarget the people who have signed up.
Read this article if you want to know more about switching states in a multiple choice opt-in form.
Track Your Pixel
To check if Facebook pixels are set up correctly, install the Facebook Pixel Helper Chrome extension. This tool detects the pixels on a page, and tells you if they’re working correctly.
The Facebook Pixel Helper extension
Note, that since we have selected the ‘when the visitor views the state’ option within the custom HTML element, the lead pixel will be detected, but not activated upon when visitors view the page. The pixel will only be activated if your visitors reach the ‘thank you’ state of your opt-in form.
Pro Tip
The more specific you are with your segmentation, the better your campaigns will perform.
Therefore, it’s beneficial to “pixel” people who were interested in your offer, but did not sign up. Then, you can show a different type of ad or a more informative landing page to this segment.
To track this segment with pixels, you’ll need to copy a ‘view content’ pixel from your Facebook Event Manager and add one to the 1st and the 2nd opt-in form for each. This way, you target people who clicked through one of the buttons, viewed the opt-in state, but then didn't take any actions.
It’s Time to Refine Your Targeting Like a Pro
The Facebook Pixel is a powerful marketing tool in your hands that can help you track conversions, optimize ads, build targeted audiences, and remarket your readers.
Our latest custom HTML element upgrade provides an elegant conversion tracking option to use with Facebook Pixels. This opens up a lot of fun lead generation opportunities and enables you to laser focus on your segments.
Do you like this new feature? How are you going to use it in your business?
If you have questions don’t hesitate to leave a comment below.


LOVE this new feature! Thanks guys.
Happy to hear Anneline!
I wish you would offer a similar option for Thrive Optimize.
Instead of the NEED to have a wordpress page as thank you page in order to track conversions, it would be nice to have more options.
E.g we are using Memberpress for the Signup Process. And Thrive Optimize can’t track a conversion properly because we can only can set Std. WordPress Pages as a “conversion”. Not a Memberpress-specific Page.
Hi Troy,
Thanks for the suggestion.
Hanne, THANK YOU for this explaination – it’s incredible.
One thing I’m not sure of though.
Does this style of tracking work for running ads?
In other words, the custom conversion we set up is tracking a thank you page so we can see which ads are performing.
I’m not sure if we can do that with the states – am I missing something?
Hi Joey,
Yes this should work exactly the same. It’s when the pixel gets fired that is important so whether it’s on a thank you page or on a thank you state doesn’t matter as long as you use the “when visitor views state” trigger to avoid the pixel being fired to early.
That’s some badass stuff right there Hanne and Andrea!! We will definitely be using this new feature. Thanks!
Yay, happy to here Jonas!
Thanks Andrea. Thank you, Andrea. This post is great
Hey Hanne,
Great video, thanks a lot. This is a killer feature.
A few months back I got to know the idea of pixeling people who already segmented themselves but didn’t end up signing up. Then I thought how I could implement a small hack of doing this with the Thrive tools. This will save me a lot of headache. 🙂
One question:
Will this also work for Thrive Quiz Builder?
I am not a customer of Thrive Quiz Builder yet, so I can’t test it. But I plan to create a quiz soon and this type of pixeling would also be very suitable in a quiz.
Best,
Florian
Hi Florian,
In Thrive Quiz Builder, you have the dynamic results option which allows to only show certain content to people with certain results.
When you add the custom html element in the dynamic content, it will only trigger the code when the content is displayed.
Could you point me to a tutorial on “how to” build out the multiple choice thrive lead
Hi Brad,
Sure!
You can follow this tutorial right here.
AWESOME feature and video/article!
Thank you Hanne and Andrea.
PS: Hanne, I really like the video resolution you have used.
So easy to view with large fonts.
When I record a video and capture my screen the fonts are so small…
Please, what was the resolution that you have used on this video?
Or have you ZOOMed IN (CTRL + mouse up)?
Thanks in advance.
Hi Rosinaldo,
I have a bit of a weird screen resolution (using a Microsoft Surface) so I film at 2724×1532 resolution, this allows for zooming in the editing process without loosing quality.
Nice. Thank you Hanne!
Hi Hanne,
This is extremely helpful. Thank you!
Would you and the Thrive team consider doing events like this for Google Analytics? I’d love to see more connection between what happens with my Thrive Themes suite and my conversions in Analytics.
Thanks again!
Hi Bryce,
I really wanted to figure this out for Google Analytics, but GA only allows for an event when a page is loaded… Or at least that’s what I understood after quite some research.
I believe it should be possible when you use tag manager. But that’s a whole other can of worms.
I spent the better part of yesterday working to achieve a similar result with tag manager and google analytics, but I was woefully unsuccessful. Even manipulating the forms in html to have an ID (which they aren’t given by Thrive) didn’t work. I even tried using the settings to observe changes in css for or visibility changes to trigger something in tag manager with no success.
Having the ability to track in Google Analytics is paramount (just as this Pixel info is, so thank you Thrive!). If anyone has solved this, please let me know.
Thanks for your reply Hanne. This is certainly a tricky one to tackle.
I wondered if there was some way to use Thrive products (whether currently or in a future release) to assign the Category, Action, and Label needed to fire the code to an element that would then trigger the conversion in Analytics once fired. I’ve toyed around with using the destination conversion method, but that also requires an entire landing page funnel (which is just as much work or more) and it can be unreliable in some instances.
I agree that the Tag Manger method is not ideal especially because my experience with Tag Manager is that it fires much more often than true conversions actually happen. I like the Events much better as they are much more stringent on when they fire.
Anyway, food for thought for you and your Dev team if you find that it’s worth looking into.
Thanks as always!
Hey Bryce, just wanted to follow up and let you know I was able to get this to work. You need to use Tag Manager and a visibility trigger to push an event tag into Google Analytics. I wrote up a tutorial and made a video. Let me know if you need any help beyond that.
Thanks Doug. I’ll be honest that I’m not thrilled about the Tag Manager method because everything I’ve ever seen with Tag Manager is that it has a tendency to fire a lot more often than it should which inflates conversion data.
If I can, I’d much rather have the ability to go with Event conversions.
@Hanne, side note: the Event conversions would be even more helpful with respect to Google Ads and Bing Ads in triggering their conversion reporting as well.
I loved the tutorial! I am going to use it right away.
Any good resources/video about different ways to use FB Pixels, best practices etc? Thanks
Hi Michael,
AdEspresso has pretty amazing content and Jon Loomer too.
Thank you so much for this! I was looking for information about Facebook Pixels with Thrive Builder, and I’ve received an email which leads to this page. It’s like you read my mind. Haha!
Anyway, my main concern is the loading time. Will this additional Pixel code added to a lightbox (for example), slow down the loading speed of all pages where lightbox shows?
Hi Andrea An amazing article was written over there,
Thank you for sharing this very interesting post with us i really enjoyed reading about it, it is very helpful with great information.