Are you thinking about launching a website for your fitness brand or gym but not sure where to start?
This blog post is here for you.
Creating an online presence for your fitness business isn't just about putting up some pictures and contact information; it’s about building a functional, inviting hub that draws in clients and keeps them engaged.
A well-designed website is essential to your marketing and client management strategy, helping to attract new members while providing existing ones with valuable resources.
If the thought of tackling this project seems daunting, don’t stress.
We've put together an easy-to-follow, step-by-step guide on how to build a compelling website for your fitness brand or gym, ensuring it serves as a powerful tool for both marketing and customer engagement.
How to Take Your Fitness Business To Your Target Clients: Build a Site
If you’re running a fitness brand, gym, or working as a personal trainer, having a strong online presence isn’t just nice to have—it’s absolutely essential.
A sleek, user-friendly website acts like the front door to your business. It welcomes potential clients, explains what you offer, and makes booking services straightforward. More importantly, it projects professionalism and shows that you take your business seriously.
Think about it: your website is hard at work 24/7. Whether it’s early morning or late night, it’s out there making sure potential clients can find you, learn about your services, and book a session right when their motivation hits.

But there’s no time to wait. Every day without a solid website means missed opportunities for growth and client engagement.
Your website not only talks up your services but also streamlines much of the routine work.
From scheduling clients to managing payments, it helps automate and keep everything running smoothly so you can focus more on what you love—training and inspiring others.
It’s also your marketing command center, where you can launch promotions, share valuable fitness tips, and build a community through your blog and newsletters.
In short, you need to have your fitness website up as soon as yesterday.
So, let’s get your platform set up today.
What You’ll Need to Build Your Own Fitness Website on WordPress:
Here’s what you’ll need to get started:
Domain: This is the address people will use to find your website (e.g., www.yourfitnesssite.com). Choose a domain name that's memorable, brandable, and relevant to your business.
Content Management System: This makes building and updating your fitness website a breeze, letting you easily manage posts, schedules, and pricing on your own, keeping your site fresh and professional to impress and retain clients. We recommend using WordPress.
Web hosting: Think of this as the virtual real estate where your website will live. There are many hosting providers to choose from, each offering different plans and features.
WordPress Theme: A theme determines your website's overall look and feel. While WordPress has a few free themes, you'll likely want to invest in a premium theme designed specifically for fitness businesses.
Page Builder: A page builder is a tool that allows you to drag and drop elements (like text, images, and buttons) onto your website pages, making it easy to create custom layouts without coding.
WordPress Plugins: Plugins are add-ons that extend the functionality of your WordPress site. You'll likely need plugins for things like contact forms, social media integration, and e-commerce.
Email Marketing Service: Capturing email addresses is crucial for building your audience and nurturing leads. Services like Constant Contact or MailChimp make creating and sending newsletters, promotional emails, and more easy.
Checkout Tool: If you plan to sell products or services online, you'll need a way for customers to check out and pay securely. Popular options include PayPal, Stripe, and WooCommerce.
We’ll help you get the right plugins to build your gym website. Just keep reading to follow.
How to Create a Successful Fitness Website That Brings In Leads and Sales (Step-by-Step Guide)
After you’ve purchased or set up a free domain name, chosen a WordPress web hosting provider, and completed the WordPress installation process -- it’s time to start working on your actual fitness website.
This step-by-step tutorial will show you how to do this:
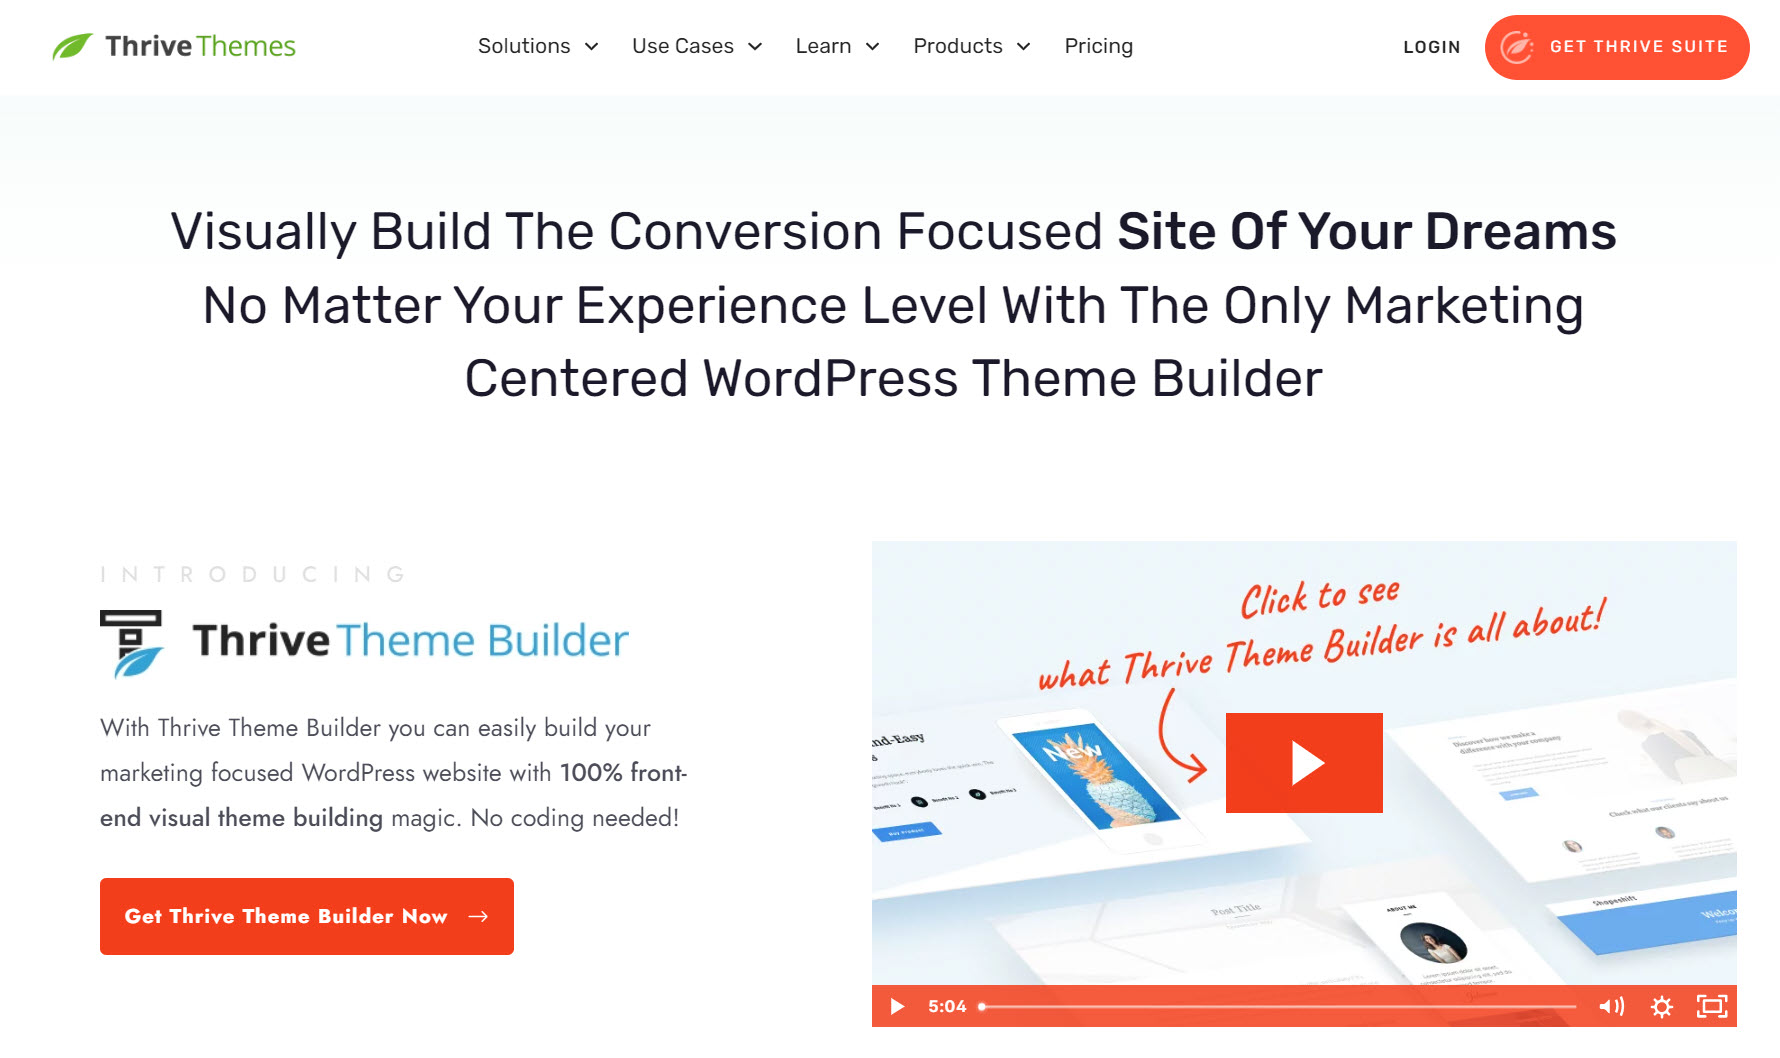
1. Download & Install Thrive Theme Builder & Thrive Architect
Thrive Theme Builder & Thrive Architect are the best WordPress
website builder duo in the market.
Think of this combo as “web development made easy” — ideal for beginners and advanced users alike.
If you want a custom WordPress theme to make your website stand out from other consulting firms– you need Thrive Theme Builder.
Thrive Theme Builder helps you build and customize every aspect of your website design without typing a single line of code.
You get access to pre-built, one-click templates to build a clean, SEO-optimized website that search engines will love — without wasting time creating complicated designs from scratch.
The best part? You can have all of this set up in minutes. We’ll show you how.
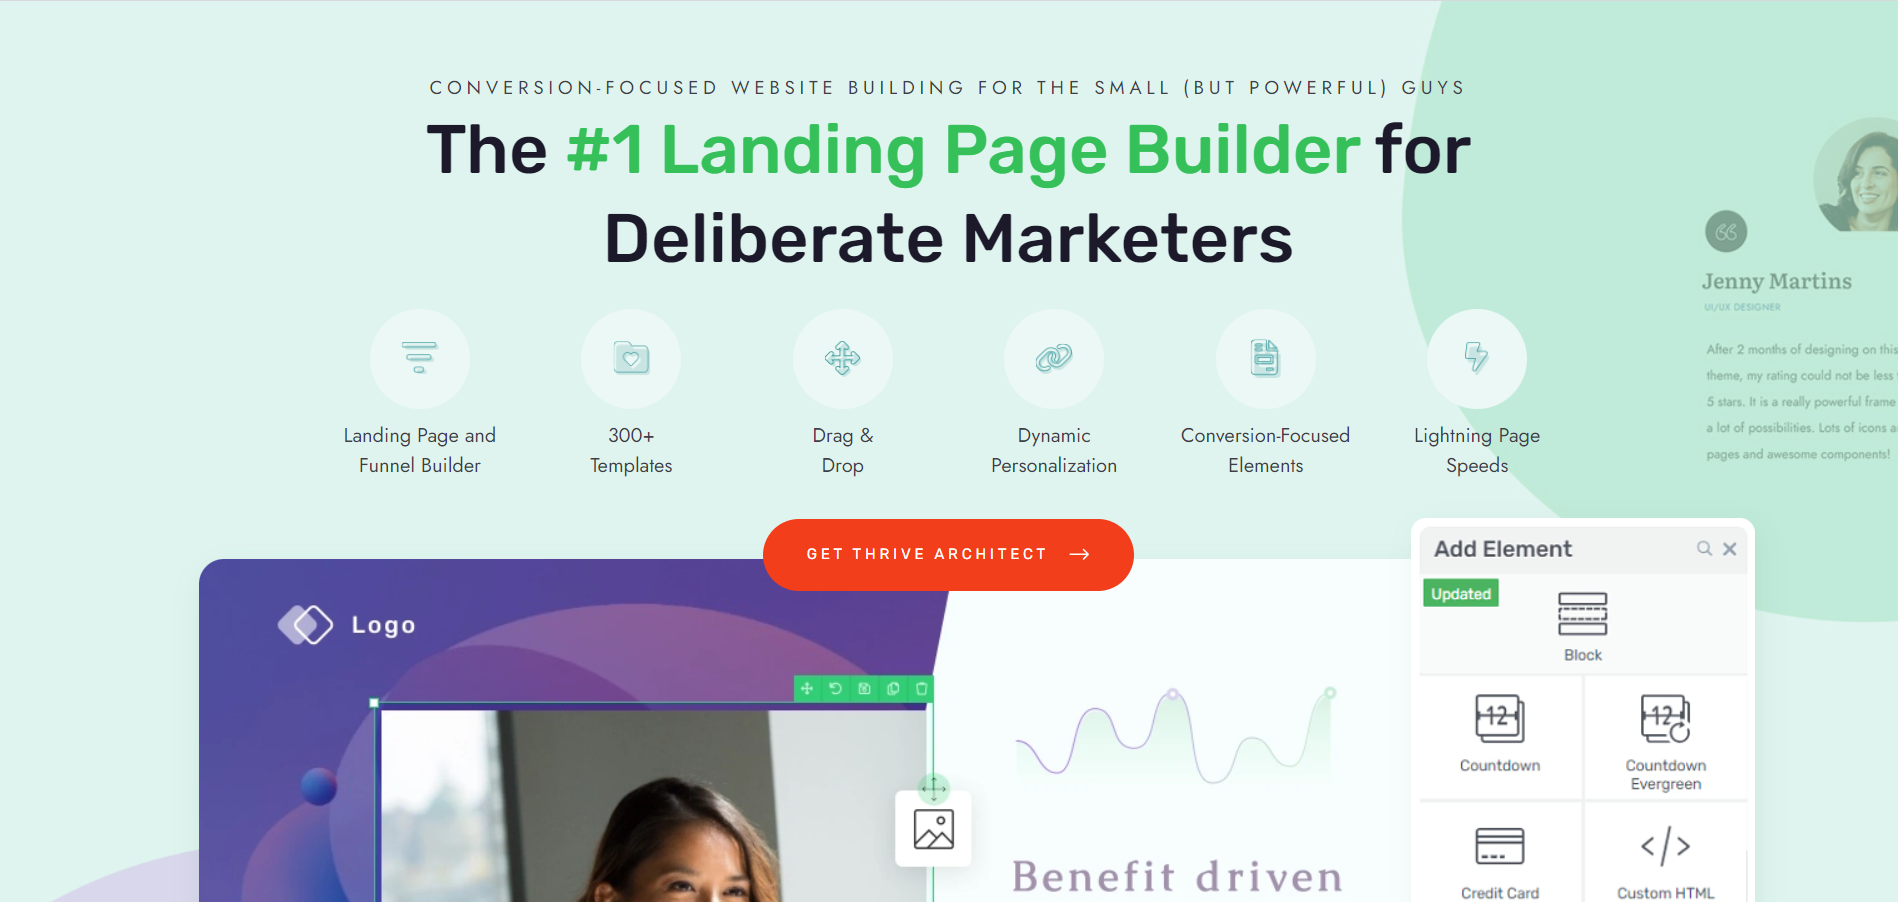
And once you’ve created your website’s structure, you’ll hop in and customize your web pages with Thrive Architect, our intuitive landing page plugin.
This page builder features drag-and-drop functionality for easy building; and a large selection of templates you can use to create unique web pages.
No need to code. No need to purchase expensive add-ons. You get everything you need to build a stunning business gym or fitness website.
And every part of your website will be responsive, making it easy to see and read on desktop and mobile devices.
You can purchase Thrive Theme Builder and Thrive Architect as a bundle or as part of Thrive Suite, where you get access to eight additional premium plugins to enhance your website.
2. Activate & Launch Thrive Theme Builder
Thrive Theme Builder helps you create your website’s structure in less than 10 minutes. And you get immediate access to it when you purchase Thrive Suite.
Once you’ve activated Thrive Theme Builder, you’ll need to select a theme for your website.
Each theme comes with a set of fully-customizable, professionally-designed templates that are perfect for your small business.
And we’ve got the perfect one for you.
3. Select & Activate Peak Gym Theme: Our Companion Theme for Gyms, Personal Trainers, and Fitness Brands
Peak Gym Theme is the perfect theme for gym businesses, fitness professionals and influencers.
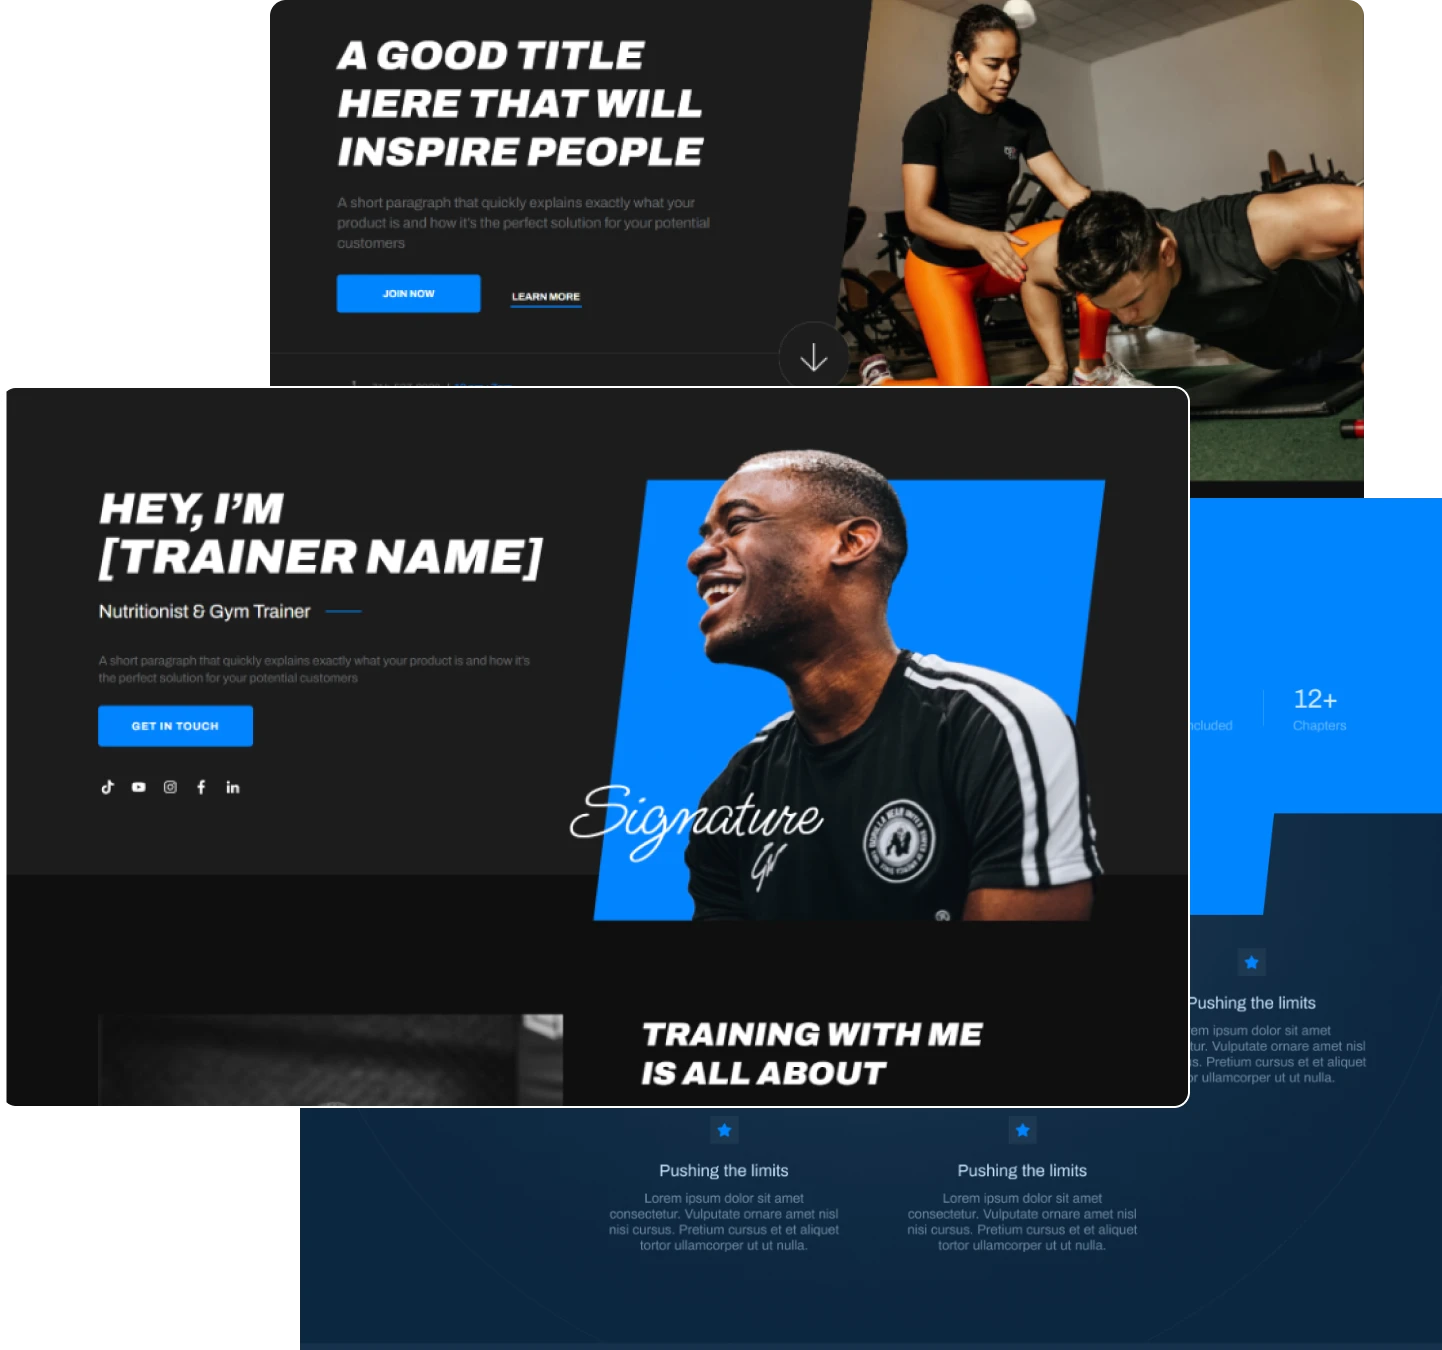
This bold theme is designed to inspire your potential clients to sign up for your business and transform their lives.
You get all the landing page templates you need to create a fitness website that stands out, including:
A business-focused homepage OR a personal branding-focused homepage for individual trainers
2 conversion-focused sales pages to promote your online courses, eBooks, or other digital products
Video blog post, audio post, and written blog post templates
Shop, Cart, and Checkout pages to set up your online store with total ease
An impressive About page template to show potential clients exactly who you are
Standard WordPress page default templates
And that’s not all.
Peak Gym Theme also comes with its own set of block templates, which are the easiest way to create custom web pages quickly.
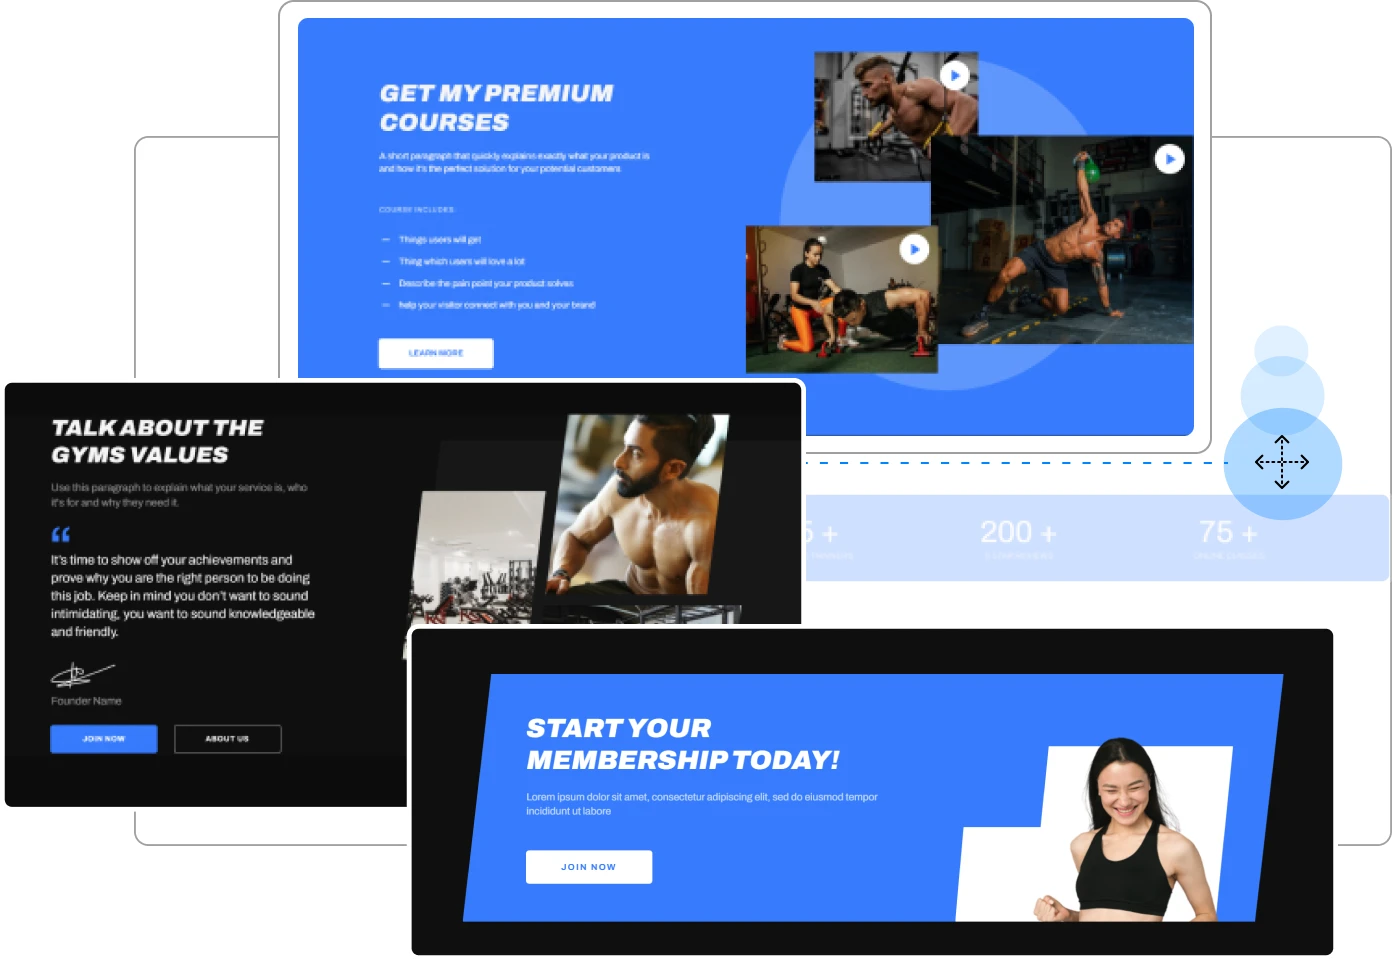
In a couple of clicks, you can drag and drop, re-order, and edit your custom landing pages – all while inheriting your chosen theme fonts, heading formats, and colors.
And if you have Thrive Architect, our professional page builder, you can change the color of individual blocks to add variety to your pages.
But we’ll dive into that later. For now, let’s focus on setting up your fitness website with Peak Gym Theme.
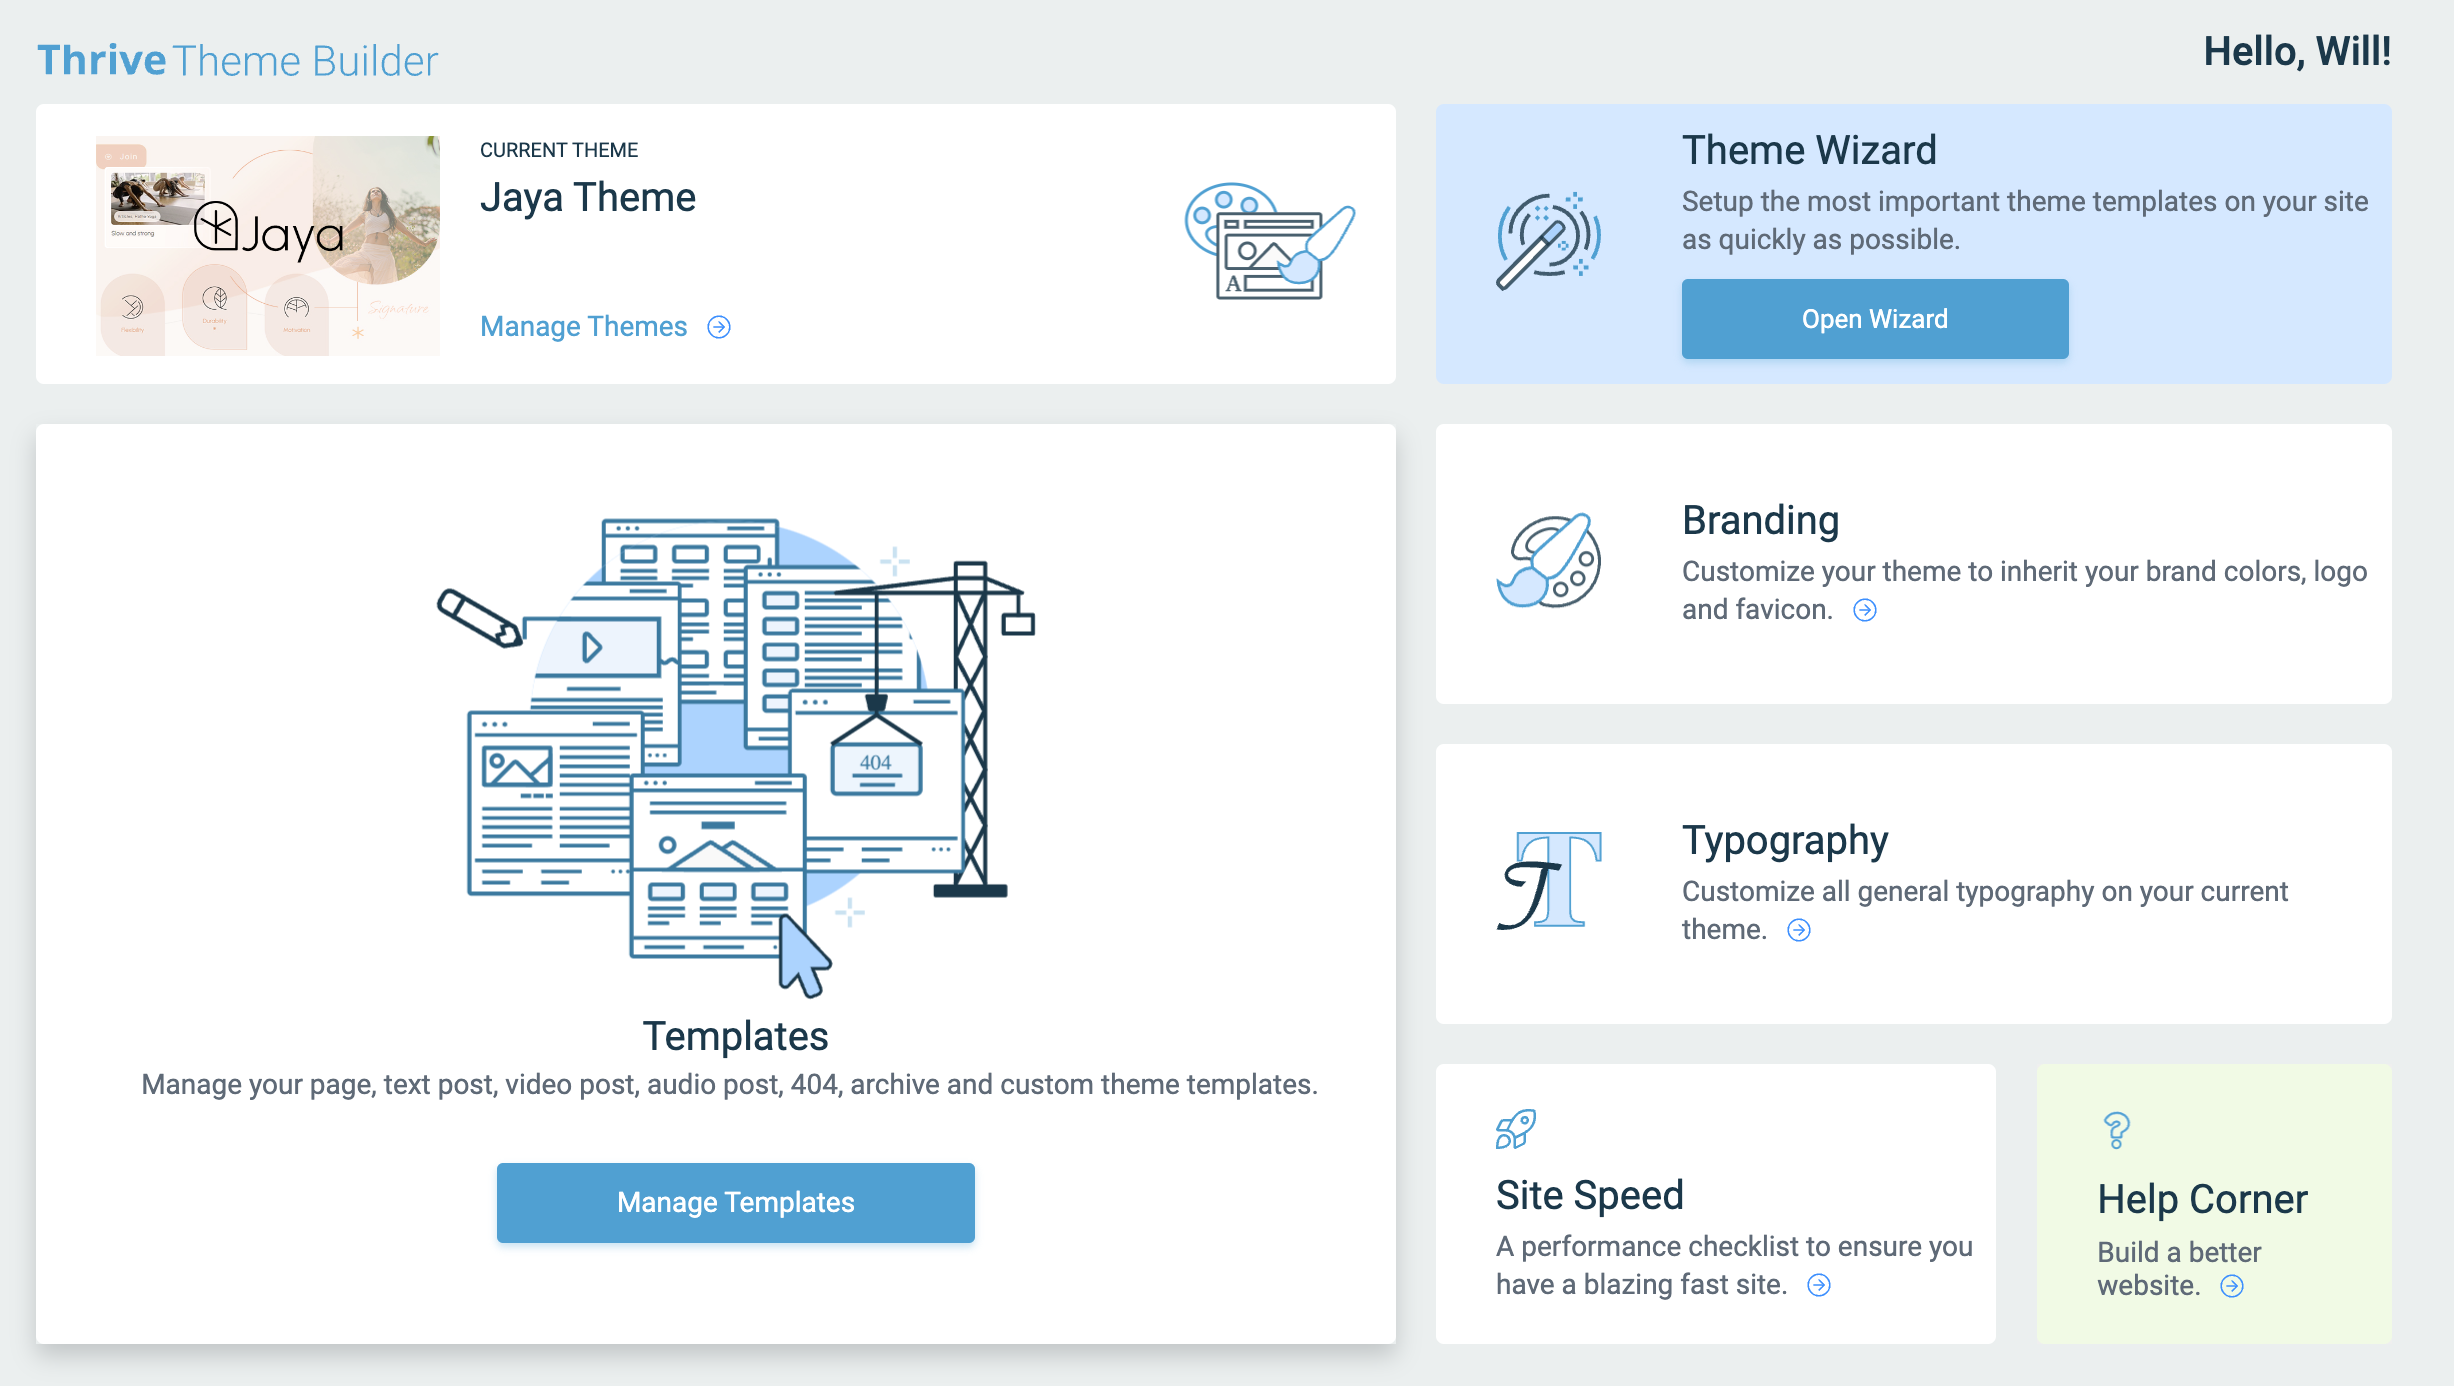
4. Set Up Your Site Structure with the Thrive Theme Builder Setup Wizard
The Thrive Theme Builder Setup Wizard helps you select all the web page templates, a color palette, and fonts you need for your clean web design—and it only takes a few minutes to do this.
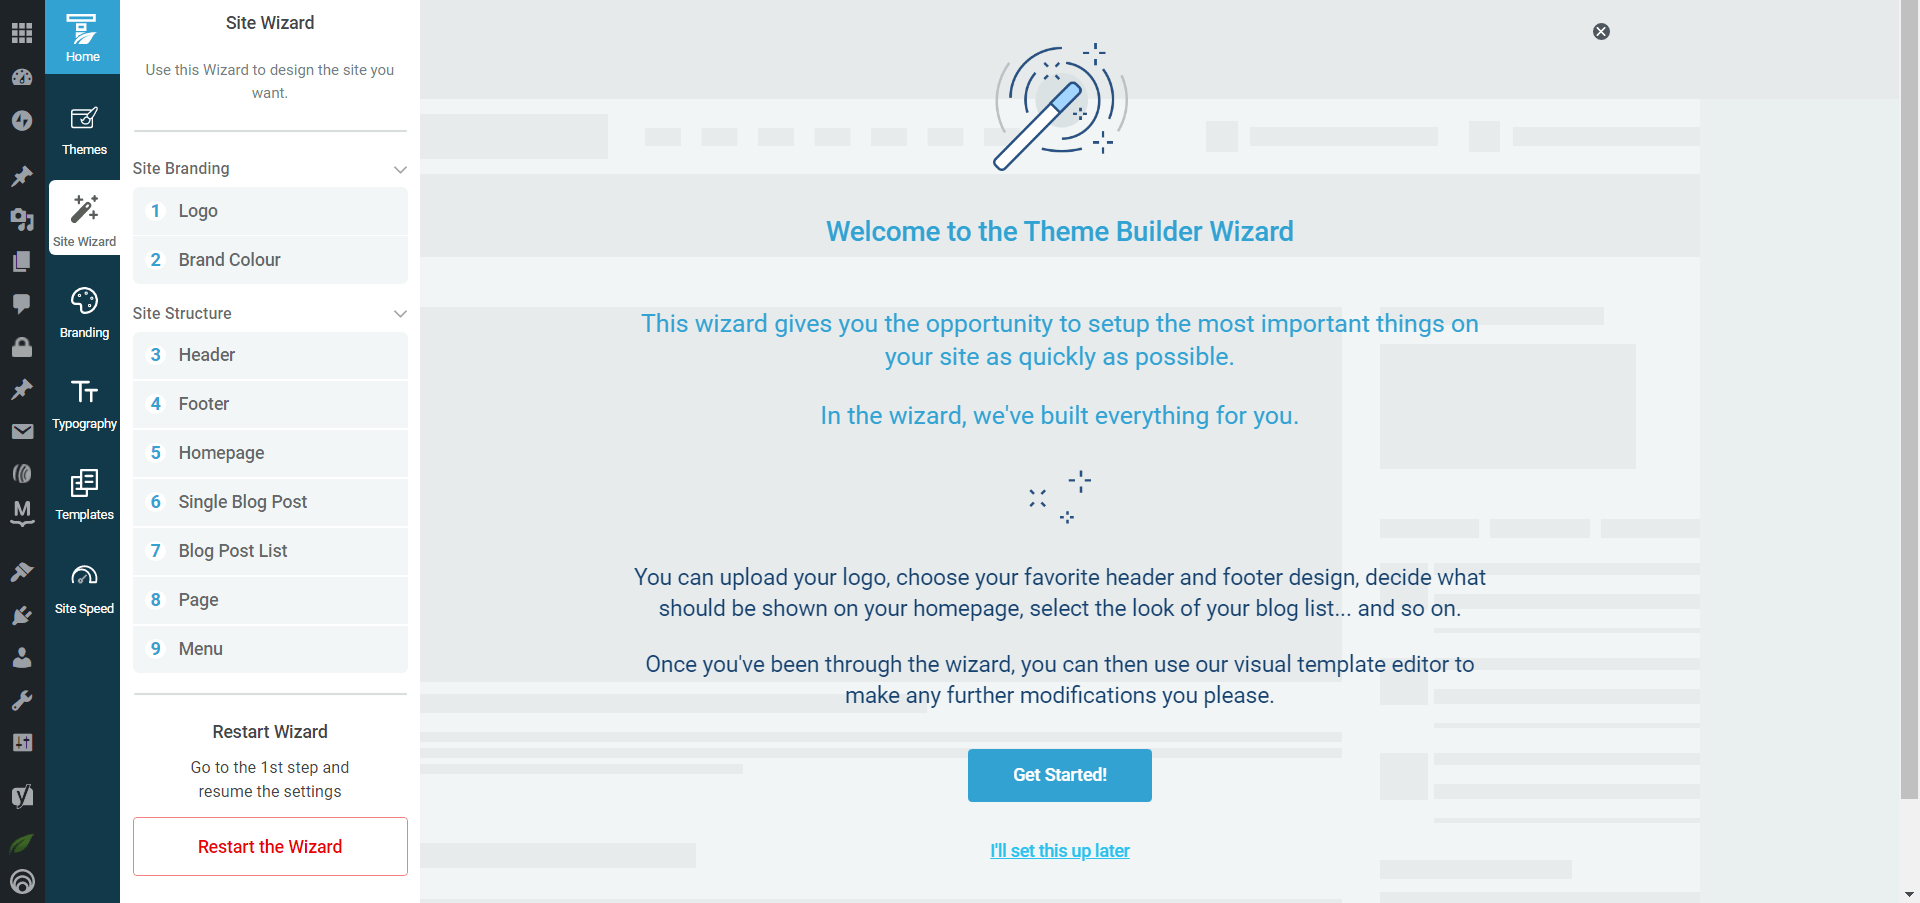
Setup the wizard in Thrive Theme Builder.
This wizard walks you through setting up the following:
A sitewide logo for light and dark modes

Example logo

A conversion-focused header for straightforward site navigation
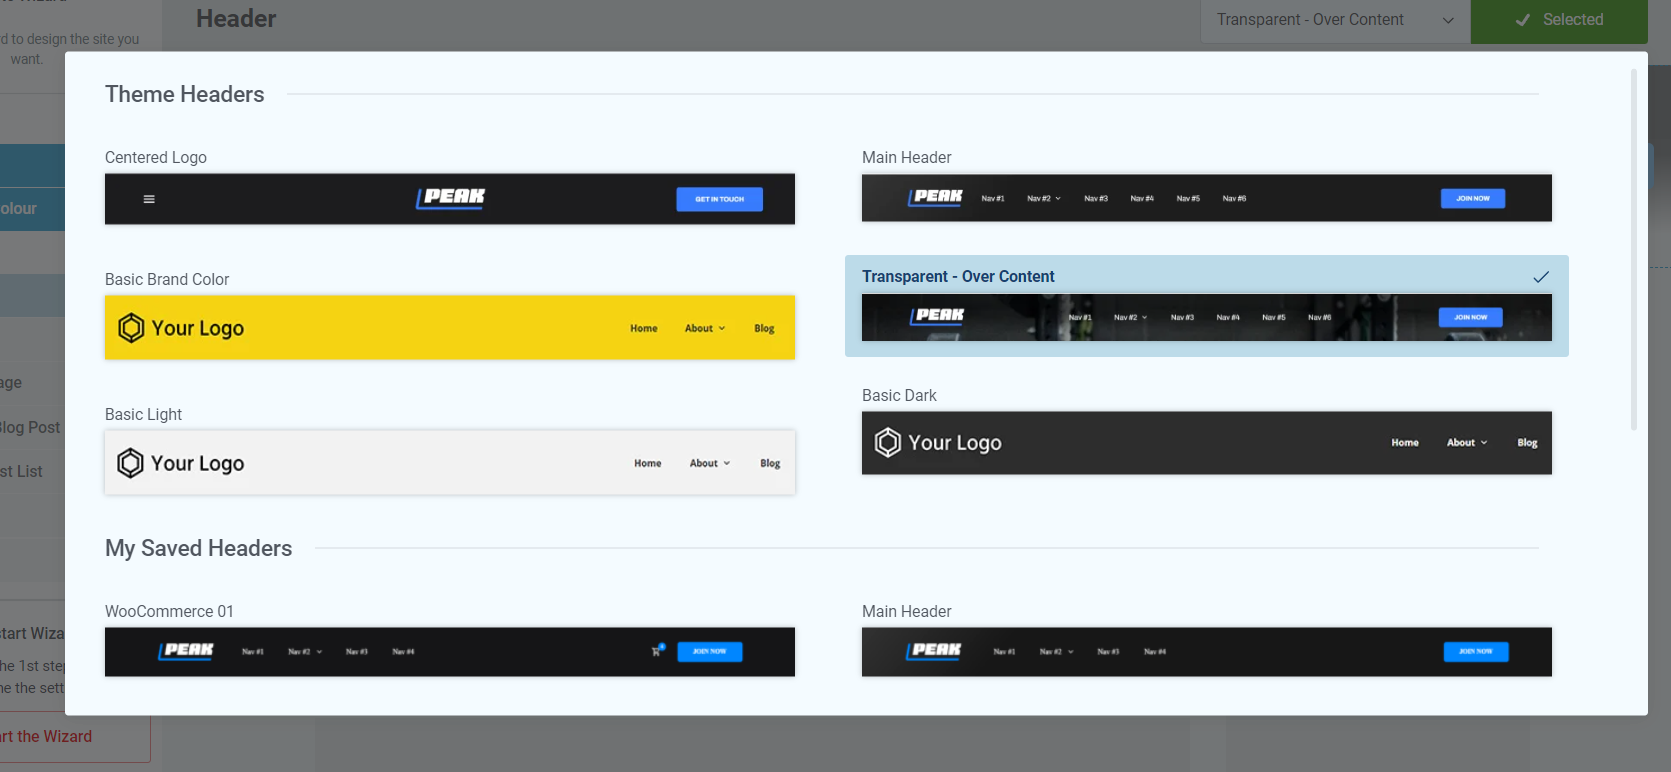
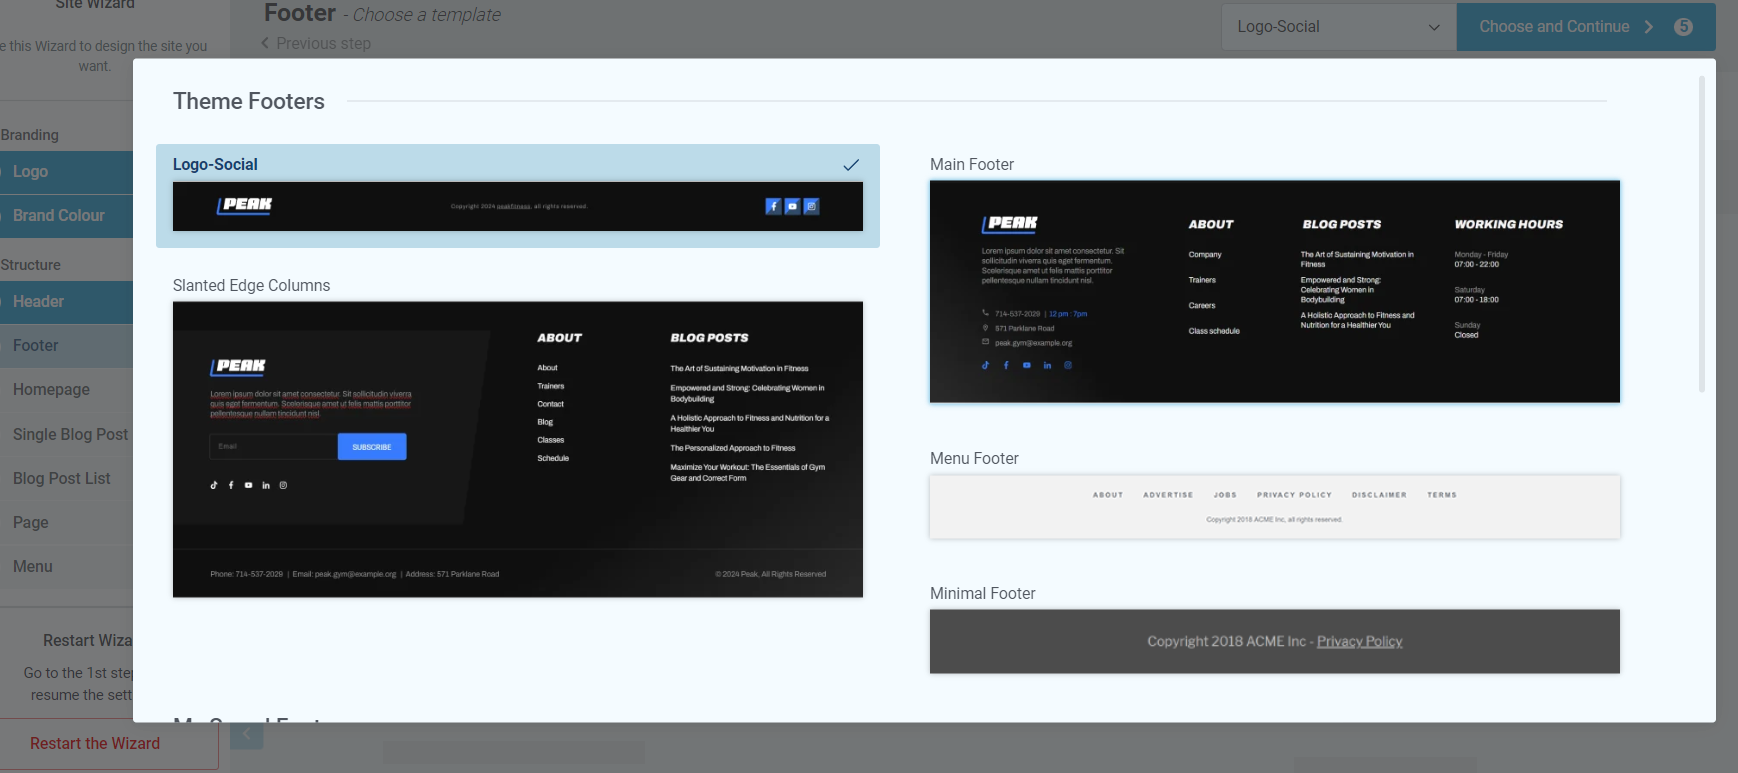
A focused footer to add contact information, your business address, links to social media platforms, etc.
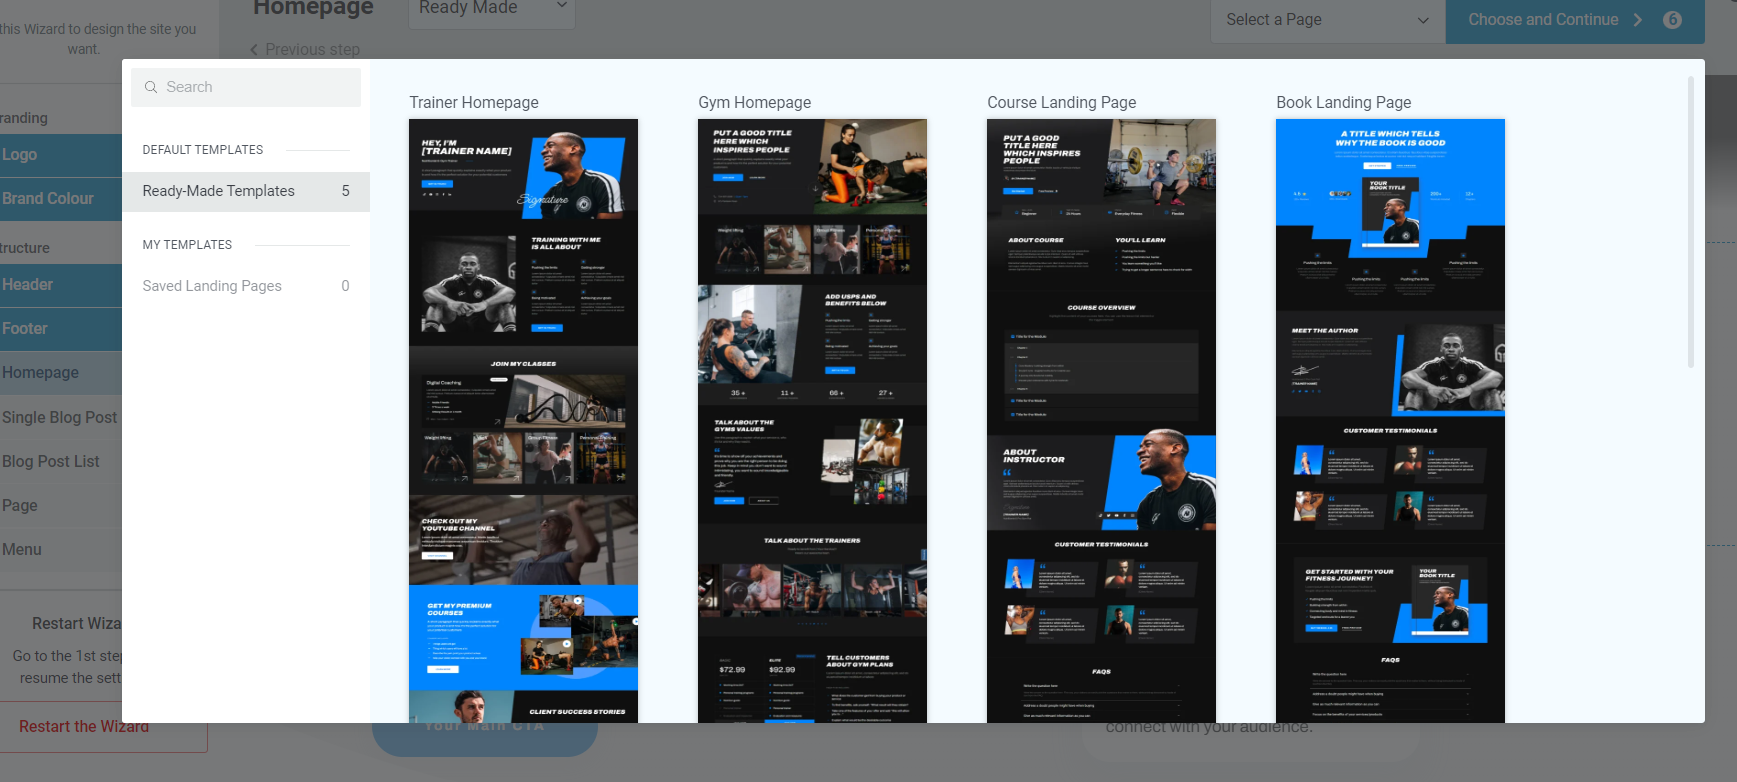
The perfect homepage template for your site
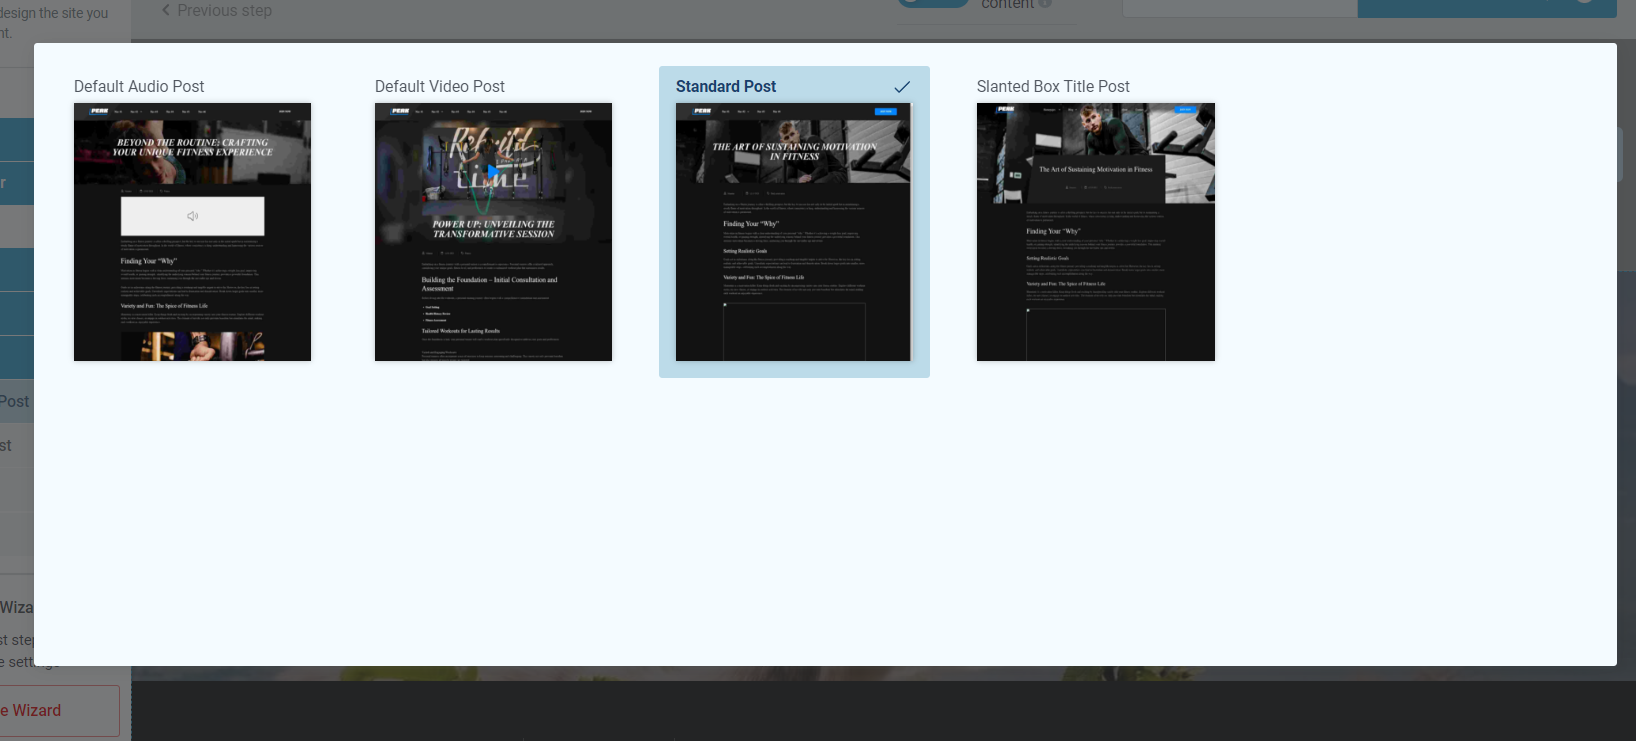
A template for your blog posts
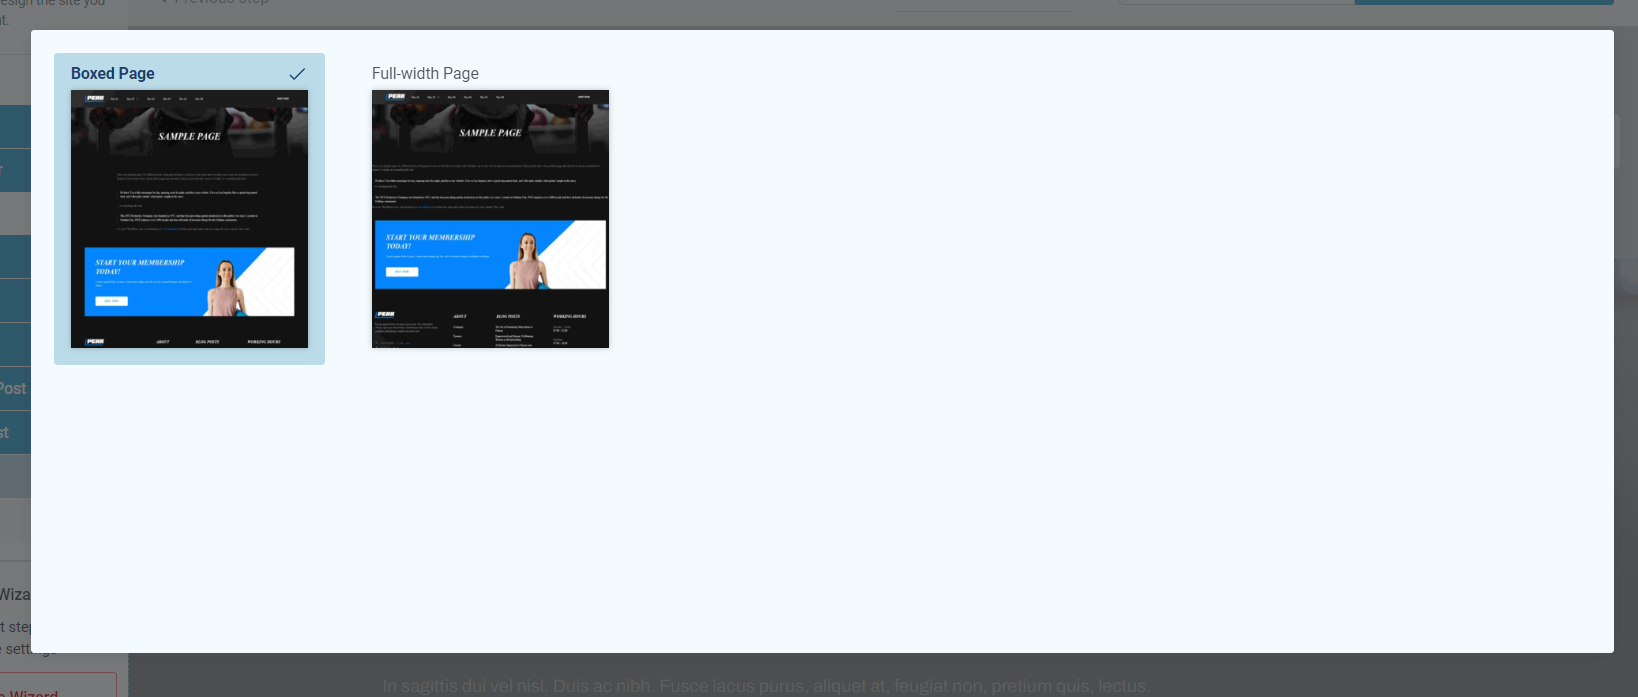
A default WordPress page template
By the end of the Setup Wizard, you will have created a clean website layout that you can customize using Thrive Architect.
Peak Gym Theme also comes with other default page templates – 404 page, about page, etc. You can find them in the “Templates” section in Thrive Theme Builder.
5. Create and Customize Your Core Webpages with Thrive Architect

The following pages are must-haves for your fitness site:
Homepage: Start with a friendly welcome that briefly introduces who you are and how you help people with their fitness goals. Keep it clear and inviting.
“About Us” Page: Tell your story and share your passion. This page helps visitors understand more about you and why you joined the fitness industry.
Blog: Offer useful tips, healthy recipes, and simple workouts. It's a place where you can share your knowledge and help visitors lead healthier lives.
Services Page: Clearly describe the services you offer, like personal training or group classes, and include straightforward pricing details.
Testimonials/Reviews Page: Feature some honest feedback from your clients to show new visitors the positive impact you’ve made.
Booking/Appointment Page: Provide an easy online booking system for clients to sign up for sessions or classes online, making the process hassle-free.
Portfolio/Projects Page: Display your achievements and the success stories of your clients to illustrate what new clients can expect.
Contact Page: Include a simple contact form and your details, so people can get in touch with questions or for more information.
How to Create a New Page in WordPress
Creating a new page for your WordPress website is super straightforward.
In the WordPress Dashboard, select the "+ New" button at the top of the page and select "Page".
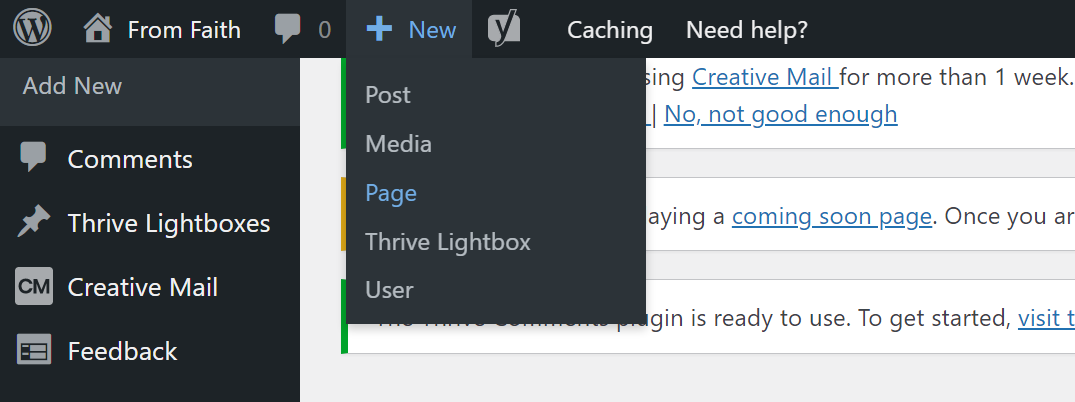
When taken to the next screen, name your page and select the bright green "Launch Thrive Architect" button.

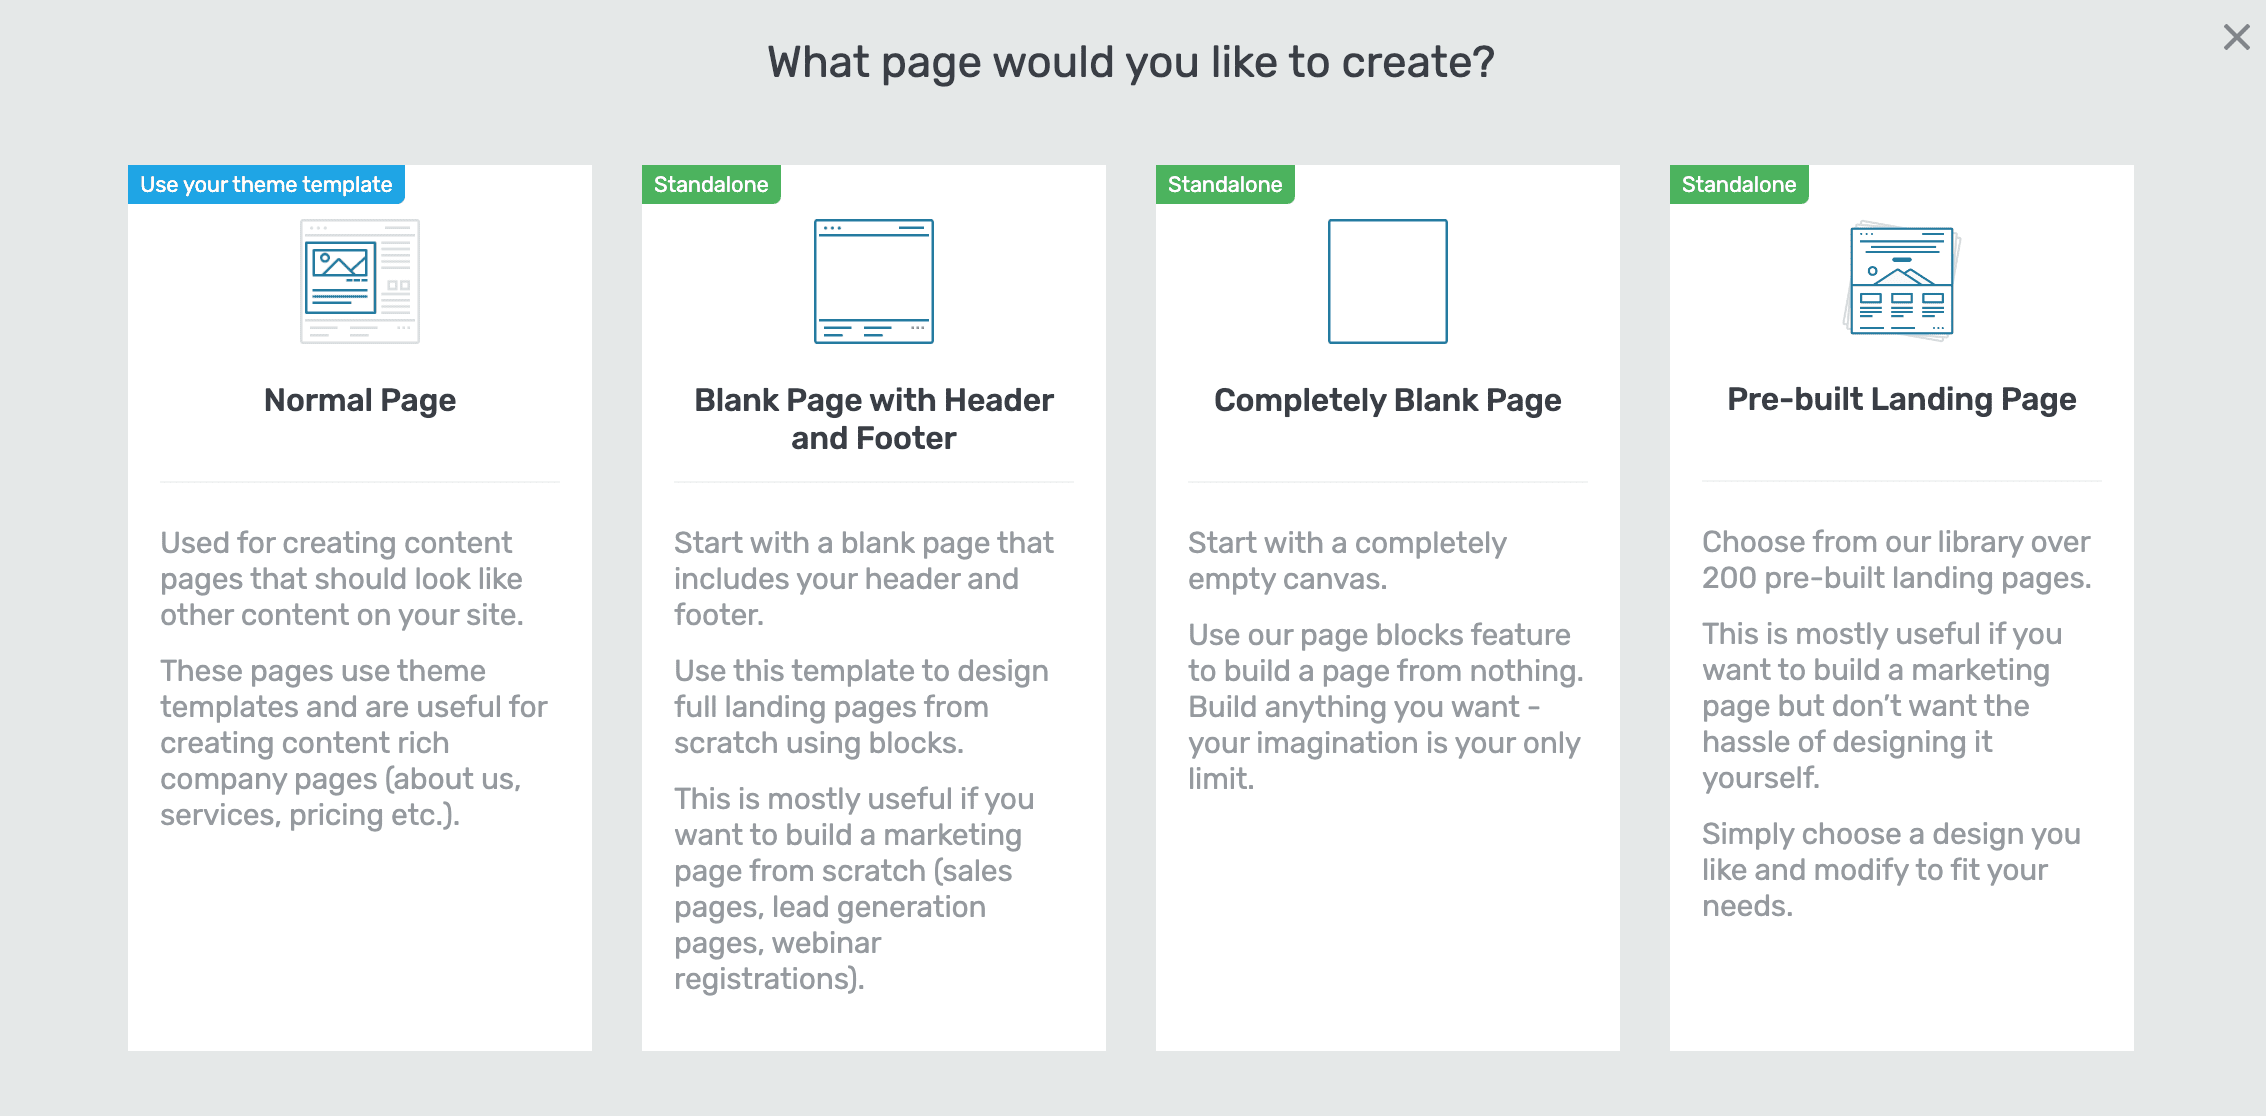
Four options will pop up:
1. Normal Page
2. Blank Page with Header and Footer
3. Completely Blank Page
4. Pre-built Landing Pages
We recommend choosing the "Pre-built Landing Page" option.
In the Landing Page Library, you can select a Smart Landing Page from Peak or any of our other companion themes.
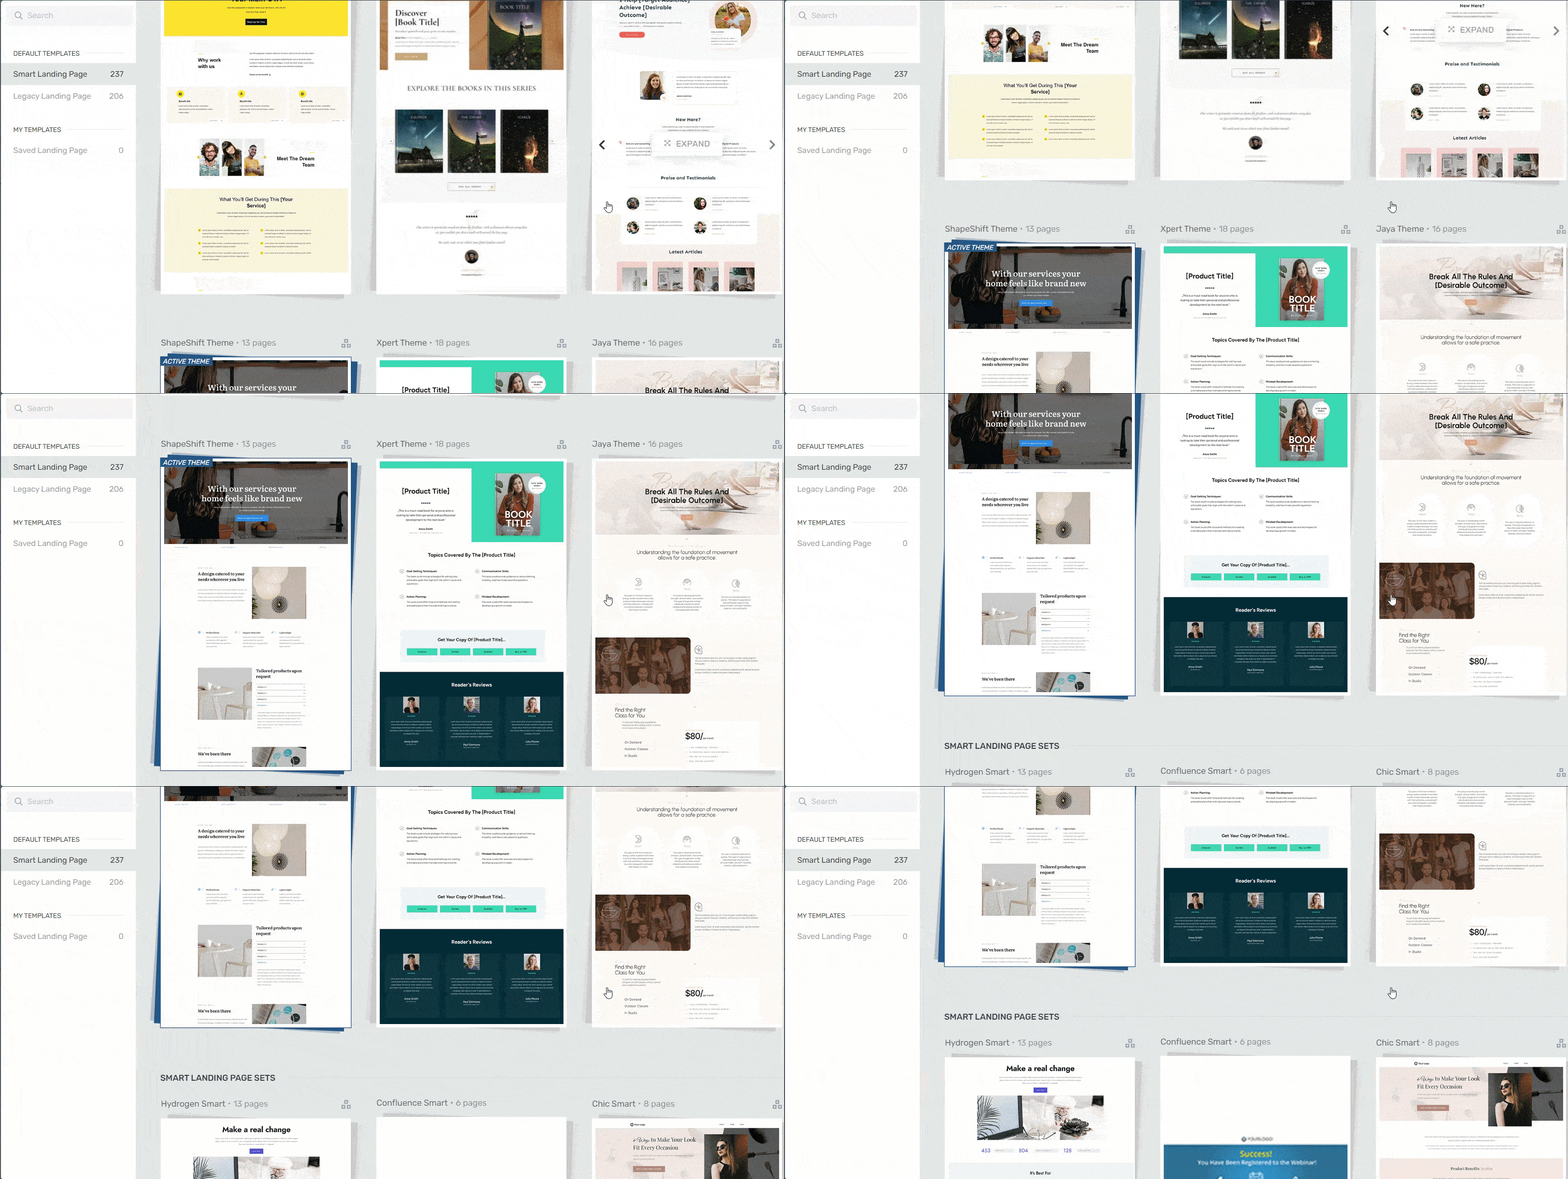
Landing page template sets in Thrive Architect
Our Smart Landing Page sets are designed to help you create stunning, conversion-focused pages in minutes.
It's as simple as perusing the Landing Page Library, finding a landing page template you like, selecting it, and customizing its design to fit your branding.
6. Customize & Finalize Your Homepage
Now it’s time to customize the homepage template you selected in Thrive Theme Builder. For this section, you will use Thrive Architect, our drag-and-drop landing page builder plugin.
When you were working through the Thrive Theme Builder Setup Wizard, you got started creating your Homepage
template…
A homepage is automatically generated for you, so you don’t need to create a new page or configure any other homepage settings.
You’ll find it in the "Pages" section in the WordPress Admin Dashboard.
Search for the page titled "Generated Homepage".
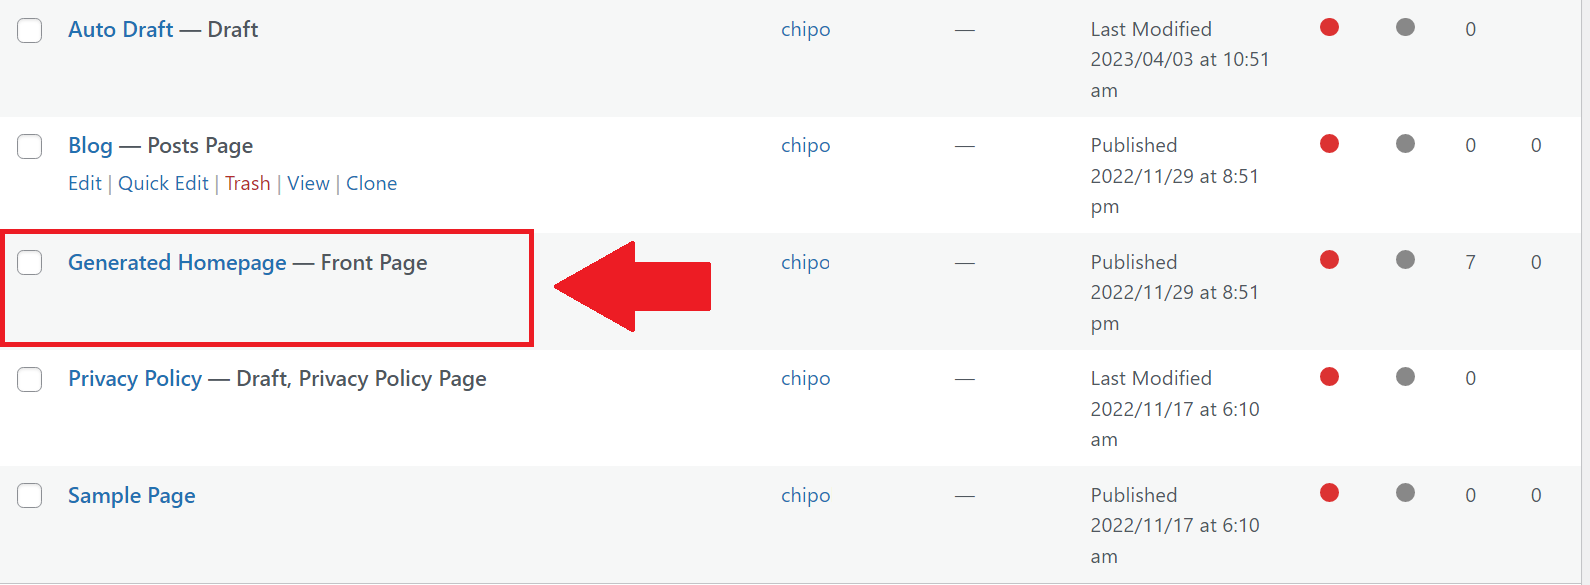
Click on the link, and you’ll be taken to the Block Editor space from the WordPress Dashboard.
In the Editor, click “Launch Thrive Architect”.
As you work on your page design, you may need to add new sections (e.g., a drop-down menu, widgets area, or FAQ section) or remove a few. Thrive Architect makes this super easy, and you’ll see how.
To create an eye-catching homepage that communicates your business's value and offers a great user experience, it must have the following sections:
Hero Section to Create a Great First Impression
A hero section is one of the most important elements of your homepage.
It’s one of the first things potential clients see when they land on your site, ultimately forming their perception of your business.
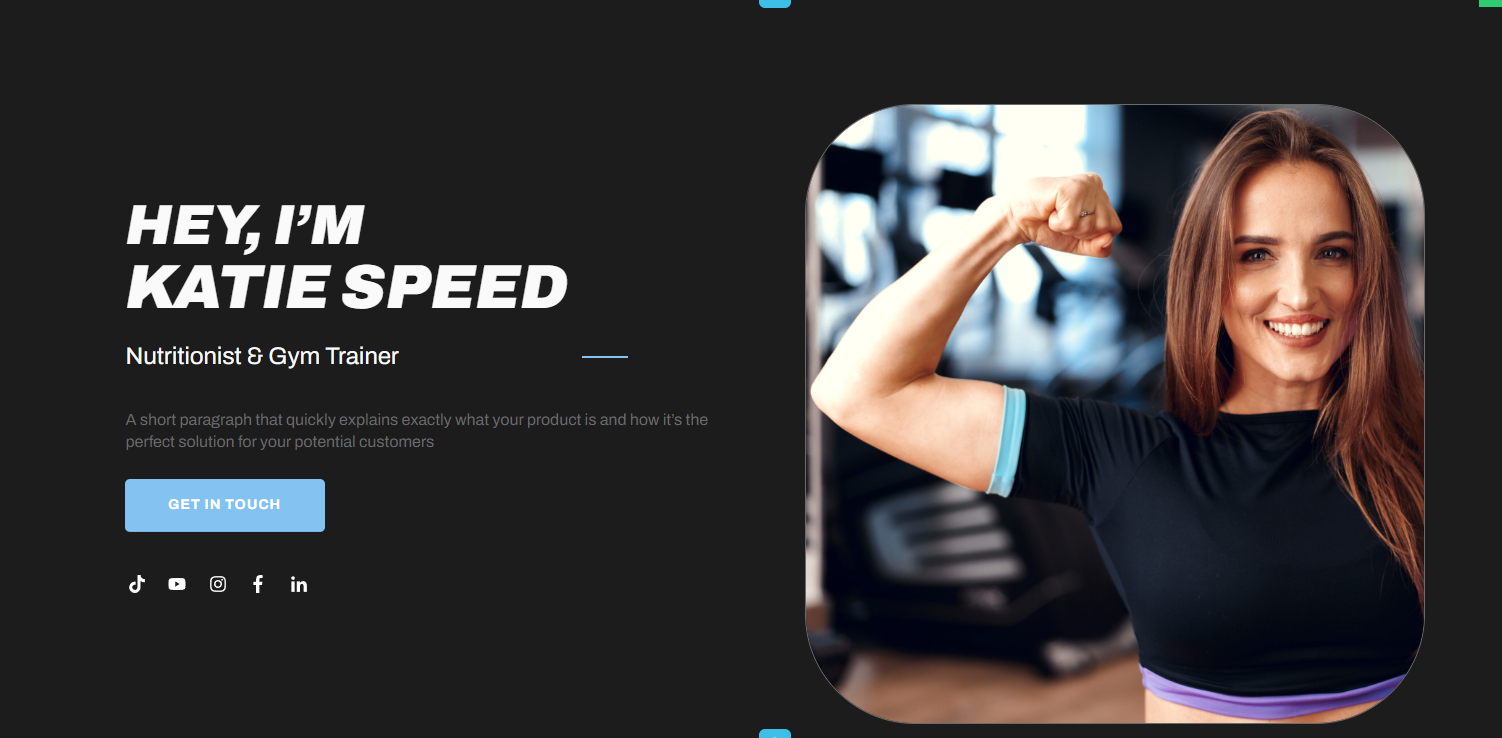
A good hero section must have:
A clear, high-quality image of yourself or something relevant to your business and products
An attention-grabbing headline that addresses your audience’s needs or introduces who you are and what you do
A supporting sub-headline or tagline to briefly elaborate on your headline and provide more information to your audience
A clear, compelling call to action button to prompt your visitors to take action – “Sign Up Now” or “Book a Consultation”.
Features & Benefits Section to Showcase the Value of Your Services
When your potential customers land on your website, they’re focused on one thing: how they can benefit from your services.
Why should they learn more about your fitness business? What makes you different from the competition?
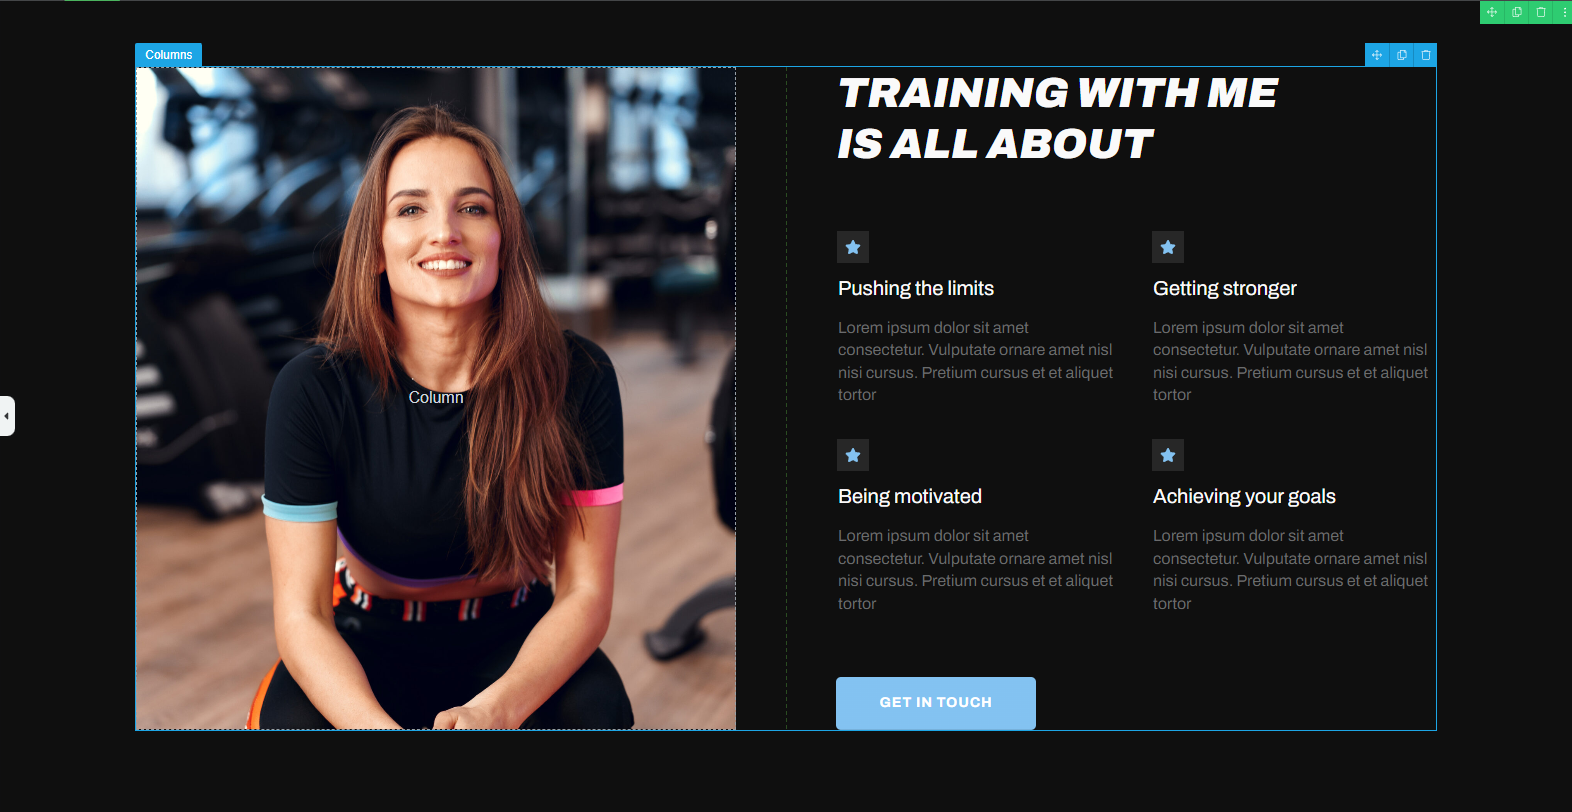
Your audience doesn’t want a long list of what you can offer. They want to know about the final picture. How are you going to solve their problems or improve their lives?
Features are simply facts about your product or services.
Benefits translate your features into value propositions. They show your potential clients why they should purchase your fitness products or services.
Thrive Architect provides a selection of features & benefits sections you can use to clearly communicate how your products will change your visitors’ lives or help them achieve a goal.
Promote Your Classes or Workout Programs
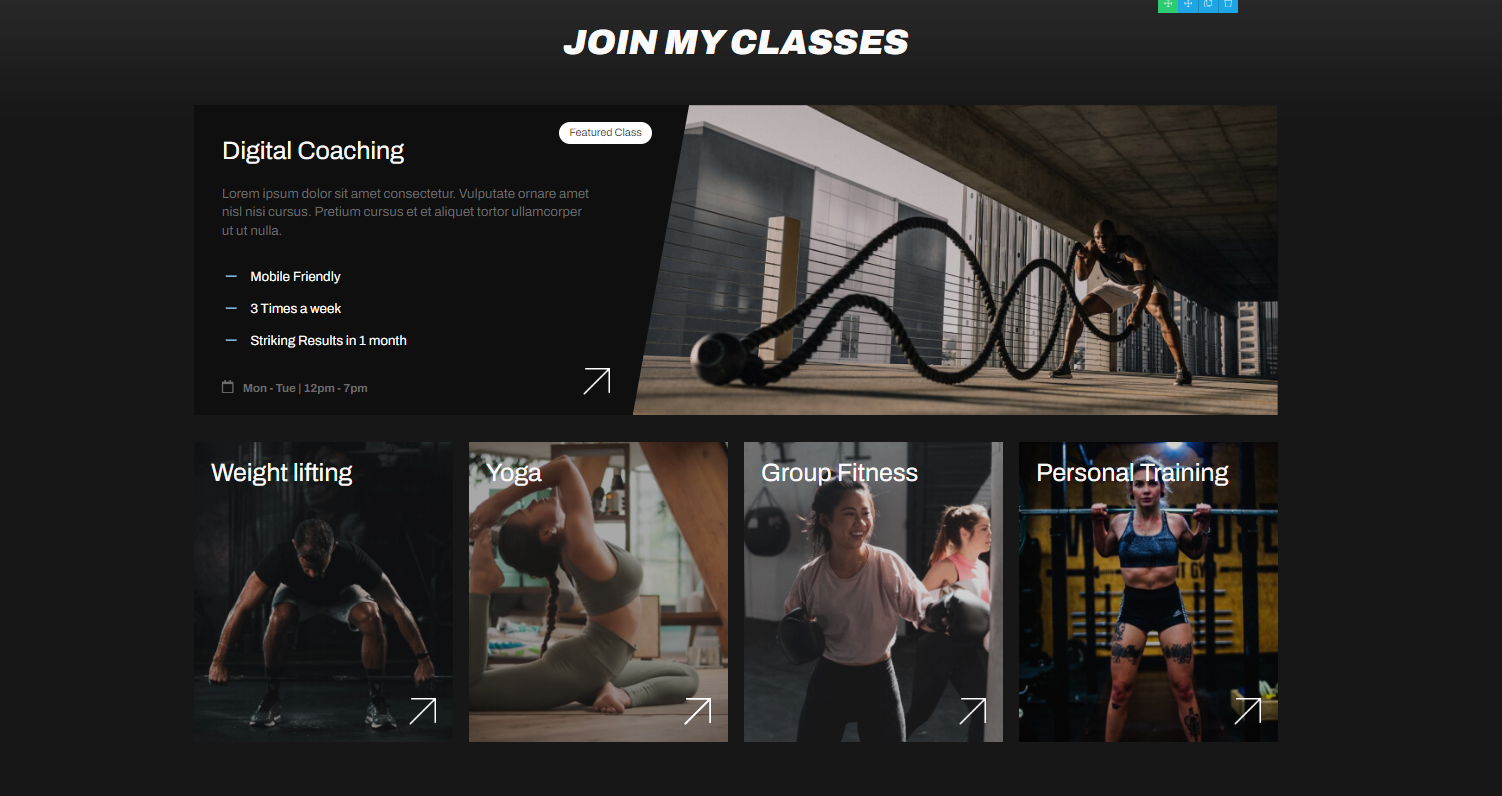
If you host fitness classes (online or in-person), hold training sessions, or sell programs, you’ll want this to feature on your homepage – along with a relevant schedule.
Our homepage templates include a “Join My Class” CTA (call-to-action) section you can customize to put your offerings in the best light.
And if you want people to know when your classes hold, go on and use the “Class Schedule” block template to get it done.

Got a YouTube Channel? Promote It, Too
YouTube’s become a great way for fitness trainers to grow and promote their brands. If you want your website visitors to subscribe to your channel and see your workout videos, just link it to the YouTube Channel block on the homepage template.

Share Your Client Success Stories
Social proof is super important for your fitness business because it shows potential clients that your offering works.
Think about it: when someone’s on the fence about joining your gym or signing up for your program, seeing real stories and pictures of people who've transformed their bodies and health can really seal the deal.

It's like seeing a bunch of good reviews before you try out a new restaurant—it makes you feel more confident about your choice.
Plus, showing off your clients' success stories and progress visuals doesn’t just prove that you know your stuff—it also builds your rep as a trusted trainer or gym in a market that's full of options. When people are looking for help on their fitness journey, they want someone who's the real deal, someone who can genuinely help them succeed.
You can easily add your client testimonials to your homepage or other landing pages using the testimonial block template in the block library.
And speaking of blocks, if you want to give your pages a custom touch – our drag-and-drop editor lets you do just that.

Peak comes with a variety of templates you can add to any part of your landing page, so you can tell your brand’s story your way.
No need to code or add custom CSS.
7. Connect Your Site to Your Email Marketing Service
Connect your email service through API. You will only need to do this once for the first opt-in form you set up.
You can find tutorials for all major email providers here.
Go to your homepage or landing page and click on the opt-in form (if you have one on your page). In the sidebar, click on "Connect form with service" and follow the setup wizard.
You'll be able to configure the fields you want to show (yes or no first name field), and you will also select the action after opt-in.
8. Connect Your Site to Your Checkout Tool
You should be able to accept payments for new subscriptions and purchased products through your website.
There are a lot of WordPress checkout tools to choose from, including:
WooCommerce
Your eCommerce payment tool of choice will have instructions or tutorials on how to create a product, set a price and pricing frequency, and add it to your site’s product page.
After you’ve completed this step, sit back and admire your new business website.
9. Install an Analytics Tool to Track Your Site’s Performance the Right Way
If you’re serious about building an audience and a remarkable online business, you need a reliable Google analytics plugin.
An analytics tool helps you understand how your site visitors interact with your website, so you can make data-driven marketing decisions to grow your business.
We recommend using MonsterInsights to track your site’s analytics.
Bonus: Create a Members-Only Area for Your Site
Once you've built up your community, think about adding a members-only section to your fitness website. This private area is perfect for offering special content, workout programs, and exclusive perks to your paying clients or members. With Thrive Apprentice, our online course and membership plugin, setting up this exclusive zone is super easy and user-friendly.
In this members-only space, you can share detailed workout plans, personalized nutrition advice, and video tutorials that aren’t available to everyone. It’s a great way to give extra love and attention to your dedicated followers and help build a stronger, more connected community.
Plus, having a members-only area can provide a reliable source of recurring revenue. Memberships encourage your visitors to stick around longer, giving you a steady income while you continue to help them achieve their fitness goals. This setup also lets you gather valuable feedback directly from your most engaged users, allowing you to fine-tune your services to meet their needs even better.
Next Steps: Set Up Your First Sales Funnel
After you’ve set up your website, it’s time to focus on your funnels.
Funnels are super important for your online business because they help turn your target audience into paying customers by guiding them step by step through your sales process. Think of them as your digital salesperson, making sure that potential buyers don't just browse, but actually take action and buy what you’re offering.

Building your sales funnel is about creating a seamless flow that guides potential customers through each stage of their buying journey, from initial awareness to final purchase and beyond.
Here are four free tutorials to help you create a profitable funnel that turns visitors into frequent customers who love your business:
Ready to Build Your Fitness Website?
Now you’ve seen how easy it is to go from zero to a clean, conversion-focused fitness website using Thrive Architect and Thrive Theme Builder.
As you get more comfortable with our user-friendly tools, you'll start refining every detail to turn your simple design into an impressive website that offers your visitors an amazing experience — and also gets them to convert.
But most of all, make sure to have fun and we can’t wait to see what you build!


