You analytics data becomes infinitely more useful once you start tracking conversions and revenue. Revenue tracking helps you truly understand what your most valuable pages and traffic sources are and how to improve your website.
Unfortunately, setting up revenue tracking is usually complicated and requires some custom coding. If you're not ready to take that step yet, here's the simplest guide you'll find to start tracking revenue (almost) no matter which analytics tool you use... and all without touching a single line of code!
More...
Price Points Alert!
The method described here comes with one caveat: it only works if you are selling products at a limited number of price points.
Here's the question that helps you find out whether this method is for you or not:
Are there fewer than 5 possible prices your customers can pay on your site?
If the answer is "Yes!" then this method is for you.
Example 1:
You are selling one single ebook on your site (for $17) and it's followed by an upsell product for $99. That means there are only 2 possible prices your customers can pay:
- $17
- $99
Example 2:
You sell three different products at different prices and also a bundle of all three products at a reduced rate. That means there are 4 possible prices your customers can pay:
- $40 for product 1.
- $50 for product 2.
- $80 for product 3.
- $150 for the bundle offer.
In both these cases, you can use the method described here.
Example 3:
You have multiple products and your customers can add as many or as few of them as they want to their shopping carts, before making a purchase.
In this case, there are an infinite number of different price points your customers can be paying you, depending on what's in their cart. The method here won't work for you.
With that out of the way, let's set up our revenue tracking:
1 Price = 1 Conversion Goal
The basis of this method is simple and requires just two steps:
- Ensure that every price point on your site leads to a different success page.
- Associate each success page with a conversion goal and value, in your analytics.
To illustrate, let's look at a real life example: one of my WordPress plugins called Viral Quiz Builder.
The plugin is available at 3 different price points, for 3 different licenses:
$147
For an agency license.
$47
For multiple sites.
$39
For a single site.
In the checkout settings in our membership/ecommerce/payment processing system, we make sure that a customer will land on a different page, depending on which license they purchased, such as:
http://viralquizbuilder.com/purchase-confirmation-agency/
http://viralquizbuilder.com/purchase-confirmation-multiple/
http://viralquizbuilder.com/purchase-confirmation-single/
In our analytics, we then set up a conversion goal for each of these pages and associate the product price with it.
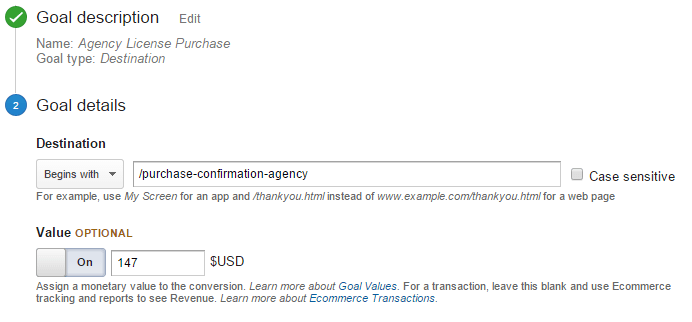
Here's what the goal setup would look like in Google Analytics:

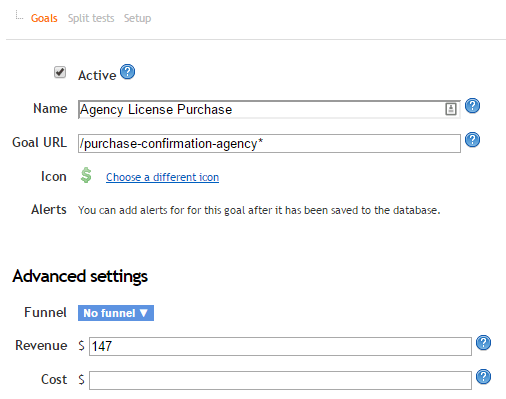
Here's what it looks like in Clicky Analytics:

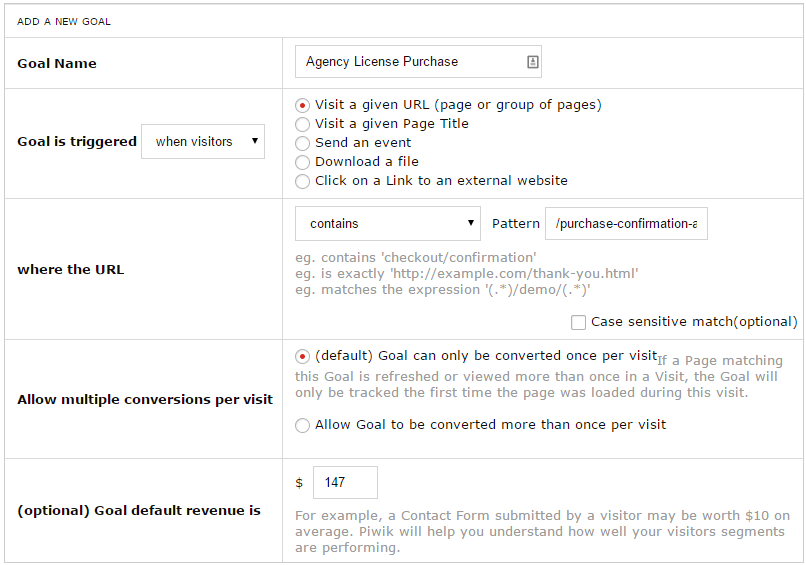
And here's an example using Piwik:

The different success pages you set up for each of the price points don't have to be different in terms of the content and message on the page, they just need to be on separate URLs. If you're using one of our themes, you can use the cloning feature to quickly create the success pages you need.
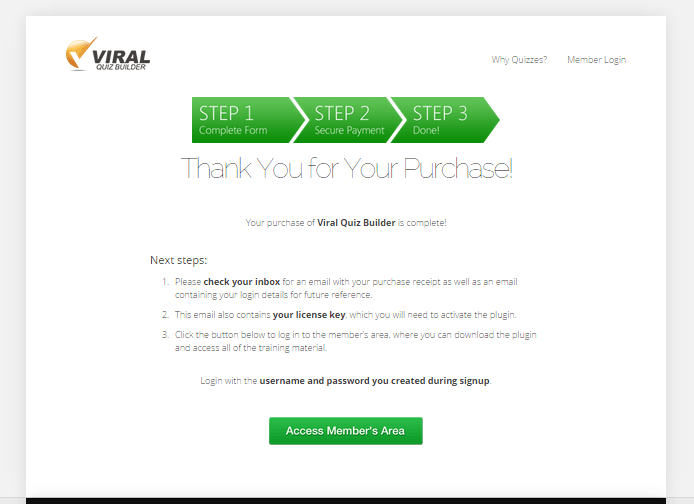
Here's what all of the confirmation pages in our example look like:

Make sure you set these pages to noindex and nofollow, since they aren't the kind of pages that you want showing up in search results. You can use the Yoast SEO plugin for this.
Quick & Somewhat Dirty
By now, I'm sure you realize why I only recommend this method if you have 5 price points or fewer. Managing and tracking more than 5 different success pages quickly becomes messy and instead of juggling all these pages, I recommend you hire someone to integrate your purchase process with custom goal value reporting - a feature that is available in any decent analytics tool.
But if you do have fewer price points, then this is a fairly quick and non-technical way to increase the value of your analytics data significantly.
Please leave a comment below with any questions or feedback you have about this post!


Great article Shane – I’m pretty sure you can simplify this even more with clicky by using dynamic goals – passing through a value into a single confirmation page!
Interesting you demo’d this using Clicky, GA and Piwik. I’ve personally used all three for a while and by far and away prefer Clicky. What is your go to analytics plugin of choice?
Hi Steve,
That’s true, but for non-techy people passing dynamic goal values is not a simple task. That’s what I made this guide for. It basically follows the same idea as my RAPID course: it’s not the perfect solution, but it’s far better to set this kind of tracking up (today) and then worry about getting a better setup in place afterwards, than putting it off forever because it’s not perfect.
As for what tools I use. I’ve spent so much time searching and testing that the answer is no longer a simple one. I present you this massive post and this slightly less massive post.
Thanks for the simplified version!
Super informative…