With Thrive Automator, there are plenty of flows that you can create in order to automate your work.
We have decided to create a series of articles in which we show specific examples of automations that can be created using our new plugin.
This article will show you how to create an automation for users who purchase a Thrive Apprentice course from your website. You can use Thrive Automator to set up a workflow in which all users that make this purchase will be automatically tagged in your autoresponder and receive a thank you e-mail with a discount code that they can use on their next order.
|
For this walkthrough you will need to do the following:
|
Important!
This automation only works for the already existing users on your website, who are also part of your mailing list. The visitors who do not have an account (and are not added to your autoresponder mailing list) will not be included to this workflow.
Here are the steps for achieving this:
1.Set up the Product in Thrive Apprentice
Start by setting up your course and adding it to a product:
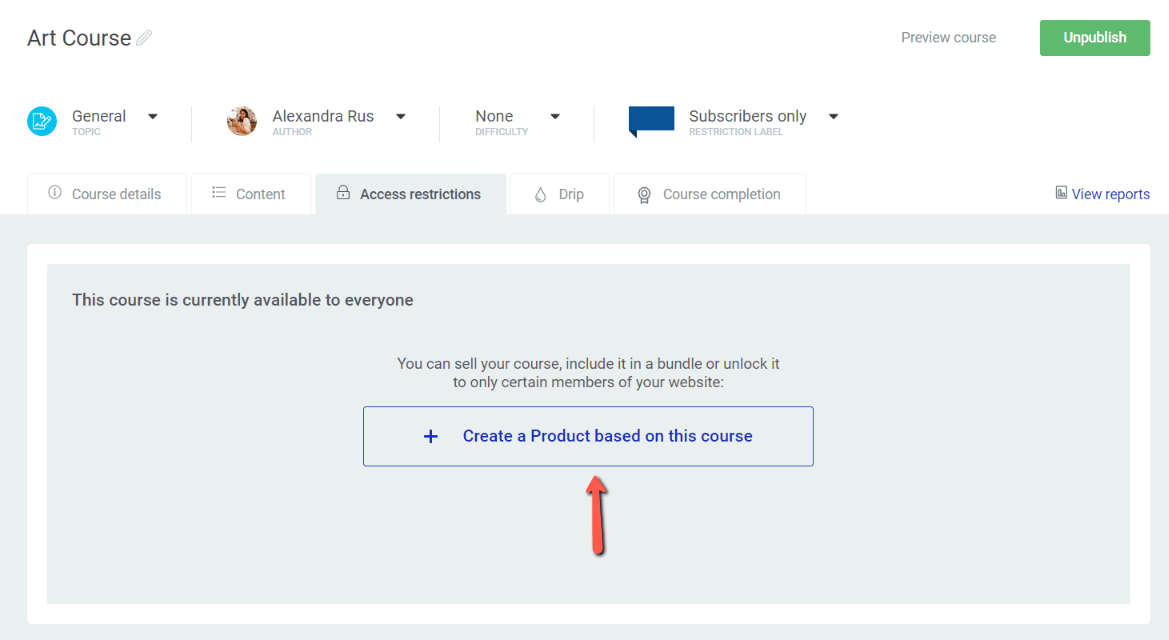
After you do this, you will be redirected to this view where you can set up access restriction rules and other requirements:
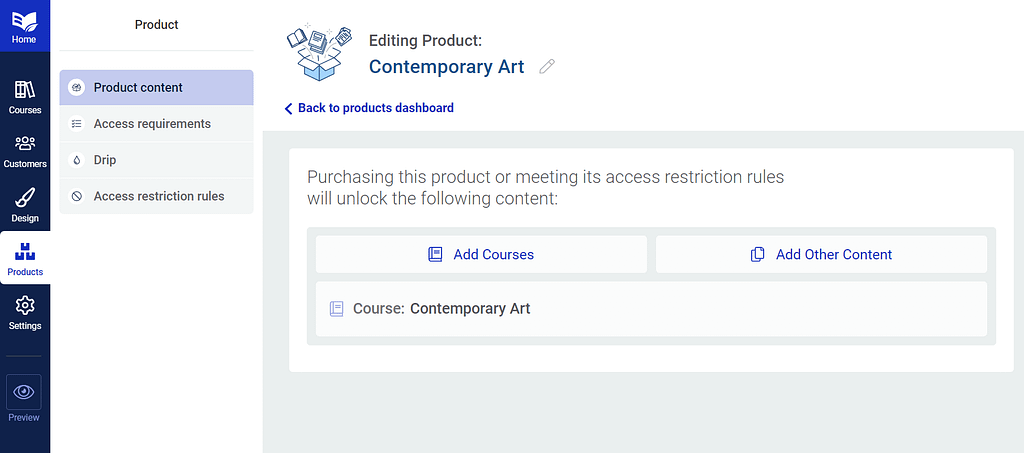
You can use the options from here to configure who gets access to this product, as well which pages will be displayed to those visitors and users who do not have access to it.
2.Set up the ‘Access requirements’ in Thrive Apprentice
Click on the “Access requirements” tab:
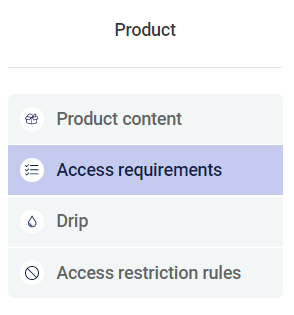
Here, make sure that that access to this product is granted only to those users who are purchasing the product through SendOwl:

We have several articles in our knowledge base that explain how you can create a SendOwl product and how to tie it to your Thrive Apprentice courses:
Don’t forget to click on “Save” before moving on to the next step:

3.Configure the ‘Access restriction rules’
Next, move to the “Access restriction rules” tab:
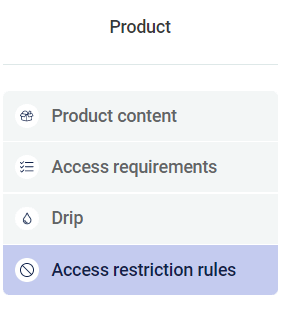
This is where you can configure the pages that will be shown for the users who do not have the right permissions to access the product:

- User not logged in
For the users who are not logged in you can use the “default site behavior” that’s set up in the “Settings” section of your Thrive Apprentice:

Here’s an article that you might find useful if you want to read more about setting up this page.
- Not yet purchased
For those users who are already logged in but have not purchased the course, you will have to use the “Display custom content” option:

Important!
In order to start the automation, the users will have to land on the restricted content page, that shows up when you choose the “Display custom content” option:
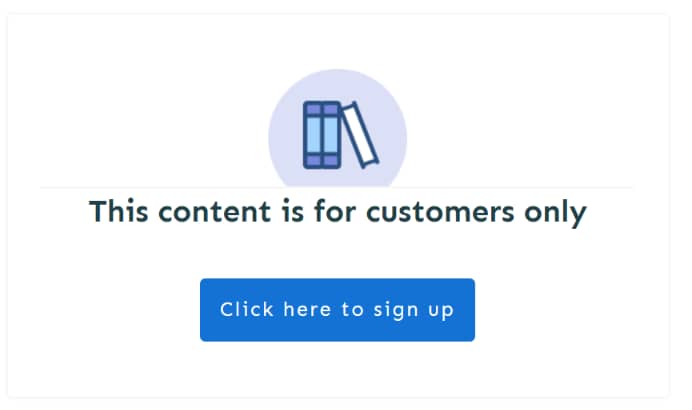
So, when you get to this step, make sure the “Display custom content” is selected.
Just like in the case of any other page, this too can be customized:

The page comes with a default template, and you can choose to customize it if you want or keep it as it is.
I’ve changed the button text slightly and also I made sure that I’ve applied the purchase link to it:

When clicked, the button should redirect the user to the checkout page of the service you are using to sell your course. It might be a course that needs to be purchased through a membership plugin or a checkout tool (such as MemberMouse, SendOwl, ThriveCart, etc.).
In this example I am using SendOwl, and I’ve generated the purchase link directly from the SendOwl tab of my Thrive Apprentice settings:

This article from our knowledge base might be useful to you if you want to learn how to generate a purchase link:
And this article will take you through a step by step process for selling your Thrive Apprentice course with SendOwl:
4.Set up the Automation in Thrive Automator
Now you can proceed with the final step, which is creating the automation. Firstly, access Thrive Automator from the Thrive Dashboard:
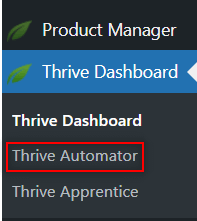
If you have not yet created any automations, you’ll be taken to this dashboard where you can add your first automation. If you have previously created automations, you can simply proceed with adding a new one:

You’ll next have to select the trigger that will set off the automation:

Open the drop-down list and select the “User makes a Thrive Apprentice purchase” field:
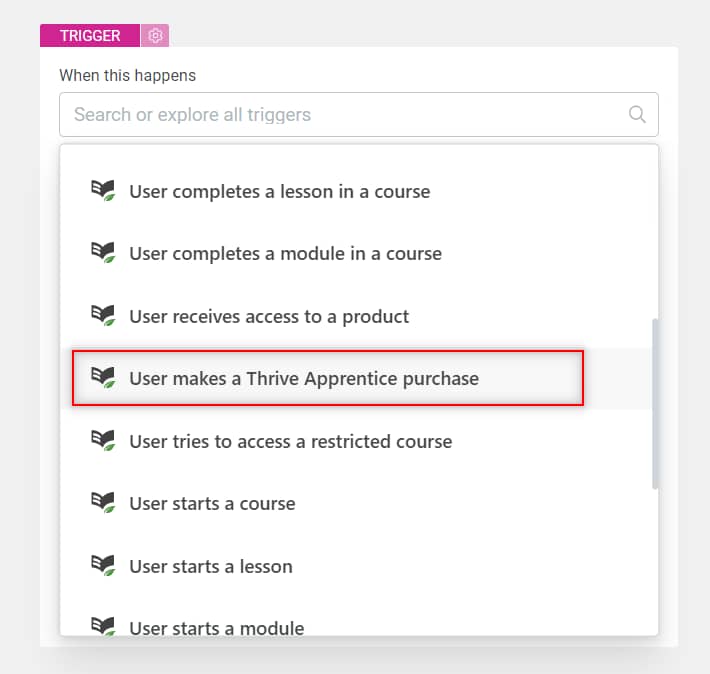
Now move to the next step and set a condition for this trigger. This means that the trigger will only fire when the condition is met. Open the drop-down list:

Select “Product name” from the list:
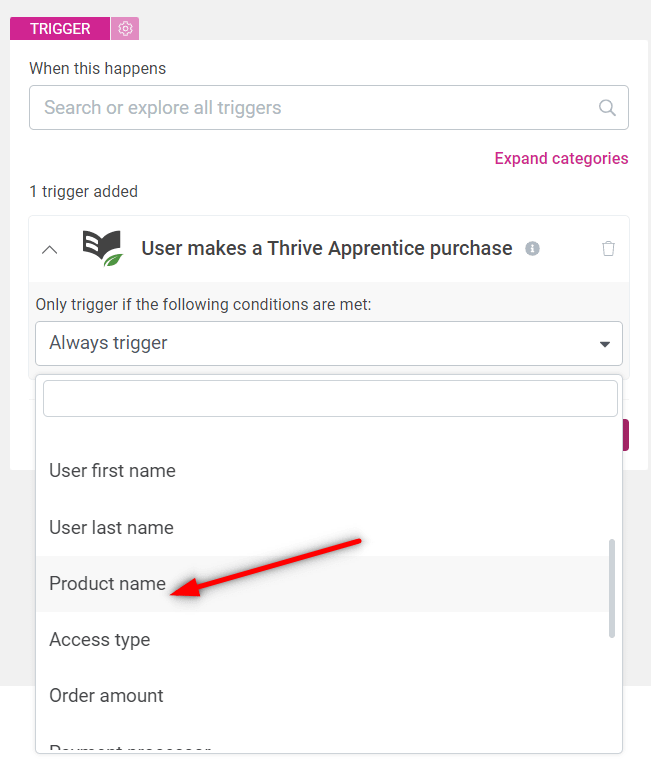
Then make sure you insert the exact product name as you’ve set it in SendOwl:
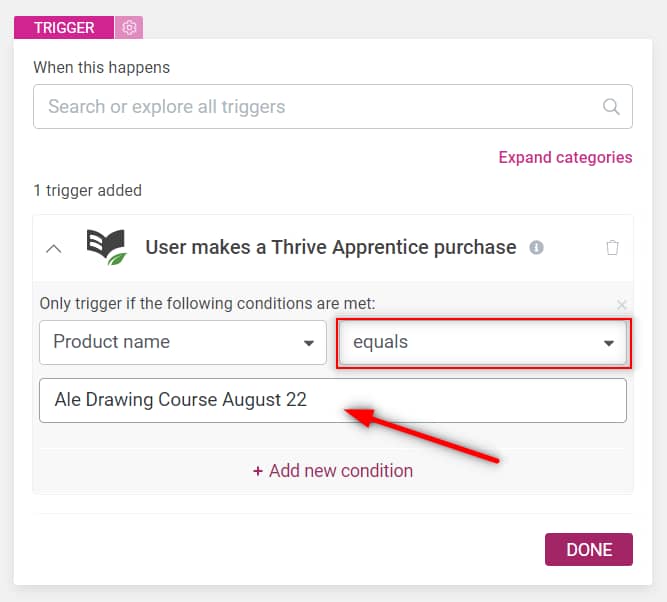
This condition will allow the automation to continue its flow only if the course title matches the one that you set up in this field.
Once everything is set up, click on “Done”:

Proceed with adding a new action to your automation:
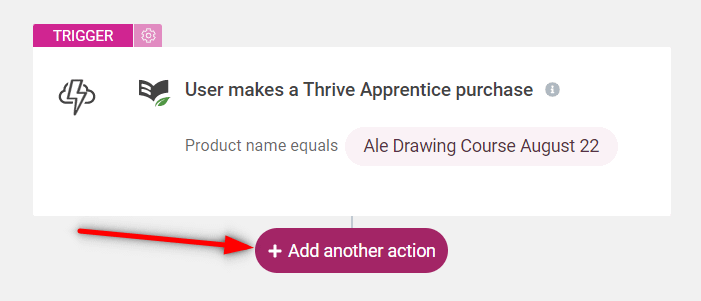
For this example, the trigger will be followed by the action of tagging the user in your autoresponder. So go ahead and add a new action for your automation, like so:
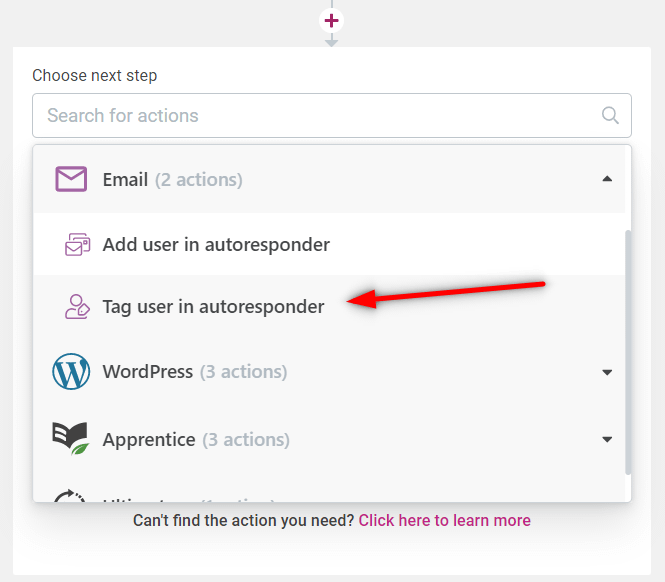
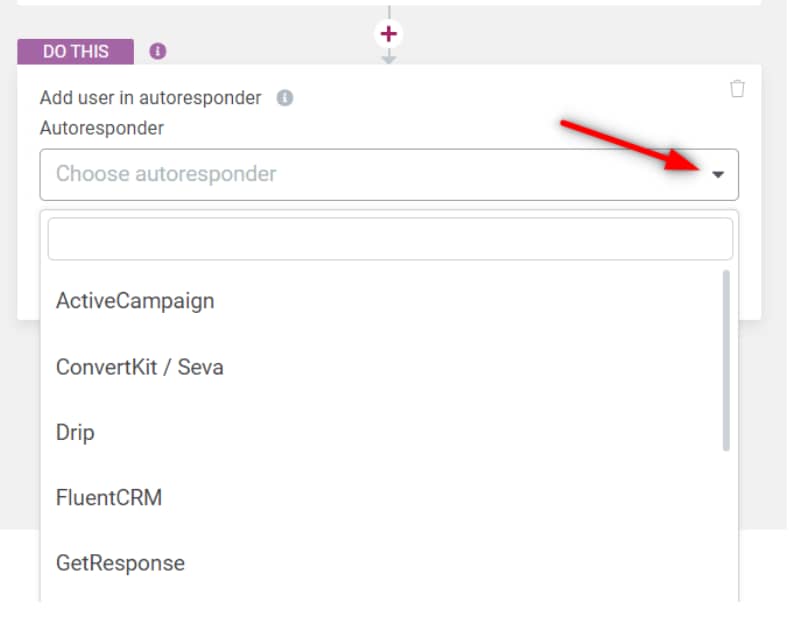
You will next have to choose the service that will be used. Open the drop-down list and pick the autoresponder:
And lastly, type in the tag that will be assigned to all users who trigger the automation and hit ‘enter’:

Make sure that you have a valid API connection set up in your Thrive Dashboard with the autoresponder of your choice. Here’s a list of all the services that support API integration with Thrive Themes.
Furthermore, as mentioned at the beginning of this tutorial, your users need to already be added to your mailing list in order for you to use the “Tag user in autoresponder” action.
This can be achieved with the help of a “Lead Generation” element that’s added anywhere on your website, through which the users can register to your newsletter, for example.
Note: In your autoresponder, you will have to set up the e-mail with the discount code that will be automatically sent out once the user is tagged in your mailing list. The process might be different depending on the autoresponder you are using.
For this example I’ve used ActiveCampaign, where I’ve set up an automation that sends an email immediately after someone is tagged with the tag I’ve set up in Thrive Automator:
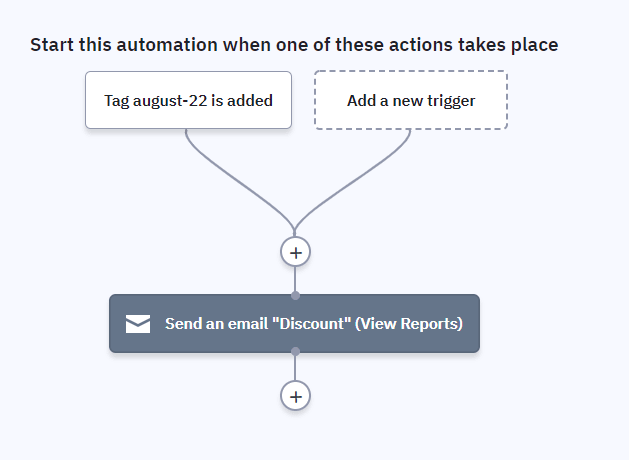
The email contains the discount code that the students can use when making another purchase on the website.
This is all that needs to be done at this stage. The automation should look like this:

Now, the only thing left to do is to save your work and activate your automation.
Also, if you haven’t done this at the beginning of your automation, don’t forget to rename it as it will be easier for you to find it if you are planning on creating multiple automation on your website:

And that’s pretty much it!
This is how you can automatically tag and send out a discount code to all users who purchase a Thrive Apprentice course from your website.
Hopefully, this tutorial was useful to you! Make sure to check out the dedicated section from our knowledge base, if you want to learn more about Thrive Automator.