Do you want to add your website users and visitors to an autoresponder while they register on the website? With Thrive Themes it is possible for you to register a user to your website and simultaneously add him to an autoresponder of your choice.
In this article, we’ll be using the “Login & Registration” element, to show how you can simultaneously allow your visitors to register to your website to access one of your Thrive Apprentice courses, and add them to the mailing list of your chosen autoresponder.
To proceed, please ensure you have followed the steps in the following documents in order.
- Understand the working of Thrive Apprentice
- Create a Thrive Apprentice course
- Create a free online course funnel
After your course is ready and published, you will have to set up some access rules so that only the visitors who register on your website can access it.
Creating a Product in Thrive Apprentice
In order to set up access rules, you’ll have to create a product in which you can add your course (and other content types, as well).
To create a product in Thrive Apprentice, refer to our detailed document here.
Setting up Access Requirements for the Product
Once you’ve created and set up a Thrive Apprentice product, navigate to the Thrive Apprentice dashboard >> Products, and click on the product you’ve created.
On the Products settings page, click Access requirements in the left column.
On the Access requirements page, click on WordPress Role.
Since you want to add registered users to a mailing list in an autoresponder, the role you need to select under WordPress Role is Subscriber.
After you select the WordPress role in access requirements, click the Save button seen in the bottom right.
To know more about access requirements and how you can publish subscriber-only courses, read our documentation here.
Adding a Login & Registration Form to a Post/Page
After setting the Access Requirements, the next thing you need to do is to create a page or post in which you can offer the visitors the possibility of registering to your site so they can get access to your course.
The easiest way to do that is with the help of a “Login & Registration Form” element. This element allows you to quickly set up a form through which any visitor can register to your website.
After the element has been added to your page, click the element and see the “Main Options” open in the left column.
Under Main Options, select the Type of form as Register.
When you select Register type form, click the Edit Form Elements button.
This will take you to a new set of options, specific to the registration type of form. Our goal is to set up a connection with an autoresponder so that each new visitor who registers will also be added to our mailing list.
You can notice that the WordPress account is already set up by default, due to the fact that the connection is required whenever someone is registering for a WordPress account:
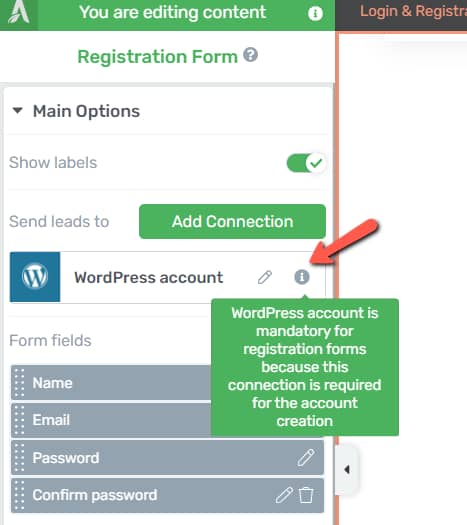
Let’s see how to use these options in order to add your newly registers users to your autoresponder mailing list as well.
Set up the API Connection with Your Autoresponder
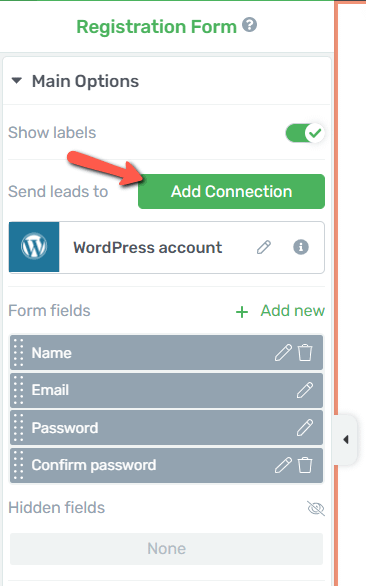
In order to add a new connection with your autoresponder, click on “Add Connection”:
Next, open the drop-down list and browse through it until you find your email delivery provider/service:
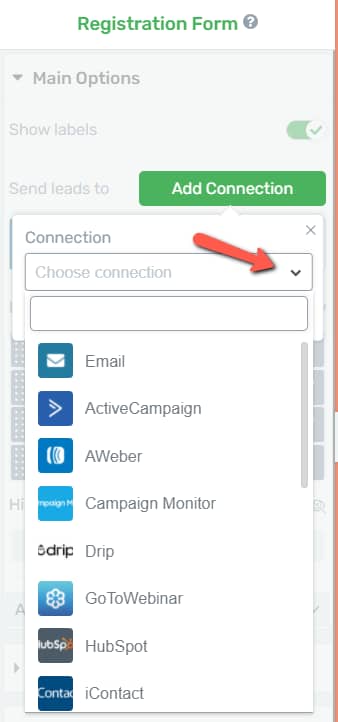
For this example, I will use Mailchimp, and as soon as I select it from the list, I will be able to set up additional details, such as which mailing list should the user be added to, the type of opt-in for this integration, the tags that can be applied to the form and so on:

If you want to use Mailchimp as your preferred service, just as in the above example, then this article explains how to set up and use an API connection with them.
Important!
This connection works only if you have an active API connection with your autoresponder set up in your Thrive Dashboard.
Set up a GDPR Checkbox
Lastly, since you are adding your newly registered users to your mailing list, you should be GDPR compliant and have their consent to do that.
For that, you can set up a GDPR checkbox that the visitor can tick and thus allow you to access their personal data.
From the same connection pop-up, click on “Add new”:
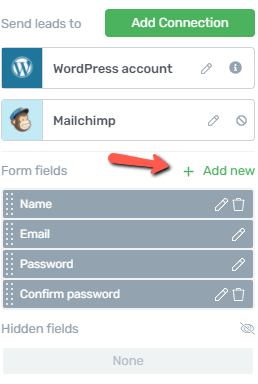
Now set up the new “GDPR Checkbox” field type from the list of available “Custom fields”:

We recommend leaving these connections unchecked so that the GDPR field will be mandatory for anyone filling in the form:
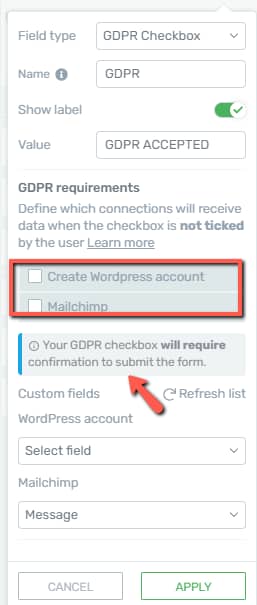
You can then configure all the remaining options as per the guidelines from this article. Once you are done, click on “Apply”, and your connection is now successfully created and ready to be used.
Now all the visitors who are registering on the website in order to access a Thrive Apprentice course will also be added to the chosen mailing list.
This way, you can send very specific offers and promotions only to those subscribers who were added to your list through this funnel. Your email marketing campaigns can be targeted to a specific set of subscribers, based on their previously shown interest in your Thrive Apprentice course subjects.
We also have a video tutorial showcasing this process (but with an opt-in form, instead of a login and registration form). However, the steps are mostly the same for both cases, so this video might come in handy to you:
Hopefully, this article about how to register users to your site and add simultaneously add them to your autoresponder was useful to you. If so, don’t hesitate to rate it with a smile below 🙂