Add the Element to Post/Page
The “Pricing Table Element” will give you a quick and easy way of adding a pricing table to your website.
First, look for the element in the sidebar:

Drag and drop it to your page and you’ll be prompted with a template library:

Pick the one that you like and as soon as you do that the element will be added to your page and the left sidebar options will become available for you to use:

Choose the Template
This option will allow you to change the template of your pricing table anytime:

A pop-up window will open, containing multiple templates you can choose from:
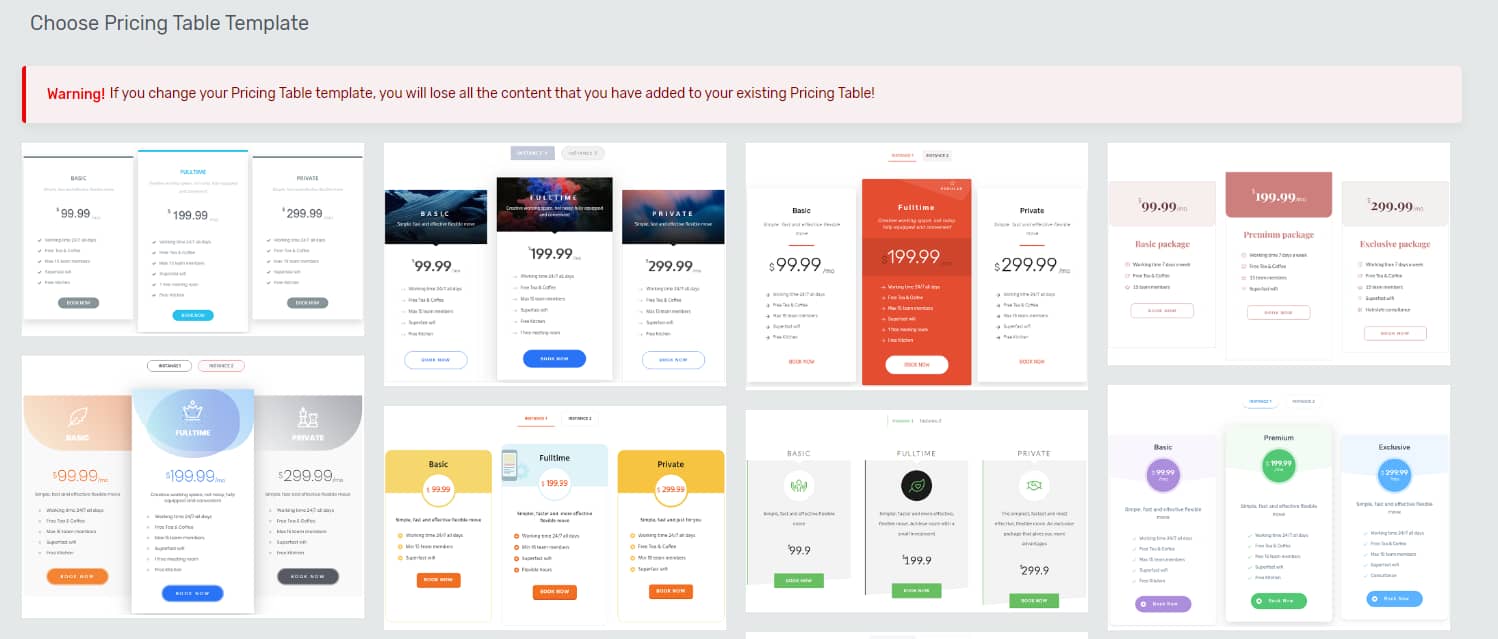
This comes in handy, not only because you have a variety of designs here, but also, because there are templates here that match the Thrive landing pages.
In case you have built your website using one of the Thrive landing page sets, then, you can select the matching template from this pop-up. Look for the same name as your landing page.
After you have selected the suitable template, click on “Replace Template”:
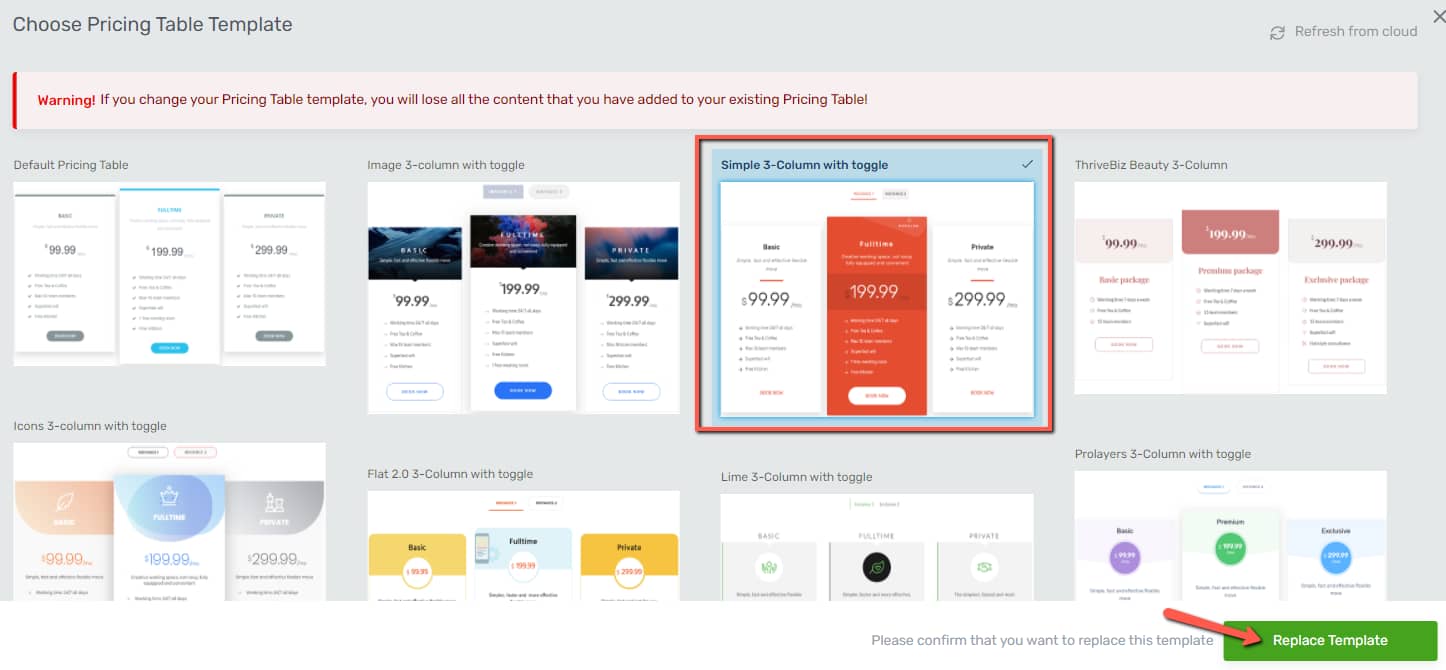
Note: If you want to replace the template, make sure you do this before adding any content or customize the existing content of the “Pricing Table” element. This is because, when changing the template, all the initial content and modifications will be lost.
Use the Main Options
Inherit page smart colors
If you are using the element on a smart landing page, then you’ll get this option that allows you to inherit the smart colors of the landing page:

if you deactivate the toggle, you’ll get this color picker that you can use to select a different color for your pricing table:

Instances
By default, the pricing table has a default instance. This is important because it gives you the possibility to have multiple states for your pricing table.
For example, you can have prices for beginner and advanced memberships, or monthly payments and yearly ones, etc., depending on your products and services:

You can use the following options next to the instance to modify it:
Edit
The first option, represented by the pencil icon, lets you edit the name of the instance. Click on it and replace the default “Instance 1” name, with a name that represents the state of this instance.
So, for example, you can replace it with “Monthly subscription”. The changes you make here will be instantly visible in the editor too, above the price boxes of the pricing table:

Duplicate
You can use the second option to duplicate an instance. All you have to do is click on this option and you will see a copy of the instance appear in this section of the sidebar, as well as in your pricing table in the editor:

Remove
If you have duplicated an instance or added new instances to the list, a new button will show up next to the “Edit” and ‘Duplicate” icons, allowing you to delete the instances:

Make this default instance
If you have multiple instances, you can decide which one you would like to set as the default one:

Add new instance
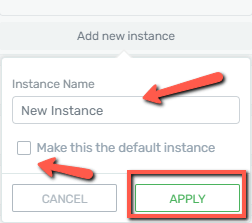
You can add multiple instances either by duplicating them, as detailed above or by adding a new one from the “Add new instance” button located in the lower part of the “Main Options” sidebar:

Clicking on the “Add new instance” button will trigger another pop-up where you can give the instance a name, and even set it as the default one if you want:
Price Boxes
You also have the possibility to manage the price boxes that can be found within the instances of your pricing table.
Edit, Duplicate & Remove
Just like in the case of the instances, you can find three options next to the name of each price box.
You can edit their name using the first option. You have to click on the pencil icon and then, replace the name of the price box with the name that you want to give to it.
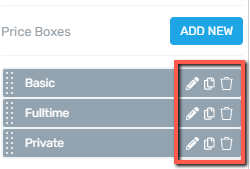
Note: Keep in mind that the name you enter here will not be visible in the editor. This is something that only you can see and it is meant to give you an easier way of keeping track of your boxes.
You can also duplicate the price boxes if you click on the second option and make adjustments to the duplicated box, or you can remove the price boxes if you don’t need them anymore, by clicking on the third option (trash can icon).
Add New and Rearrange
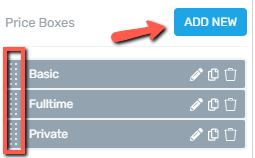
You can add new price boxes to your element by clicking on the blue “Add New” button.
In case you want to rearrange the price boxes, you will have to hover your mouse over the dotted lines next to their names, and after that, drag & drop them to the desired position:
Note: The newly added price boxes will have the default template, thus, you will have to customize them separately.
Gutter Width
This option allows you to adjust the spacing between the price boxes. In order to do that, you have to drag the slider under this option or enter a value manually in the box next to it:

Wrap price boxes
This option is useful if you want to place a price box under the other ones. You can do this by checking the “Wrap price boxes” option and then, using the slider under the “Minimum Price Box Width” to place the price boxes under the other ones:

Besides using the Pricing Table Options, you will have to change the content of the pricing table by clicking on each element (titles, prices, descriptions, buttons) and replace the text with your own prices, descriptions, etc.
Furthermore, if you wish, you can customize every element within the pricing table separately as well and use the various options these elements have to change the way your pricing table looks like.
In order to do this, you will have to click on each individual element and use their sidebar options. If you need detailed information on how to customize the various elements of the pricing table (like Buttons, Content Boxes, or Styled Boxes) please consult our Knowledge Base.
Note: If you have edited a separate element and you want to return to the options of the Pricing Table Element, you can either click on the Pricing Table Element itself, or on the “Pricing Table” from the breadcrumbs. Then, click on the Pricing Table options from the sidebar.
When you are done, you can save the page and preview it to see how the pricing table will be displayed for your visitors.
Here you can find a blog post with tips on how to use the pricing table element efficiently.
Use the Rest of the Options
Just like in the case of other elements, besides the “Main Options”, you can use some other general options, as well (such as Layout&Position, Borders&Corners, etc.):

If you want to know how to use the rest of the options from the left sidebar, make sure to take a look at the articles and tutorials from our knowledge base.