The “Fill counter” is a data element from Thrive Architect, which comes in handy if you want to show data like percentages on your website.
Add the Element
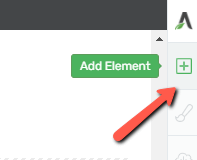
The first thing you need to do in order to use the element is to open the page or post on which you want to place it, and then, click on the plus sign from the right sidebar:

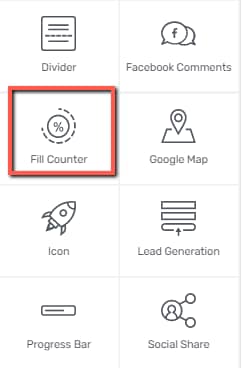
Look for the “Fill Counter” element within the available list of elements:

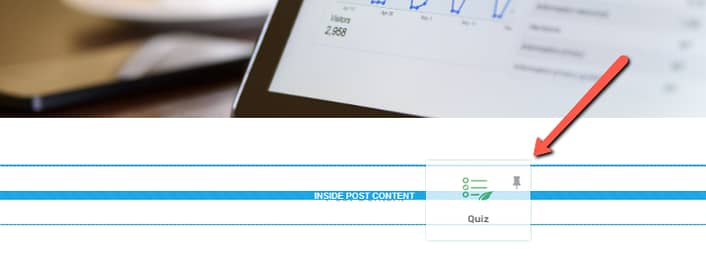
Drag and drop the element to the desired location on your post or page:

As soon as you do that, the “Main Options” of the element will appear in the left sidebar, allowing you to further customize it.
Use the Main Options
With the help of its specific options you can have a “Fill Counter” that best suits your needs:

Counter Size and Fill Percentage
Simply drag the slider under these options or enter a value manually in the box next to them, to change the size or the fill percentage of the “Fill Counter”.
Keep in mind, that changing the “Fill Percentage” won’t automatically change the percentage number on the counter. You should think about the inner part as a separate part of the counter.
If you wish to change the percentage number or the “Fill Counter” label, click on them and edit the inline texts:

Note: If you have previously used the “Advanced Custom Fields” plugin to set up a “Number” custom field, then you will have the possibility to use that field for the “Fill Counter” element.
In such cases, the section with the “Element Type” options will appear after the “Counter Size” one, and you have to choose “Dynamic” from it, in order to use the custom field:

Read this article in order to find out how to do use custom fields with the “Fill Counter” element.
If you want to use the “Advanced Custom Fields” plugin, but you are not familiar with it, make sure to check out this article and follow the steps accordingly.
Keep in mind that the “Element Type” options will be available only if you have followed the steps presented in the article mentioned above.
|
Important! Please keep in mind that, if you modify the numerical value directly from the editor, the value from the left sidebar, under the “Fill Percentage” field, will not be affected:  |
Circle, Fill, and Inner Color
There are three colors of the “Fill Counter” that you can change: the “Circle” color, the “Fill” color and the “Inner Color”. Each of these can be changed by clicking on the color box next to them and selecting the specific color from the color picker:

Match fill value with dial value
The last option available in the sidebar is the “Match fill value with dial value”:

If you activate this option, the numerical value shown within the “Fill Counter” will be directly proportional to the filled circle.
Below you can see two images that exemplify this:
-
this is how it looks with the option active:

-
this is how it looks with the toggle deactivated:

Use the Rest of the Options
In case you want to make further adjustments to the “Fill Counter” elements, make sure to use the other available options of the left sidebar:

You can find dedicated articles about each of these options in our knowledge base.
This is how you can use and customize the “Fill Counter” element. I hope you found this article useful. If so, don’t hesitate to rate it with a smile below :).