When setting up the Progress Bar element, you can display the current progress of the bar, using the “Current Progress” option, found in the left sidebar, with the rest of the options for this element:
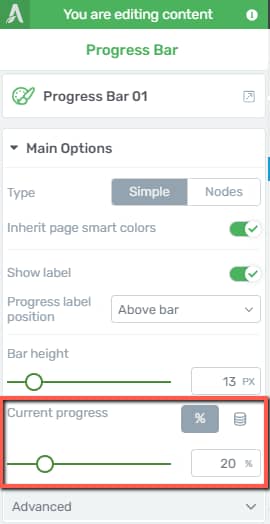
Here, you have two options. You can choose to insert a “Static value” for the progress of a dynamic one.
If you want to choose a static value, click on the first option here:
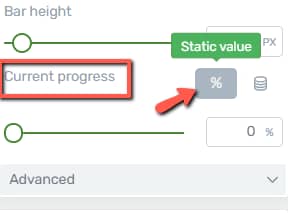
You can use the slider below the option, or simply enter a numerical value in the field next to the slider:

The second option you have here is the “Dynamic value” one:

In this case, the bar will be populated using dynamic data. If you click on the first field from this option, you will see the options that can be configured here:
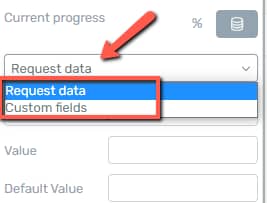
Here are the different options that you can use, to fill in the progress bar, as well as some examples of how you can use them.
Note: If you are using the “Progress Bar” in the content of one of your Thrive Apprentice lessons, then you’ll have one additional option here:
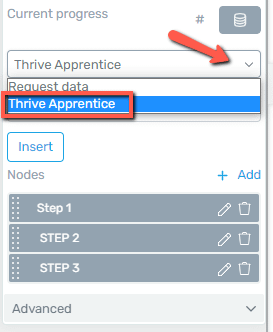
You will be able to use dynamic data to display the actual progress made on one of your Thrive Apprentice courses. This feature is only available if used on a Thrive Apprentice lesson content.
We have a separate article in our knowledge base which explains in detail how you can use this feature.
Request Data
We’ll start with the first option, which is the “Request Data” one:
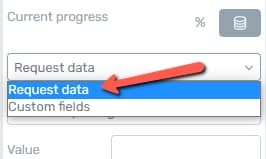
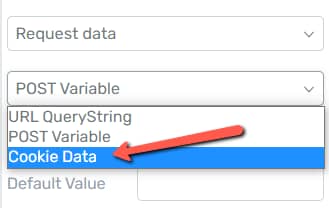
If you select this option and click on the next field, you will have three choices:
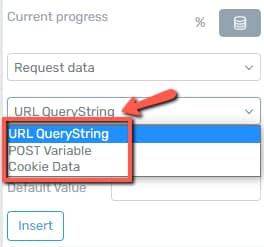
As you can see, you will be able to request data using three different methods.
URL QueryString
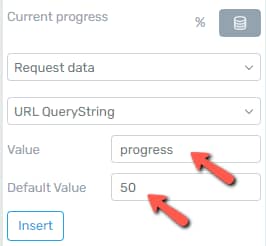
If you choose to populate the “Progress Bar” using this method, enter the “Value” and “Default Value” in the two fields:
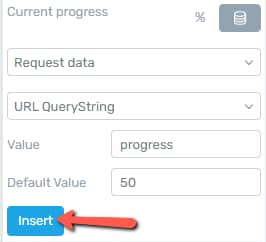
Then, click on “Insert”:
Make sure to save everything by clicking on the green “Save Work” button:
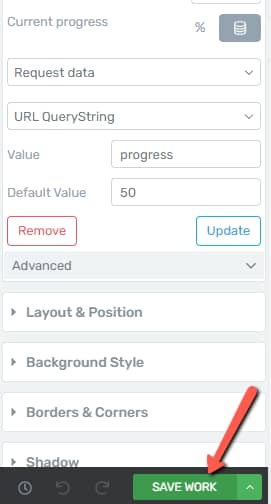
Now, if you have added a number in the “Default value” field when you preview the post/page, the bar will show that progress. For example, in my case, the “Progress Bar” will be at 50%:

If you do not add a “Default value”, the bar would not show any progress, it will start from zero.
To modify the value and the progress shown, go to the URL of the page and, at the end of it, add this part: ?value=number, where:
-
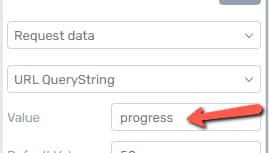
"value"will represent the value added here, in the “Value” field:
-
"number"will be the percentage of the “Progress Bar” that you want to be shown;
In my case, the URL will look like this:

Thus, when you access the new URL, the progress bar will show an 80% progress:

POST Variable
This method allows you to fill the progress bar with values that are received via a POST request.
For example, you can create a form that redirects the users to one of your posts/pages, on which the “Progress bar” will show a certain value.
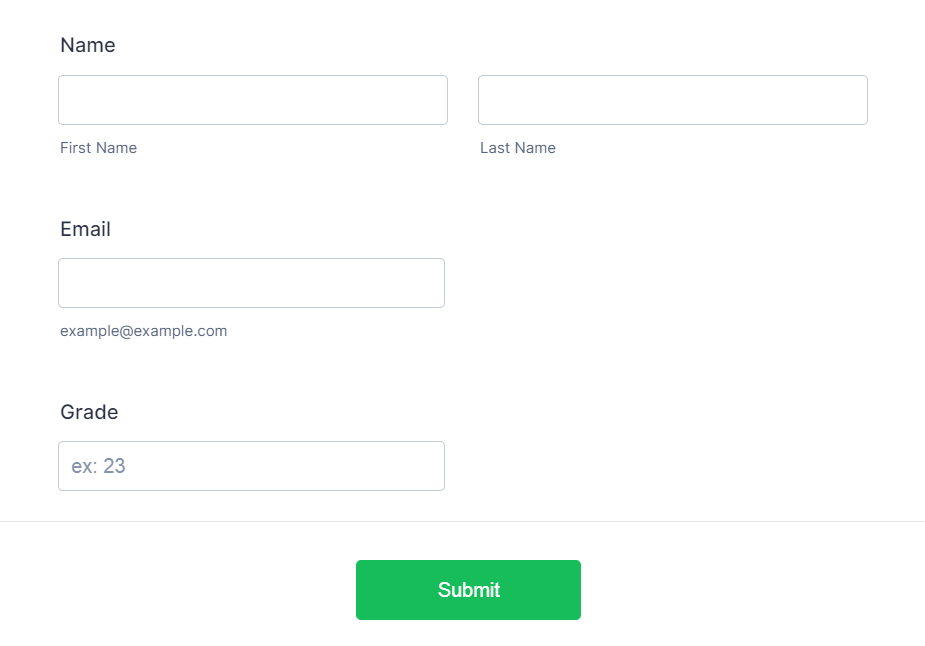
To exemplify this, I will use Jotform to quickly create a form. When someone fills in the form, they will be redirected to my page, on which they will be able to see their progress using the “Progress Bar” element.
I will add the “Name”, “Email” and “Number” types of fields to my form:
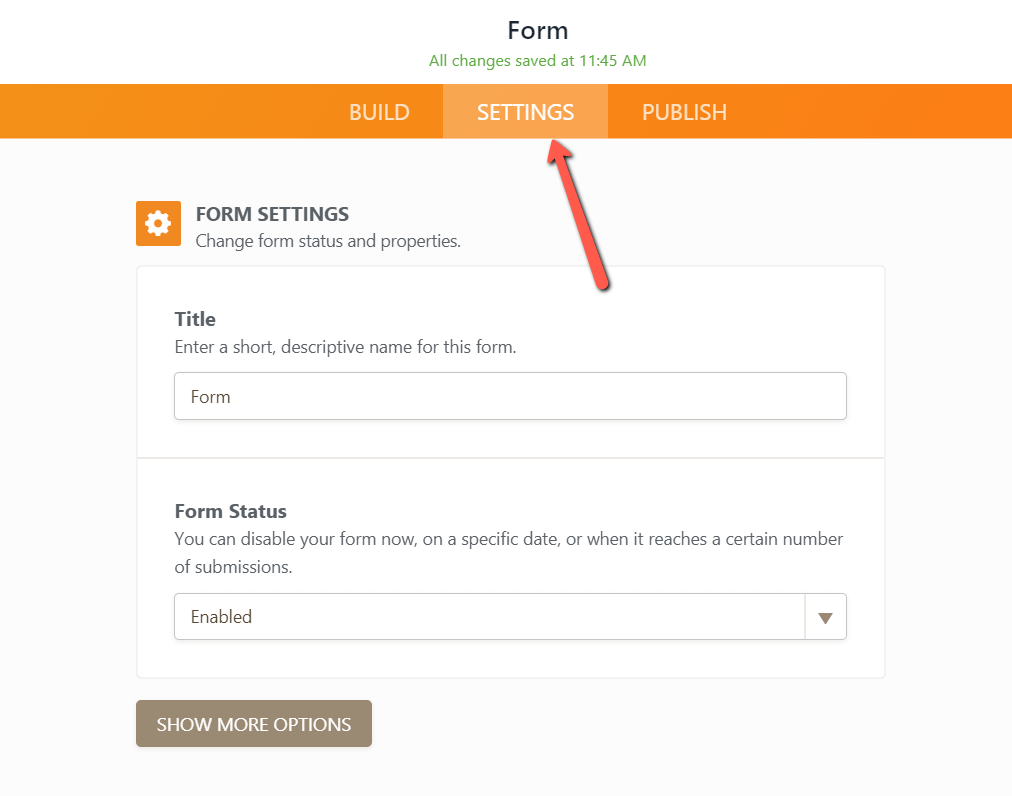
When setting up the form, an essential part is to allow POST variables to be sent to your website. For that, you will have to access the “Settings” section:
Click on “Show More Options”:

Then, scroll down to get to the “Send Post Data” option, and make sure to select “Yes”:

This way, you will ensure that the POST data will be sent to the page of your choice, which we will also have to set up. For that, go to the “Thank You Page” section of the left sidebar, in Jotform:

Select the “Redirect to external link” option:

Enter the URL of the page with the “Progress bar” element in this field:

The form is set up properly. What you have to do next is set up the “Progress Bar” element.
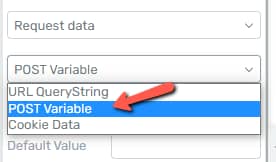
In Thrive Architect, in the “Dynamic value” settings, choose the “POST Variable” option:
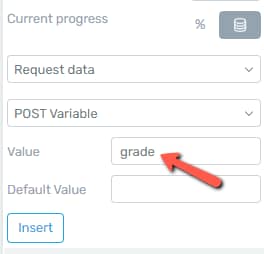
In the next field, enter the value that should populate the bar. For example, I want my “Progress Bar” element to show the users their grade.
For that, I have set up a field in the form, called “Grade”, and I will also add “grade” as a value here so that the progress bar will take the numerical value that the users entered in the “Grade” field, and turn it into the “Current Progress” percentage:
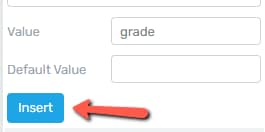
Click on “Insert”:
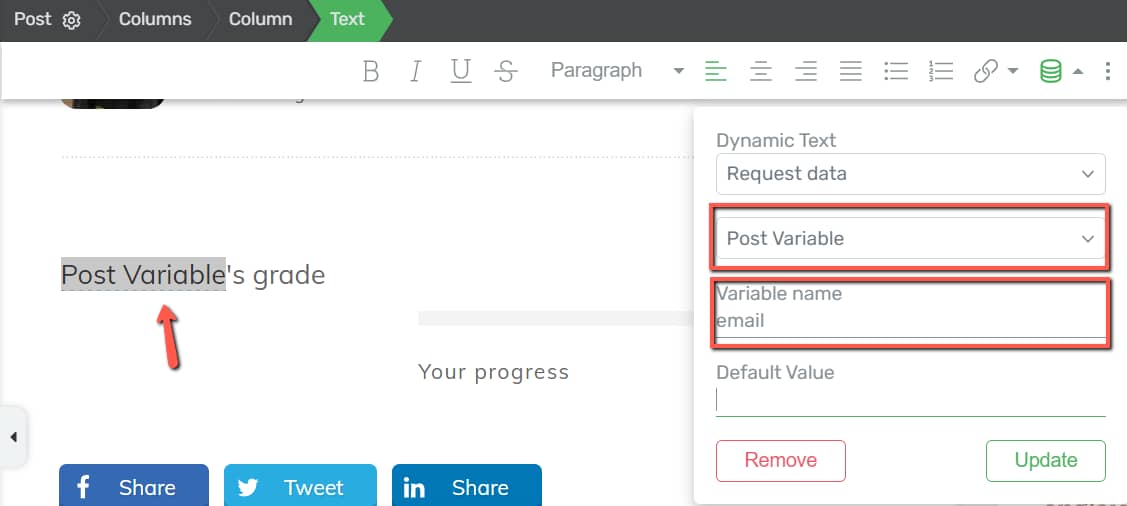
Optionally, you can customize “Text” elements, for example, and request POST variables data from there, too. For example, I’ve added a “Text” element and will use it to show the email for each user, when they access my page:
Save everything using the green “Save Work” button from the bottom-left side of the editor.
Now, as a result, when someone fills in the form and hits “Submit”, they will be redirected to a page that will show their email and grade in the form of a progress bar:
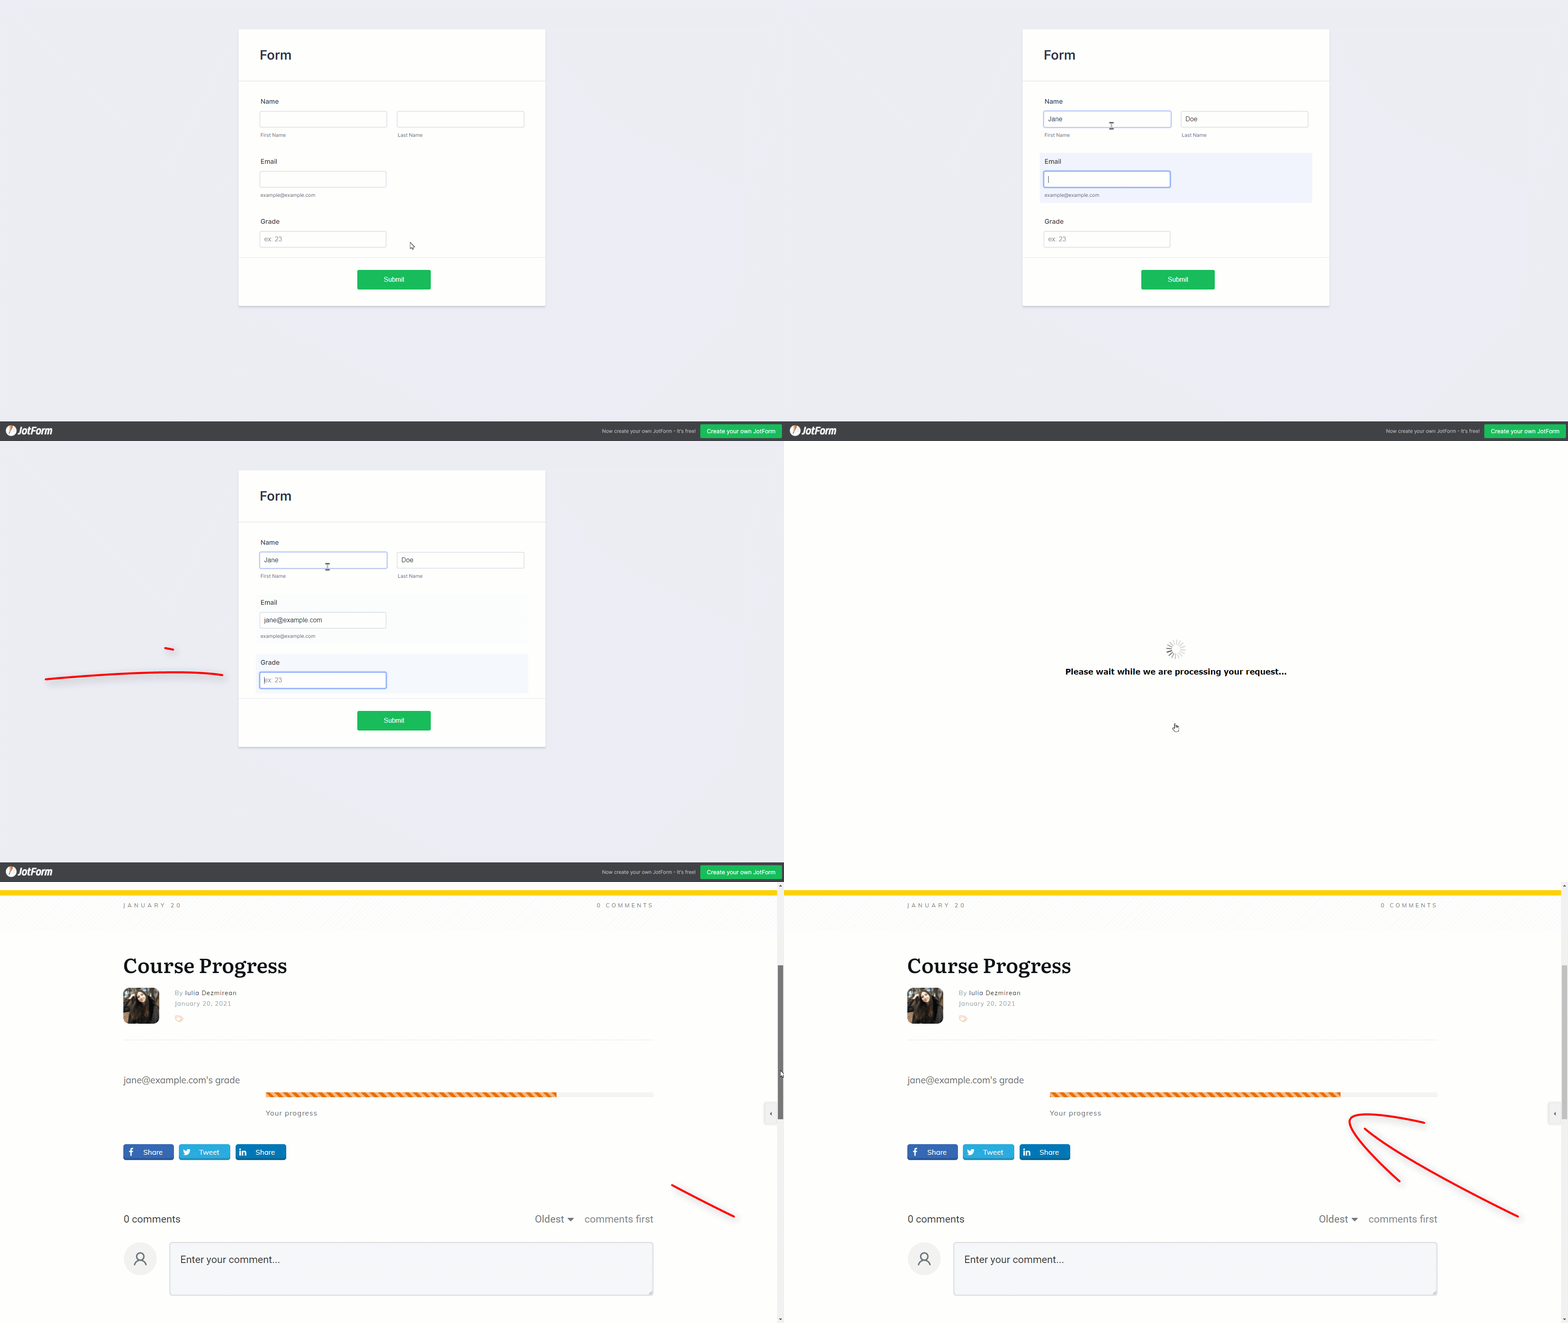
Please keep in mind that this is just an example to show how you can use the “POST Variable” option as a way to fill in the current progress of the “Progress bar” element.
Cookie Data
The third “Dynamic Value” method is the “Cookie Data” one:
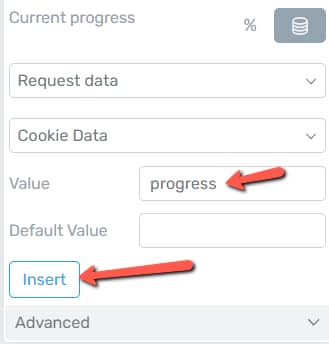
If you want to fill in the “Progress Bar” using this method, enter a “Value” and a “Default Value”, and click on “Insert”:
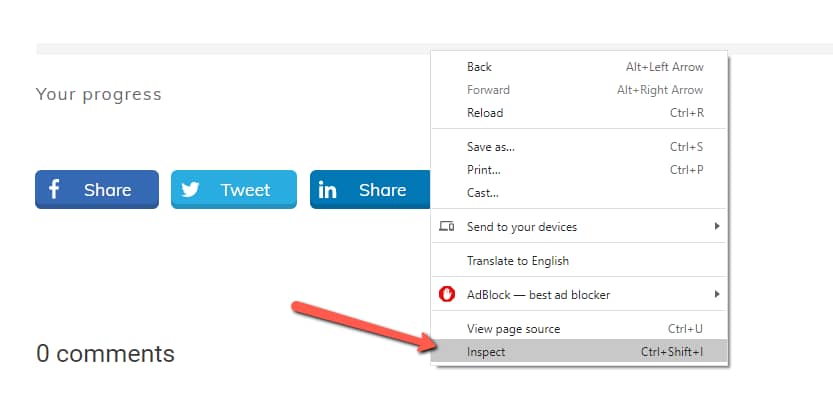
Save everything. Now, if you preview the page, you can access the DevTools tab. Right-click on the page with the progress bar, and click on “Inspect”:
Go to the “Application” tab:

From the left sidebar, access the “Cookies” section:
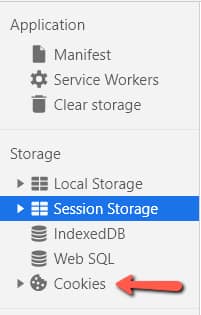
Then, click on the URL that appears when you select the “Cookies” section:
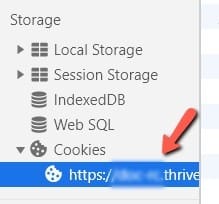
You can clear all cookies if you want. Then, right-click on the first field, and click on “Add New”:
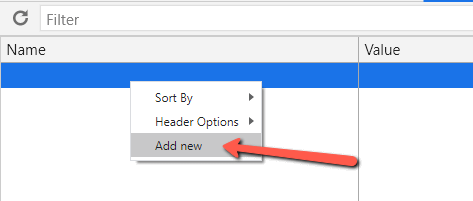
You will then be able to start typing in that field.
- in the “Name” field, type in the “Value” chosen when setting up the “Progress Bar” element. In my case, the value is “progress”:
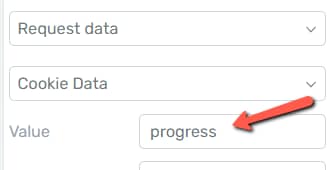
- in the “Value” field, type in the percentage that you want to populate the “Progress Bar” element.
Here is an example:

You can close the DevTools tab. If you reload your page, you will notice that the “Progress Bar” element will be populated with the input value:

These are the ways in which you can fill in the bar using the “Request Data” option of the “Dynamic Value” element setting.
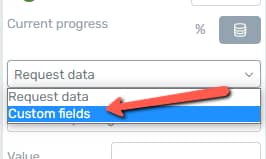
However, there is one more option available here, the “Custom Fields” one:
Custom Fields
It is also possible to populate the “Progress Bar” current progress using a custom field.
|
However, for this option to be available, please keep in mind the following:
|
Create a Custom Field
As mentioned above, you will have to first create a “field group” in which you will have to add a custom field.
We have a detailed article about this, that you can check out here, but I will briefly show you how you can add a “Number” or “Range” type of field.
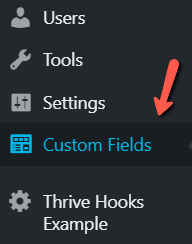
In the left sidebar of the WordPress admin dashboard, click on “Custom Fields”:
You can use a field group that was previously created, or just add a new one:

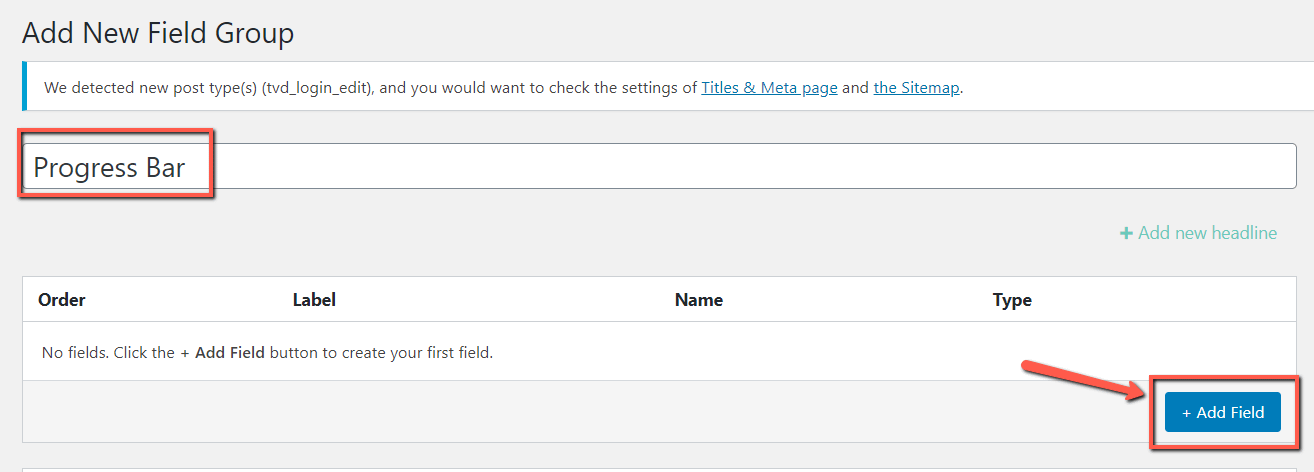
Provide a name for the field group, and then add a new field:
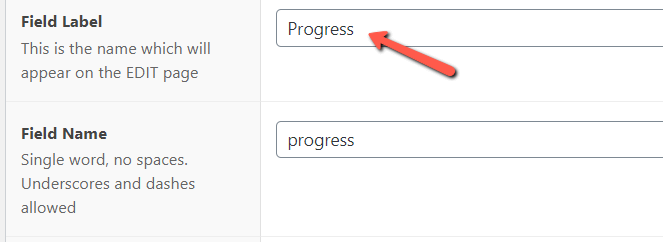
Then, add a label for the field:
Then, choose the “Field Type”. This has to be either a “Number” or a “Range” type of field:
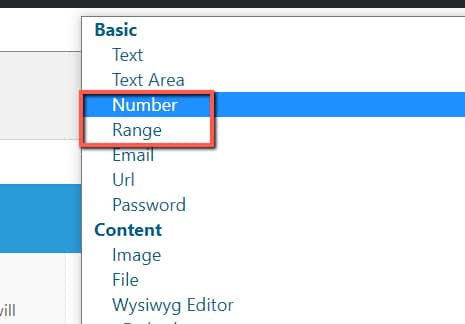
Choose the preferred field type, and customize the field as you wish. When finished, click on “Publish”:
Assigning a value for your post
Now, you have to access the post on which the “Progress Bar” element is placed.
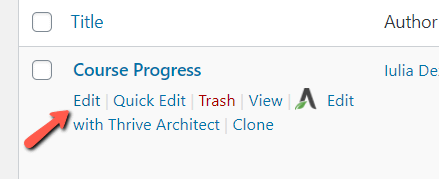
In the list of your WordPress posts, look for the post with the element, hover over it, and click on “Edit”:
In the WordPress editor, scroll down and you will get to the “Custom Fields” section, where you will be able to see all of the published field groups.
Look for the one that you’ve created, and assign a value, by entering it in the field below the field group:
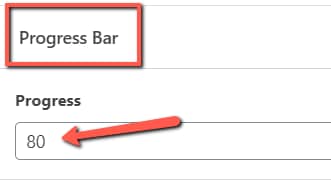
This will be the value that will populate the progress bar. Make sure to save the changes, by updating the post:

Now, you can go ahead and open the post using the Thrive Architect editor:

In the editor, select the “Progress Bar” element, and go to the “Dynamic Value” section. Choose the “Custom fields” option:

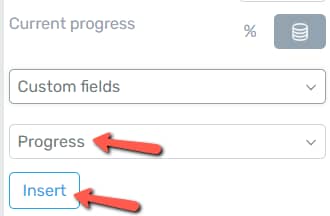
In the second field that appears, choose the custom field that you’ve created. In this case, it’s the “Progress” one. Click on “Insert” when finished:
Save everything and, if you preview your post, you will notice that the “Progress Bar” will be filled with the value that was assigned to the post (in this case, 80%):

This is how you can fill in the “Progress Bar” element with a dynamic value. I really hope this article was easy to follow and helped you understand how and when to use this option.
If you need more information about Thrive Themes and any other product from the Thrive Suite, make sure to check out the articles and tutorials from our knowledge base.