Let’s find out how to use Thrive Automator and the Drip feature from Thrive Apprentice to unlock course content for the students who pass their exam quiz.
Use case:
I have a Thrive Apprentice course, that consists of two modules. The first one is a beginner module, whilst the second one is for more intermediate students.
At the end of the first module, I want to include a 10 question quiz (in which each correct answer is worth 1 point). All the students that score a minimum of 8 points, can unlock the next intermediate module.
In order to create this workflow, and make sure it’s an automated process, we need to create a Thrive Apprentice product, apply a drip schedule to it and then use Thrive Automator to trigger the unlocking of the drip schedule.
Set up the Quiz
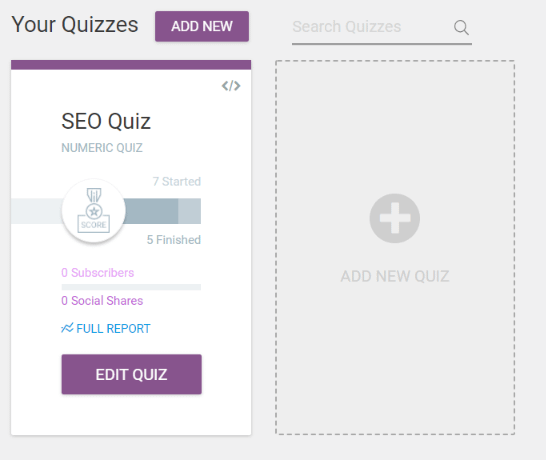
First, you can head over to Thrive Quiz Builder and set up your quiz:
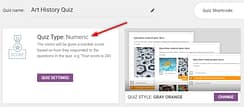
I’ve created a numeric type of quiz in which you can gain a certain number of points, depending on the answers you give:
The main goal is to allow the students that score at least 8 points in the quiz to unlock the next course module.
So for that, I’ve assigned a certain number of points to each correct answer:

After you’re done setting up the questions and correct answers, proceed to the next step, which is configuring the results page:

Here you can customize it in such a way to let the students know if the score they got allows them to advance to the next module of the course, or if they have to retake the quiz:

I’ve also added a hyperlink that takes the students back to the beginning of the quiz, if they haven’t managed to get a passing grade:

Note:
You can find the lesson link if you right click and copy the link address directly from the “Preview” option of the corresponding lesson:

Create the Course
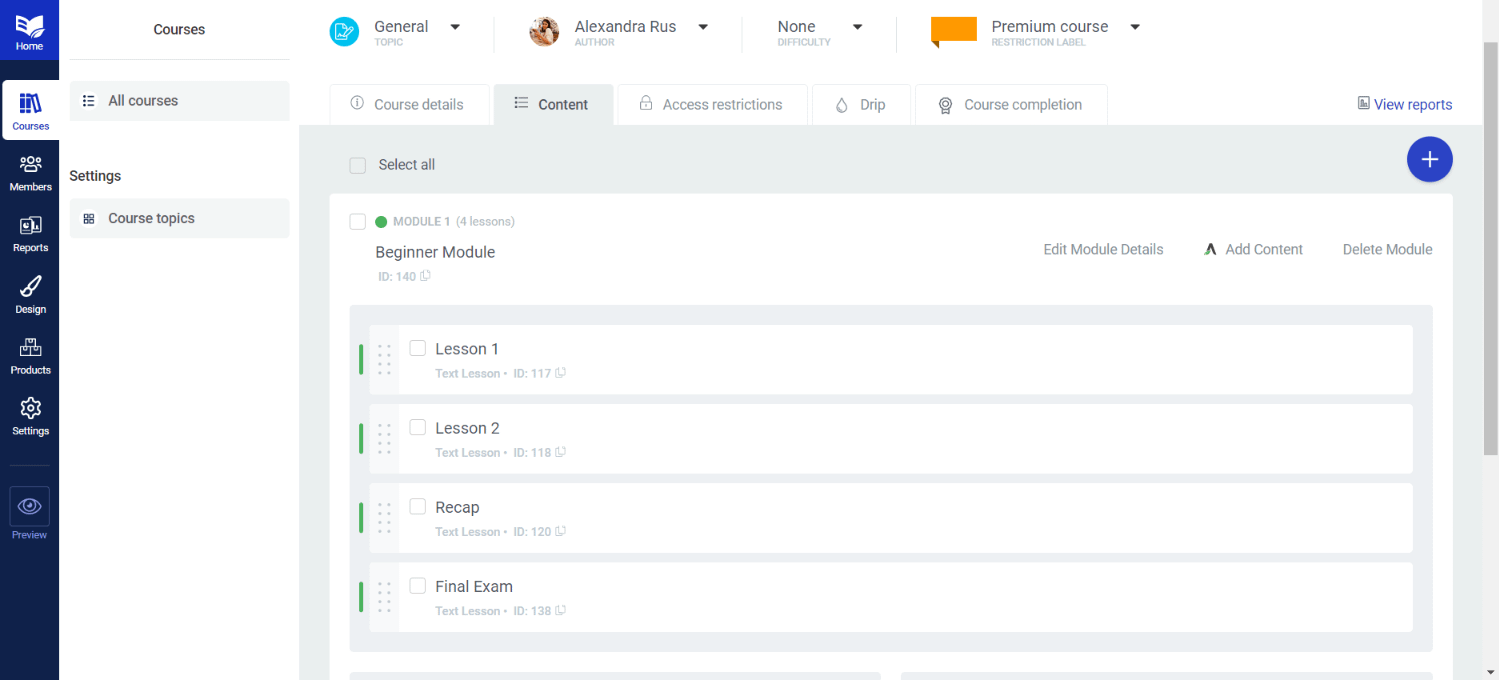
First of all, create your Thrive Apprentice course (with the necessary chapters or modules, depending on how you plan to drip feed it). Mine has two modules, a beginner and an intermediate one, each containing several lessons, a recap and naturally, the quiz:
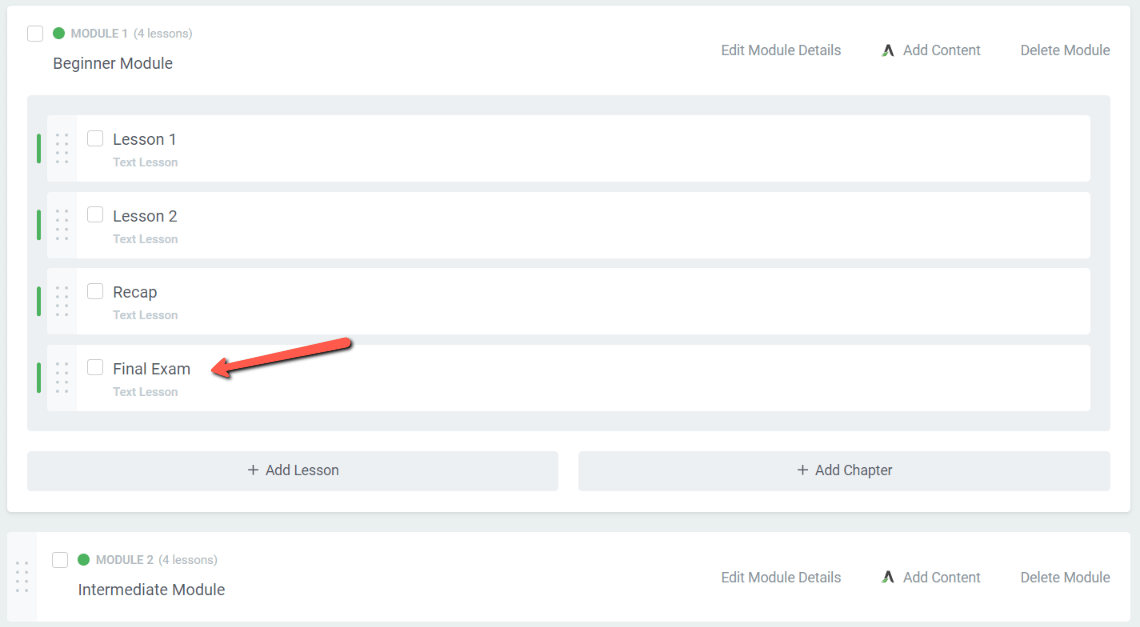
The last lesson of my beginner module is called “Final Exam”, due to the fact that it will have the quiz that I’ve just set up in Thrive Quiz Builder.
To embed your quiz in the lesson, you fist have to open the lesson content with in the Thrive visual editor:

Look for the “Quiz” element in the right sidebar:
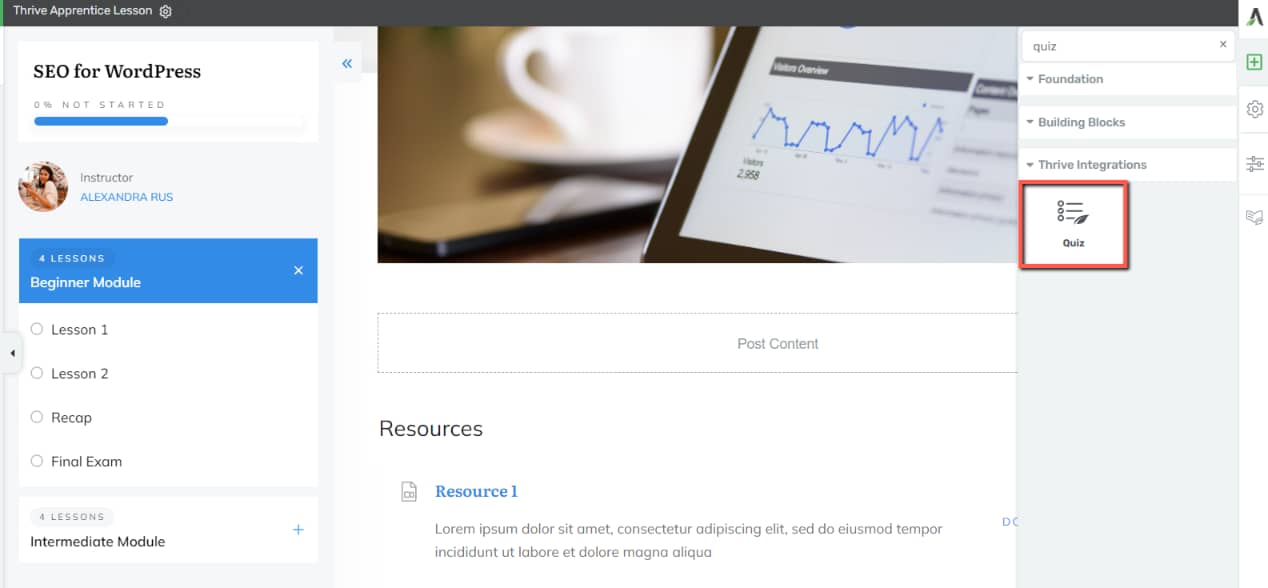
Drag and drop it onto your content, where you best see fit:

And lastly, select the quiz that you need from the drop-down that appears on screen:

It will show right up in your lesson content:

Now save your page and return to the main course overview:
Create a Drip Schedule
Now you can start setting up your drip campaign, from the “Drip” tab:

The “Thrive Automator Unlock” campaign template is the one that we will be using for this example :

Here, tweak the settings so that they match your needs and create your campaign:

My drip schedule looks like this:
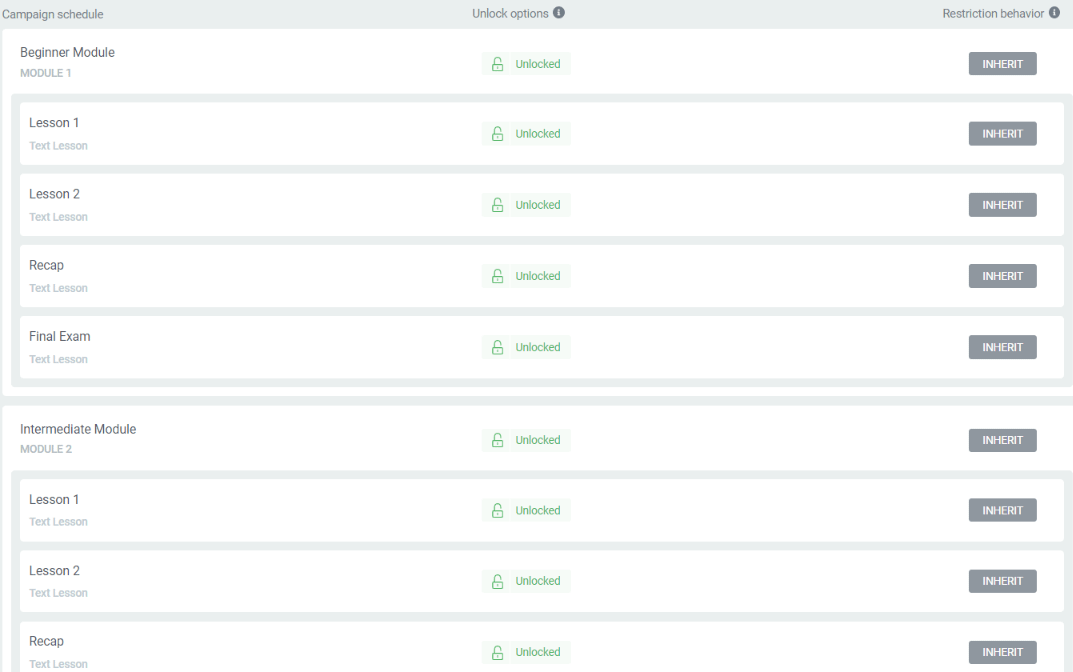
At the moment, all my course content will be unlocked as soon as the student starts the course.
Now I have to create a condition that basically locks my intermediate module, so that only the students who meet this condition can unlock it. And the condition is to pass the exam quiz from the previous module.
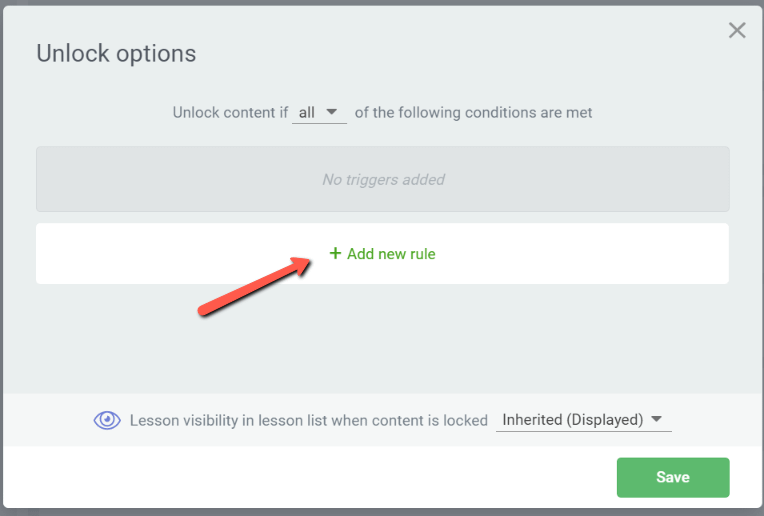
So for that, I need to add a rule that is only applicable for my “Intermediate Module” and its content. Click on the “Unlocked” option:

And proceed with adding a new rule:
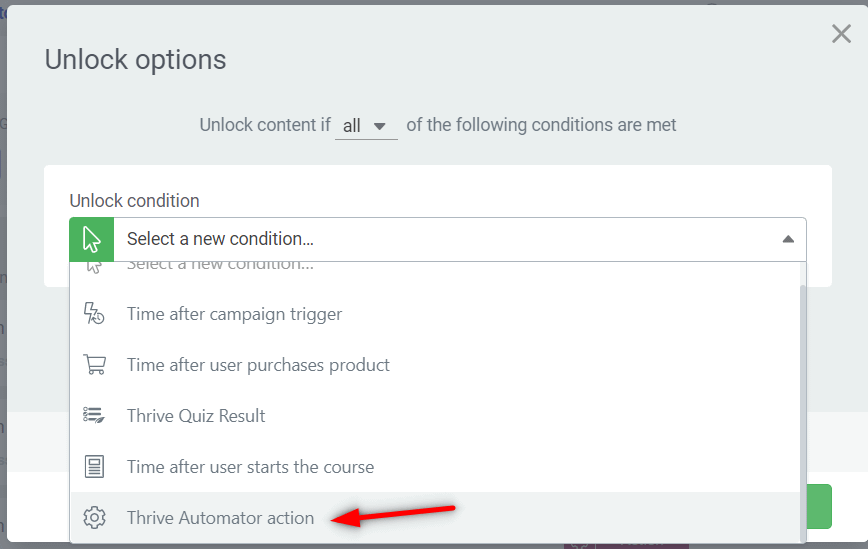
Select “Thrive Automator action” from the drop-down list:
Lastly, make sure you add your rule and save your work:

Your schedule for the “Intermediate Module” will look like this now:

The module is protected by this Thrive Automator rule, and so is the content from this module:

Add the Course to a Product
The next step in the process is making sure that your course is tied to a product:

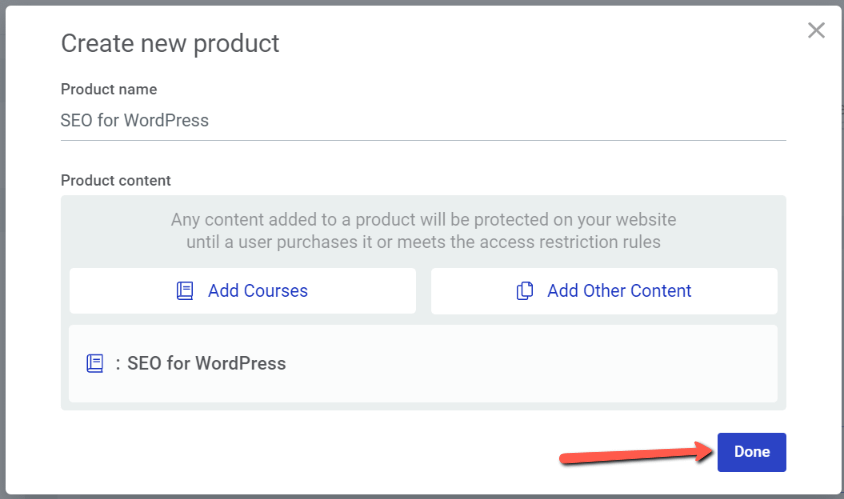
Click on the “Create a Products based on this course” button and you will see this pop-up where you can see that the course has already been added to your product and also inherited the name by default.
If you want, you can add additional content here (such as pages, posts) and also rename the product. If not, simple click on “Done” and your new product will be created:
As soon as you do that, you will be redirected to the “Products” tab of the Thrive Apprentice navigation bar:
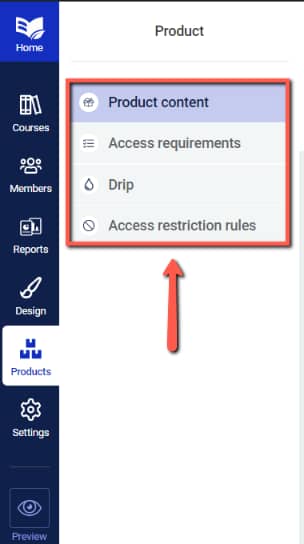
There are still several details to be set up here for the product that you’ve just created.
Set up Access Requirements
Swipe over to the “Access requirements” tab of the left sidebar:

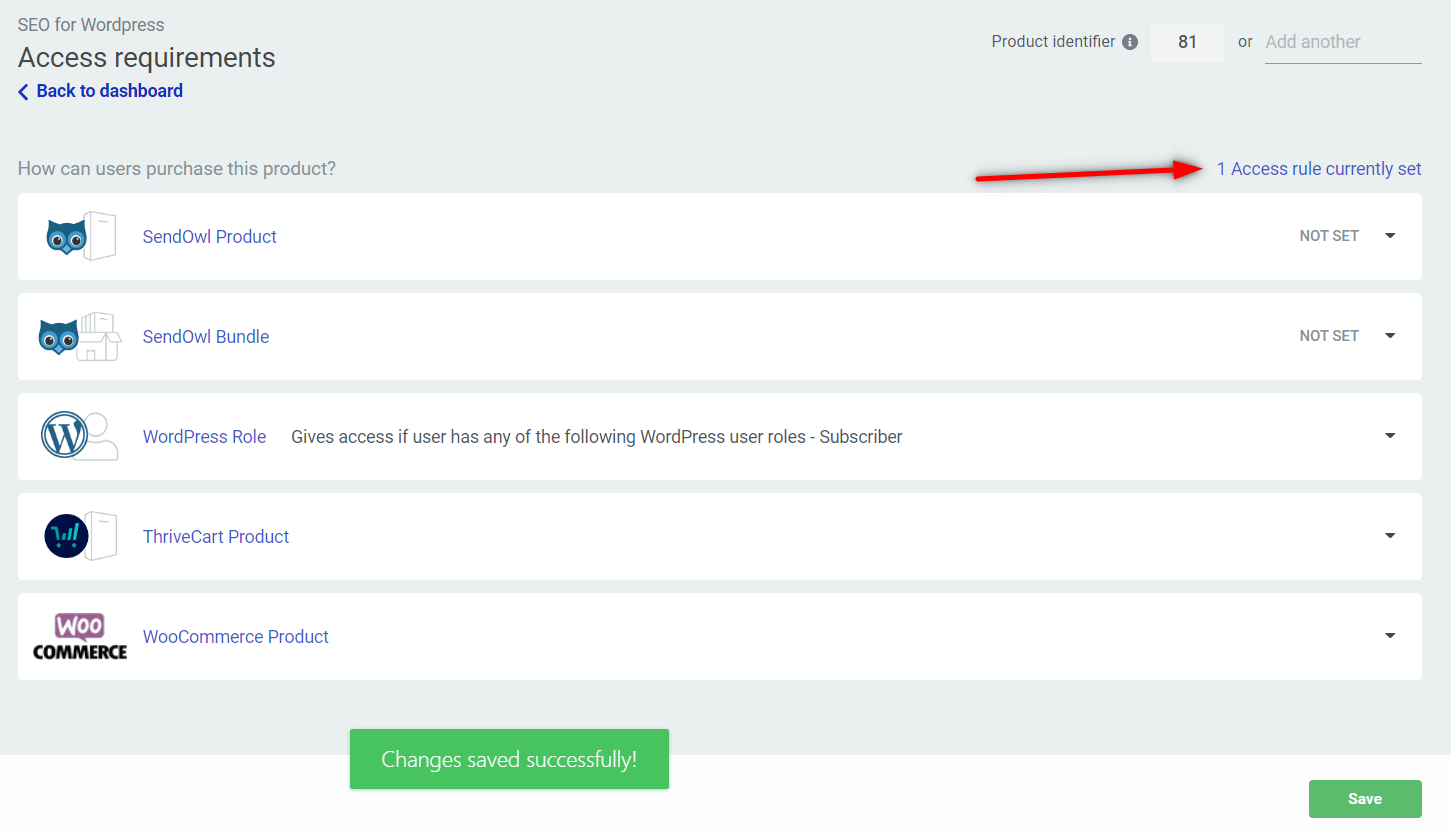
Here’s where you can restrict the access to this product only for those users who are logged in and have the “Subscriber” role:

After you save your progress, the rule will appear like this:
Apply the Drip Schedule
The next step in the process is applying the drip schedule to your product. Open the “Drip” tab:

Here as well open the schedule drop-down list and select the campaign that you’ve just set up in the “Drip” tab of your course:

Configure the Access Restriction Rules
Lastly, while you are still on this view, open the last tab:
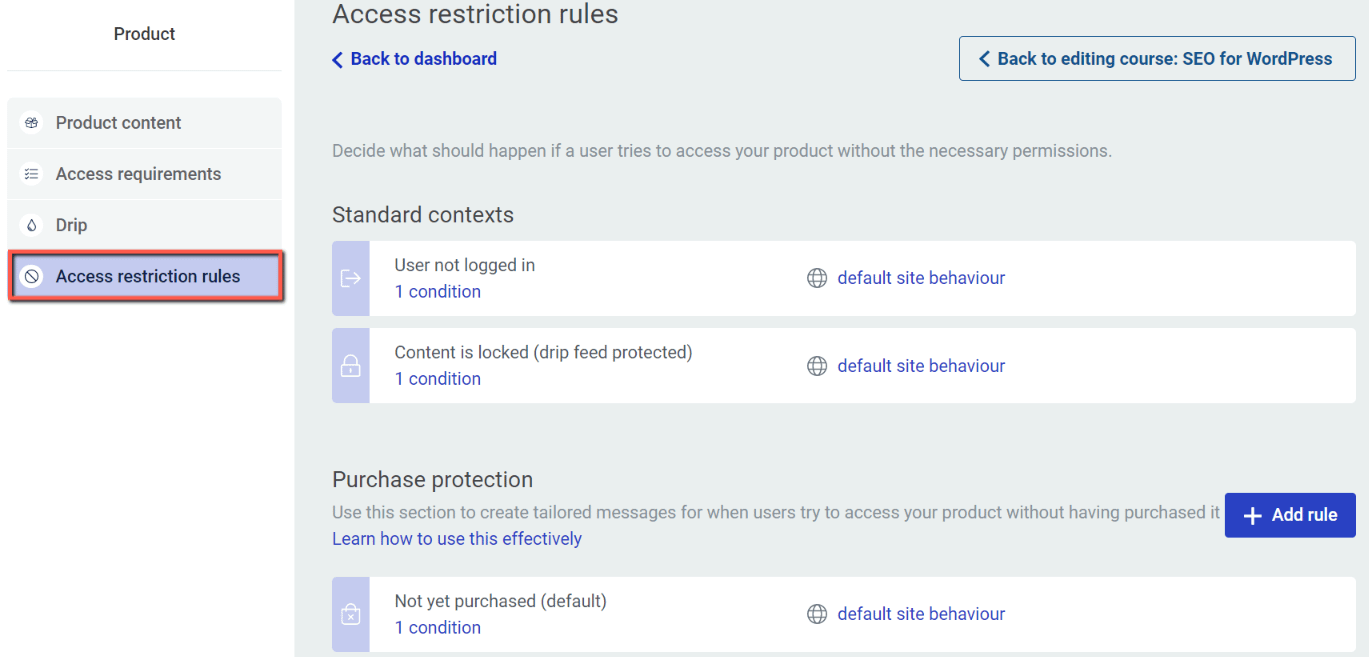
Here we will be focusing on these two contexts:

We’ll configure the content that is displayed for the users who are not logged in yet, and also for the ones that try to access the module that is not yet unlocked.
By default, the system will inherit the behavior set at site level, but you can click on the option next to each content and configure a different behavior, at product level.
For the “User not logged in” case, you can leave the default site behavior, as long as it’s set to redirect the user to the login and registration page:

Alternatively, you can simply click on this option and select the “Redirect to login & registration page” to make sure this is the intended behavior:

Next, let’s configure the content that will be displayed for those students for which the content is drip feed protected:

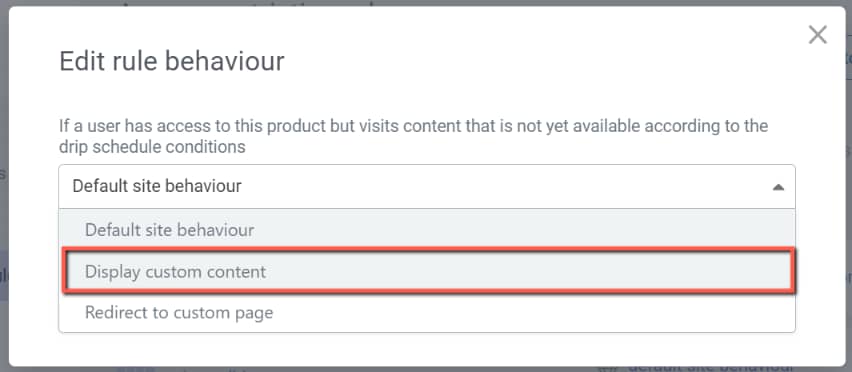
Select the “Display custom content” option from the pop-up that appears:
And start editing the content with Thrive Architect:

Here in the editor I’ve changed the existing text so that it matches my course content, and I’ve also added a hyperlink that takes the visitor to the quiz:

This way, if the students try to access this module without having yet unlocked its content, they can easily be redirected to the quiz page to try unlocking it.
Create Automation
Lastly, with all this set up you can proceed to the last and final step, which is creating the Thrive Automator workflow that will trigger the unlocking of the module for those students who have passed the exam with a minimum of 8 points.
Create a new automation from your Thrive Automator dashboard:

Then select your start trigger, which in this case is the completion of a quiz:

You’ll next have to set up some conditions that need to be met. Open the drop-down list:

And select “Quiz title”, so that you isolate the correct quiz (in case you have multiple quizzes on your website):

Look it up in the list and once selected, click on “Done”:

Next, add another condition:
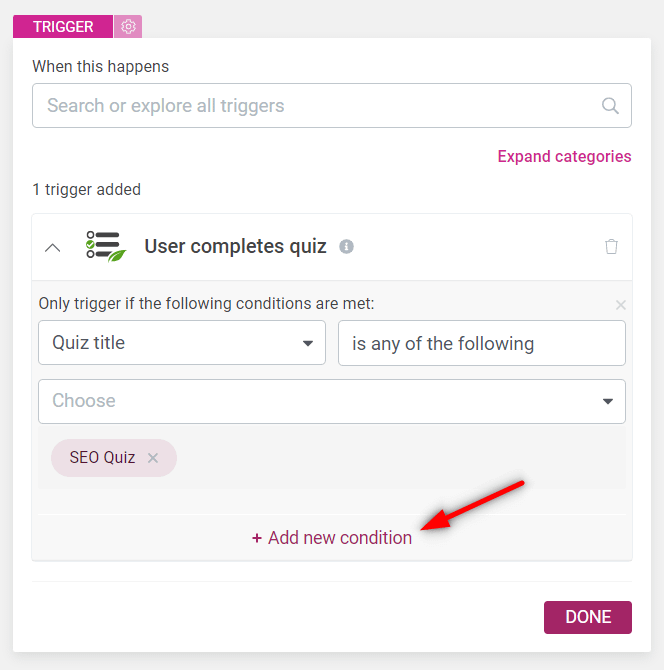
This time we are making sure that only the students who get the passing score will trigger this action and unlock the intermediate module:

I’ve set it up in such a way that all the students that get more than 7 points will meet the condition and trigger the action:
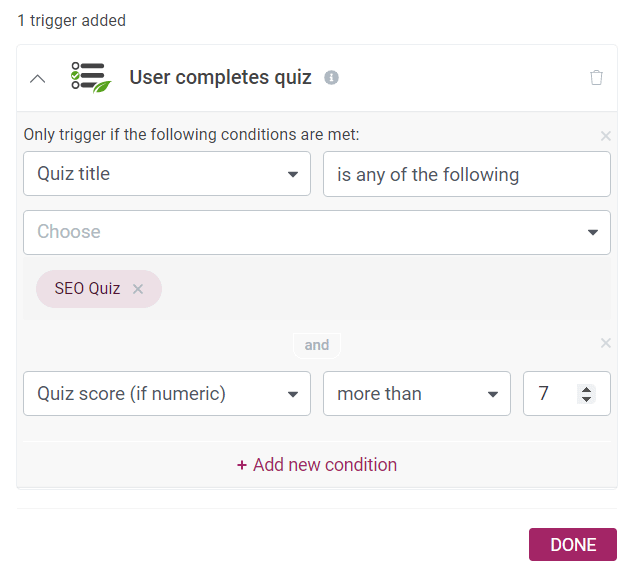
Here as well click on “Done” and proceed to adding an action to the workflow:

Select the “Unlock content for specific user” option:

Here we are making sure that the intermediate module is the one that will be unlocked by the users who meet the right criteria:

In the end, your automation should look like:

You can now go ahead and save your work and run it whenever you decide.
With this set up and ready, your Thrive Apprentice course should start drip feeding the second module only for the students who score at least 8 in their exam quiz.
This is how you can use Thrive Automator and the Drip feature from Thrive Apprentice to unlock course content for the students who pass their exam quiz.
I really hope you found this walkthrough useful and easy to follow. Make sure to check out other tutorials of this type available in our knowledge base.