When you create a new automation in Thrive Automator, the first step is to choose the start trigger. A start trigger is an event that you set up. When the event occurs, the automation starts.
You can find the full list of available Thrive Automator start triggers here.
The ways to set up a trigger will depend from trigger to trigger, but we have created multiple articles with automation examples and use cases in which we go through the process of setting up the triggers, so make sure you check those out as well.
However, one thing all of the start triggers have in common is the “Trigger Options” section:
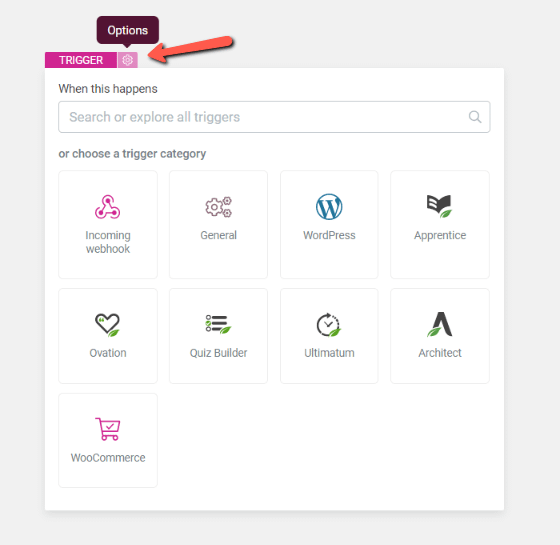
If you click on the icon, the options will appear:
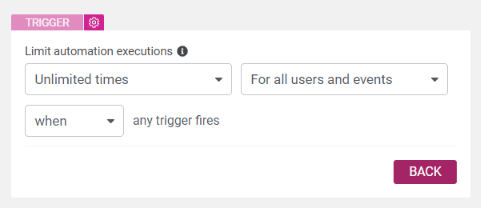
When setting up the trigger, you will be able to decide how many times and for which users the automation should run. Here’s how to use these options:
Limit automation executions
Firstly, you can choose how many times the automation should start. You can choose between:
-
Unlimited times
If you choose this option, the automation will run indefinitely for each “rule” that is set. -
Once
If you choose this option, the automation will run one time for each “rule” that is set. -
A specific number of times
If you choose this option “set number of times”, you will be able to choose a specific number of times for the automation to run.
The automation will run the defined number of times for each “rule” that is set.If you choose this option, a field will appear, where you can input a numerical value:

Choose the suitable option, according to what you’re trying to achieve.
Type of Users/Events
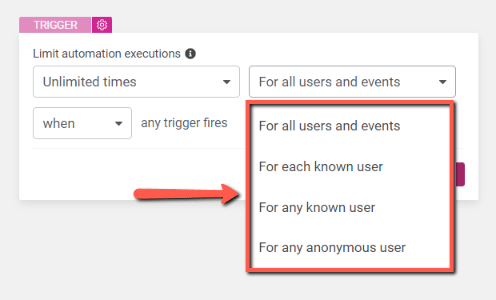
The next field will let you decide for which users the automation should start. If you click on this dropdown, the available options will appear:
-
For all users and events – if you choose this option, the automation will run every time without taking into consideration the logged-in state of the user, or whether the event was triggered systematically or by an administrator in the backend.
-
For each known user – will run individually for each logged-in user.
For example, if you choose the automation to only run one time and also choose this option, you can make sure that the automation will only be triggered once per user.
-
For any known user – will run for any logged-in user
For example, this automation would only run once when a logged-in user triggers the automation if it has been set to “One time”.
-
For any anonymous user – will run for any logged out user
When/After
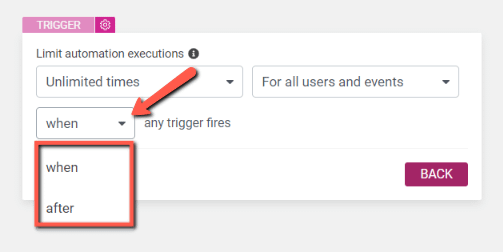
Next, you can click on this field to open a dropdown with two options:
-
when: The automation will run when any of the defined triggers are fired
-
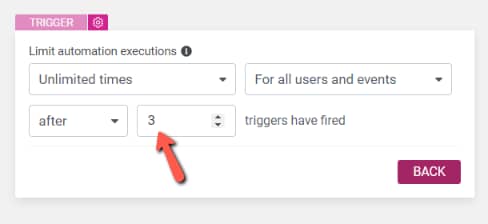
after: When “after” is selected, the automation will only run after a defined number of triggers have been fired. You can enter a numerical value to set the number of triggers in the field that appears:
This is how you can set up the trigger options, to have full control over when and how the automation starts.
Make sure you check out the rest of the Thrive Automator articles and tutorials from our knowledge base for more information on how to set up automations.
