If you have created a quiz on your website, you can easily use the “Notification Manager” to set up notifications for it.
This way, you can be notified via email whenever someone completes a quiz. The email you receive can contain the name of the person who took the quiz, the email, and the answers.
If you want to find out how you can do that, keep reading this article.
If you haven’t already created a quiz for your website, learn how to do that by reading this article.
Step one: Access the Notification Manager
After you’ve set up the quiz, the first thing you need to do is to go to your WordPress dashboard and click on “Thrive Dashboard” from the menu on the left side:
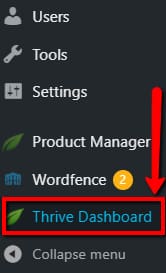
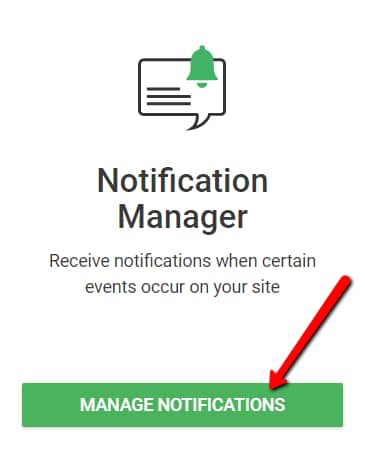
This will open a list of the Thrive Products you own, as well as some settings. Scroll down until you see the “Notification Manager” card:

Here, click on the green “Manage Notifications” button:
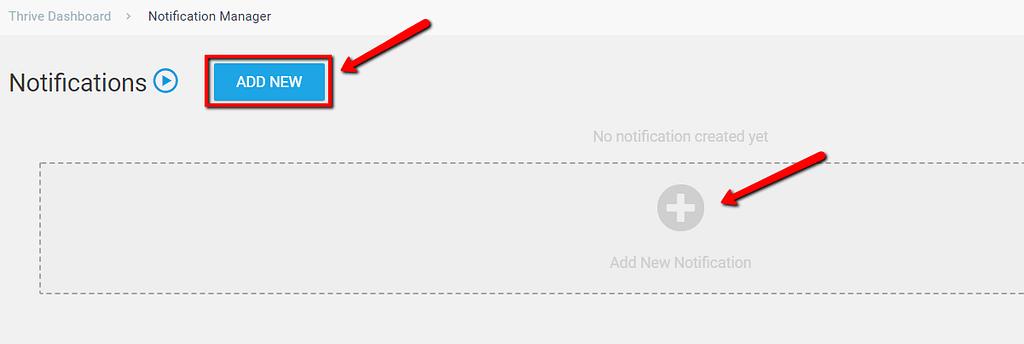
You will be taken to the “Notification Manager”, which looks like this if you haven’t set up any notifications yet:

To add a new notification, click on the blue “Add New” button, or click on the “+ Add New Notification” field:
Step two: Add the Notification
Set the trigger
This will open a pop-up where you have to set a trigger. In this case, since we’re talking about being notified when someone completes your quiz, we will choose “Quiz Completion”, but keep in mind that you can set triggers for other things as well, by choosing from this trigger list:
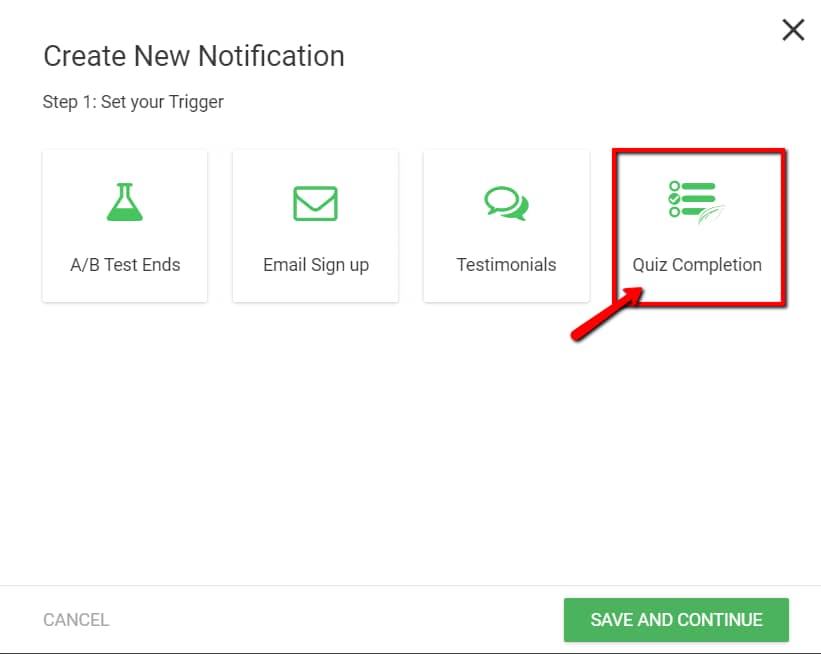
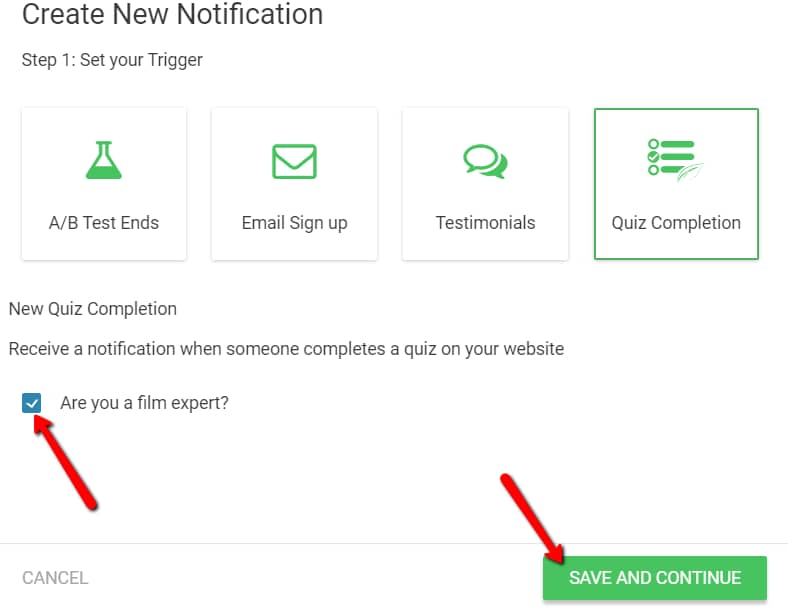
After that, a list of your quizzes will appear, and you have to choose for which one you want to receive email notifications. To do that, simply check the box in front of the quiz name, and then click on the green “Save and Continue” button:
Choose the action
The second step of this pop-up is to choose the action to be performed, in our case “Send Email notification”. Click on it:

Recipient’s email
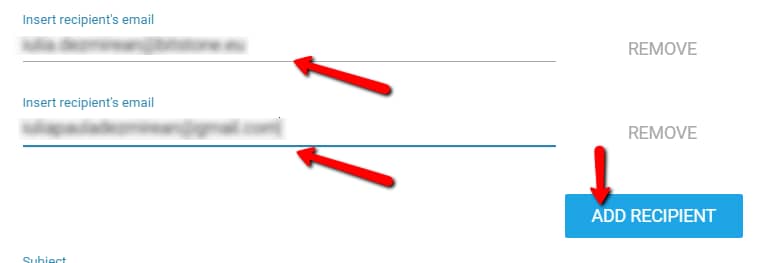
You will notice a few fields appeared below the “Send Email Notification” option. The first one is the “Insert recipient’s email”. This is where you can insert your email, or the email of the person you want to get notified:

You can add more than one recipient. To do that, click on “Add Recipient” and a new field will appear, where you can insert another recipient’s email address:
Subject
You can choose what the subject of the email is, by changing the default “A visitor has completed your quiz” one with whichever subject best fits your needs:

Message
You can change the message that appears in the email, as well. Simply delete the default message and write your own in this field.
Keep in mind that the “[quiz_details]” shortcode is included in this message by default. If you want to change the message, but still want to keep the details besides the message, you should keep the shortcode:

Available Shortcodes
You can also choose to display or hide the available shortcodes. If they are displayed, you have the option to copy them:

When you’re done, click on the green “Save Notification” button:

You will now be taken back to the Notification Manager page, and it should look something like this:

You can now go to your quiz page and do a test to check if everything works properly.
Open your page where the quiz can be found in an incognito window. Complete the quiz just like a user would. Then, wait to see if you receive the notification email that you have set up.
This is an example of how the email will look like:
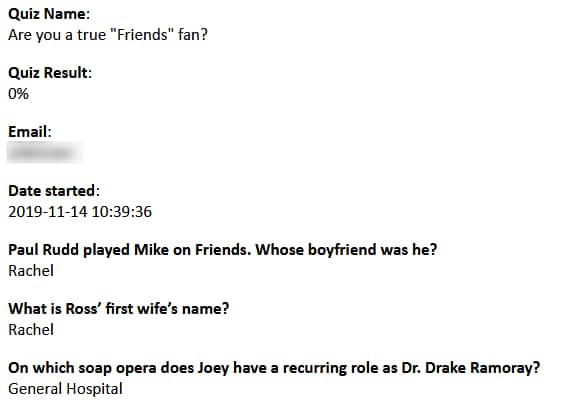
This is how you can easily get notified via email whenever someone completes a quiz from your website.
If you want to find out more information about various Thrive Themes products or features, make sure to check out our knowledge base.