Thrive Themes products connect to GoToWebinar through the API. Watch the video below to learn more:
When you set up a connection between your GoToWebinar account and a “Lead Generation” element, or a Thrive Leads opt-in form you are basically giving the visitors of your website the means through which they can sign up for your upcoming webinars.
Here is how to achieve this:
Add the login details to your Thrive Dashboard
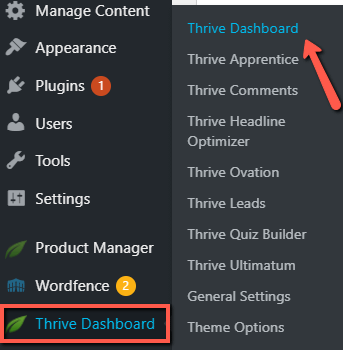
The first thing you need to do in order to start setting up the connection is accessing your Thrive Dashboard:
Scroll down until you see the “API Connections” card click on “Manage Connections”:

Next, click on the downwards pointing arrow to open the drop-down list and look for the GoToWebinar app. Once found, click on it to select it:

Add your GoToWebinar account credentials in the corresponding fields, and click on “Connect”:

If the connection was successful, you will receive this notification:

You can always return to this dashboard and test (1), edit (2), or remove (3) the connection:

Connecting GoToWebinar to a “Lead Generation” element
Once the API connection with GoToWebianar has been set, you will be able to connect “Lead Generation” forms to your account.
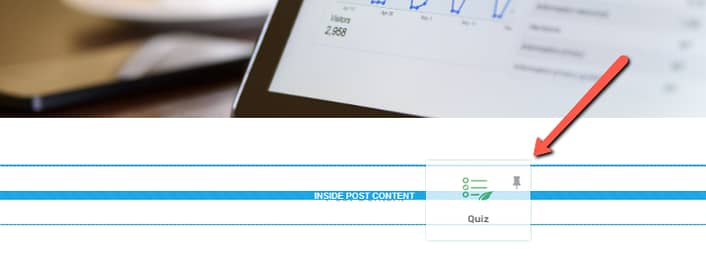
In order to do that, open the page or post on which you want to add the “Lead Generation” element and look for it in the right sidebar:

Drag and drop the element to your page:
After you choose a template, you will notice that the “Main Options” will become available in the left sidebar:

1. Add Connection
In your left sidebar options, look for the “Connection” section and make sure is set to “API”:
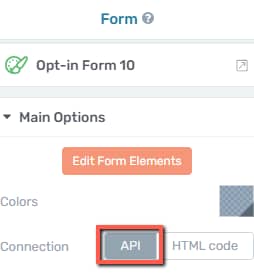
Next, click on “Add Connection” to start setting up the connection details:

Connection
In the pop up that opens, click on the drop-down list to expand it and select the GoToWebinar field:

Now that your selection has been saved, you can start setting up other aspects of your connection.
Mailing list
The next drop-down list that appears in the sidebar is the mailing list:

Click on the drop-down to expand the list and see the available mailing lists which you have previously set up in your GoToWebinar account. Once you select the desired list, click on “Apply” to save your progress:

2. Set up the form fields
The following section of the left sidebar is dedicated to setting up the form fields for your connection. You will see different form fields here, depending on what template you have chosen for your “Lead Generation” element:
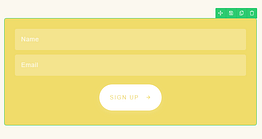
We do have a separate section dedicated to setting up these fields, so make sure to read it in the article linked here.
When you have finished with customizing your left sidebar options, make sure to save all the changes by clicking on the green “Save Work” button from the bottom left side of the screen:

Connecting GoToWebinar to Thrive Leads
You can also connect your GoToWebinar account to a form from Thrive Leads.
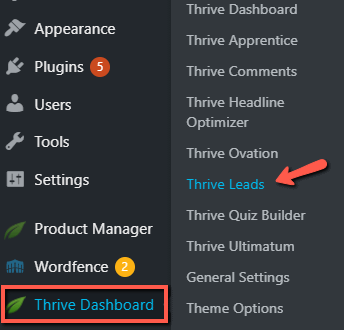
For doing that, you first have to access the Thrive Leads dashboard, by hovering over the “Thrive Dashboard” of your WordPress admin dashboard:
From the available list of Lead Groups, select the one which has the opt-in form which will be used for the GoToWebinar connection:

Next, click on the “Edit” button next to the type of form you want to edit (a “Lightbox”, in this example):
This will open a list with all the “Lightbox” types of forms. Look for the one that you want to add the connection to, and click on “Edit Design”:

The Thrive Architect editor will open, and you will be able to see the “Lead Generation” element available for that form. Click on it to select it:

This will enable the left sidebar set of “Main Options”, allowing you to start setting up the connection:

As you can see, you can now connect your opt-in form to GoToWebinar by following the steps described above for connecting to a “Lead Generation” element.
These are the steps for connecting your GoToWebinar account to your site, with the help of a “Lead Generation” element or a Thrive Leads opt-in form.
If you want to read more about API Connections and how they work, make sure to check out our knowledge base articles.
Hopefully, you found this article useful. If so, don’t hesitate to rate it with a smile 🙂