During this video, you will need to access this Facebook developers link.
Creating an API connection between your Facebook profile and your page can be important.
For example, you need this connection, if you want to offer the visitors of your website the possibility to upload their Facebook picture on the Thrive Ovation testimonial capture form.
If this connection is set up, then, they will be able to log in to their Facebook profile and upload their picture to the testimonial they leave on your website.
Another instance when you need this connection is when you use Thrive Comments and you want to allow people to sign in to their Facebook profile when leaving a comment on your website. You can check out the way to do this in this article.
Important!
Facebook does not accept URLs that are not secure. In order to be able to make the connection between your Facebook profile and your page, your website URL must start with “HTTPS”. Thus, if your website URL is not secure, meaning that it starts only with “HTTP”, you will not be able to set up this connection properly.
Follow the steps below to get your Facebook App ID and then, create the connection.
1.Access the Facebook Developer Page
First, log into your Facebook account and go to the Facebook developers page. Once here, click on “Get Started”:

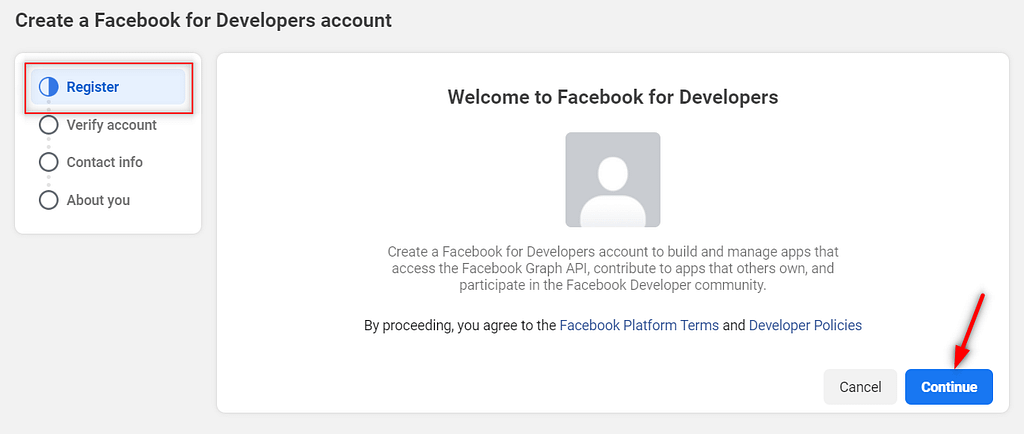
Next, proceed with the required registration/verification steps:
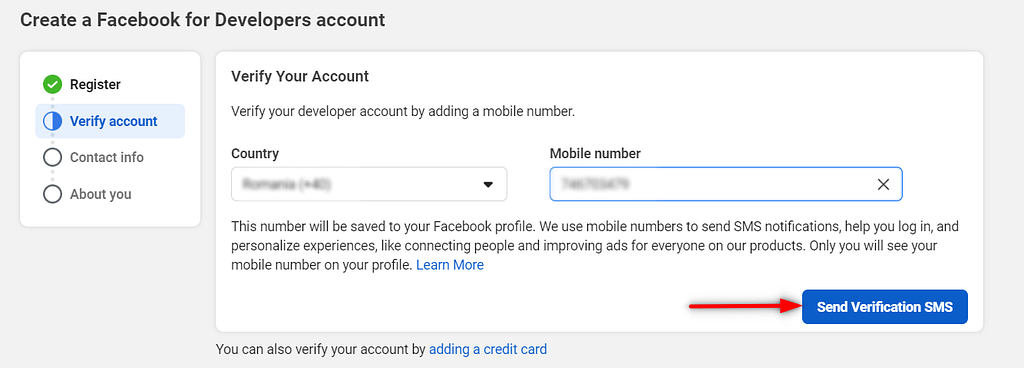
Verify your account using your phone number:
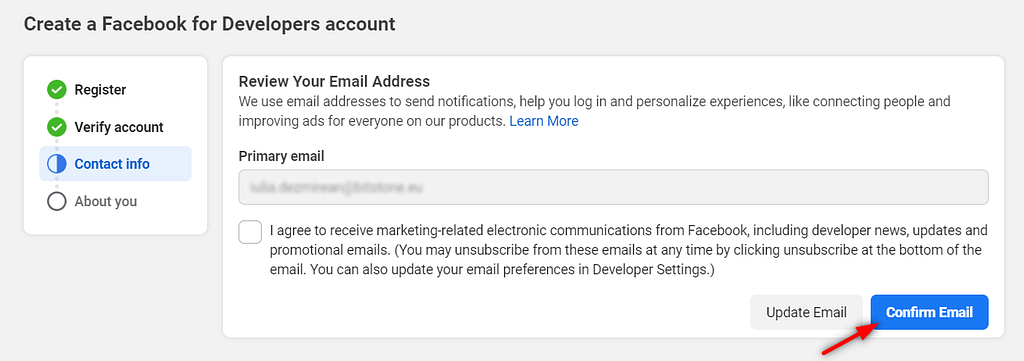
Then review your e-mail address:
And lastly, submit your “About you” information. We’ve selected “Developer” for this use case:
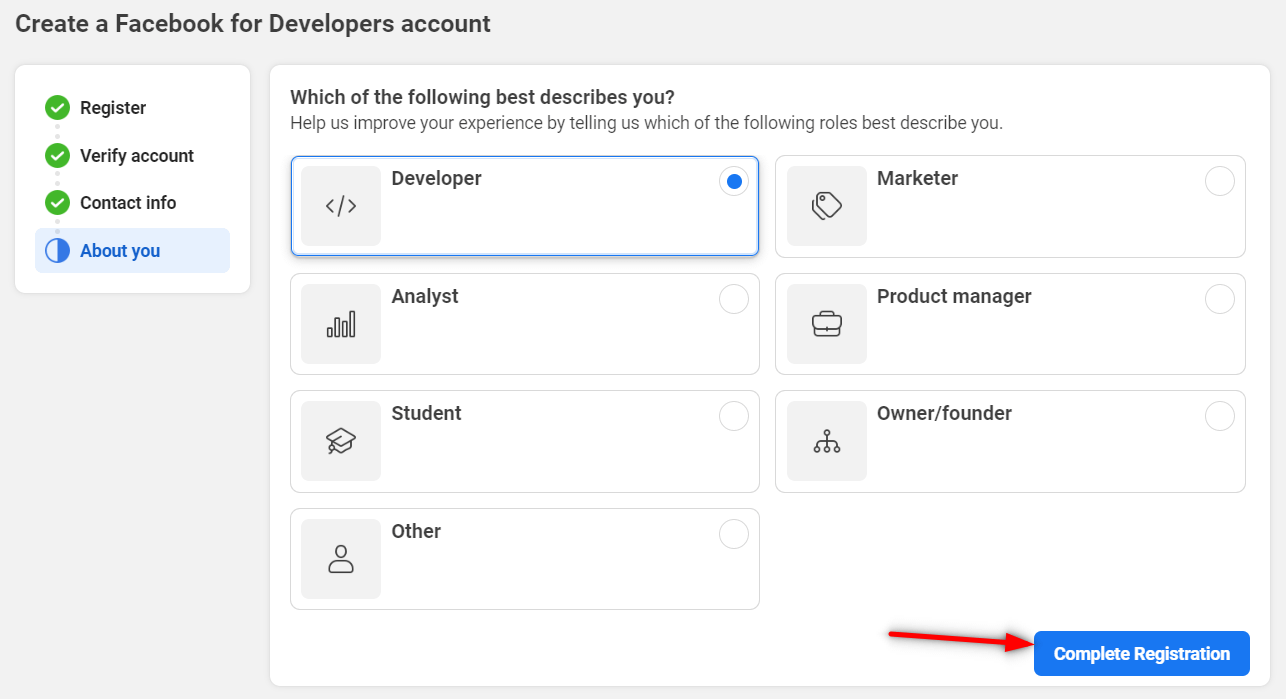
When your registration is complete, you can proceed to the next step, which is creating a new app.
2. Adding a New App
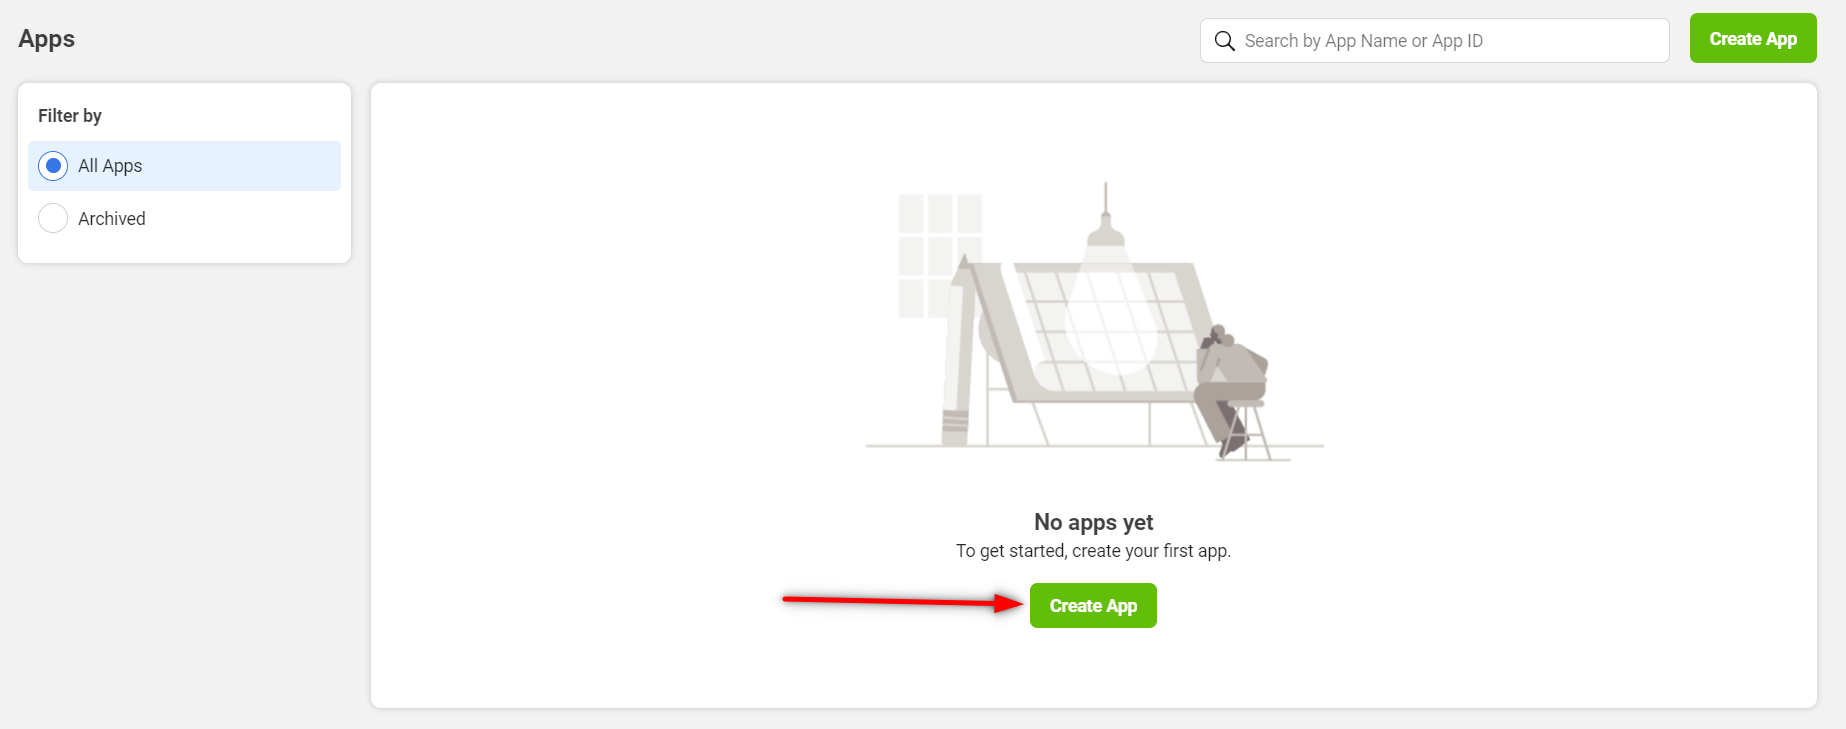
Click on the “Create App” button, to start the process:
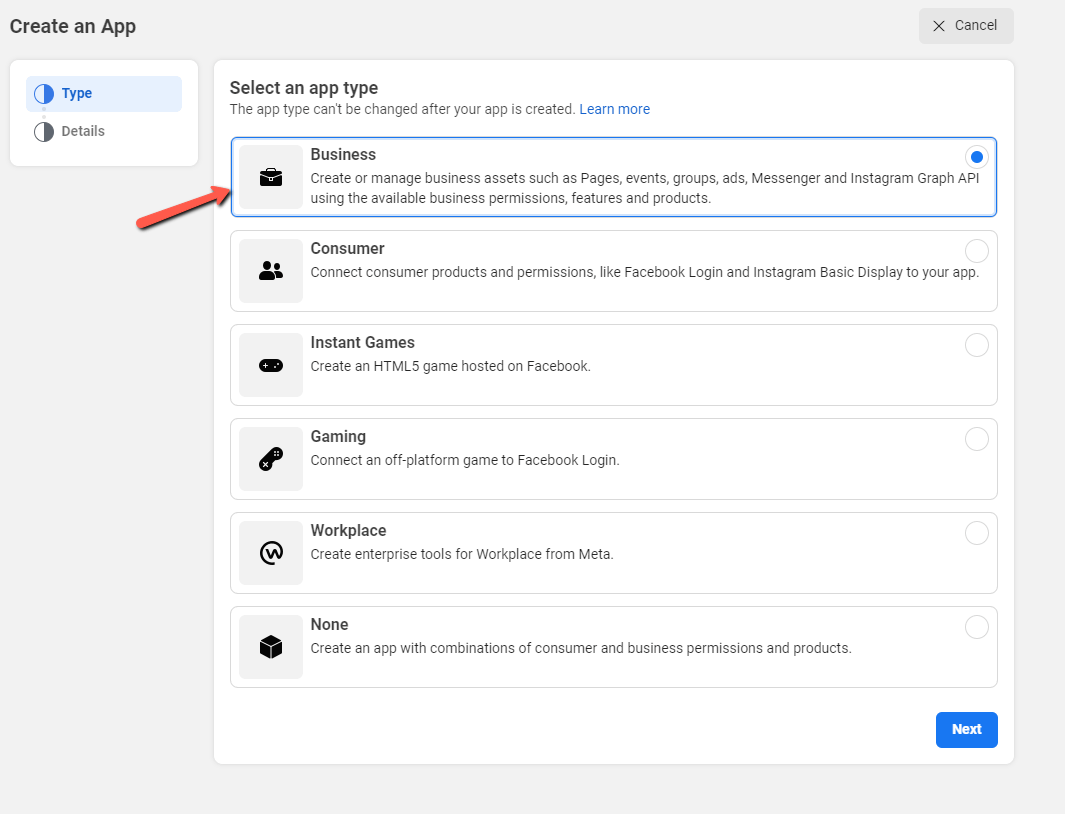
A pop-up window will open, where you will be required to select between a few different options. For this purpose, we’ll select “Business”:
Next, a new pop-up will appear on the screen, where you will be required to enter a name for your app, as well as your contact email, and then you can click on “Create app”:
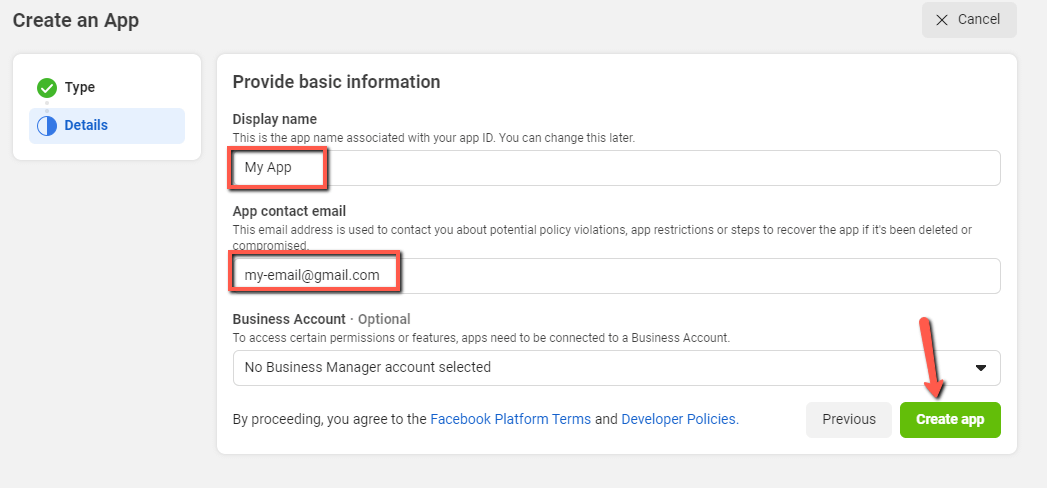
Note: You may be prompted to do a security check with either a captcha or a checkbox (e.g. “I’m not a robot”).
2. Adding a Product
The next step is to add a product. Here you will have to select a product from the list, based on what exactly you are going to use your app for.
If you wish, you can also read the documentation for each product, to see what they are about. You just have to click on the “Read Docs” option to do that.
For this connection, you should choose the Facebook Login For Business product. This gives the visitors of your website an easy way to log into your website using their Facebook account:
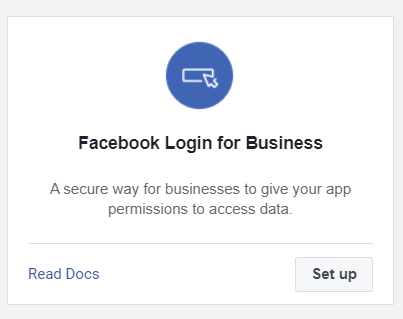
3. Choosing a Platform for Your Product:
Here, you have to choose the platform you want to use your product on. In this case, we will use “Web”:

After that, you will need to enter the URL of the website you want to use the App on and click on “Save”:

Then click on “Continue” to follow the next steps of the setup wizard. You can go through each step, click on “Next” when you have read them.
Nevertheless, you can also skip going through this wizard if you want to. This is not mandatory in order to integrate your app with Thrive Themes.
You can continue with setting up the connection by doing the following:
4. Disable “Strict Mode for Redirect URIs”
Facebook has the “Strict Mode” activated by default and there is no option to deactivate it, so you will have to build the exact OAuth Redirect URI yourself in order to continue the process of adding the app.
The OAuth Redirect URL is a link, a URL, where the visitor will get sent to after he/she signs in (the account authorization is successful).
This might seem a little tricky, but follow the guidelines below and you’ll see that it is a lot easier than it seems:
Construct Redirect URL
This URL has three parts:
a.) Your admin page
This part has to contain your domain (https://www.domain.com/), along with the admin part of it, which looks like this, if you leave it by default: “/wp-admin/admin.php”.Thus, so far, your link should look like this:
Note: If you have a custom login URL you will have to use that URL. For example, if your custom login page is in the “/test/admin.php directory, then, the URL should look like this:
b.) After this comes a static part, which is always the same.
This part contains the page of your website where the visitors will be redirected and the type of API connection (in this case, Facebook) that is used, preceded by a question mark:
?page=tve_dash_api_connect&api=facebook
So, the URL should look like this after you add that static part to it too:
c.) The third part of the URL is a dynamic part because it changes based on your APP details.
This contains your App ID and your Secret ID.In order to find these, you will have to go to the “Settings” part of your sidebar options and then, click on the “Basic” drop-down.

Before copying the keys that you need, you should complete the “App Domains” field with your domain and the “Privacy Policy URL” field with a URL to your website’s Privacy Policy:

Then, click on “Save Changes” from the bottom right part of the page.
These have to be completed because later on, you will have to change the status of your App and that cannot be done without these fields completed.
Now you can copy the “App ID” and the “App Secret ID” from the top of the options.

Please keep in mind, that when you click on “Show” in the “App Secret” section, you might be required to introduce your password again.
After you have copied the IDs from here, complete the link with them. The third part should look like this:
&app_id=Your Facebook APP ID&app_secret=Your Facebook Secret ID
Paste the App ID and the Secret ID instead of the two placeholders from the example (Your Facebook APP ID, Your Facebook Secret ID)
Here is a sample of what a correctly composed URL would look like:
Note: Please, make sure that you change the domain, the App ID, and the Secret ID with your details:
- instead of the www.domain.com part, enter your website URL
- instead of the Your Facebook APP ID part, enter your App ID
- instead of the Your Facebook Secret ID part, enter your App Secret
Here is the example of how the URL will look like with the necessary parts replaced:
Make sure to save everything before leaving the page.
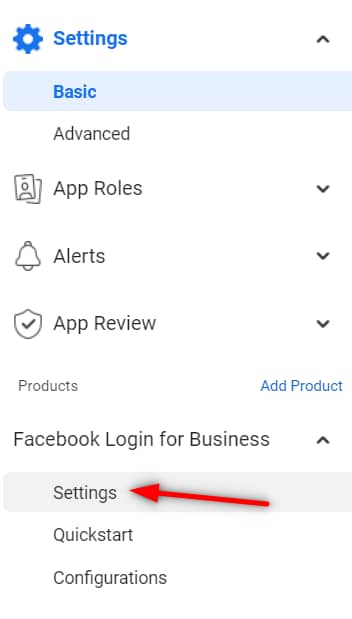
Once you have the URL, you will have to go to the sidebar and in the “Products” section, where you will find the product that you have added, Facebook Login in our case. Click on it and then, choose “Settings”:
Now, enter the URL, composed of the three parts detailed above, in the “Valid OAuth Redirect URIs” section:

Then, make sure to enable the “Login with the JavaScript SDK” option:
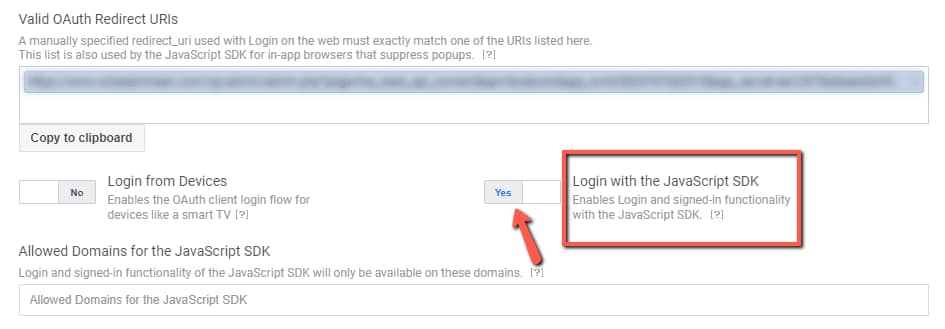
And enter the allowed domains in this field (your website URL):

It is important that you click on “Save Changes” after adding the URL in the “Valid OAuth Redirect URLs” field:

|
Important! To use Facebook Login and be able to save the changes, you will need to make sure that your app has advanced access to public_profile (instead of the standard access). To switch the access type, go to “App Review” in the left sidebar, access the “Permissions and Features” section and look for “public_profile”. If the access type is standard, click on “Get advanced access”:  Scroll down until you find the “public_profile” section and click on “Get advanced access”:  You will then be able to continue the setup, and the “public_profile” permission should have the advanced access option enabled:  |
Redirect URL Validator
As the next step, you will have to check whether the URL that you have composed is a valid one. In order to do this, first, you will have to complete the “Redirect URL Validator” section with the respective URL you have constructed and then you will have to check it.
Scroll down until you see the “Redirect URI Validator” section and complete the “Redirect URI to Check” field with the composed URL:

Then click on the “Check URL” button to check whether the URL is valid and correct:

If the URL is correct, you will see a notification message letting you know that the redirect URL is valid and you can use it for the application:

When you have checked the URL’s validity too, save the changes again, on the bottom of the page:

You will have to do all of these steps so that the URL will be validated correctly.
All there’s left to do is make the connection with your page.
5. Copy the API Keys
In order to create the connection, you will have to use the two API keys (App ID, and Secret ID) that you have previously copied and used to create the Redirect URL.
You can copy them again by going back to the “Settings” part of your sidebar options and then, to the “Basic” drop-down. Look for the keys in the “App ID” and “App Secret” fields

Have the API keys ready because you will have to paste them on your website, in the API Connections area, from the Thrive Dashboard.
6. Integrating Your App with Thrive Themes
Go on the WordPress admin dashboard of your website, and access the “Thrive Dashboard”:

In the “Thrive Dashboard”, scroll down until you come across the “API Connections” card and then, click on “Manage Connections”:

Add a new connection by selecting an app from the drop-down. In our case, look for the “Facebook” option:

Once you have selected the “Facebook” option, paste the “App ID” and the “App Secret ID” in the fields that will show up:

Once the fields are completed, click on “Connect”. A pop-up window will open, with the information that will be used by the App.

You can edit this if you wish, or leave it as it is and then, click on “Continue as”.
After you have completed all these steps, you will see a notification about the fact that your connection is ready to be used:

You might also be interested in these two articles if you want to connect more social media apps for similar purposes:
We hope this article was useful to you. If so, please give us a smile below 🙂