If you are using a “Lead Generation” element into your post or page, and you connect your form to a service, you can add various types of custom fields to that form. The “Textarea” type is one of them.
If you select this custom field type, the users can add a message when completing the form.
Continue reading this article, to find out how to set up and customize the “Textarea” type of custom field.
Set up a Textarea Field
First of all, you have to connect your “Lead Generation” element to your desired services. Click on the “Lead Generation” element, to select it, and go to the left sidebar menu to click on “Add Connection”:

Make sure to check out this list and click on any of the services that we support, to see a tutorial on how you can establish an API connection. Then, after setting up a connection, you will have to add a new form field.
As an example for this article, I have connected my “Lead Generation” element to Mailchimp.
In order to add a new field, in the “Form Fields” section of the left sidebar, click on “Add New”:

A pop up will open, and this is where you will have to set up the new field. Click on the “Field Type” section:

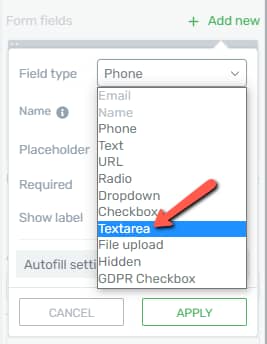
From this list that opens, choose the “Textarea” type of field:
Then, continue setting up the field, as shown below. Firstly, you can choose a name, but this is optional. Providing a name for the field will help you identify it if you are using multiple “Textarea” fields in the “Lead Generation” element:

Then, choose a placeholder (the text that should appear inside the field):

Then, you will have to set whether this should be required or not, as well as if you want to show its label or not:
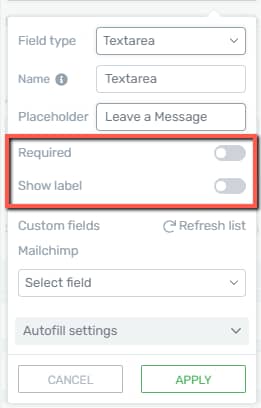
After that, you should set up the field mapping. Since I’m using Mailchimp as an example, I will have to click on the “Select field” section, to choose a field where the information should be sent to, in my Mailchimp account:

Lastly, if you want, set the “Autofill settings”. The process of setting these up has been described in this article. When you’re done setting the field up, click on the “Apply” button and the custom field will be added to your element:
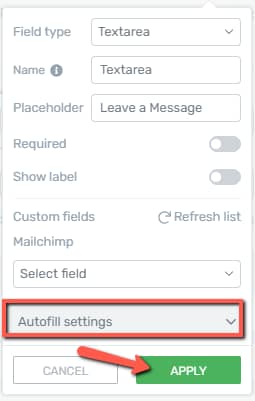
The field has been added to your “Lead Generation” element.
Edit the Textarea Field
The “Textarea” field type comes with some options which you can use in order to customize the form even more. If you want to access the “Textarea” options, after you set the field, click on the “Edit Form Elements” option, in the “Main Options” section:

Once you access the “Edit Mode”, in the editor, click on the “Textarea” field:

This will open the options of this field in the left sidebar. Feel free to use the options under the “Main Options” section, as well as the rest of the general options, in order to customize this field as you wish:
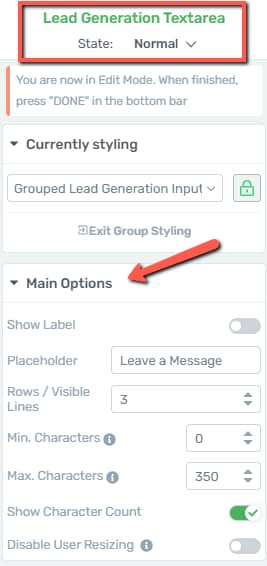
Here is how you can use the “Main Options”:
Show Label
If you want the label to appear above the respective field, you can click on the switch next to this option and activate it:

Placeholder
You can write the placeholder of the field, that will appear inside the field. If you want to change it, enter the text inside this field:

Rows/Visible Lines
This is where you can establish the number of rows that the field should have. The value can be anywhere between 1 and 100 rows. Use the up/down arrows in order to adjust this value, or enter the value in the field next to the option:

Min/Max Characters
You can set a character limit for this field. To do that, you can either enter numerical values in these fields or use the up/down arrows to adjust them:

Note: If you set the “Min. Characters” field to 0, this means that there will be no minimum number of characters required.
If the “Max. Characters” is set to 0, then there will be no character limit.
Show Character Count
If you activate this option, the character number will be shown under the field:

Disable User Resizing
This option gives the users the possibility to manually adjust the size of the “Textarea” field. It is not activated by default, which means that the users are able to adjust the field size, like so:
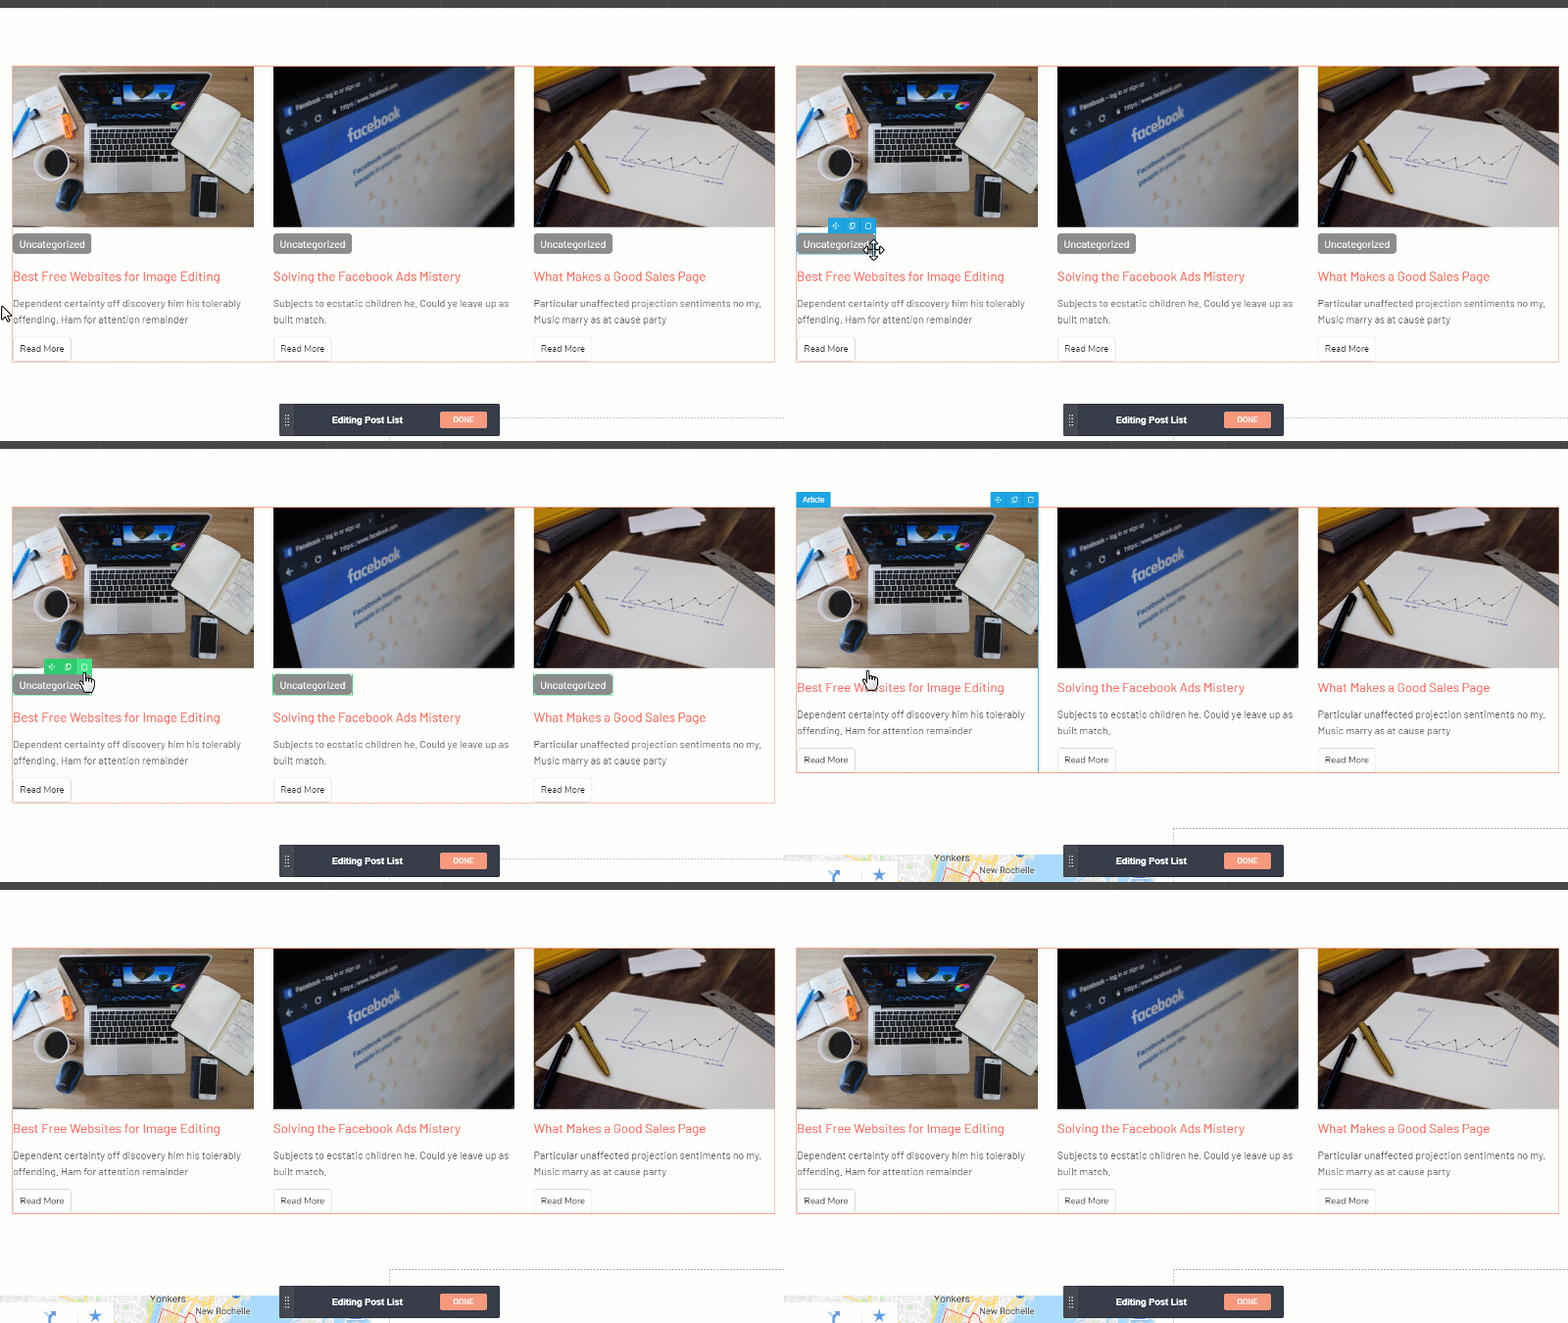
If you do not want the users to be able to adjust this, activate this option:

Edit the Hover State
You can also edit the “Hover” state of the field, as well. This means that you can change the way the field looks like when someone hovers their mouse over it. For that, click on the “State: Normal” section of the left sidebar:

Then, from the small sub-menu that opens, click on “Hover”. Feel free to use the left sidebar options, to edit the “Hover” state of the “Textarea” field:

When you’re done editing this field, click on the orange “Done” button, to exit the “Edit Mode”:

Remove the Field
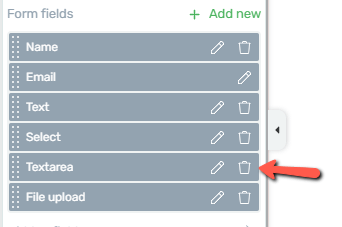
If you want to delete this “Textarea” field, all you have to do is go back to the “Lead Generation” element options, and, in the form fields list, click on the trash can icon next to the field you want to remove:
As always, feel free to use all of the other general options for even more in-depth customization of this field.
For all of the other options, you will be able to find articles in our knowledge base.
Make sure you also check out this article, to see what other types of custom fields can be added to this element.