This article will explain how you can send the quiz results using tags or custom fields, through either the Opt-In Gate of a quiz or the Results Page.
When using an autoresponder, after someone takes the quiz, you can either send the results through a tag or through custom fields. Keep reading the article to find out how to implement both of these methods.
For both of them, you first have to access the Thrive Quiz Builder dashboard. For that, in your WordPress admin dashboard, go to the left sidebar and hover over “Thrive Dashboard”.
From the small sub-menu that opens, click on “Thrive Quiz Builder”:

The Thrive Quiz Builder dashboard will open. Find the quiz for which you want to send the results, and click on “Edit Quiz”:

After this, it depends whether you want to send the results of the quiz from the Opt-In Gate, or from the Results Page. You can find both of these described below:
Send the Quiz Results through an Opt-In Gate
After you click on “Edit Quiz”, you will be taken to the quiz options.
Add an Opt-In Gate (if you do not already have one)
When you first create a quiz, it does not have an opt-in gate by default, and you will have to add one if you want to have it in the quiz.
For that, in the “Quiz Structure” section, click on “+ Opt-In Gate”:

Then, the Opt-In Gate will appear as a part of the Quiz Structure. Click on “Manage” to continue:

Then, click on the “Edit Design” option:

Note: If you have just created the Opt-In Gate, you will see the notification from the image above, which informs you that this comes with default content, which you should change.
If you did already have an Opt-In Gate created and customize, you should also access the “Edit Design” option, since this is where we will configure the results from.
The Opt-In Gate will now open in the Thrive Architect editor. The Opt-In Gate contains a “Lead Generation” element, which we will use to send the results.
In the editor, click on the “Lead Generation” element, to select it. Once you do that, its options will appear in the left sidebar:

Note: Please make sure that you have successfully set up an API connection first, in order for these methods to properly work.
In this article, I will use the ActiveCampaign autoresponder, but this should work for all of the autoresponders from this list.
Then, you can either send the results using tags, or using custom fields, or both at the same time.
Send the Results Using Tags
Important!
Make sure that the autoresponder that you are using supports the use of tags.
In order to send the results using tags, all you have to do is enable the “Send quiz results as tag” option, while editing the “Lead Generation” API connection.
In order to edit the connection, click on the pencil icon next to it:

Then, a pop-up will open, from where you can edit or set up the ActiveCampaign API connection. After you set the mailing list, as well as the form that you want to use, make sure you enable the “Send quiz results as a tag” option.
For that, click on the switch next to the option:

When you activate this, the “%results%” tag will automatically be added to the list of tags:

Then, click on “Apply” to save everything:

Make sure to also save this page, using the green “Save Work” button:

Then, we need to add the quiz to a page, where you want your quiz to be. There are two methods in which you can add a quiz to a page.
-
the first one is to copy the Quiz Shortcode, add a “Text” element to a page, and paste the shortcode into that “Text” element;
-
secondly, you can edit the page where you want the quiz to be, using Thrive Architect, and add a “Quiz” element to that page.
You can find both of the methods described below.
Insert the quiz in a page using the Quiz Shortcode
If you want to use the first method, then, after editing the Opt-in Gate, go back to the quiz options. In the top right corner of the page, you will see a “Quiz Shortcode” section. Click on “Copy” to copy the shortcode to your clipboard:

Then, in the left sidebar of your WordPress admin dashboard, hover over the “Pages” section and go to “All Pages”:

This will open the list with all of your pages. Go to the one where you want the quiz to be inserted into, hover over it, and click on “Edit with Thrive Architect”:

The page will then open in Thrive Architect. Next, you have to add a “Text” element to the page, by drag and dropping it on the page, from the list of elements:

Then, paste the Quiz Shortcode inside this element:

After this, don’t forget to save everything.
Insert the quiz in a page using the Quiz Element
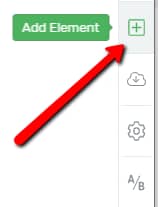
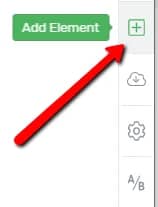
As previously mentioned, there are two ways in which you can add a quiz on the page. If you do not want to use the Quiz Shortcode, then, in the Thrive Architect editor, open the list of elements by clicking on the plus sign from the right sidebar:

Here, look for the “Quiz” element. Once you find it, drag and drop it on your page:

Once the element has been added, a small list will open, with all of the available quizzes. Select the right one from that list:

The quiz will then be added. Feel free to use either one of these two methods to add the quiz to your page. This is it! Now, whenever someone takes your quiz, the result will appear as a tag in the autoresponder dashboard. Since I’ve used ActiveCampaign as an example, this is how the result will be shown:

Of course, the way this looks like will depend on each autoresponder website.
Send the Results Using Custom Fields
The second way to send the quiz results to an autoresponder is by using a custom field.
Important!
Just like in the case of sending the results using tags, before you begin, please make sure that the autoresponder that you are using is supported by the custom fields integration with the “Lead Generation” element. You can find the list here.
When editing the “Lead Generation” element of the Opt-In Gate, after setting up the desired API connection, click on the “Add New” option, to add a new custom field:

This will open a small pop-up, to set up the new field. Click on the field next to the “Field Type” option, in order to open a list with all of the available custom fields:

A list will open, with all of the available types of custom fields that you can add for this connection. If you want to see how to set each one up, please read this article.
The last item from this list is the “Results of Quiz” option. Click on it, in order to select it:

After this, choose the campaign where the results should be collected, by clicking on this field and choosing one from the list that opens:

After you set everything up, click on “Apply”:

Again, make sure you save everything by clicking on the green “Save Work” button:

After this, when someone takes the quiz, you will be sent the results, in the dashboard of the autoresponder that you have chosen. Here is an example of how this works when using ActiveCampaign:

These were the methods in which you can send the quiz results, using the Opt-In Gate of your quiz. You can do the same when using the Results Page, as well.
Send the Quiz Results through the Results Page
If your quiz does not have an Opt-In Gate, or you do not want to use one, you can also send the results via the Results Page of your quiz.
The process is just the same as the one in the case of the Opt-In Gate, with the addition that you might have to add the “Lead Generation” element yourself since the Results Page does not usually have such an element.
For that, in your Thrive Quiz Builder dashboard, find the quiz and click on “Edit Quiz”:

Then, from the Quiz Structure section, click on the “Manage” option, under the “Results Page” card:

Then, click on the “Edit Design” option of this page:

The Results Page will open in the Thrive Architect editor. Since the default one does not come with a “Lead Generation” element, you will have to manually add one. For that, click on the plus sign from the right sidebar:

Look for the “Lead Generation” element, and drag and drop it on the Results Page:

After that, you can go ahead and follow the same steps as the ones described above, to set up the “Lead Generation” element:
This was how you can send the results of a quiz through the Opt-In Gate or through the Results Page, using either tags or custom fields.
Keep in mind that, when you do all of these steps, the results will be added together with the subscriber’s details, as a tag or a custom field, depending on your setup, and then it’s up to you to decide what to do with the information.
You might also be interested in this article, in which we’ve explained how you can set up the notification manager, and receive the quiz results via email.
If you need more information about various Thrive Architect features, please make sure to check out our knowledge base.
I hope this article was helpful. If so, please don’t forget to leave a smile below 🙂