A common issue that users encounter when having caching plugins installed (such as Autoptimize or W3 Total Cache) is that the “Minify” option of these plugins interferes with the saving process of Thrive products.
This means that while building your website with Thrive products, although, the saving process seems to work, the changes that were made are not saved.
- For instance, it might happen that you add a lightbox to your page, and even though the lightbox is saved, it does not open when it is clicked by your visitors.
- Another example of such an issue is when the layout of your page is not saved and displayed correctly because the JavaScript minify option of a caching plugin is interfering with it.
- It might also happen that you have added an event to your page, but the event does not redirect the visitors as it should.
- Furthermore, if you have issues adding images to your page, the problem could be the minification for caching plugins again.
All of these issues occur because of an overlap in minification. The files of our products are already minified and optimized to ensure that your website has the best performance when using them.
Thus, when other plugins have the minify option enabled, this interferes with the minification of Thrive products.
Solution
However, when you encounter such problems, you do not have to uninstall these plugins. Disabling minification for logged-in users in these caching plugins is an optimal solution which should be enough.
This way, the overall performance of your website is not compromised and you will be able to use the Thrive products in the most efficient way, without encountering such issues as mentioned above.
Here is how to set the “Minify” options for the most popular caching plugins.
Autoptimize
If you have installed and activated the Autoptimize plugin, follow these steps to disable the “Minify” option for logged in users:
Go to your WordPress admin dashboard, and then, click on the “Settings” section from the menu to open it. Look for “Autoptimize” and then, click on it to open its settings:

- Check the first three options
The next step is to make sure that after the “Settings” page is opened the first three options in the “Main” tab are checked:
✓ Optimize JavaScript Code
✓ Optimize CSS Code
✓ Optimize HTML Code

- Uncheck the “Also optimize for logged-in editors/ administrators” option
However, there is one option that should be unchecked here, which is the “Also optimize for logged-in editors/ administrators?” one:

- Exclude the editor.min.js and frotend.min.js scripts
Lastly, you’ll have to go to the JavaScript options and exclude these two scripts from being aggregated by Autoptimize:
editor.min.jsfrontend.min.jsTo do that, enter the scripts in the “Exclude scripts from Autoptimize” field, in the JavaScript Options section, separated by commas:

When you’re done with the three steps, click on the blue “Save Changes and Empty Cache” button:

After you have done this, the minification for logged-in users on Autoptimize will be disabled.
W3 Total Cache
If you’re using W3 Total Cache, you will need to disable minification for logged-in users for this plugin. The first step for that is to access the “Performance” section from the menu in your WordPress admin dashboard. Then, select the “Minify” item of this section:

On the page that opens, scroll down and simply enable the “Disable minify for logged in users” option, meaning that you have to check the box next to this option, as shown here:

Then, click on the blue “Save Settings & Purge Caches” button to save your changes:

WP Fastest Cache
Disabling minification for logged-in users for the WP Fastest Cache plugin can also be done in a few steps.
If you have this plugin installed and activated, then go to your WordPress admin dashboard, and look for “WP Fastest Cache” in the menu. Click on it to open its options:

- Check all the minification checkboxes
The next step is to make sure that in the “Setting” tab, every option that is related to minification (Minify HTML, Minify HTML Plus, Minify Css, Minify Css Plus, Minify Js) is checked, meaning that the box next to them is checked:

Note: Some of these checkboxes can only be ticked if you’re using the premium version of this plugin.
- Uncheck the “Logged-in Users” checkbox
Then, to disable minification for logged in users, make sure that this box is not checked:

When done, click on “Submit”:

- Delete cache
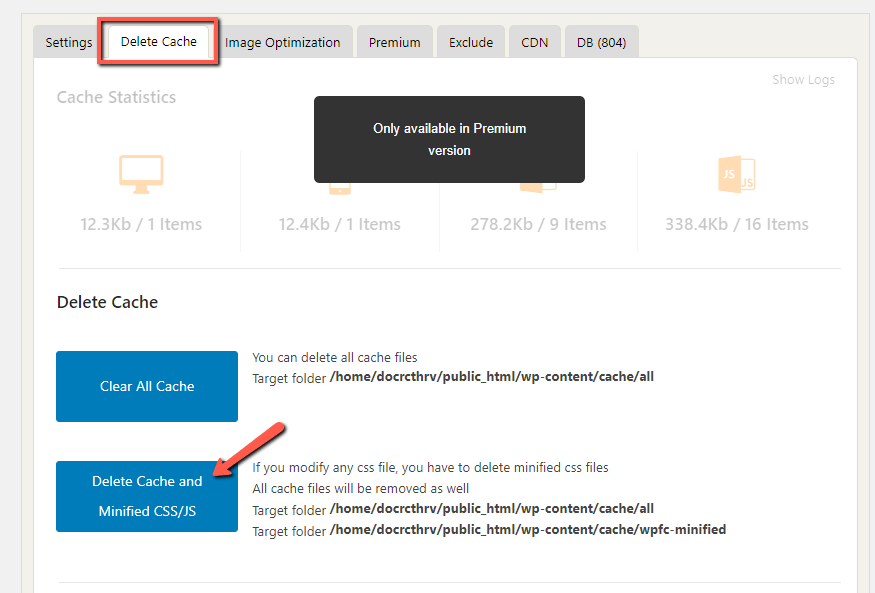
The last step here is to go to the “Delete Cache” tab and click on the “Delete Cache and Minified CSS/JS” to finish the process of disabling minification for WP Fastest Cache:
Cloudflare
If you are using Cloudflare you will have to go to your Cloudflare account in order to disable the “Auto Minify” option.
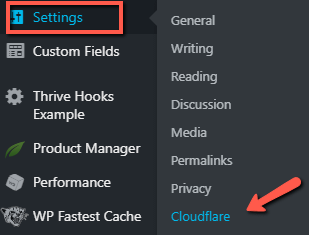
For that, in your WordPress admin dashboard, hover over “Settings”, and click on “Cloudflare”:
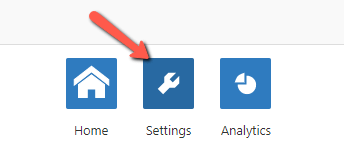
Make sure you log in to your account. Then, open the “Settings”:
Look for the “Auto Minify” option, which can be found under the “Speed” section:

You will have to make sure that the “Auto Minify” option for JavaScript, CSS, and HTML are unchecked, so you will have to uncheck the boxes next to them.
Please note that you will also have to purge your Cloudflare cache in order for these changes to be visible.
WP Rocket
If you have WP Rocket installed and activated you will have to access it to be able to disable the minification options (this is an affiliate link, which means we get a small commission if you end up purchasing one of their plans, as it allows us to track how many people we refer).
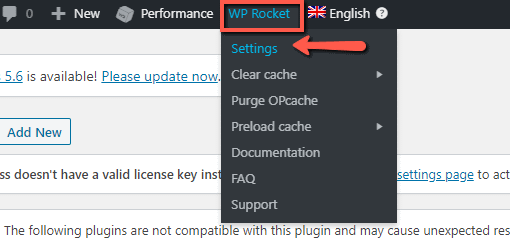
Go to the upper part of your WordPress Dashboard and click on “WP Rocket”. Then, select “Settings” from its dropdown:
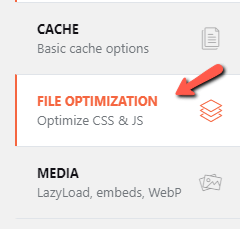
Scroll down to the “File Optimization” part and open the tab:
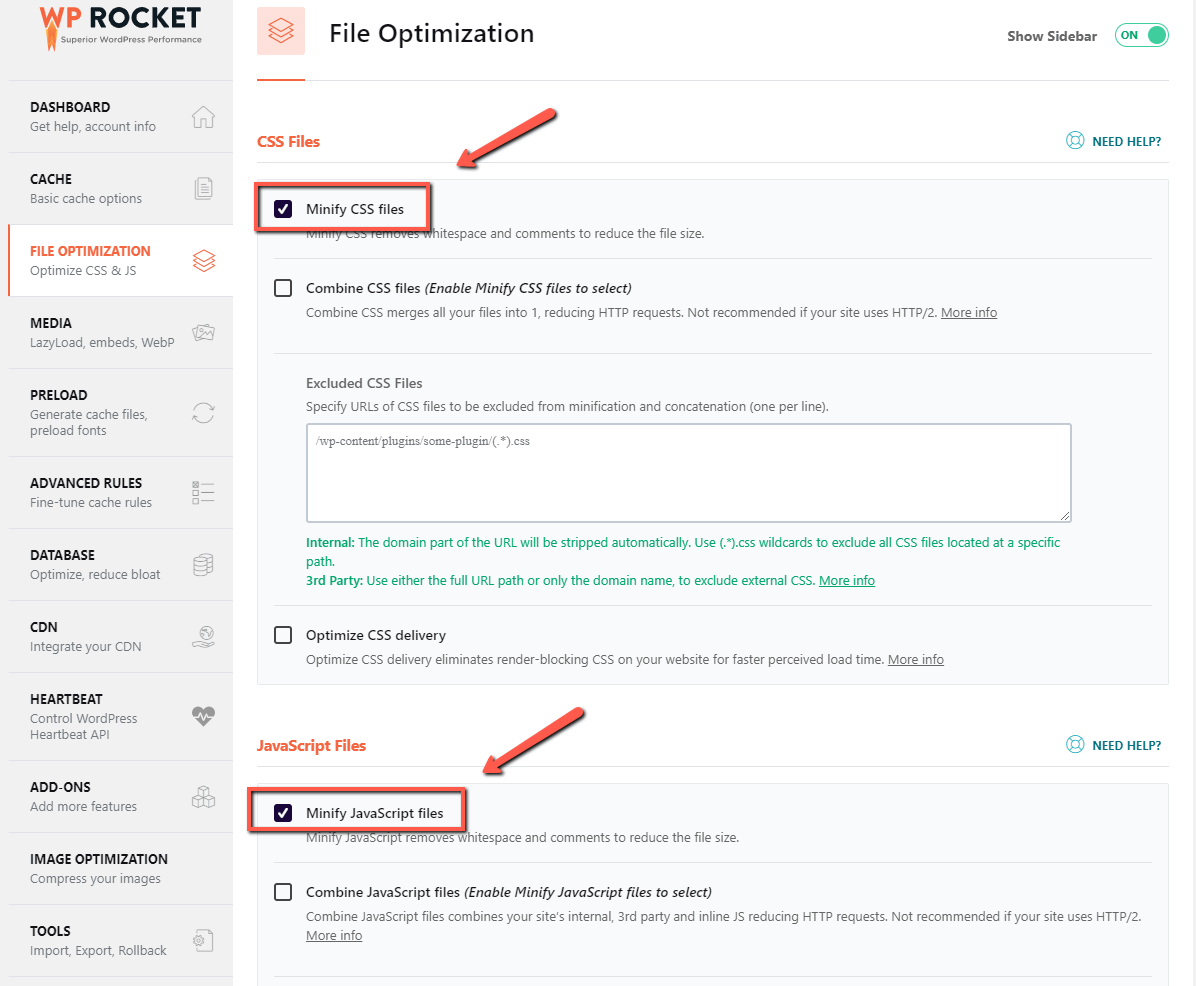
- check the “Minify CSS files” and “Minify JavaScript files” checkboxes
You can keep the checkboxes that refer to the minification of the CSS and JavaScript files checked:
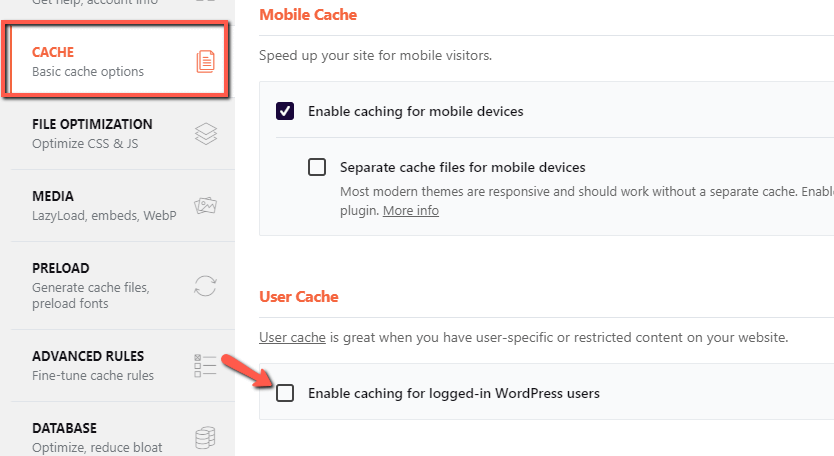
- disable the “Enable caching for logged-in users” option
However, make sure that the “Enable caching for logged-in users” option is unchecked. This can be found under the “Cache” tab:
Once you are done, click on the “Save Changes” option.
After you have disabled the minification for any of these plugins, please make sure to reload Thrive Architect and save your page again.
This time the saving process should work properly. Thus, the layout, as well as the content of your page should be displayed and should be working in the right way.
Hopefully, this article was useful for you. If so, please give us a smile below 🙂