When using Google fonts on your site, they will be loaded from the Google servers.
However, in case you want to use Google fonts on your site, but you do not want them to be loaded from the Google servers, but from your own, you can easily do that.
This article is a step-by-step guide on how you can load Google Fonts on your website and use them, while the connection to the Google servers is being disabled.
Here are the steps that you need to take:
1. Install the Custom Fonts plugin
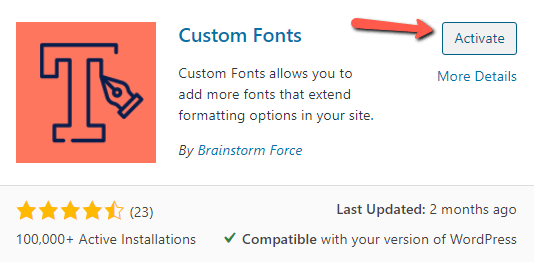
In order to achieve this, you will need to install a plugin that allows you to use custom fonts. You can use the Custom Fonts plugin for this.
To install it, in your WordPress admin dashboard, go to “Plugins” -> “Add New”:

Look for the “Custom Fonts” plugin, and then install and activate it:

2. Download the Google fonts that you want to use
Next, go ahead and choose which Google fonts you want to use, and download them.
3. Upload the Google fonts using the Custom Fonts plugin
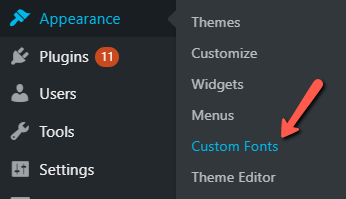
Once you’ve found the fonts that you want to use, access the “Custom Fonts” plugin and upload them. For that, go to “Appearance” -> “Custom Fonts”:

Enter a name for the font, and click on “Upload”, under the correct font format field:

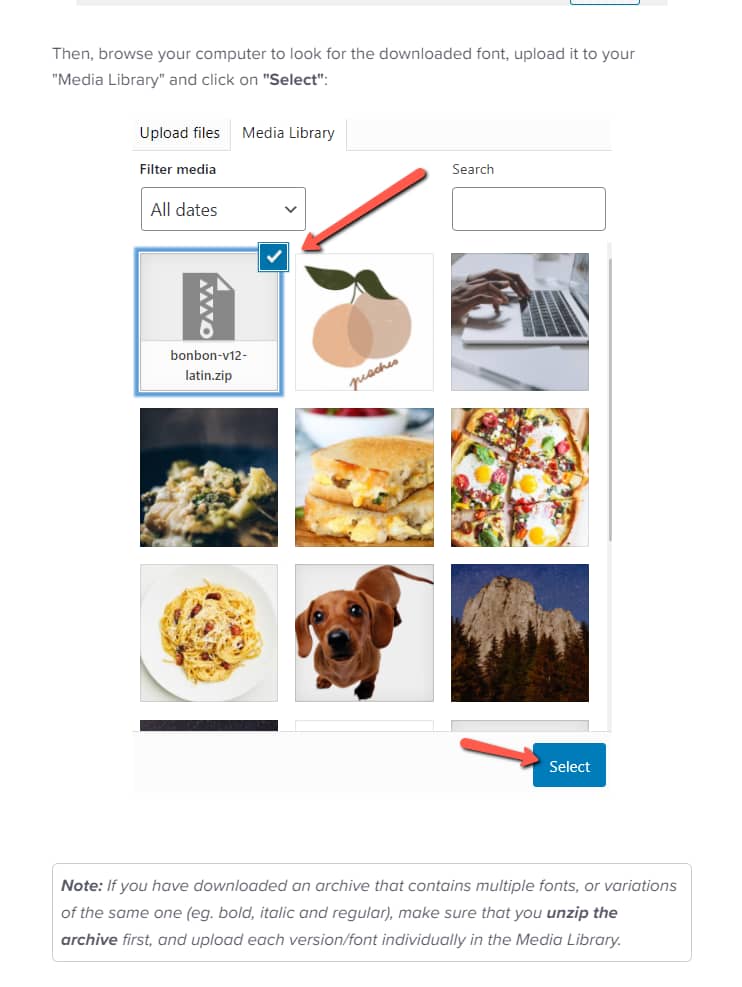
Then, browse your computer to look for the downloaded font, upload it to your “Media Library” and click on “Select”:

|
Important! Make sure that you unzip the archive if you are using a font that uses multiple variations (such as italic, regular, bold, etc.), and upload each version/font individually in the Media Library. |
Click on “Add New Font” to continue:

The font has been added. You can repeat this process for as many fonts as you want, to add them to the plugin:

4. Use the custom fonts on the desired post/page
Next, you can open the page/post where you want to use the fonts, using Thrive Architect:

In the Thrive Architect editor, select the text that you want to use the custom font on, and click on the “Font” field, from the left sidebar:

Choose the “Custom Fonts Plugin” font source:

After you choose the font that you want, click on “Apply”:

When you’re finished with all of the custom fonts, make sure you save everything:

5. Disable the Google Fonts connection
The next step is to block the Google API calls, by disabling the connection to Google Fonts, from the Thrive General Settings.
This article goes into more details about this, so please check it out for more in-depth information.
Briefly, to disable this connection, hover over “Thrive Dashboard” in the left sidebar of your admin dashboard, and click on “General Settings”:

At the end of this page, you will notice the “Disable all Google Fonts loaded by Thrive Themes on your website” option.
By default, this option is not ticked. However, in our case, we need to check this option, in order to cut the connection to the Google servers:

This is it. Now, if you go back to your page, you will notice that the font has not been changed, but the Google APIs have not been called.
This way, you can use Google fonts and not have to keep the connection to Google Fonts enabled.
I really hope this article was useful. Make sure to also check out the rest of the articles and tutorials from our knowledge base, if you need more information about our products.
Also, don’t forget to leave a smile below 😄