Whenever you set up an “Email Connection” for one of your “Lead Generation” elements (just as it is showcased in this article), you have the option of choosing to integrate with an “Email Delivery Service”.
This means that instead of sending the notification emails from the server of your website, these will be sent using the email delivery service that you integrate with. So, when someone will use the form you create with the “Lead Generation” element, the notification email about it will be sent through the email delivery service of your choice.
Select the email delivery service
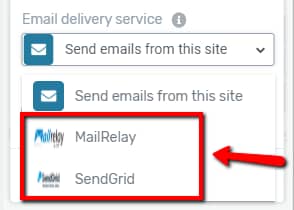
To use this option, you will have to first click on the field with the “Send emails from this site” option, when you are setting up the “Email Connection”, in the left sidebar:

This will open a drop-down which, besides the default “Send emails from this site” option, will contain every email delivery service that you have previously set up an API connection with for your website. In this example, we have MailRelay and SendGrid:

When you have found the connection you want to use in the drop-down, click on it to select it.
Note: In case you have not yet set up an API connection between an email delivery service and your website, then the drop-down will only contain the default option.
Therefore, you will first have to set up the API connection with the services you want to integrate with, before being able to use them for the “Email Connection”. You can do this using your Thrive dashboard.
Use the Message section – Set up the emails
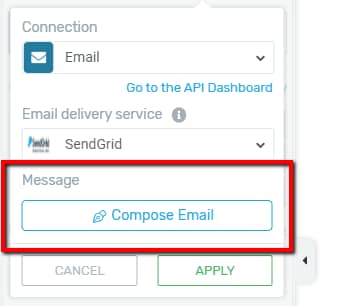
After you have selected the email delivery service, you can continue with setting up notification email (and optionally a confirmation email as well) using the options from the “Message” section, below the “Email delivery service” section of the drop-down in the left sidebar:

Click on the “Compose Email” button from here. This will open a pop-up where you can set up various aspects of the notification email.
You can define the “To” field (the email where you want the notification emails to be sent), the “From Name” field (the name from where the email is sent), as well as the “Subject” and the “Message” of the notification email. We have described in detail how to define these in this article.
You will see only one difference in the pop-up, between the cases when you use an email delivery service to send the notification emails, and when you choose to send them from the server of your website.
This difference is related to the “From Email” field.
If you choose to use an email delivery service, then this field will not be customizable (it will be grayed out), you cannot enter a different email address here.
This is because it is not possible to change the “From Email” address to anything different than the one you have used to make the API connection between the email delivery service and your website.
Naturally, if instead of integrating with an email delivery service, you choose to send the notification emails from the server of your website, then you can enter whichever email address you want in the “From Email” field.
Save the settings & test out the connection
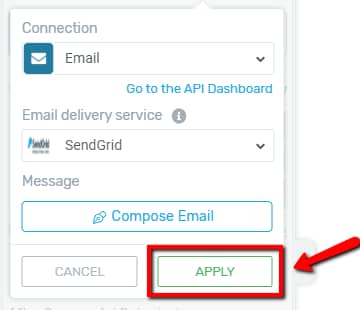
After you have set up everything related to the “Email Connection” and its integration with the email delivery service, you should click on the “Apply” button from the “Connection” pop-up:

Then, you can customize the “Lead Generation” to your liking, as described in this tutorial.
Once you have also done that, save the changes that you have made using the “Save Work” button from the bottom-left part of the page:

After you have also saved the page, you can preview it using the “Preview” button from the bottom center of the page:

We recommend you preview the page in an incognito window to be able to test the connection.
While you are previewing the page you can also test out the connection. Go to the form created with the “Lead Generation” element and complete it as a user would.
If everything is set up correctly, a notification email will be sent through the email delivery service. As mentioned above, you should receive this notification email on the email address you have used to make the API connection between the email delivery service and your website.
If you want to find out how to use various Thrive Architect elements, don’t forget to check out our knowledge base.
Hopefully, this article was useful for you. If so, please give it a smile below 🙂