Are you bored of using the same old WordPress Comments and looking for something new? Thrive Comments lets you replace WordPress Comments on blog posts and can be added anywhere on your website.
In this article, we’ll introduce you to everything you need to know to get started with Thrive Comments.
- Installing and Enabling Thrive Comments
- Enabling Comments on Blog Posts/Pages
- Customizing Thrive Comments
- Adding Thrive Comments Anywhere on Your Website
- Enabling Comment Voting
- Awarding Badges in Thrive Comments
- Boosting Conversions Through Comments
- Enabling Thrive Comment Notifications
- Moderating Comments on Your Website
- Accessing Thrive Comment Reports
- Frequently Asked Questions About Thrive Comments
Installing and Enabling Thrive Comments
Before you get started with Thrive Comments, please make sure you have installed and activated Thrive Comments following this method.
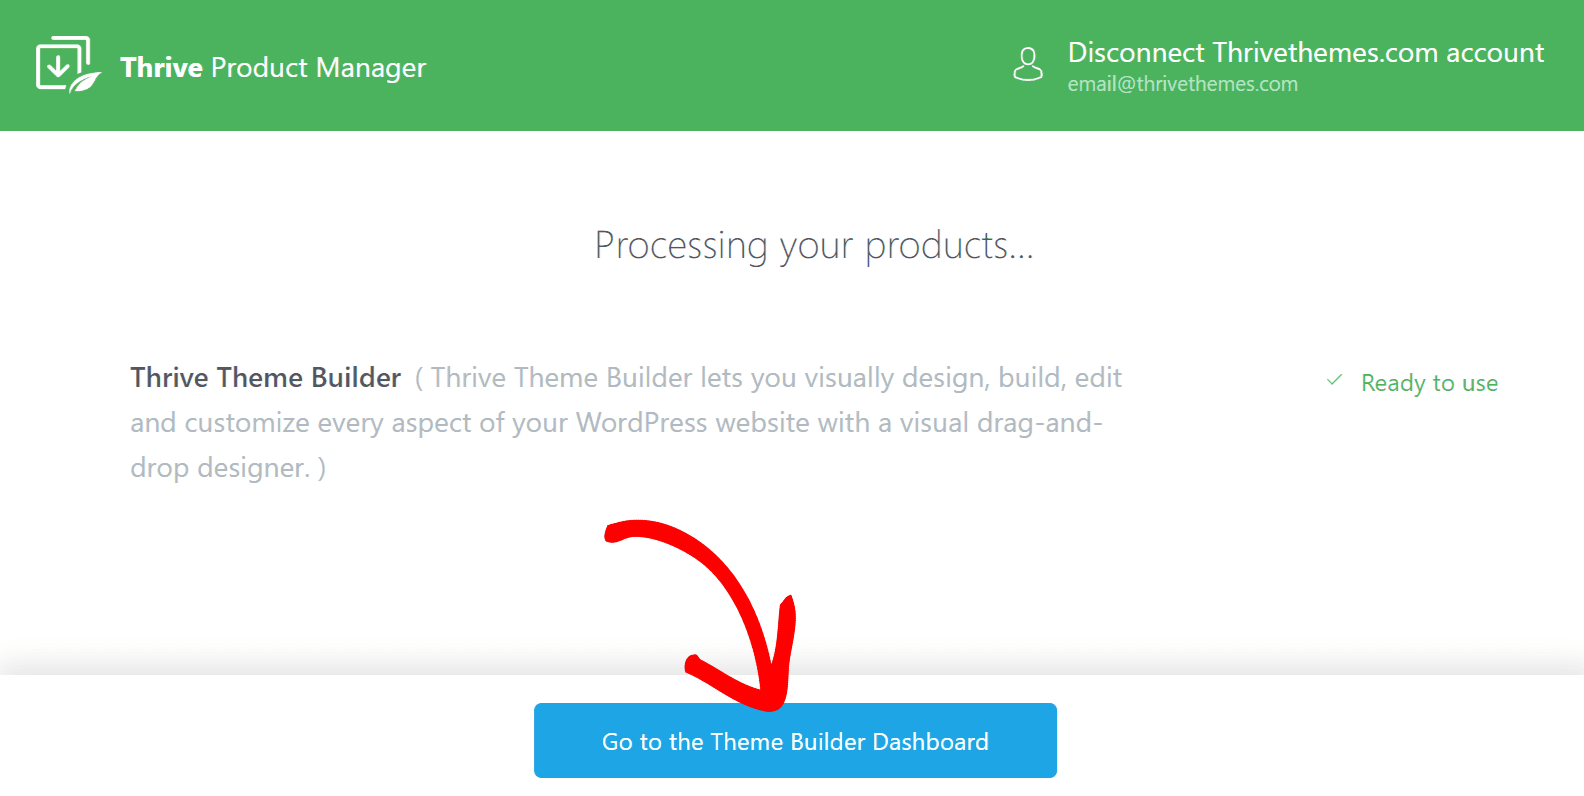
Once Thrive Comments is installed and ready to use, click on the Go to the Thrive Themes Dashboard button. As the button text suggests, this will take you to the Thrive Dashboard.
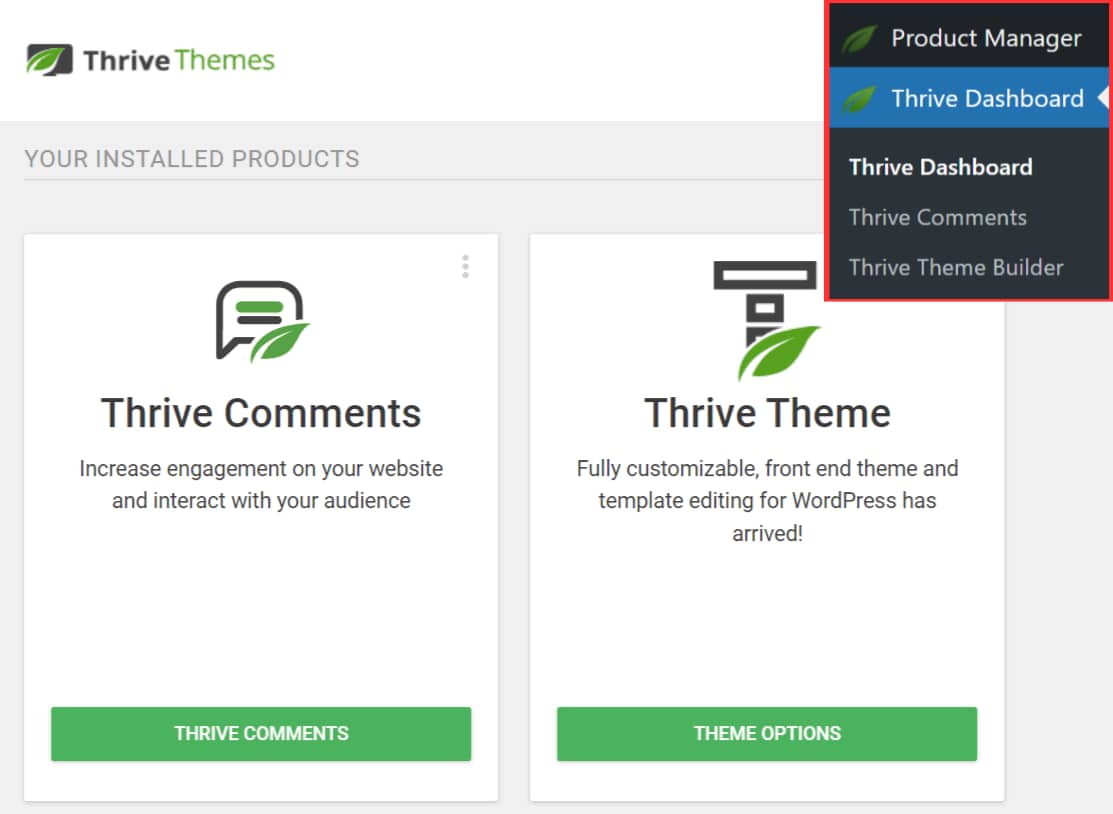
You can also go to the Thrive Dashboard by opening the WordPress admin area and navigating through the Thrive Dashboard >> Thrive Dashboard. You’ll see Thrive Comments listed under Your Installed Products.
Once the Thrive Comments plugin is installed and activated, let’s proceed to enable it.
To do so, open your WordPress admin area, navigate to Thrive Dashboard >> Thrive Comments, and click on General Settings.
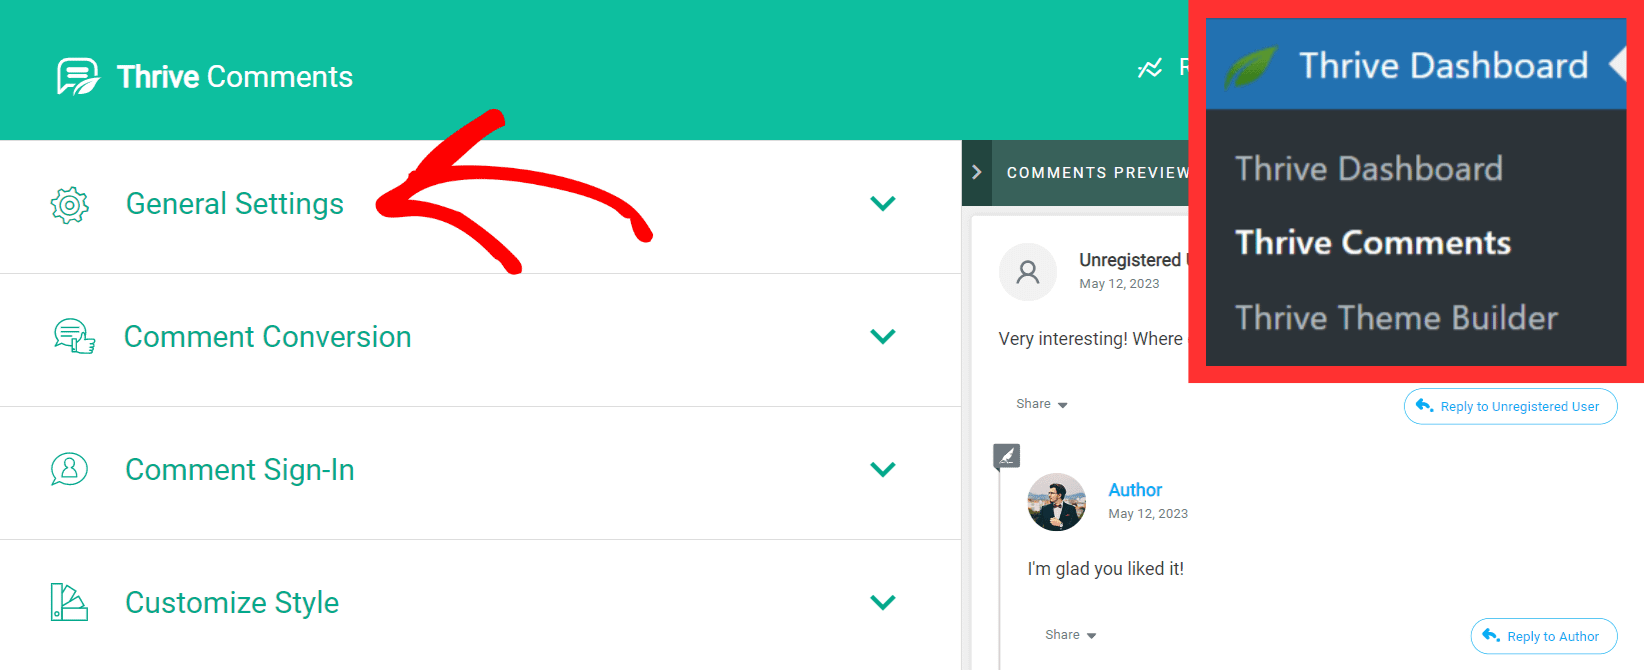
When you click on General Settings, it will expand the tab and display the settings. Under General Settings, switch the toggle to Activate Thrive Comments sitewide.
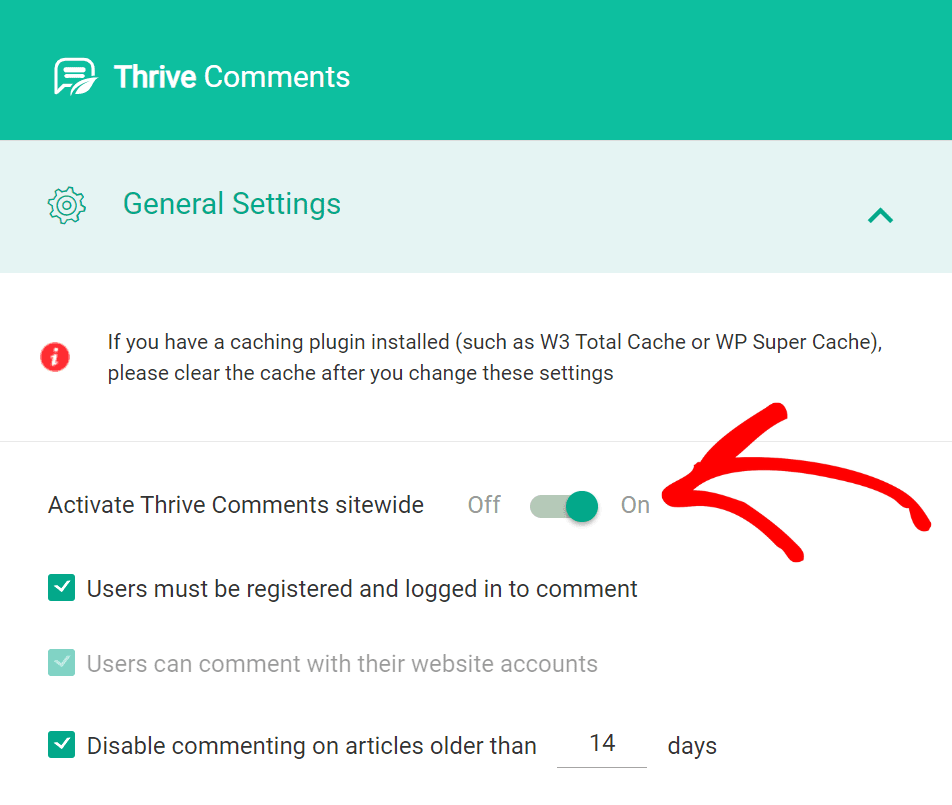
For more customization details, please check out our document about the Thrive Comments General Settings.
Enabling Comments on Blog Posts/Pages
Once you have installed and enabled Thrive Comments on your website, you will have to make sure you have comments enabled for the posts and pages they’ll be seen on.
Note: The methods to enable comments on posts and pages are the same. You’ll just need to edit a page instead of a post.
As an example, let’s enable comments on a post.
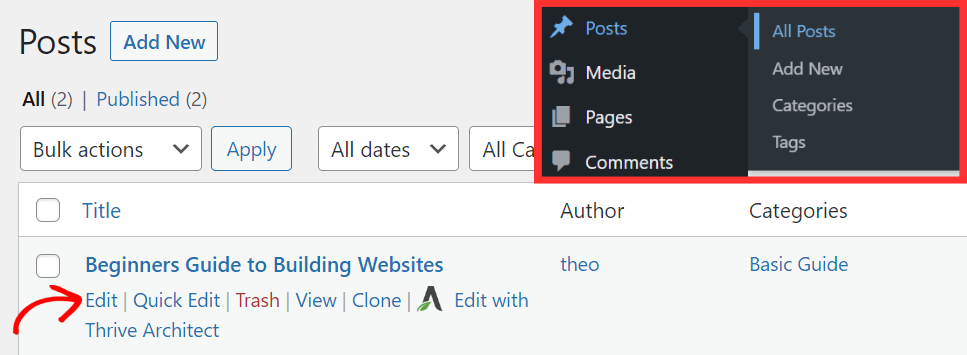
In your WordPress admin area, navigate to Posts >> All Posts. Then hover on the post you want to enable comments on, and click Edit.
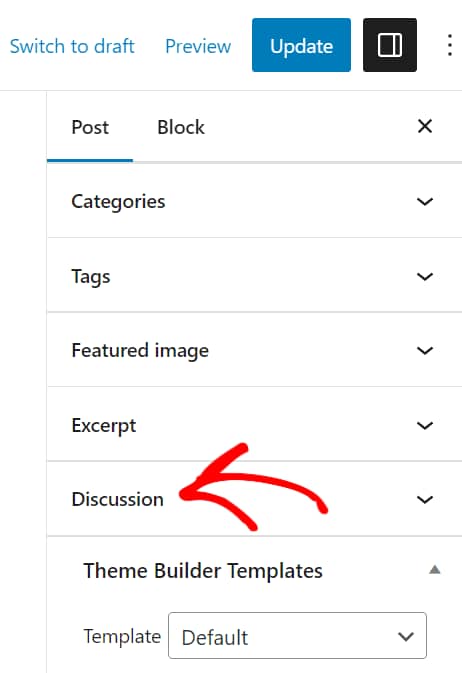
In the right sidebar, lookout for Discussion under the Post tab.
When you expand Discussion, check the box beside Allow Comments to enable comments on the post.
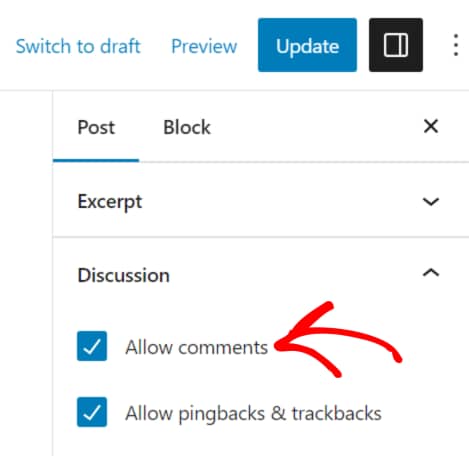
After you are done enabling comments for the post, click on the Update button on the top right to save your settings.
Note: Thrive Comments is also available as an element in Thrive Architect. So, you can drag and drop it on a page or post while editing it with Thrive Architect as well.
Customizing Thrive Comments
You can customize Thrive Comments by opening the WordPress admin area and navigating to Thrive Dashboard >> Thrive Comments.
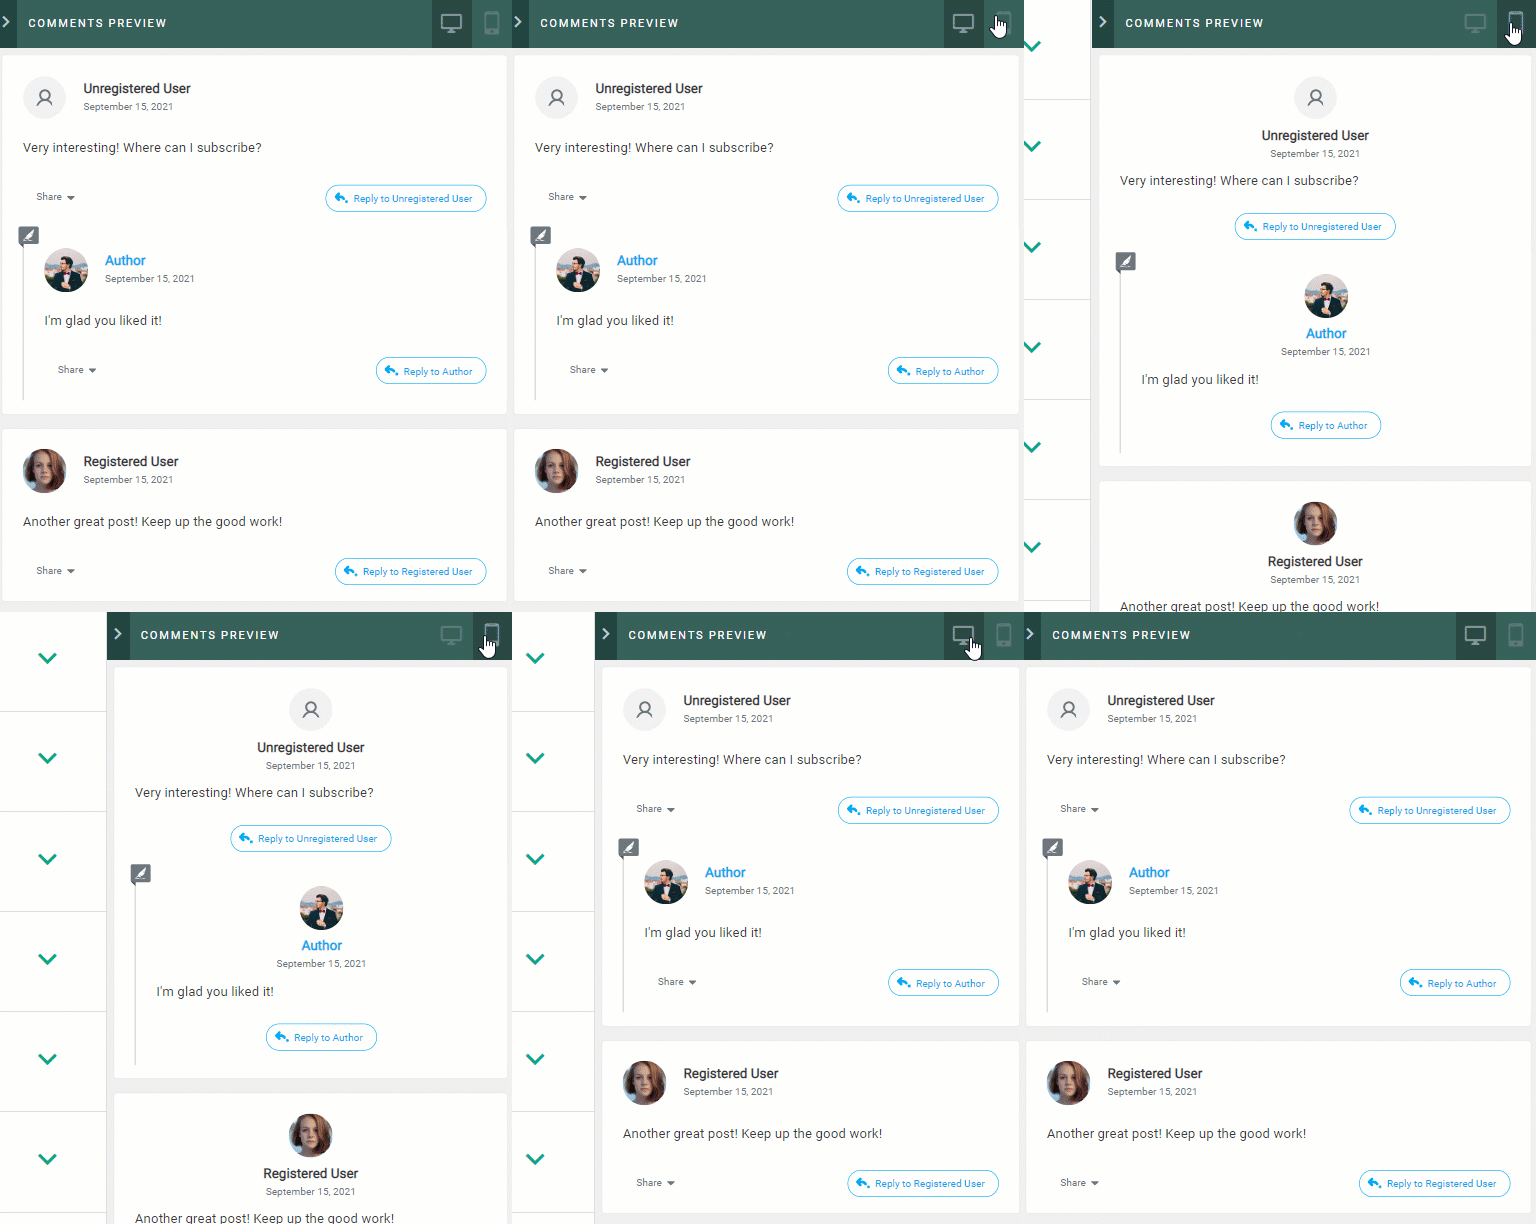
On the Thrive Comments page, you’ll find some settings on the left and a Comment Preview area on the right. The Comments Preview section shows you how the comments will look while you work on the styling options.
You can also click on the desktop and mobile icons seen in the upper right corner of the Comment Preview window to see how the comments will look on these devices.
To customize your comments, click on Customize Style.
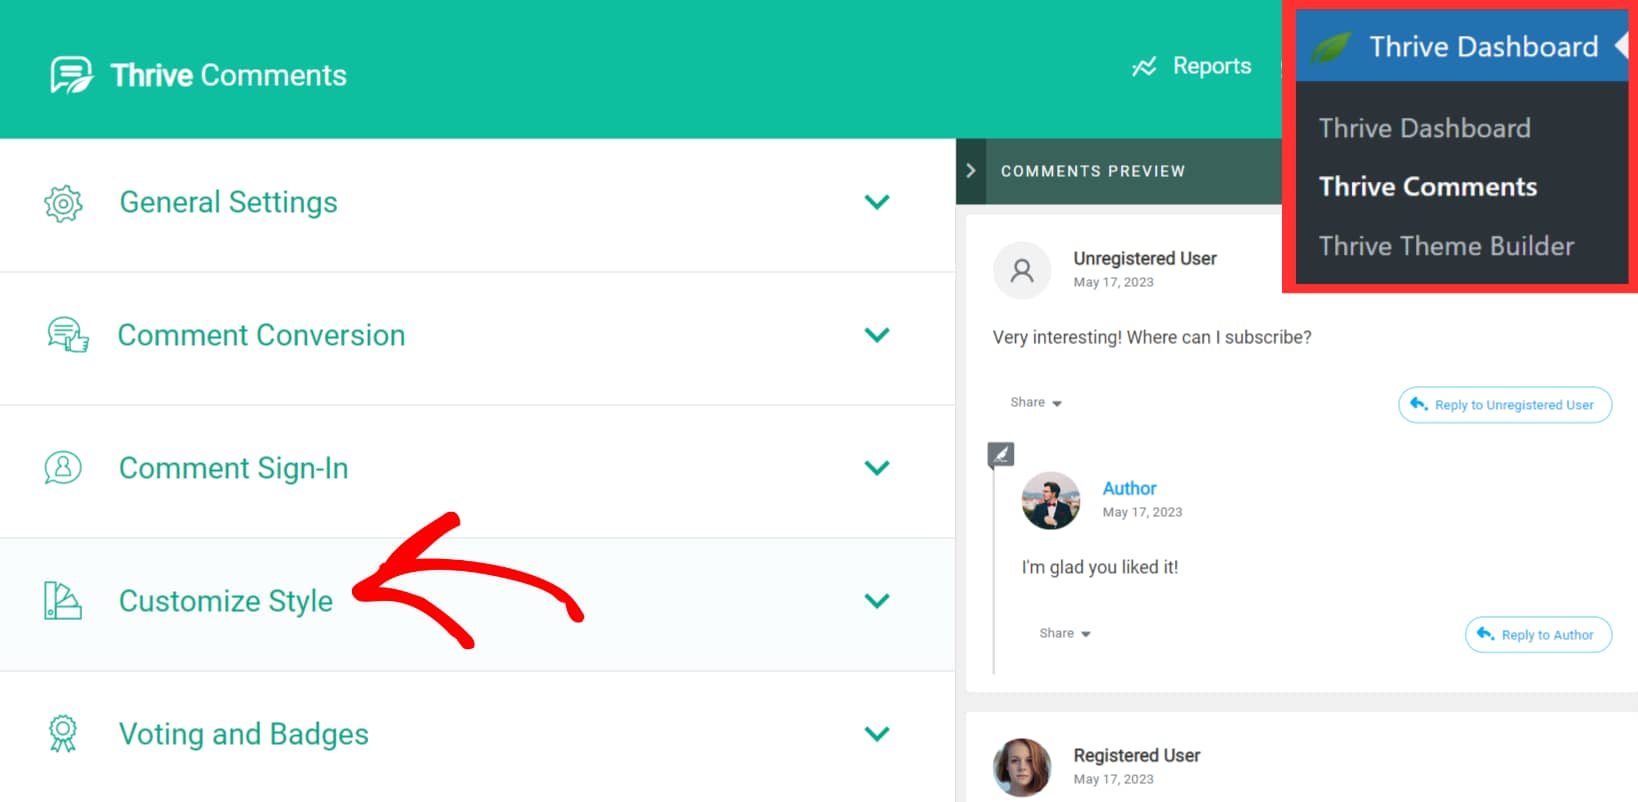
When you click on Customize Style, it expands to display all styling options.
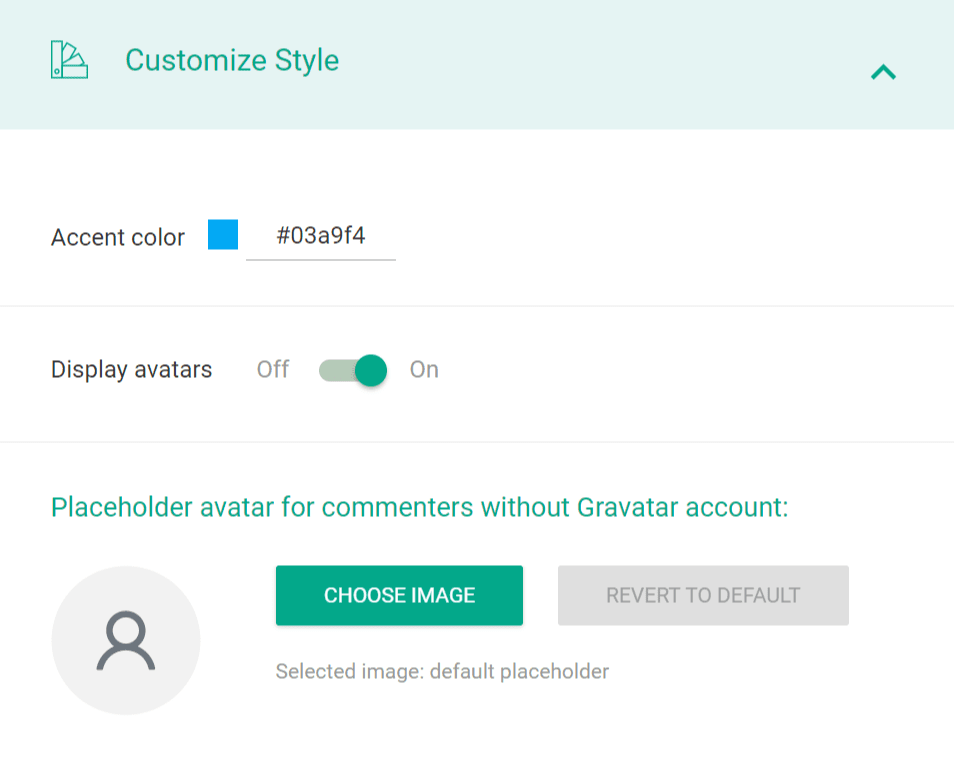
These options include:
Accent color: select a color for the user’s name, hyperlinks, and the reply button.
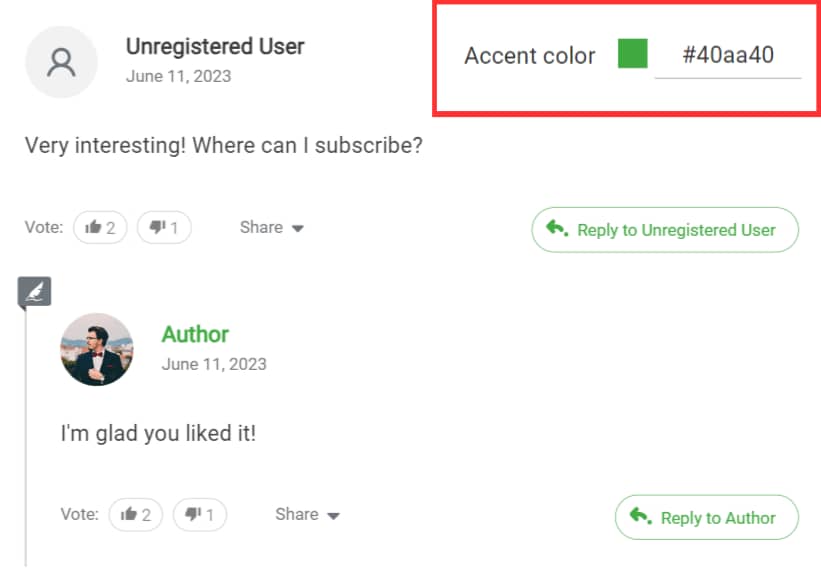
Display avatars: decide whether you want the user’s avatar (image) to be shown.

Placeholder avatar for commenters without a Gravatar account: Set a default profile picture for users who do not have a Gravatar account. Gravatar is an account where users can set up a profile that shares information across various WordPress websites.
Know more about Gravatar here.
Comment date: decide whether you’d like to display the actual date of the comment, a relative time like two days ago, or hide it completely.
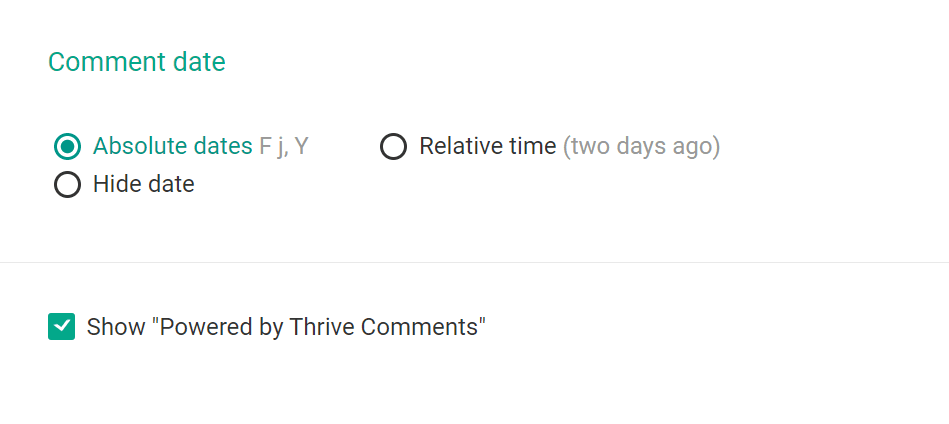

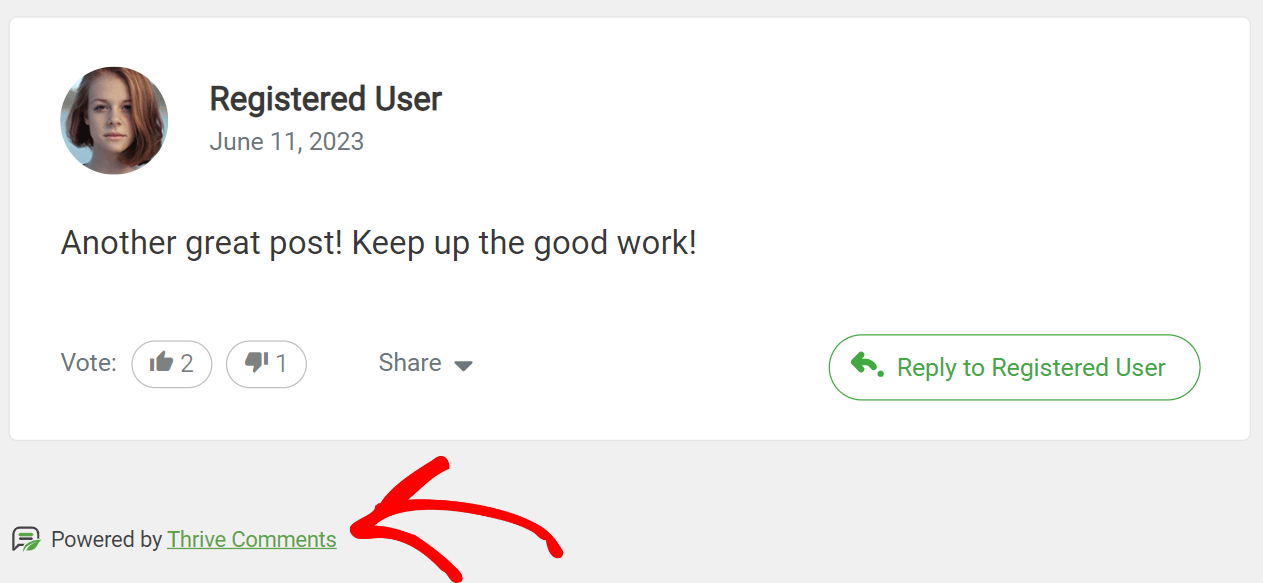
Show “Powered by Thrive Comments”: check this box to let website visitors know that you are using Thrive Comments.
Adding Thrive Comments Anywhere on Your Website
In the above method, we showed you how to replace built-in WordPress comments with Thrive Comments. But with Thrive Architect, you can include comments anywhere on your website.
Note: To use the Thrive Comments element in the Thrive Architect editor, please make sure:
- Both Thrive Architect and Thrive Comments are installed and activated on your website.
- The page or post on which you want to insert the Thrive Comment element is built using a ready Landing Page template.
To display comments on an existing page, navigate to Pages >> All Pages, hover on the page you want to edit, and click on Edit with Thrive Architect.

In the Thrive Architect editor, click on the + (plus) icon in the right-side panel. Then, type “Comments” in the search bar. In the results, you should see Thrive Comments under the Thrive Integrations section.
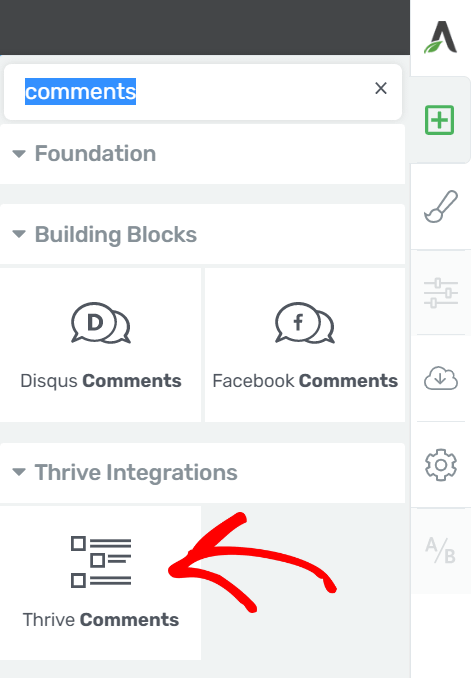
To display comments on a page, drag and drop the Thrive Comments element in the desired position on the page.
When you drag and drop the element, you’ll see the styling options appear in the left side panel.
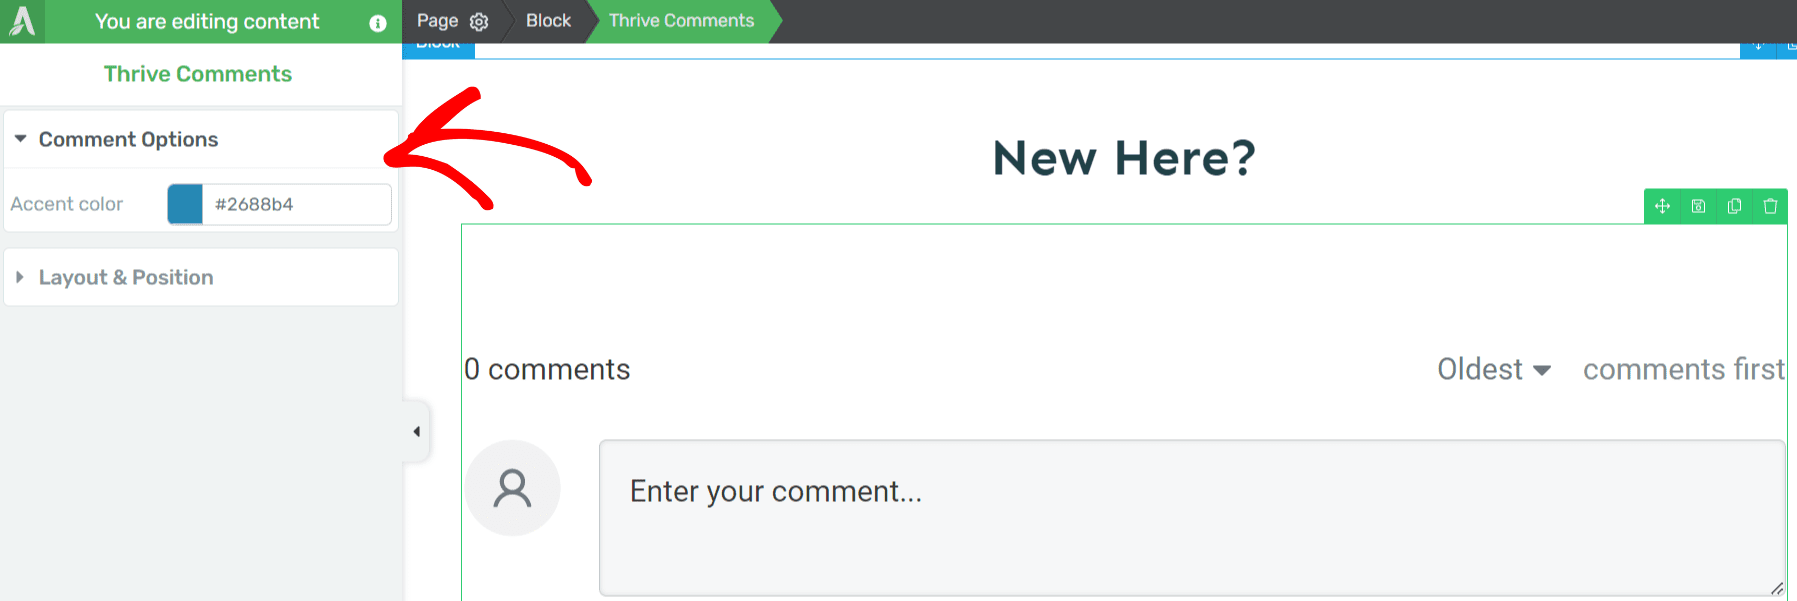
The Accent color option allows you to select a color for the hyperlinks, button text, etc. that accompany the comments.

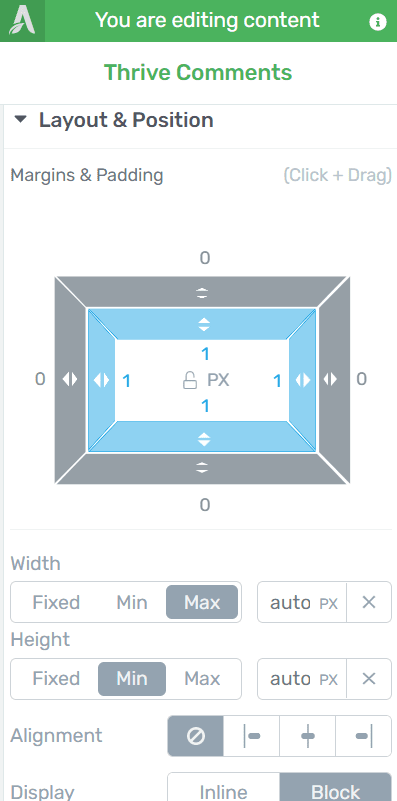
The Layout & Position section lets you manage the margin and padding, width, height, alignment, and display of the comments. You can read more about the Layout and Position settings in our document here.
Enabling Comment Voting
Just like forums, Thrive Comments lets you enable voting in the comments section. This means that you can choose to allow other website visitors to upvote or downvote comments.
To enable comment voting, open your WordPress admin area, and navigate to Thrive Dashboard >> Thrive Comments. Then, click on the Voting and Badges section.
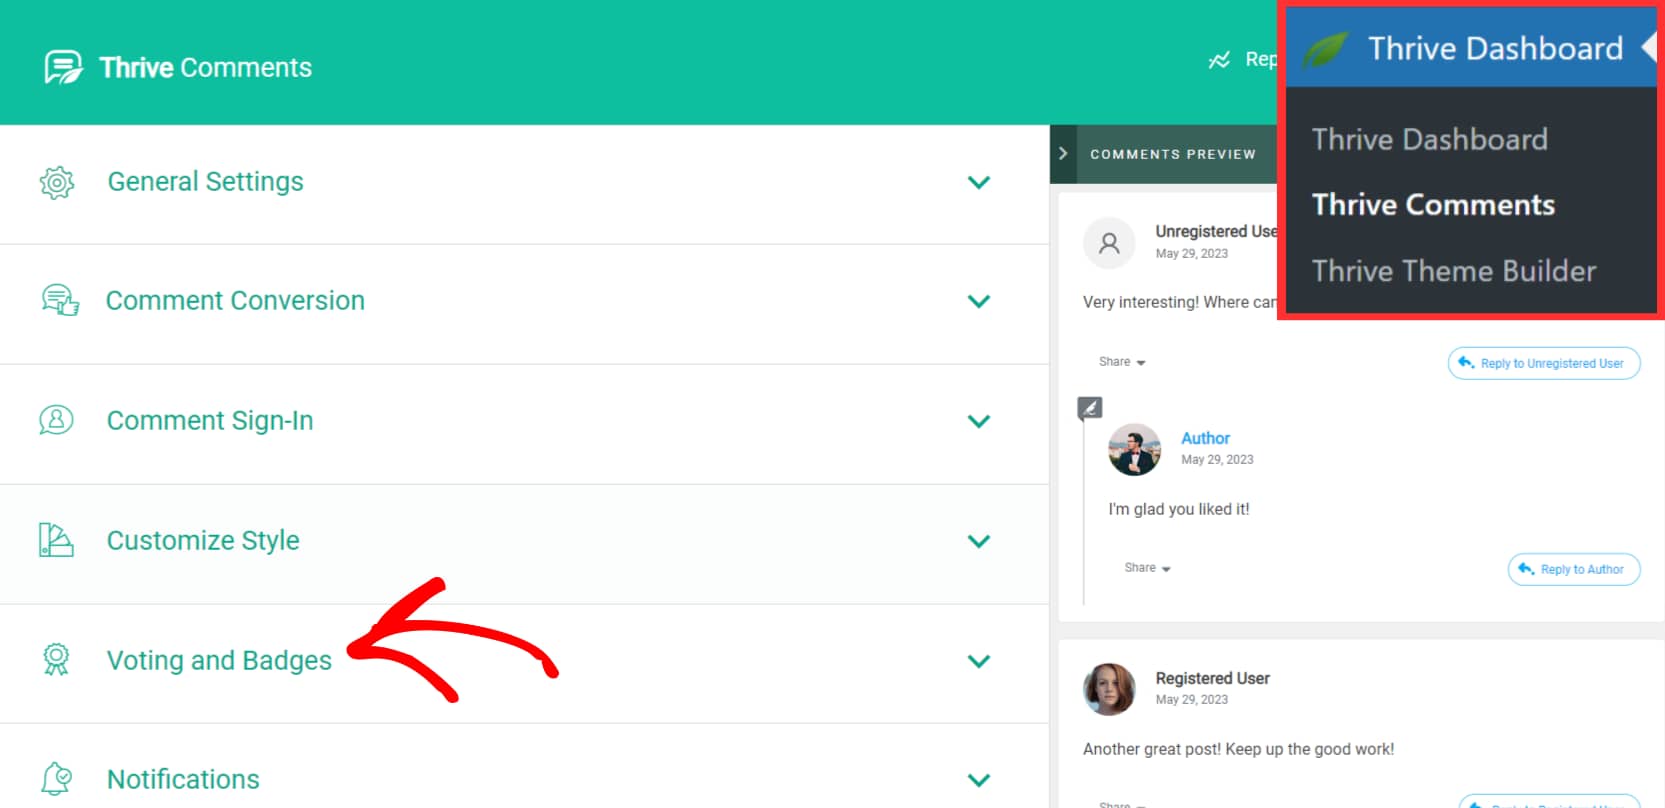
When you click on Voting and Badges, the section expands. Here, you can choose whether you want users to upvote comments, or upvote and downvote comments.
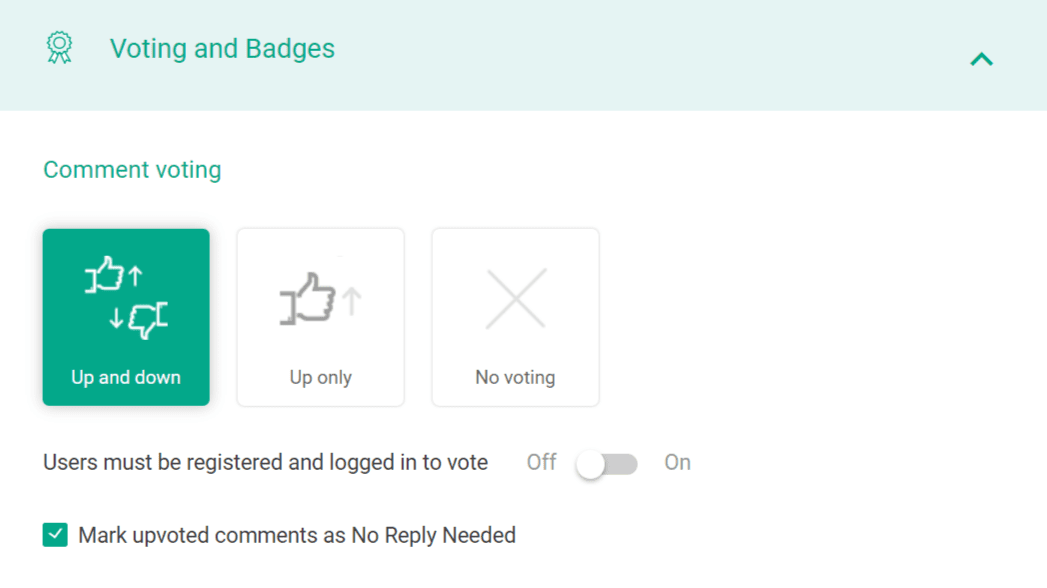
After you enable voting on comments, two more settings will open up.
- Users must be registered and logged in to vote: Prevent any logged-out users from voting on comments
- Mark upvoted comments as No Reply Needed: Turn off replies for upvoted comments on the website.
Awarding Badges in Thrive Comments
Thrive Comments also lets you award users with badges when they reach a particular milestone.
To enable badges, navigate to Thrive Dashboard >> Thrive Comments from your website backend and click on the Voting and Badges section on the Thrive Comments page.

Under Voting and Badges, click on the slider to set Award badges to On.
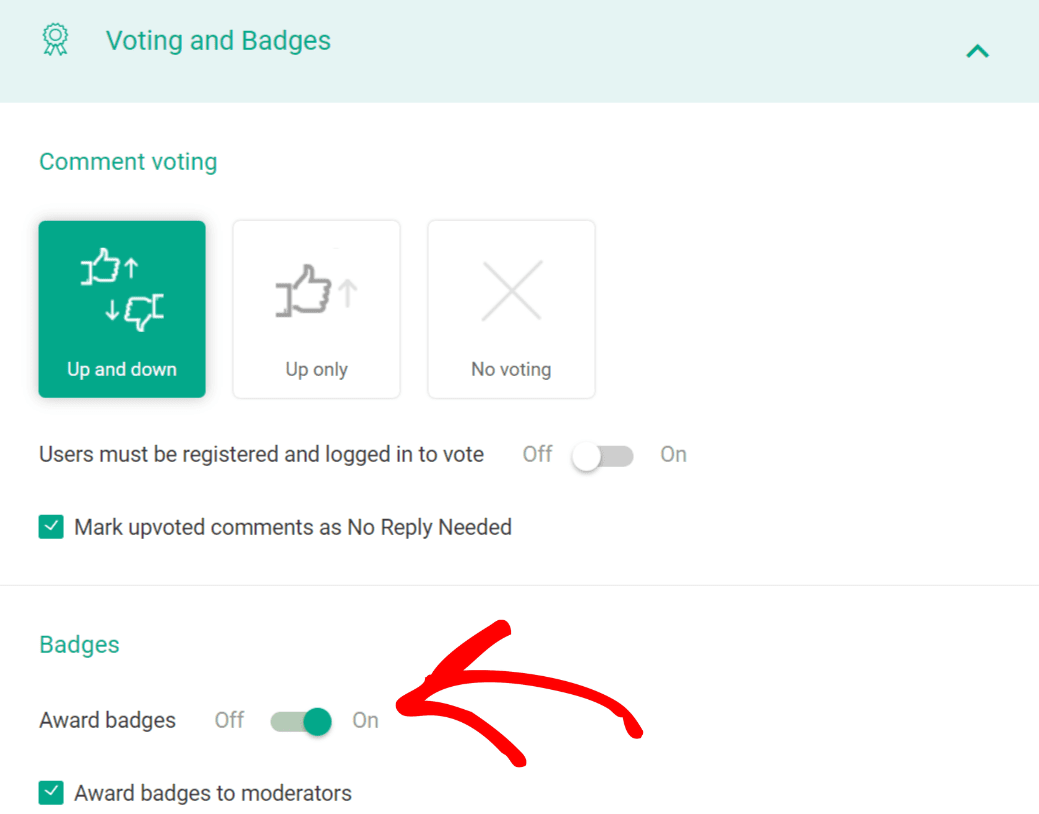
When you enable the Award Badges option, you’ll see a checkbox appear. You can check Award badges to moderators if you’d like moderators to be eligible for badges, too
Now that you’ve chosen to award badges, click + Add New Badge to start creating a badge.
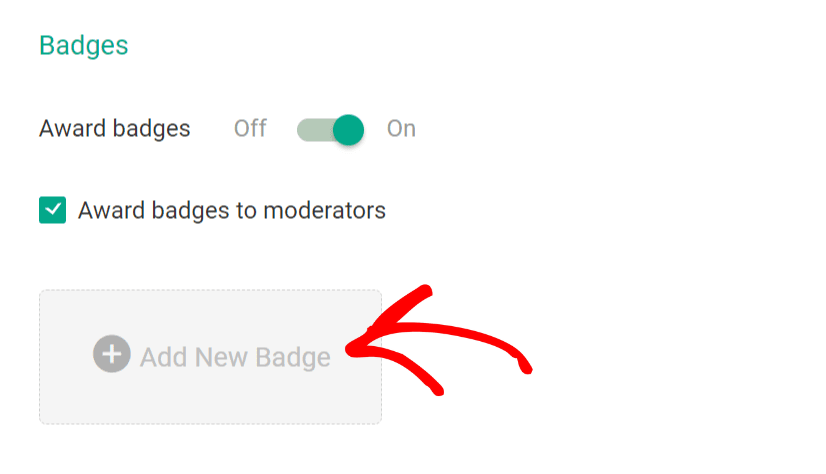
After you click to add a new badge, you’ll see a popup where you can set up all your badge details.
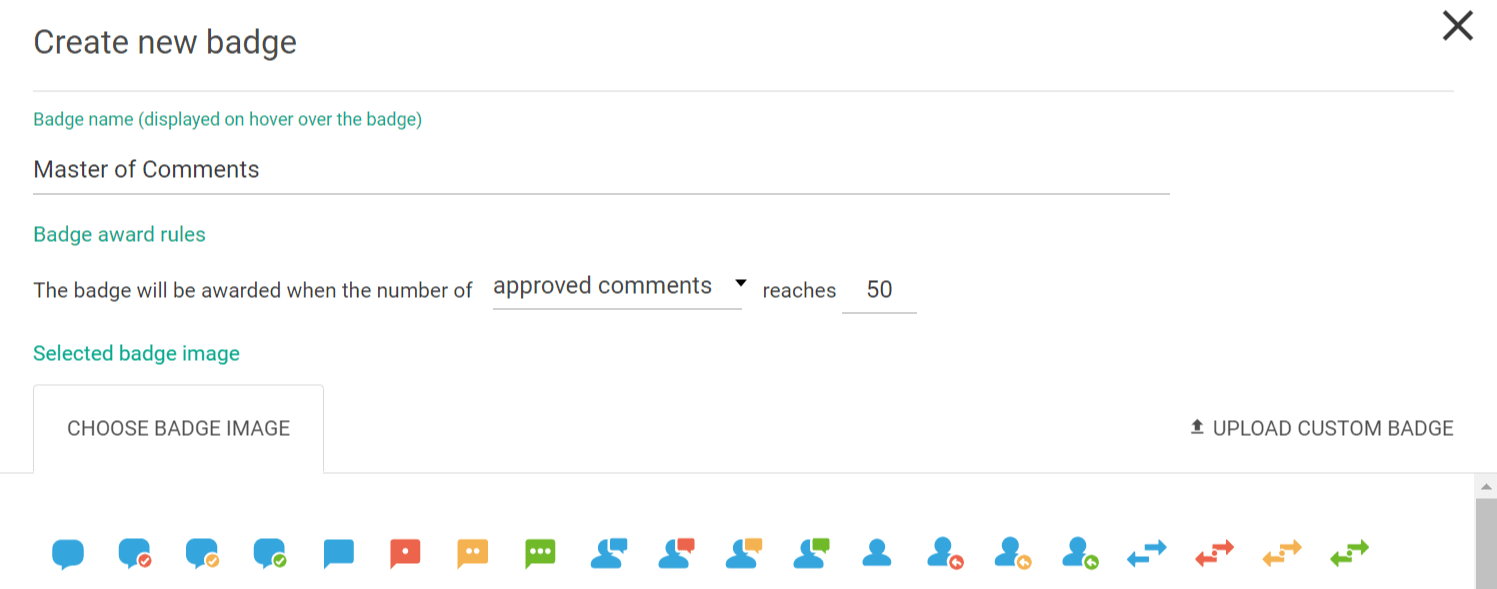
Here are all of the badge settings you can set up:
- Badge name: Add a title for your badge (users will see this when they hover over the badge)
- Badge award rules: Decide what needs to happen in order for the user to get the badge. Options include:
Number of approved comments
Number of approved replies
Number of featured comments
Number of upvotes received- Selected badge image: Choose an image to use for your badge or upload your own by clicking Upload Custom Badge
After you finish adding the badge title, the rule, and a badge image, click on the Save Badge button.
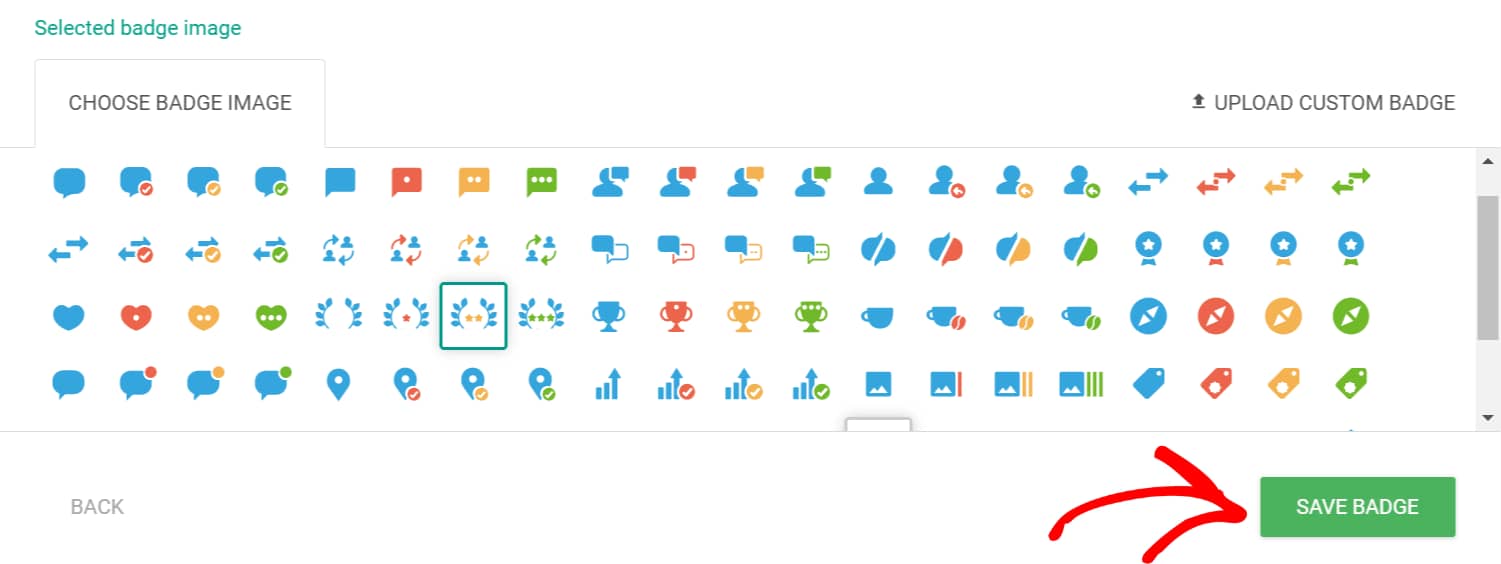
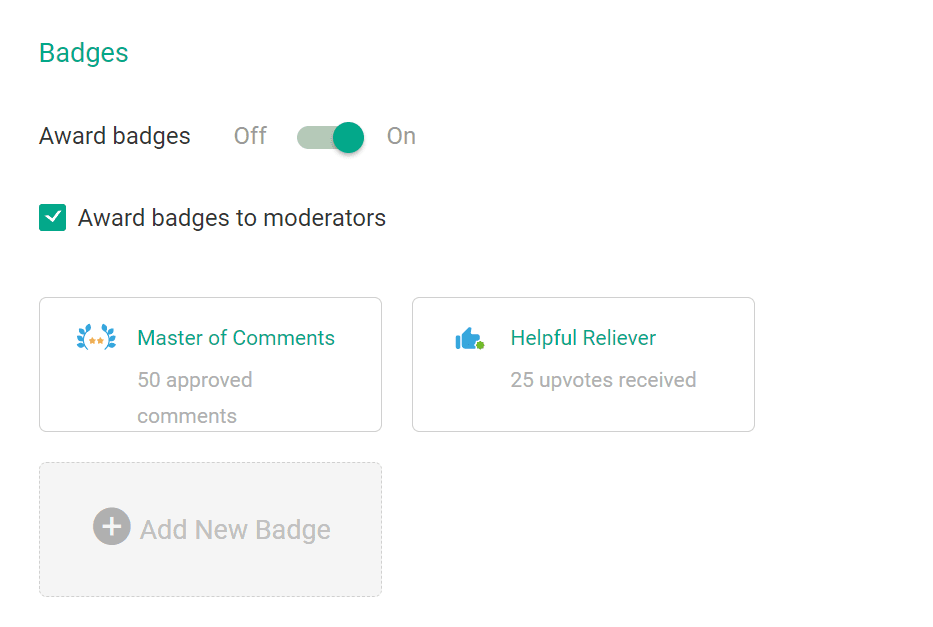
You can repeat these steps to add as many different badges as you want!
Boosting Conversions Through Comments
Dropping a comment could be a visitor’s first interaction with your website. Thrive Comments allows you to take this further by choosing what happens when a user leaves a comment on your website.
To enable Comment Conversions, log in to your WordPress admin area, navigate to Thrive Dashboard >> Thrive Comments, and click on the Comment Conversion section on the Thrive Comments page.
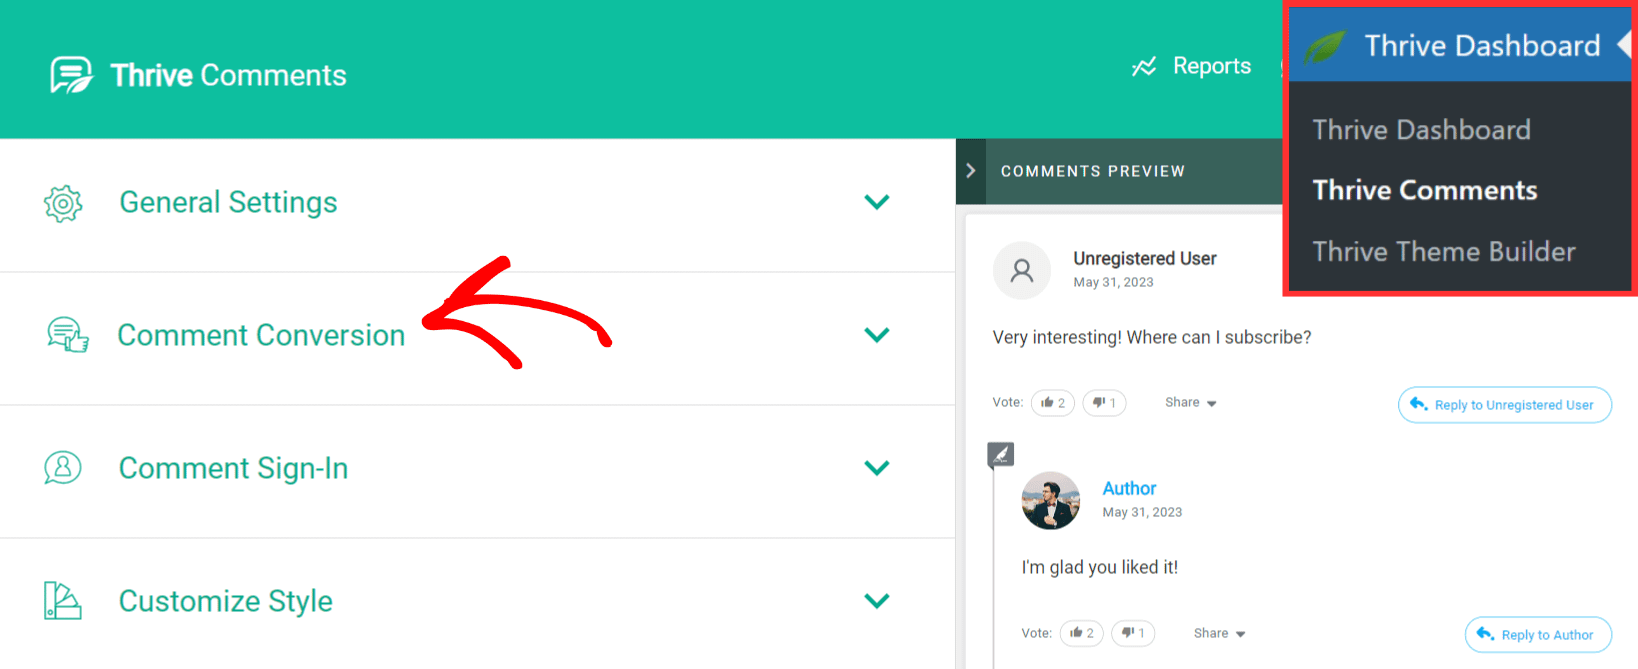
When you expand the Comment Conversion section, you’ll find options to decide what happens for first-time commenters and repeat commenters.
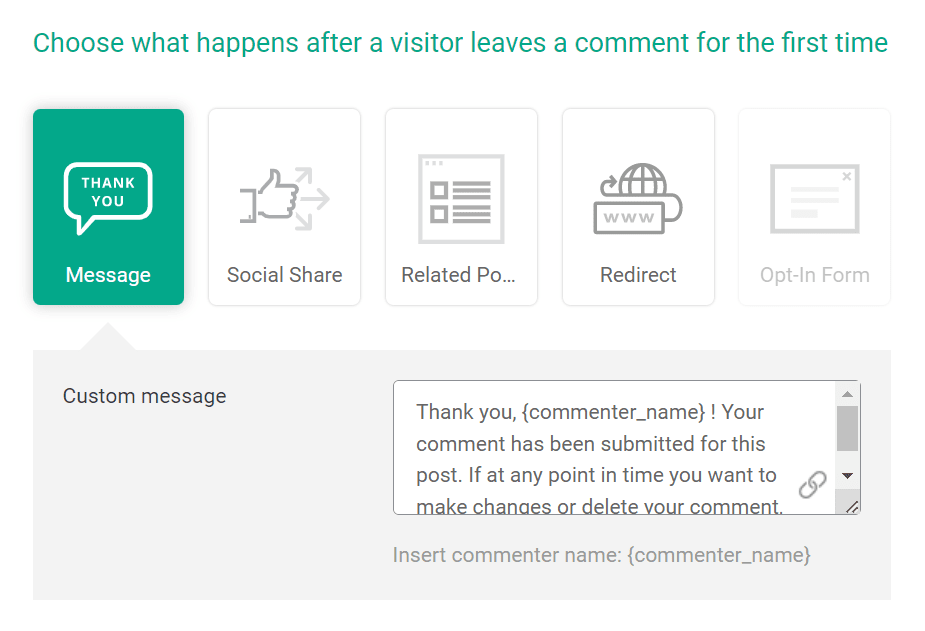
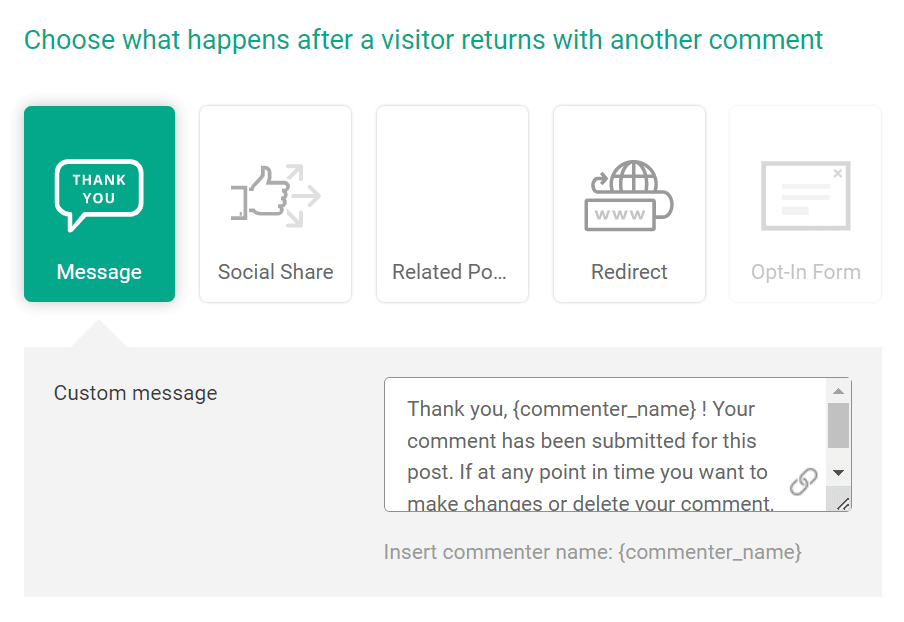
For both first-time and repeat commenters, you can choose from four actions. We’ll share details on each below.
Message
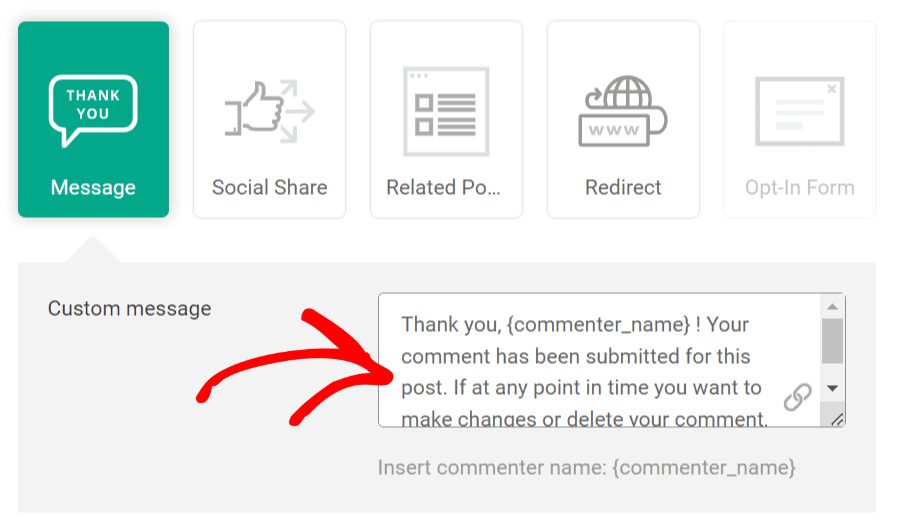
You can choose to display text when a user leaves a comment. For example, you might thank them for adding a comment or suggest the next steps such as signing up for your newsletter, etc.
{commenter_name} is a shortcode that will fetch the commenter’s name and display it in the message.
Social Share
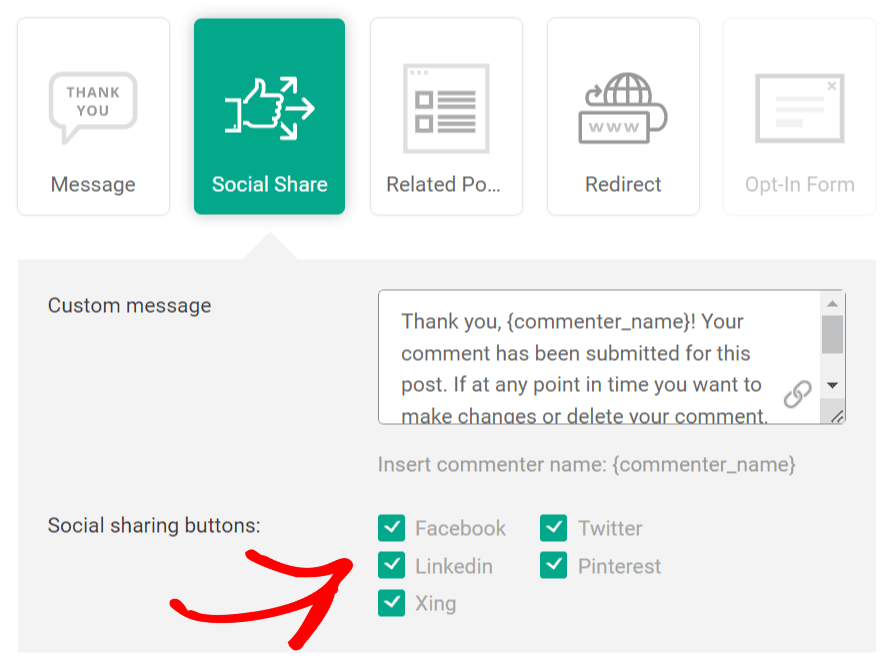
When you choose to display Social Share links, Thrive Comments allows you to select the Social Networks you want to list along with a message after the user posts a comment.
You can currently allow users to share the post through Facebook, Twitter, Linkedin, Pinterest, and Xing.
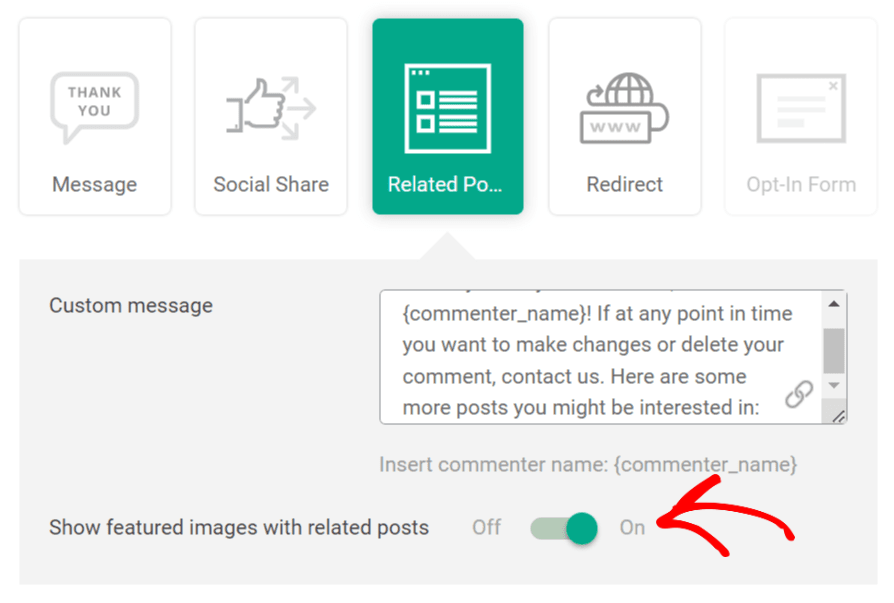
Related Posts
Selecting to display related posts with the thank you message will give you an option on whether you’d like to display the featured images along with the related posts.
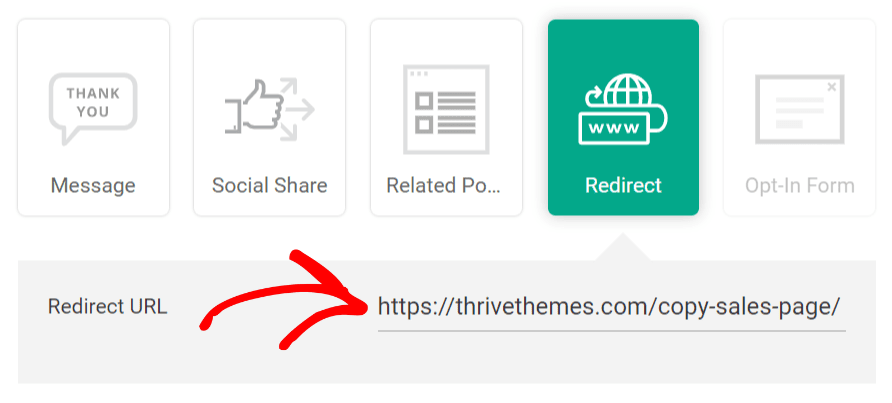
Redirect Users
When you choose to redirect the user as soon as he posts a comment, you just need to enter the URL of the destination page or post you want to take him to.
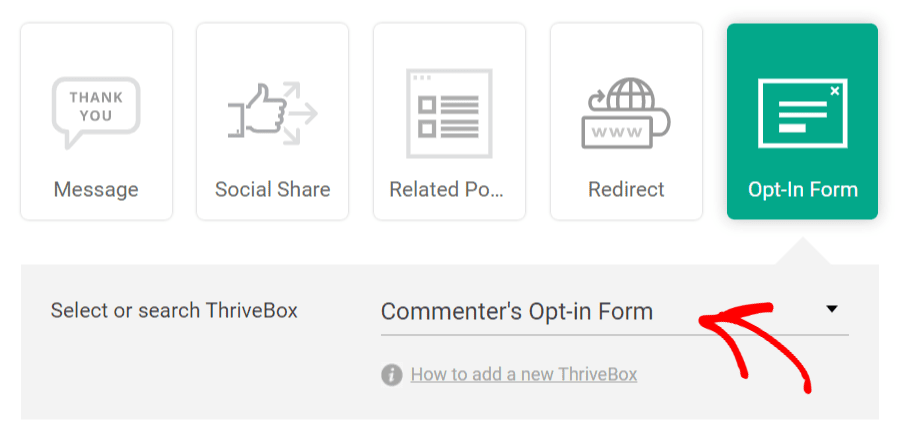
Display Opt-in Form
If you’d like to take this further by displaying an opt-in form for users to sign up for your newsletter or anything else that you want to offer, select the opt-in form block.
Note: The opt-in form can be selected only when you have Thrive Leads installed and activated on your website.
When you select to display an opt-in form, it’ll show a dropdown where you can pick the ThriveBox. (A ThriveBox is a term used for opt-in forms created using Thrive Leads)
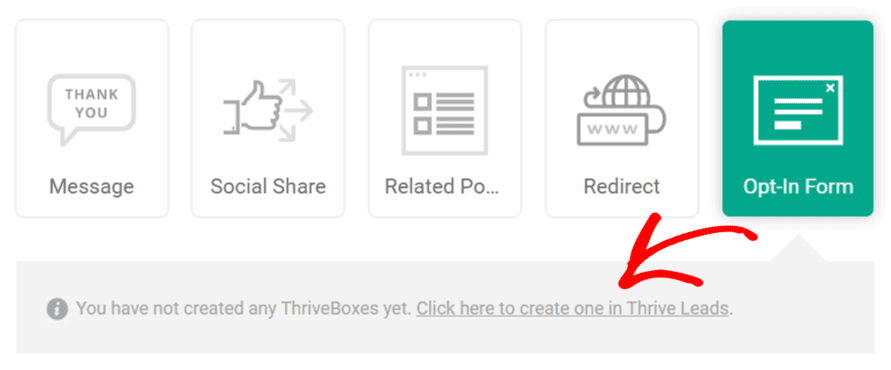
If you don’t have a ThriveBox created, you’ll see a message instead of the dropdown that’ll direct you to a page to create a ThriveBox (opt-in form) using Thrive Leads.
Enabling Thrive Comment Notifications
Thrive Comments allows you to receive email notifications when a user drops a comment on your website. All of this can be set up and customized in a few easy steps.
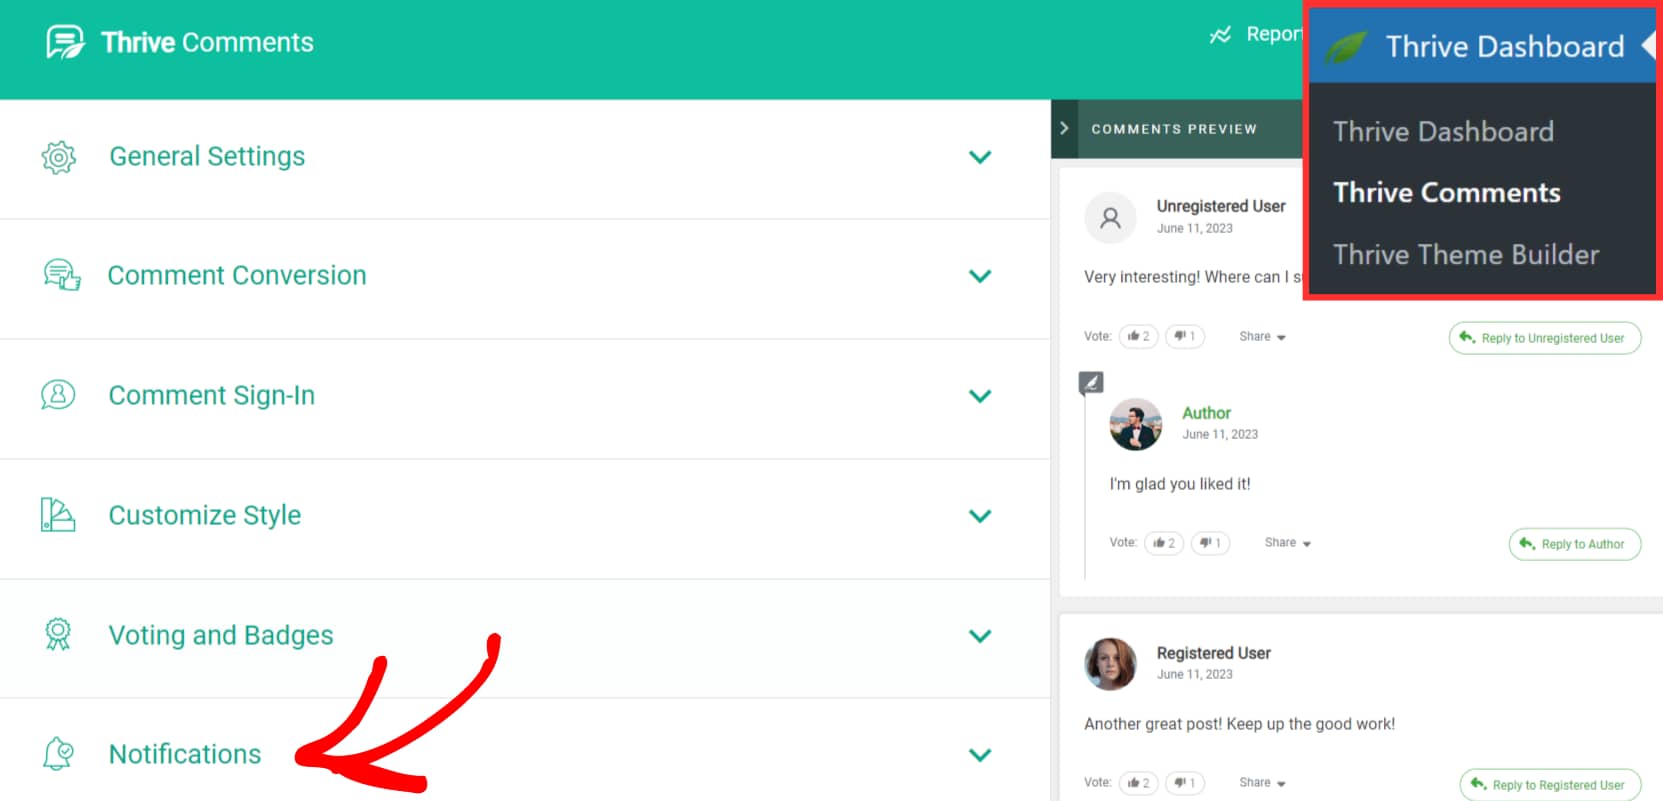
To enable Comment Notifications, log in to your WordPress admin area, navigate to Thrive Dashboard >> Thrive Comments, and click on the Notifications section on the Thrive Comments page.
Under Notifications, you’ll be able to able to add a new connection for email delivery, customize notification messages for new replies and comments, and decide whether you want moderators to be notified when someone replies to their comment.
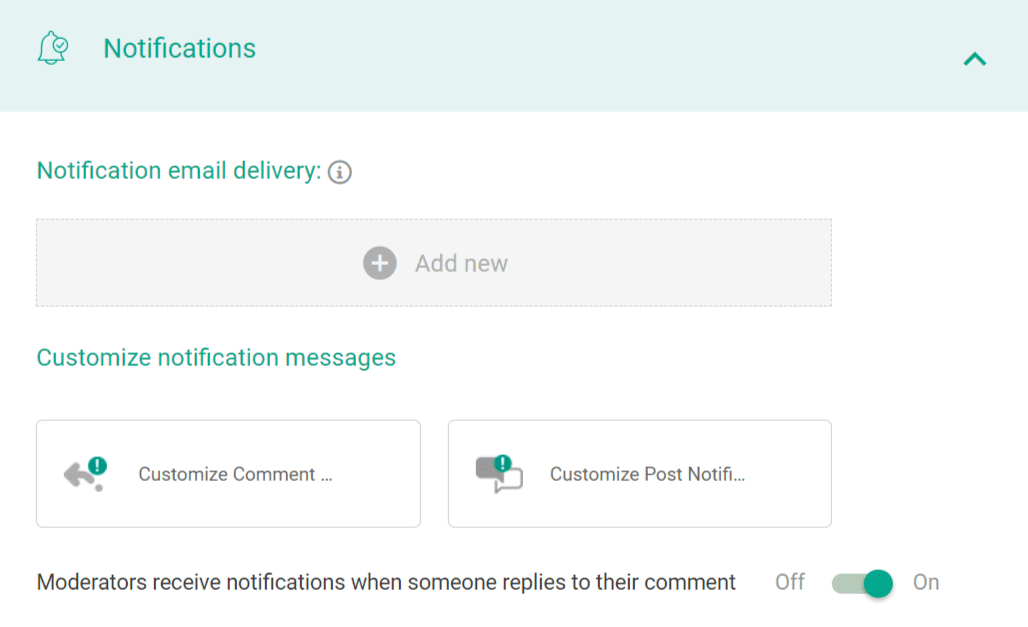
You can read more about Comment Notifications in our dedicated document.
Moderating Comments on Your Website
Just like WordPress Comments, you can moderate Thrive Comments too. You can moderate comments and decide which ones can be published or rejected.
To enable comment moderation, open your WordPress admin area, navigate to Thrive Dashboard >> Thrive Comments, and click on the Comment Moderation section on the Thrive Comments page.

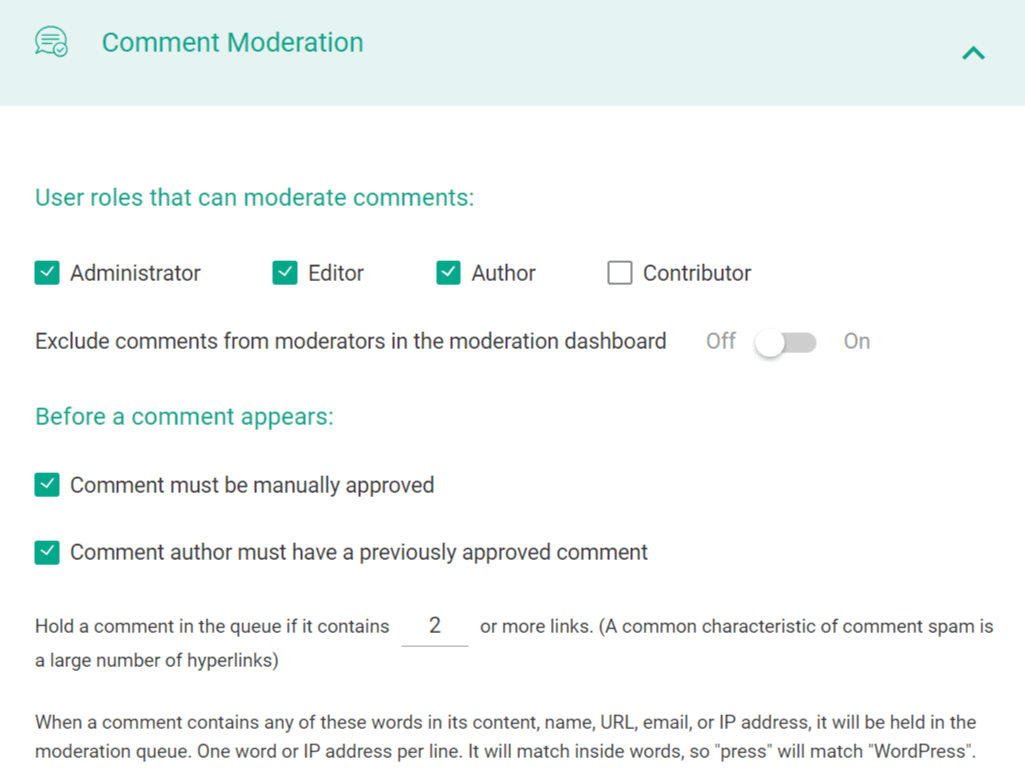
After clicking on Comment Moderation, you’ll find options to manage moderation. This is where you can decide the user roles that can moderate comments. You can select user roles like Administrator, Editor, Author, and Contributor.
Furthermore, you can choose to hide comments from moderators from being added to the moderation queue.
This section also lets you add conditions that’ll decide whether a comment will be added to the moderation queue.
Need help understanding Comment Moderation? Read our detailed documentation.
Accessing Thrive Comment Reports
Comments are a sign of user interaction on your website. Thrive Comments maintains comment reports that give you insights like vote engagements, most active commenters, upvoted comments, and more.
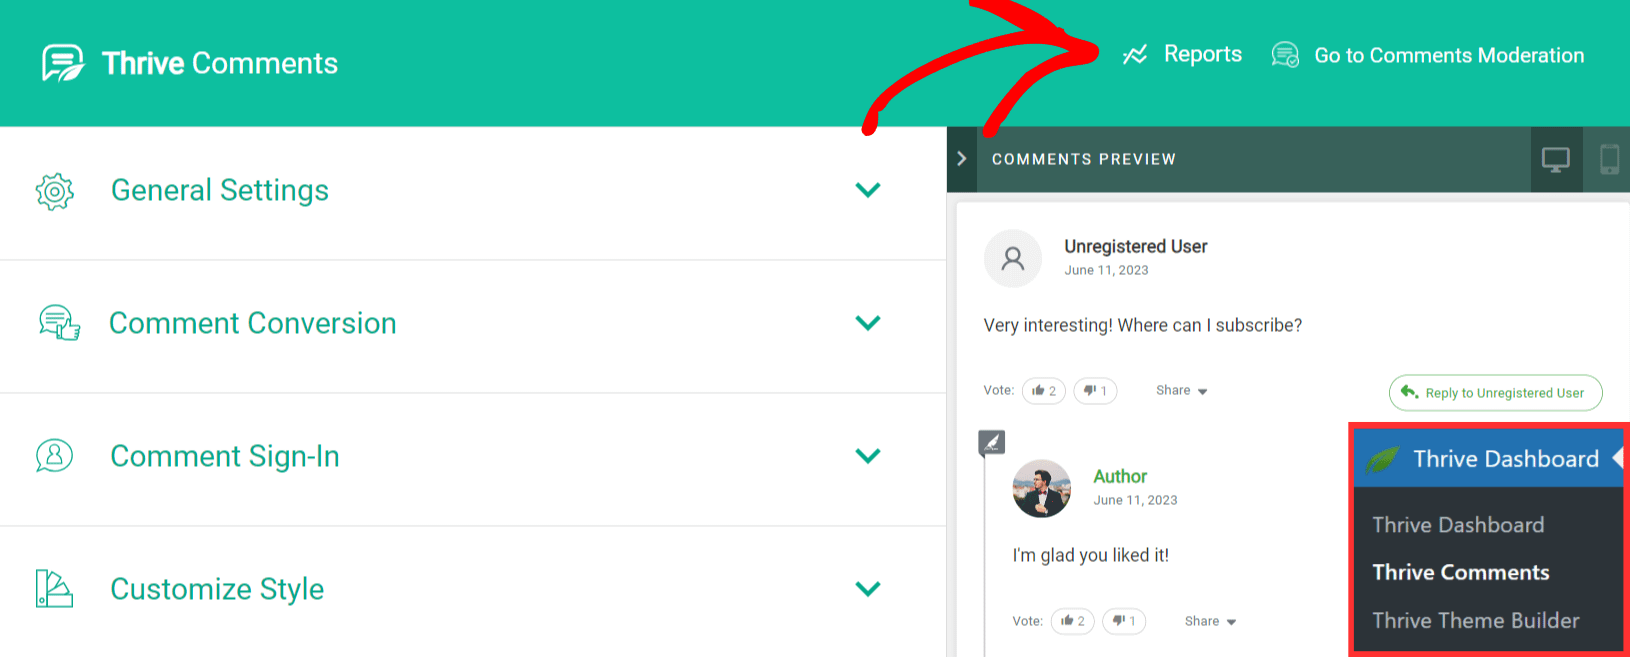
To access Thrive Comment Reports, open your WordPress admin area, navigate to Thrive Dashboard >> Thrive Comments, and click on Reports seen on the top right of the Thrive Comments page.
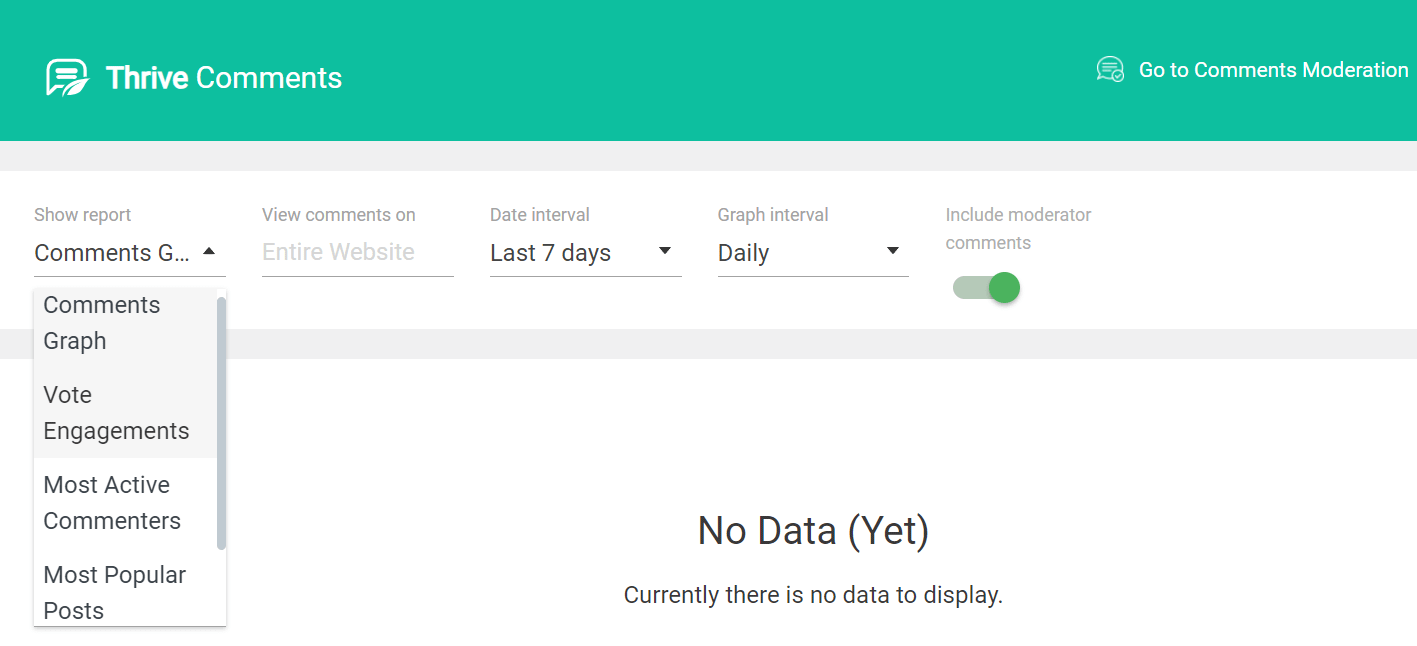
On the Comment Reports page, you’ll be able to select different factors based on which the reports will be presented.
You can choose to see reports based on the Comments Graph, Vote Engagements, Most Active Commenters, Most Popular Posts, and Most Upvoted Comments.
Furthermore, you can select the place where the comments are published. This will consider the comments from the selected post or page only.
The next three factors allow you to select the date and graph intervals and decide whether you’d like the moderator comments to be counted in the reports as well.
You can read our detailed document to know more about Thrive Comment Reports.
Frequently Asked Questions About Thrive Comments
How does enabling Thrive Comments affect the default WordPress Comments on a website?
The default WordPress comments settings can be seen when you navigate to Settings >> Discussion in your website backend.
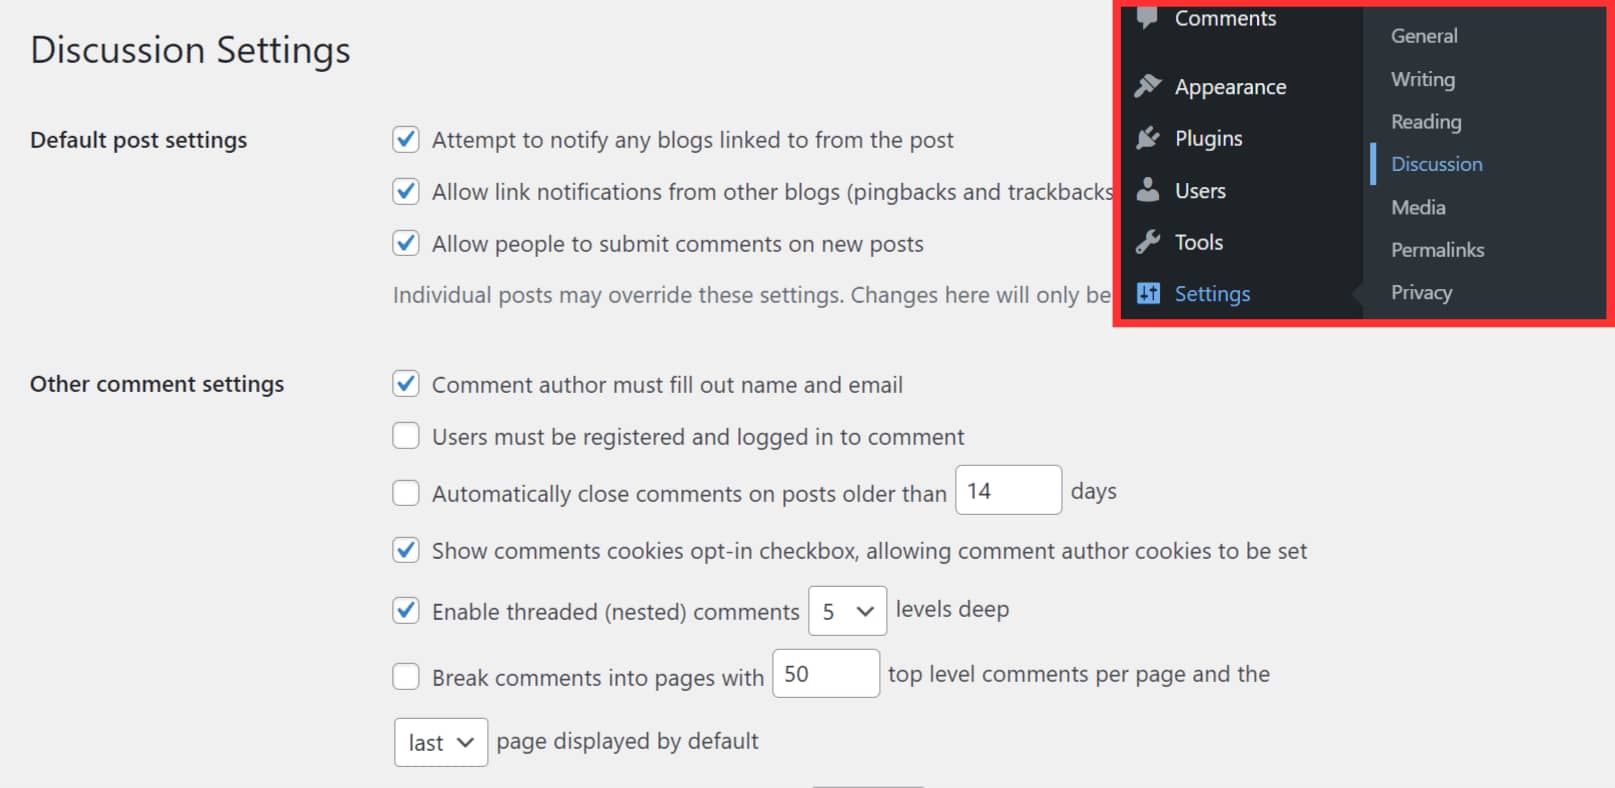
When you enable Thrive Comments by following the steps here, the settings from the Thrive Comments General Settings will override those of WordPress Comments in the website backend.
I want to know more about the General Settings of Thrive Comments.
You can read our detailed document to know more about the general settings of Thrive Comments.
Next, just like website content, you can translate comments too. It will encourage people from different parts of the world to interact with your website.