Do you want your students to submit assessments and obtain grades while taking up your course? Thrive Apprentice version 5.8 introduced the Assessment feature allowing your students to submit assessments in different formats.
In this article, we’ll show you how to enable an assessment for a course created using Thrive Apprentice.
Before creating an assessment, ensure you’ve created and published a course using Thrive Apprentice.
- Adding a New Assessment
- Creating an Assessment as a Quiz
- Asking Students to Upload an Assessment
- Accepting Assessments in the Form of a YouTube Video
- Accepting External Links to Student Assessments
Adding a New Assessment
To add an assessment, you’ll need to open the course to which you want to add it.
To begin, open your WordPress admin dashboard, and navigate to Thrive Dashboard >> Thrive Apprentice.

On the Thrive Apprentice Home page, click on the course to which you want to add the assessment.

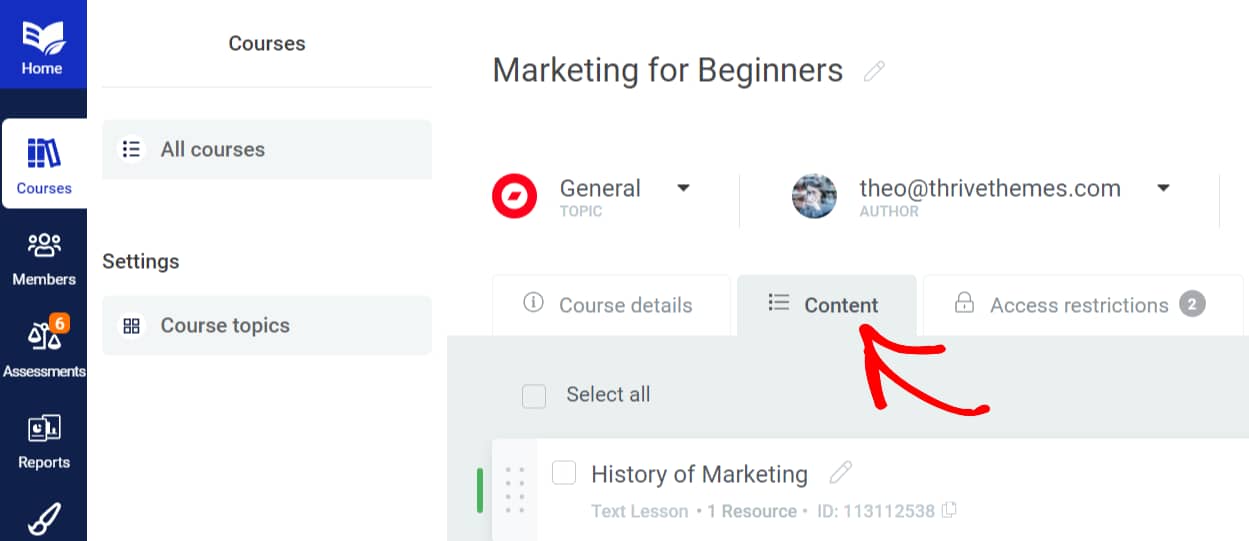
On the course page, click on the Content tab.
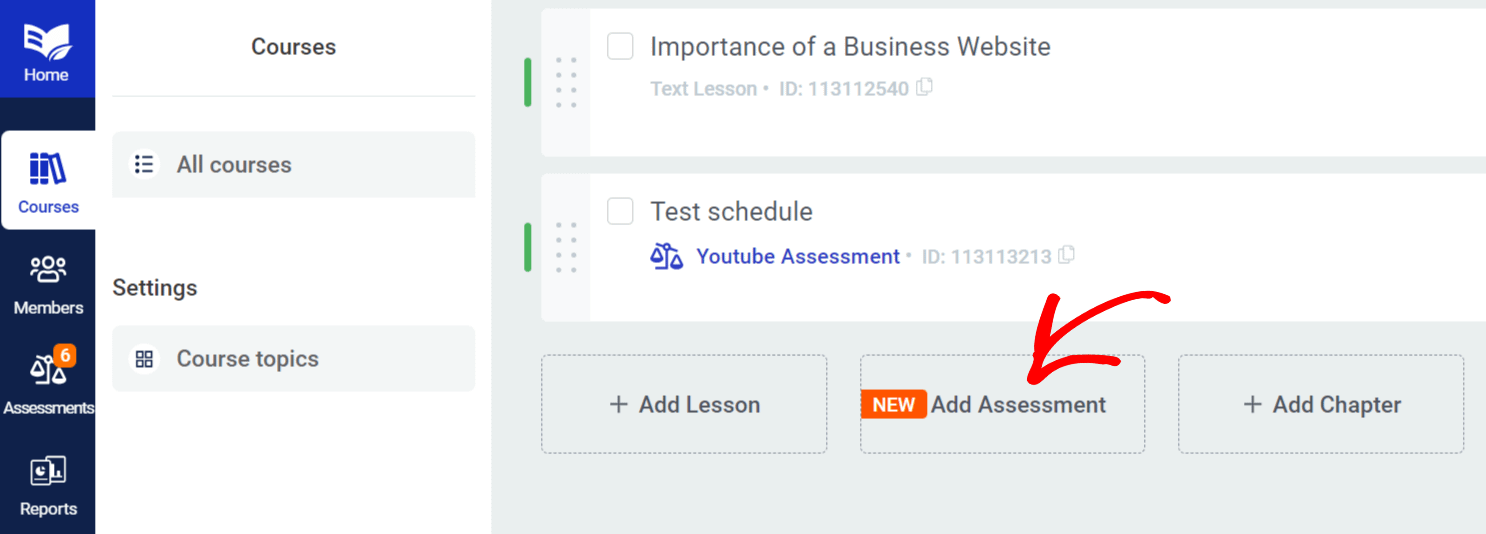
On the Content page, scroll down and click the Add Assessment button.
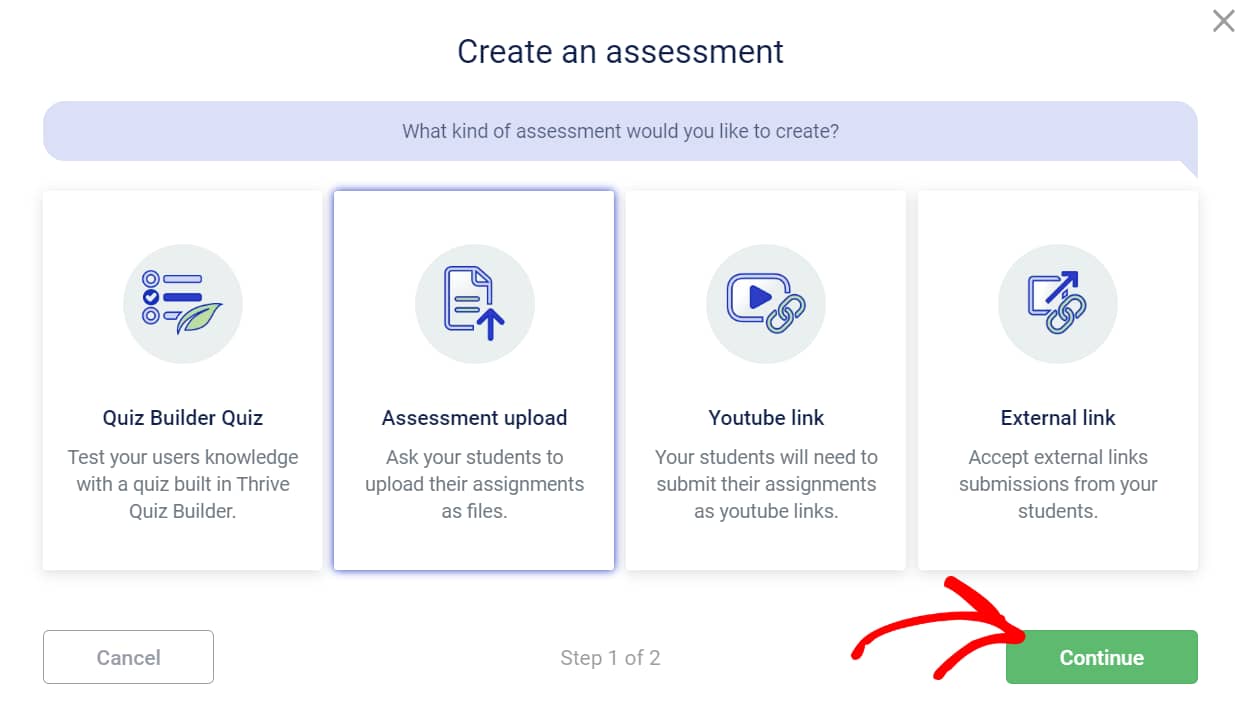
Next, in the following popup, you must select the kind of assessment you’d like to create.
Note: If you see a notice asking you to reload your lesson list or refresh a template, please refer to this document that’ll help you.
This may happen when you are using an old template that was originally built without the assessment feature. Refreshing a template or reloading the lesson list will set things up.
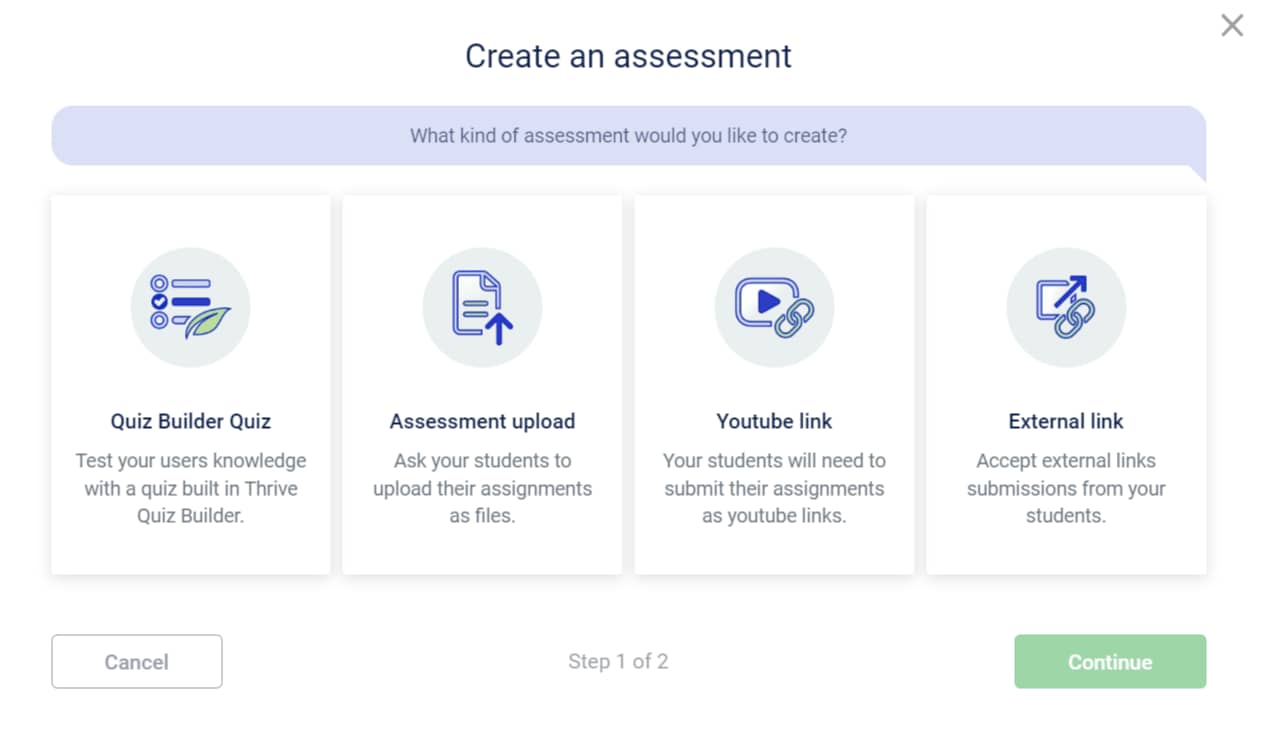
The kinds of assessments you can create using Thrive Apprentice are as follows:
- Quiz Builder Quiz: this will let you create an assessment using the Thrive Quiz Builder. You can read more to learn how to create a quiz.
- Assessment upload: this will allow your students to upload files you can evaluate and grade.
- YouTube link: this can be used when you want your students to submit the assessment as a video uploaded to YouTube.
- External link: this will allow your students to share external links to access the assessment they’d like to submit.
Creating an Assessment as a Quiz
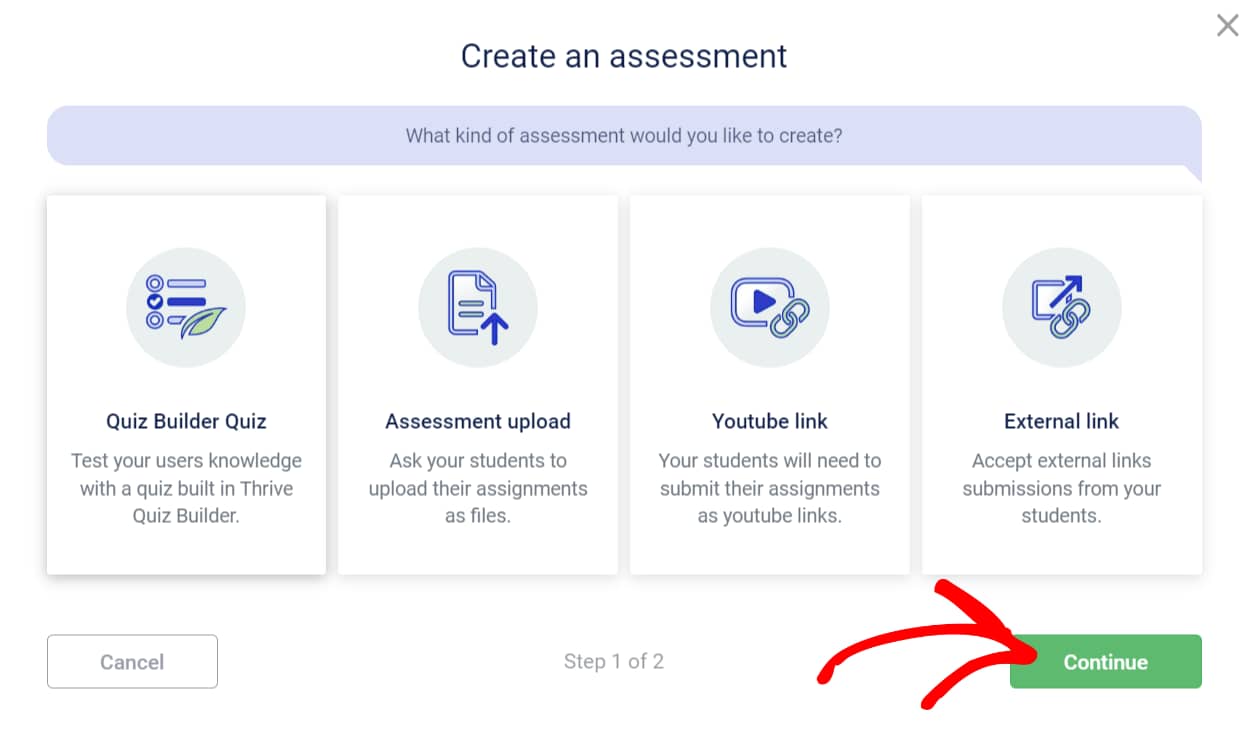
When you choose to create a quiz assessment, click on Continue to proceed.
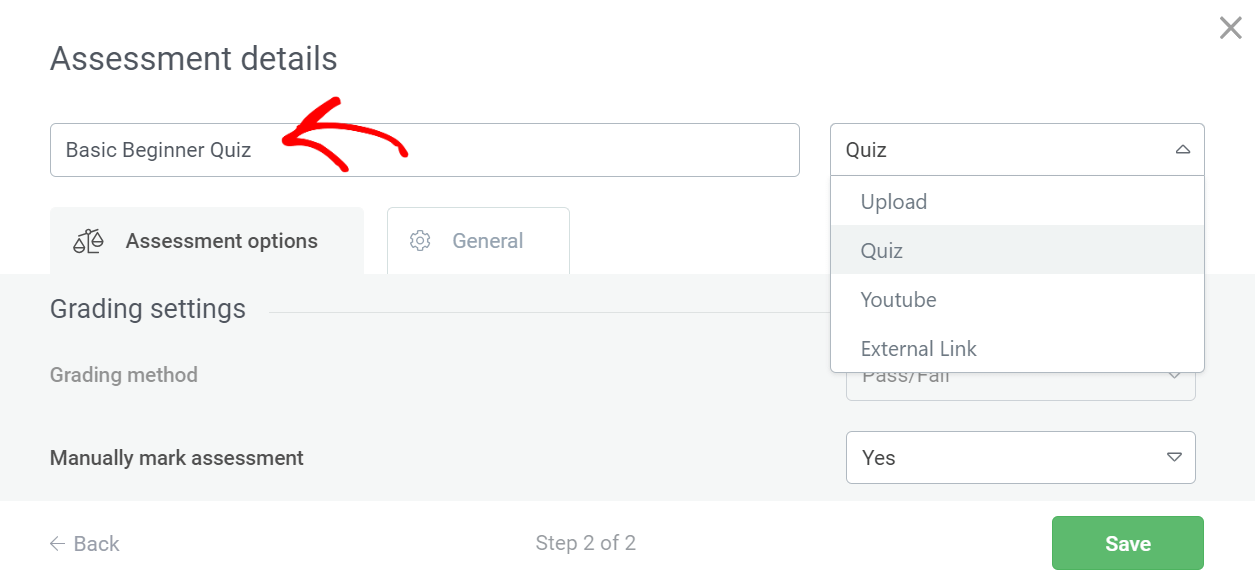
On the following popup, you’ll be able to manage the assessment settings. This is where you add a title for the assessment, confirm the type, and proceed.
Under the Assessment Options tab in this popup, you can first select the quiz you’d like to use as an assessment.
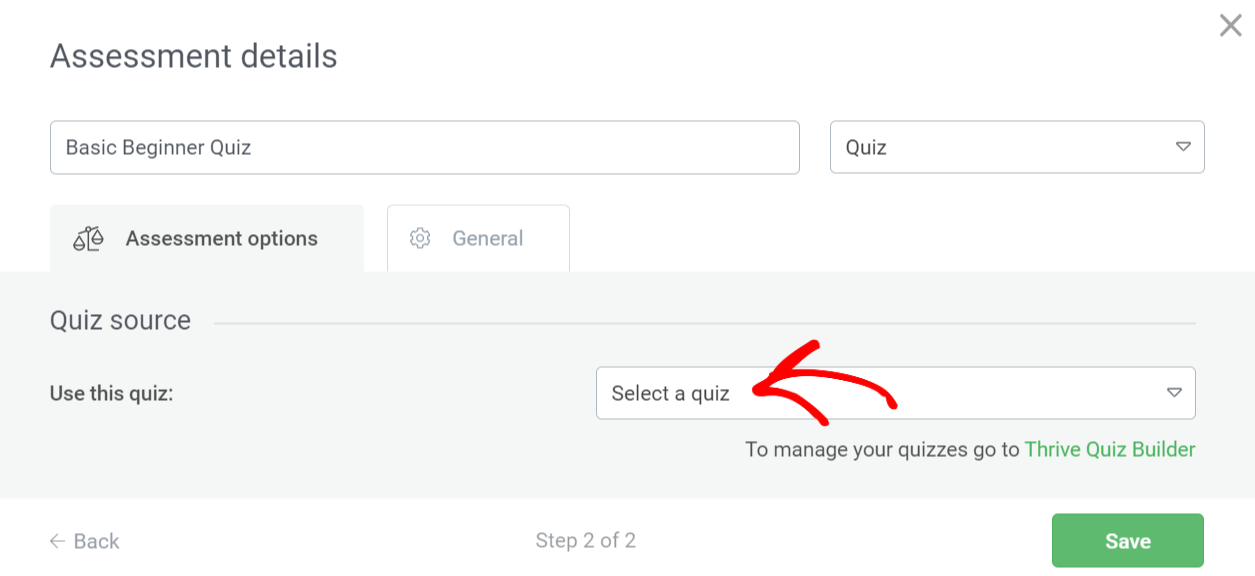
Not sure how to create a quiz? You can refer to our document to learn how to create one using Thrive Quiz Builder.
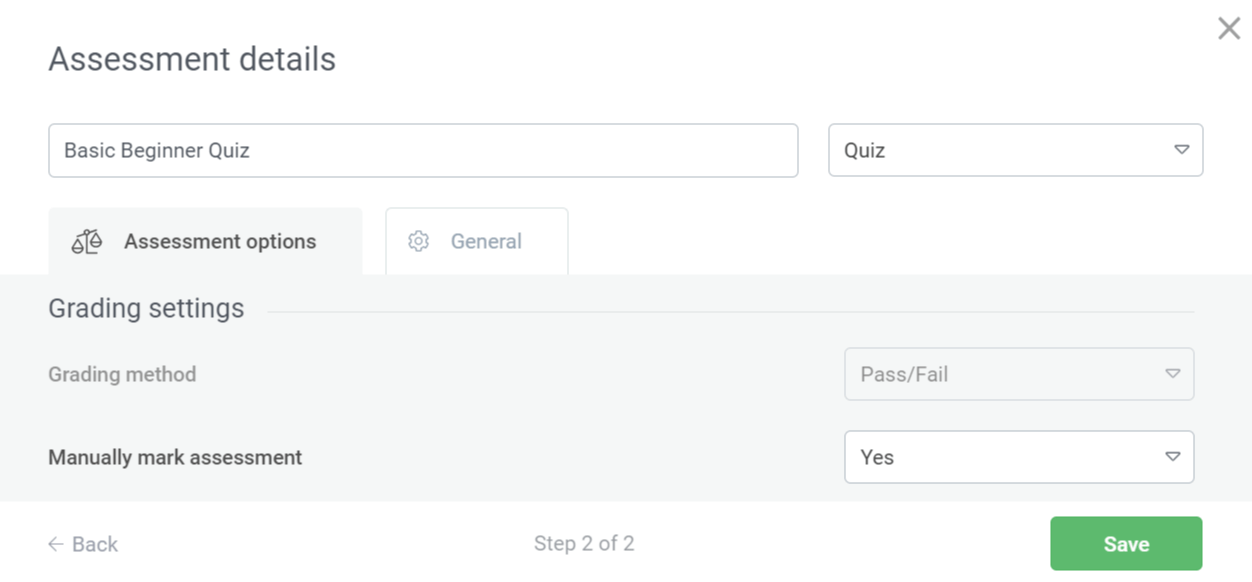
When you scroll further, you’ll see options like:
- Grading method: to decide how you’d like your grades to look.
- Mark Assessments Manually: where selecting Yes will let you look into each assessment, while No will declare that the student has passed the assessment as soon as they submit it.
After completing the Grading settings, you can open the General tab. You can set a unique URL for your assessment by adding the slug to the URL field.
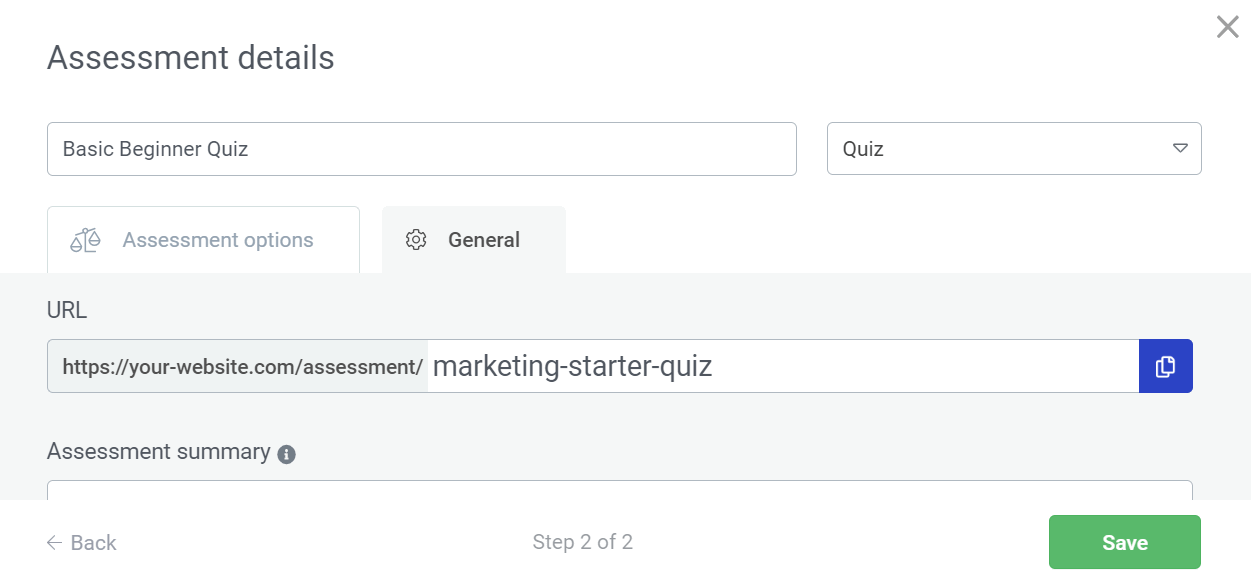
Scrolling further, you can manage the following settings:
- Assessment Summary: This is a quick description that’ll be displayed on the course overview page on the front end.
- Allow users to comment on this assessment: Let users comment on the assessment.
- Give users free access to this content: You can decide whether to restrict access to the assessment or let logged-in users access it for free.
- Would you like to add a custom assessment cover image: Has a field where you can upload a cover picture for the assessment that’ll appear on the frontend.
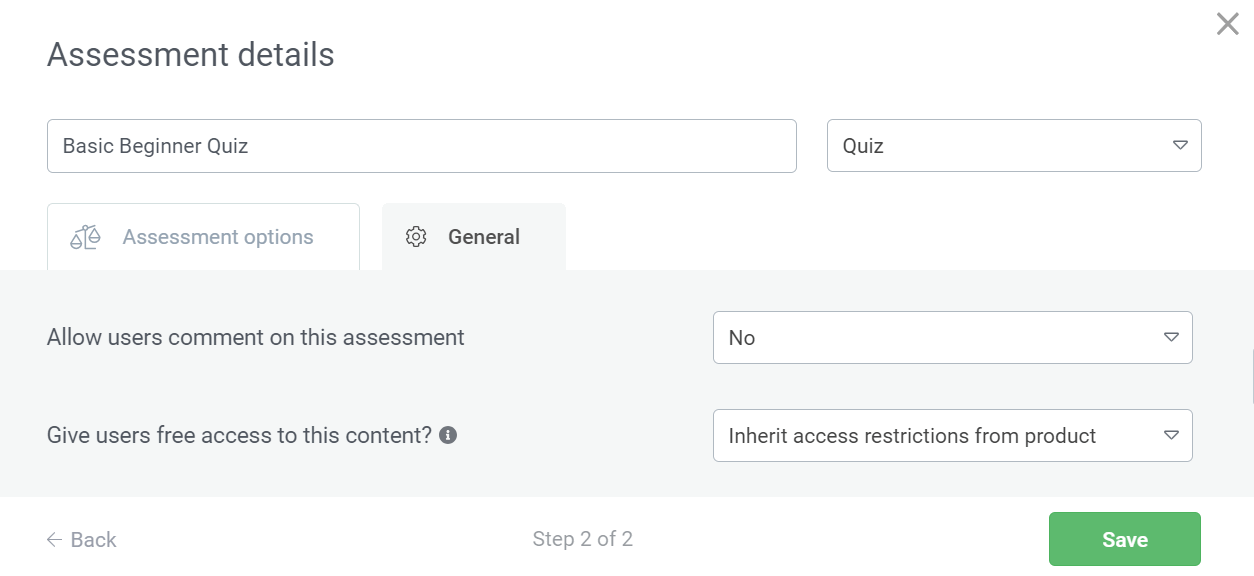
Once you complete the Assessment options and general settings, click the Save button to add the assessment to the course.
Asking Students to Upload an Assessment
Thrive Apprentice allows you to let students upload their assessments so you can evaluate their progress.
These assignments can be uploaded in different formats.
Note: You can integrate Thrive Themes with Google Drive or Dropbox to collect files uploaded through your website. In this case, too, you can use Google Drive or Dropbox to collect the assessments that your students upload.
To select a service and a Destination folder in Google Drive or Dropbox using Thrive Apprentice’s Assessment Upload settings. Here’s a document that’ll help you with it.
To create an assessment and set students to upload theirs, select the Assessment Upload option on the Create an Assessment popup, and click the Continue button.
On the next screen, you can set an Assessment name and confirm the type of assessment to proceed.
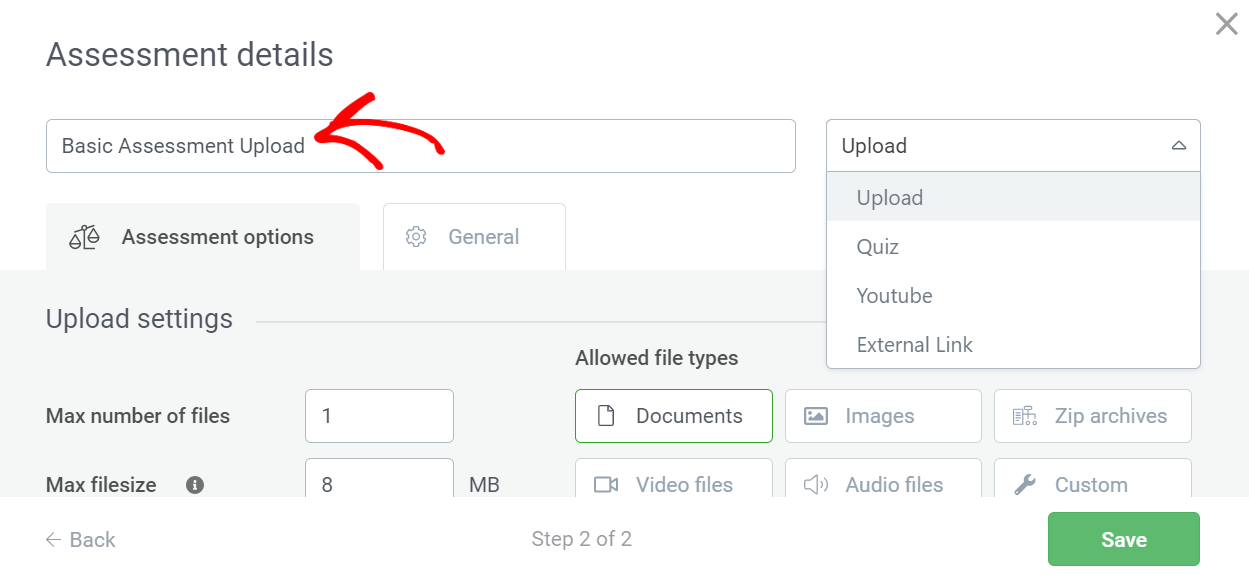
Following this, open the Assessment Options tab.
Under Assessment Options, you can set Upload and Grading settings.
The Upload settings will let you set the following:
- Max number of files: limit the number of files your user uploads.
- Max file size: to limit the size of a file being uploaded.
- Allowed file types: to set specific file types you want to allow. You can choose types like Documents, Images, Zip archives, Video files, Audio files, etc.
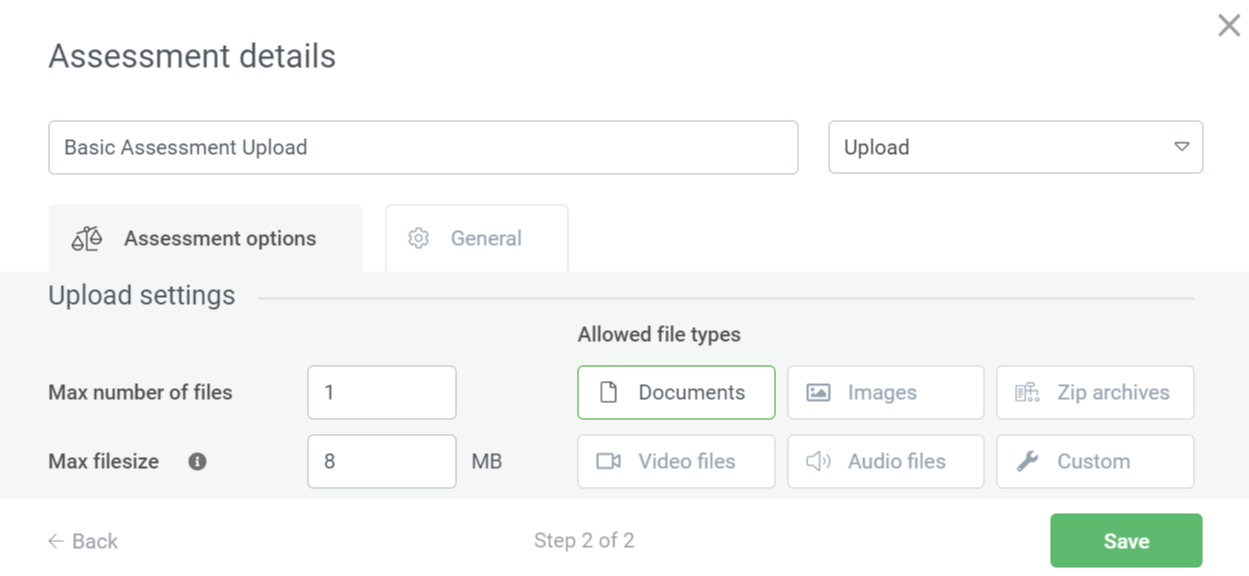
After the upload settings, you can scroll down to manage the grade settings for the assessment.
The Grading settings include the following:
- Grading method: to decide how you’d like your grades to look.
- Mark Assessments Manually: where selecting Yes will let you look into each assessment, while No will declare that the student has passed the assessment as soon as they submit it.
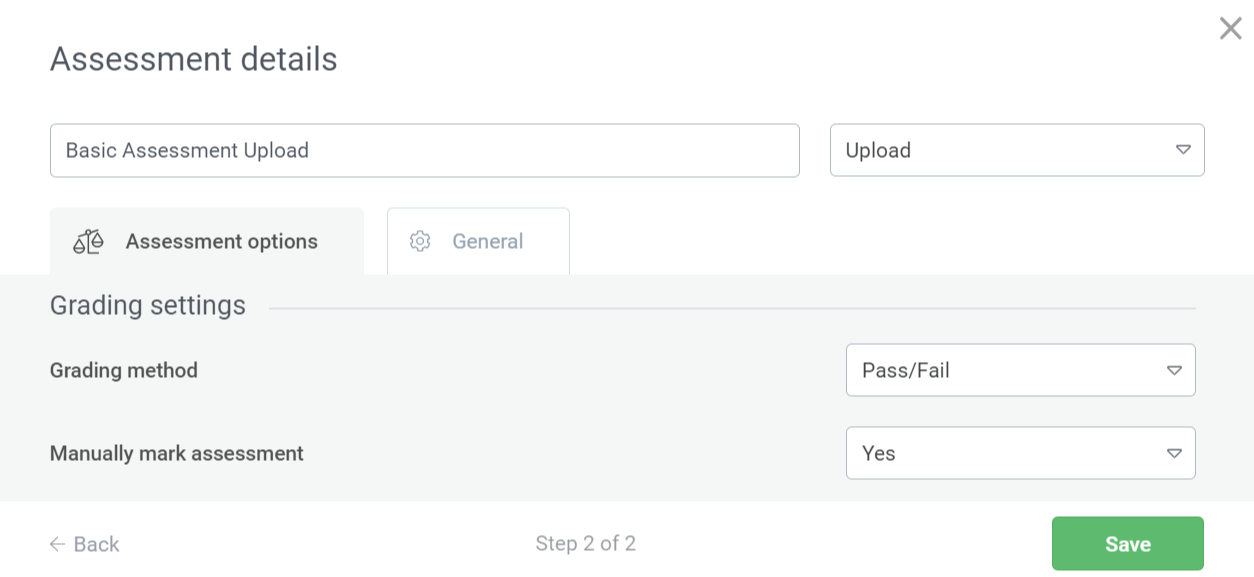
Once you’ve completed the Assessment Options, open the General tab on the popup.
Under the General tab, you can set a unique URL for your assessment by adding the slug to the URL field.
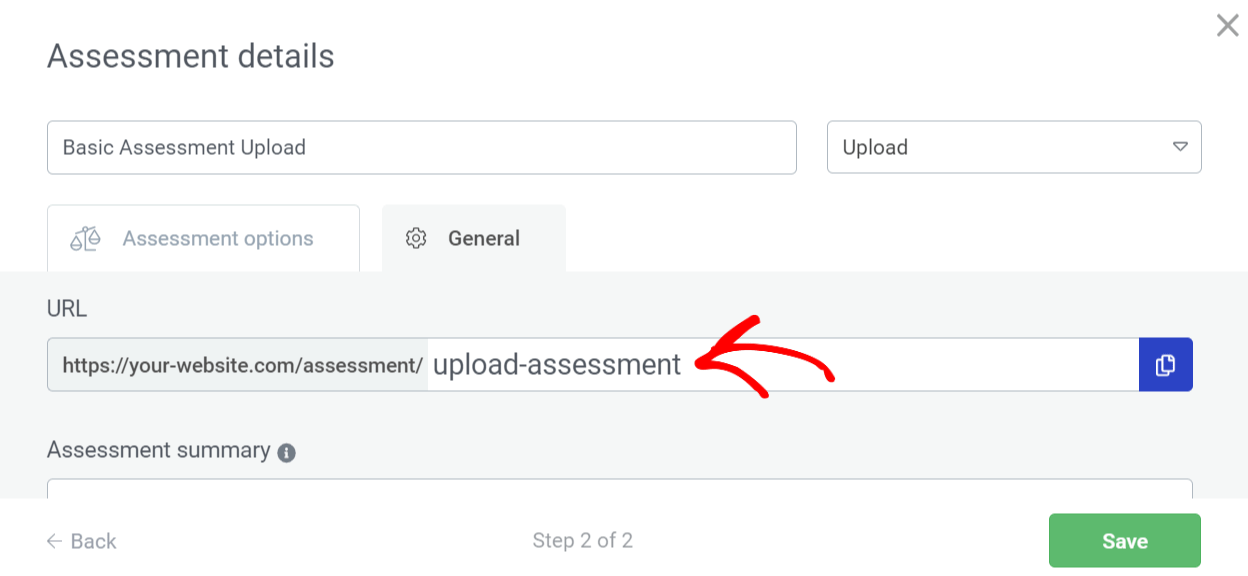
When you scroll further, you’ll find the following options:
- Assessment Summary: This is a quick description displayed on the course overview page on the front end.
- Allow users to comment on this assessment: Let users comment on the assessment.
- Give users free access to this content: You can decide whether to restrict access to the assessment or let logged-in users access it for free.
- Would you like to add a custom assessment cover image: Has a field where you can upload a cover picture for the assessment that’ll appear on the frontend.
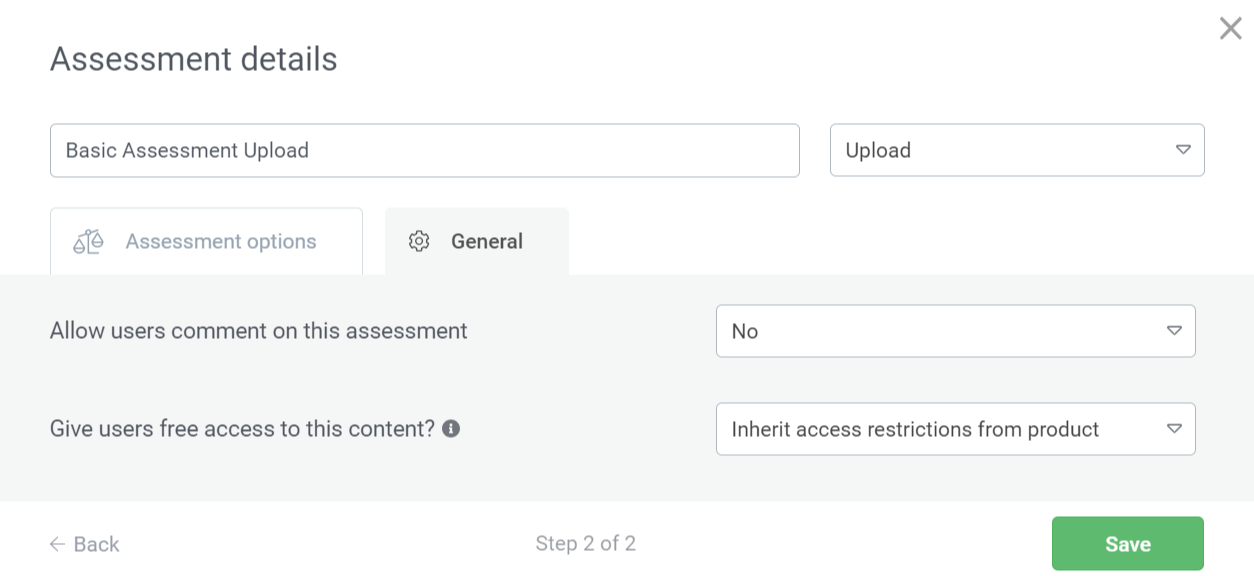
Once you complete the Assessment options and general settings, click the Save button to add the assessment to the course.
Accepting Assessments in the Form of a YouTube Video
Do you want your students to submit an assessment in the form of a video uploaded on YouTube? It is possible with the Assessment feature in Thrive Apprentice.
To create an assessment that accepts YouTube links, select the YouTube Link option on the Create an Assessment popup, and click the Continue button.
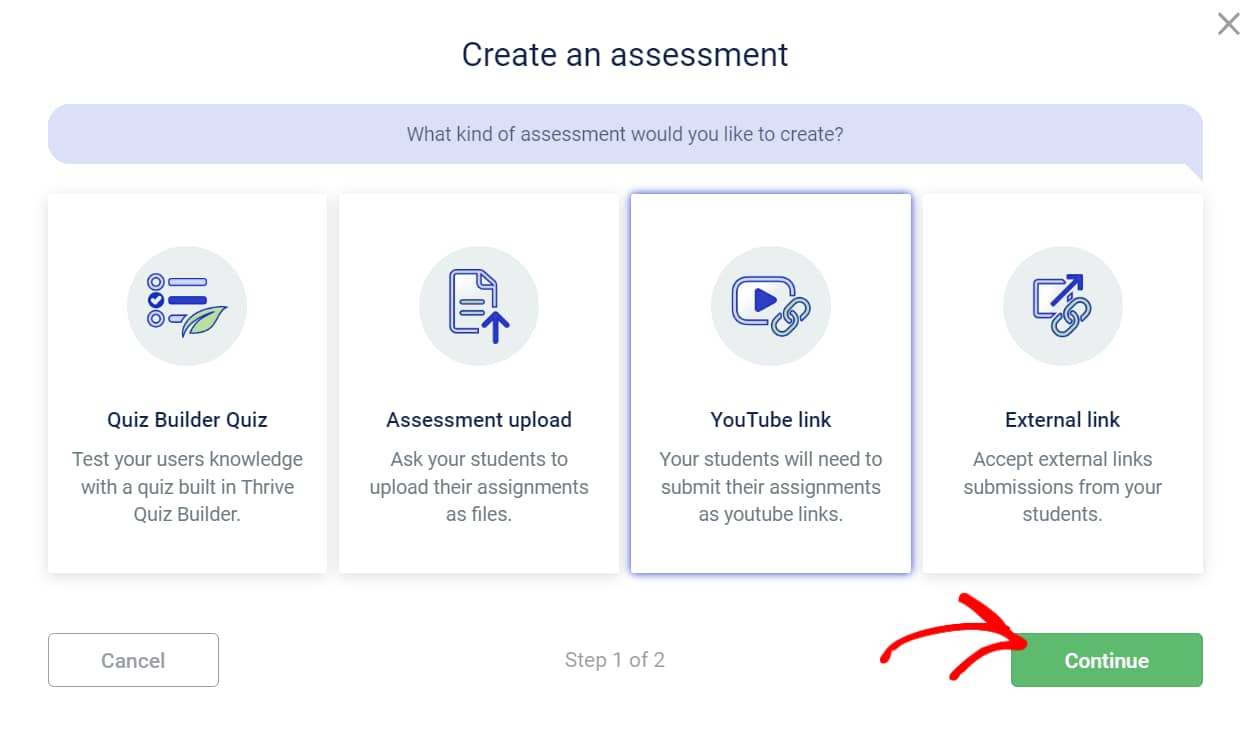
On the next screen, you can set an Assessment name and confirm the type of assessment to proceed.
Note: The page design and form students use to submit the link can be edited using Thrive Architect.
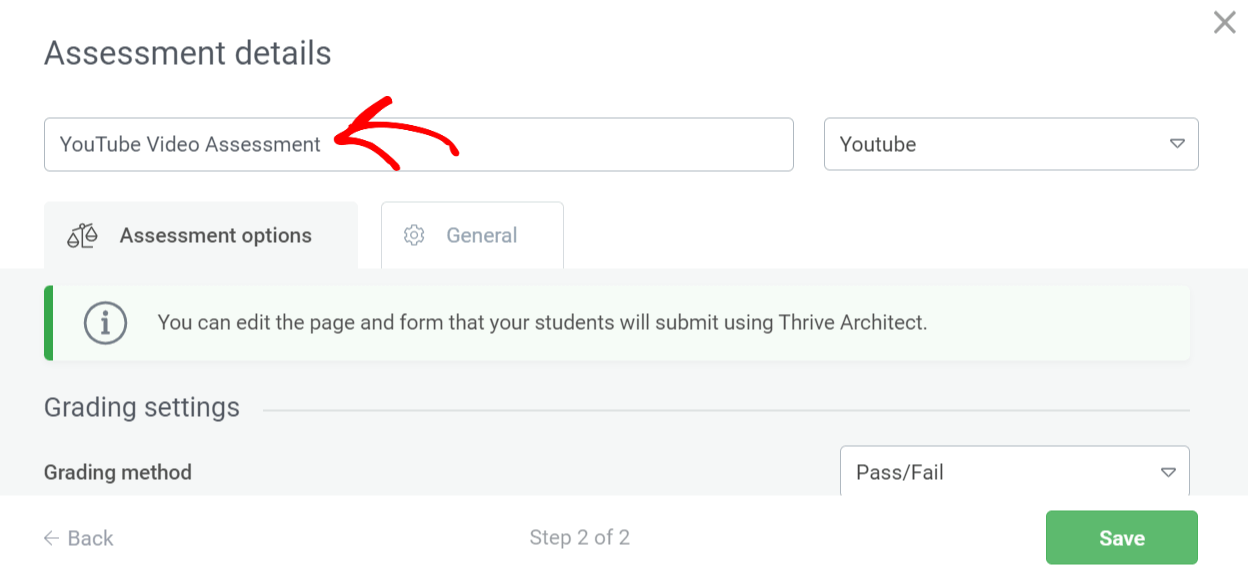
Further down, you’ll find the Grading settings, where you can manage the following:
- Grading method: to decide how you’d like your grades to look.
- Mark Assessments Manually: where selecting Yes will let you look into each assessment, while No will declare that the student has passed the assessment as soon as they submit it.
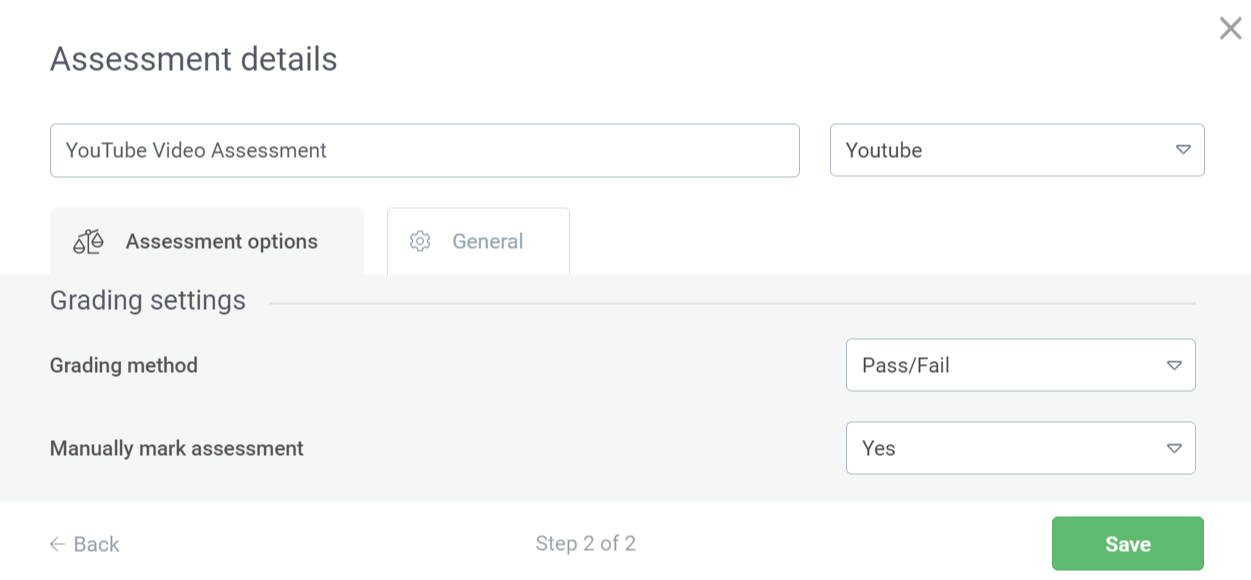
Once you’ve completed the Assessment Options, open the General tab on the popup.
Under the General tab, you can set a unique URL for your assessment by adding the slug to the URL field.
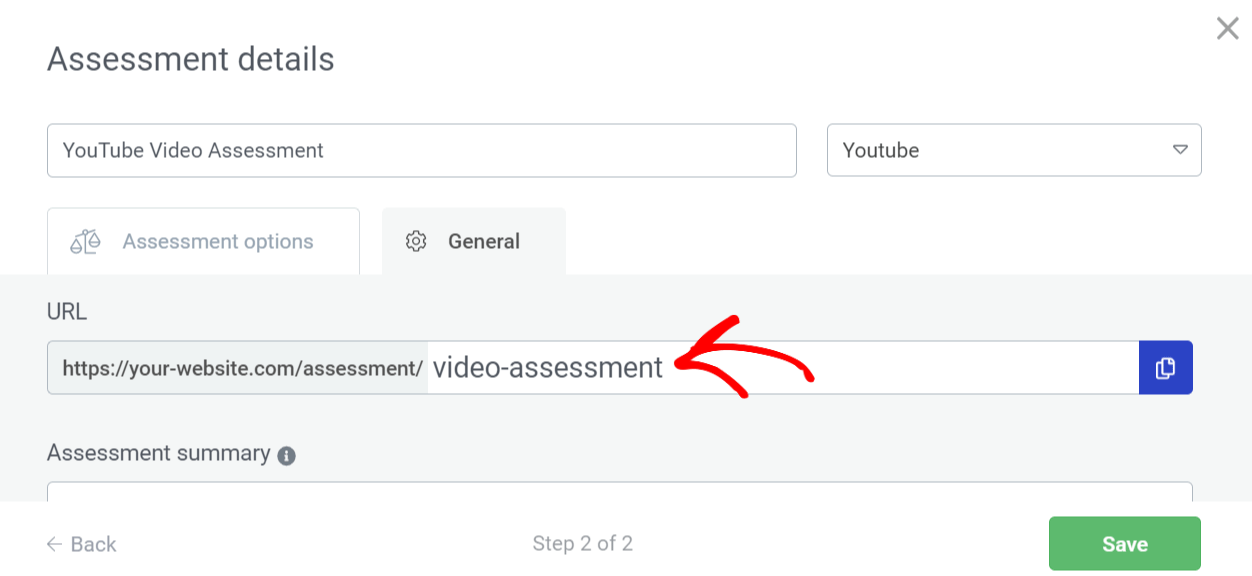
When you scroll further, you’ll find the following options:
- Assessment Summary: This is a quick description displayed on the course overview page on the front end.
- Allow users to comment on this assessment: Let users comment on the assessment.
- Give users free access to this content: You can decide whether to restrict access to the assessment or let logged-in users access it for free.
- Would you like to add a custom assessment cover image: Has a field where you can upload a cover picture for the assessment that’ll appear on the frontend.
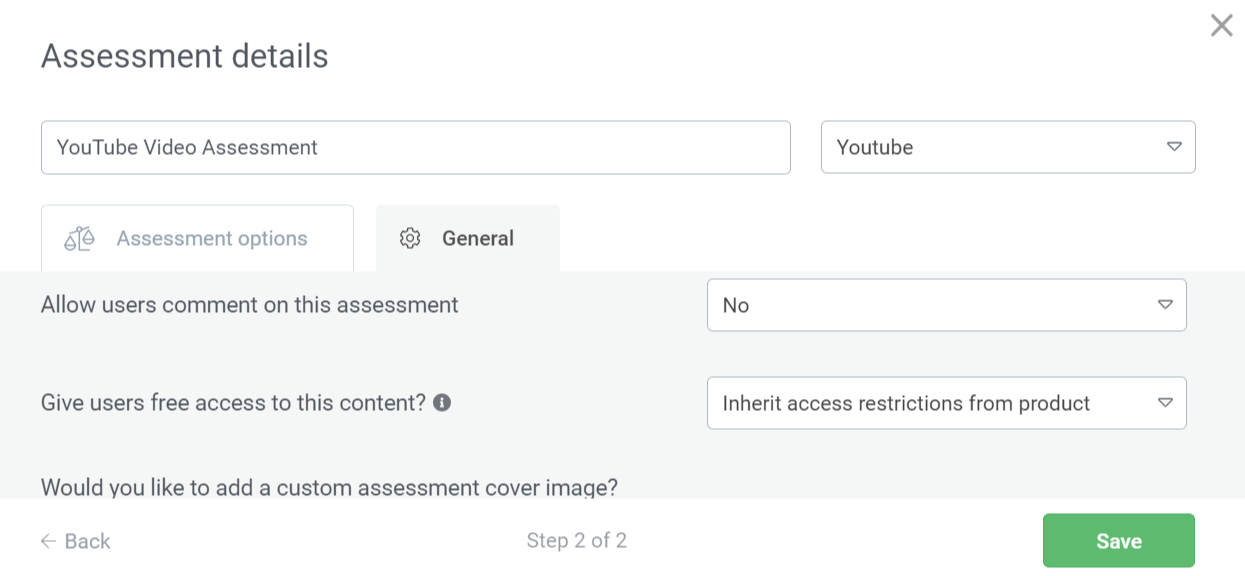
Once you complete the Assessment options and general settings, click the Save button to add the assessment to the course.
Accepting External Links to Student Assessments
Would you like to collect assignments as links to a website, blog, Google document, or anything else? You can do that using the Assessment feature of Thrive Apprentice.
To create an assessment that accepts YouTube links, select the External Link option on the Create an Assessment popup, and click the Continue button.
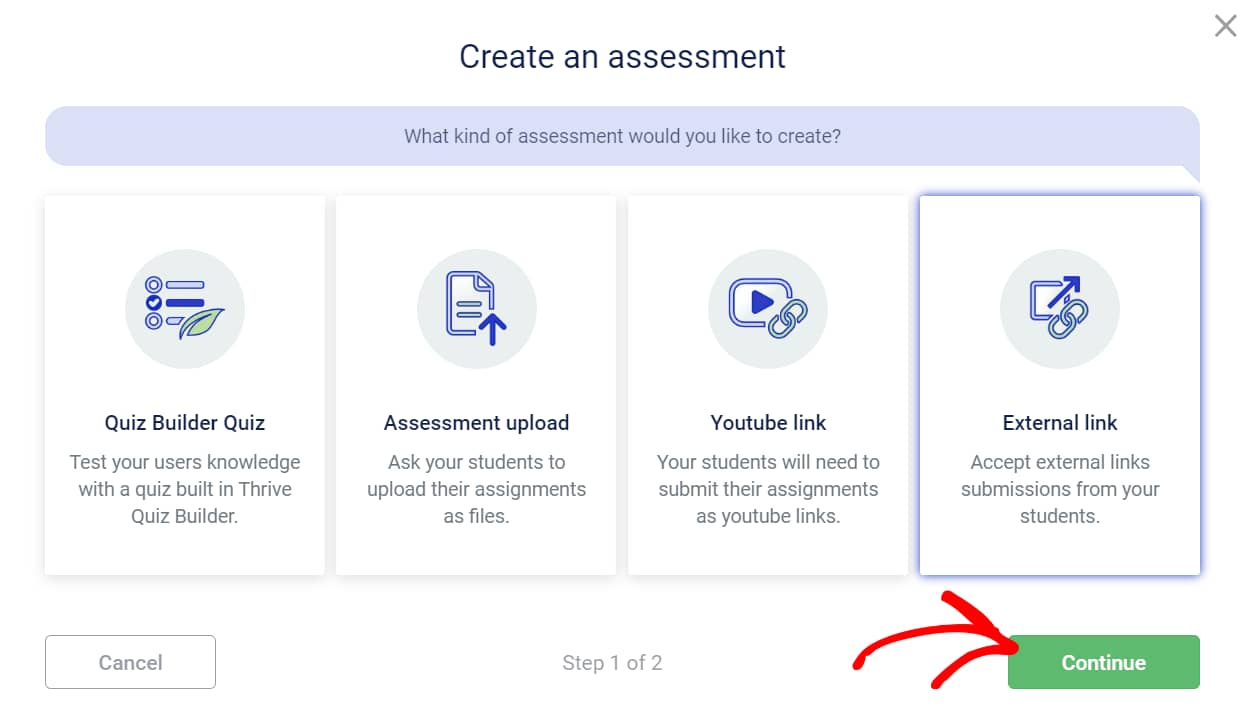
On the next screen, you can set an Assessment name and confirm the type of assessment to proceed.
Note: The page design and form students use to submit the link can be edited using Thrive Architect.
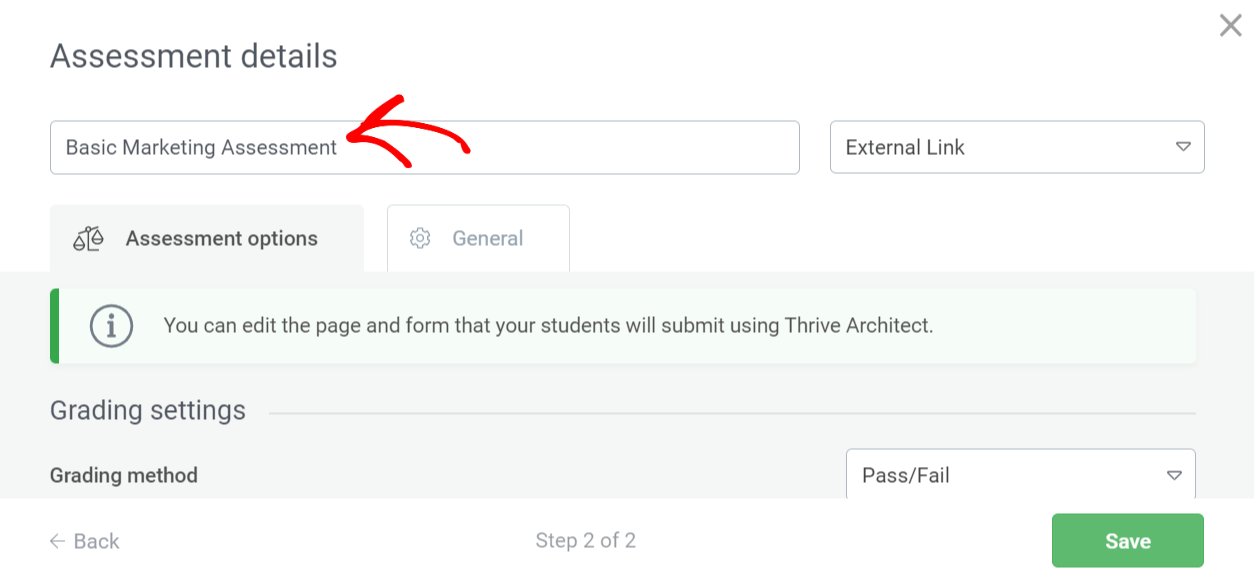
Further down, you’ll find the Grading settings, where you can manage the following:
- Grading method: to decide how you’d like your grades to look.
- Mark Assessments Manually: where selecting Yes will let you look into each assessment, while No will declare that the student has passed the assessment as soon as they submit it.
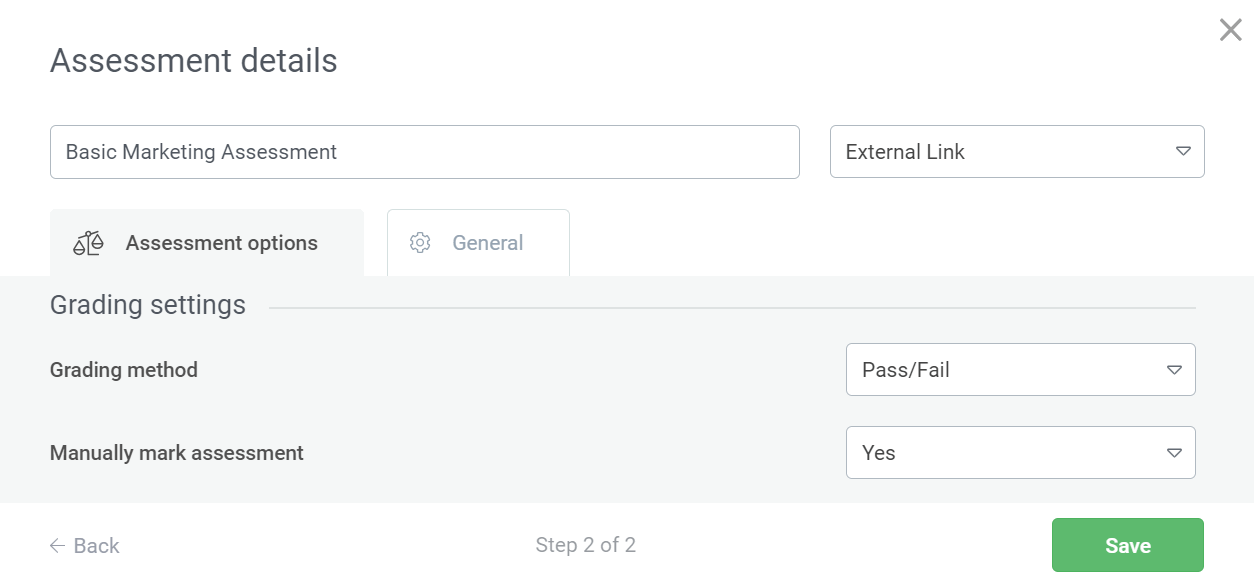
Once you’ve completed the Assessment Options, open the General tab on the popup.
Under the General tab, you can set a unique URL for your assessment by adding the slug to the URL field.
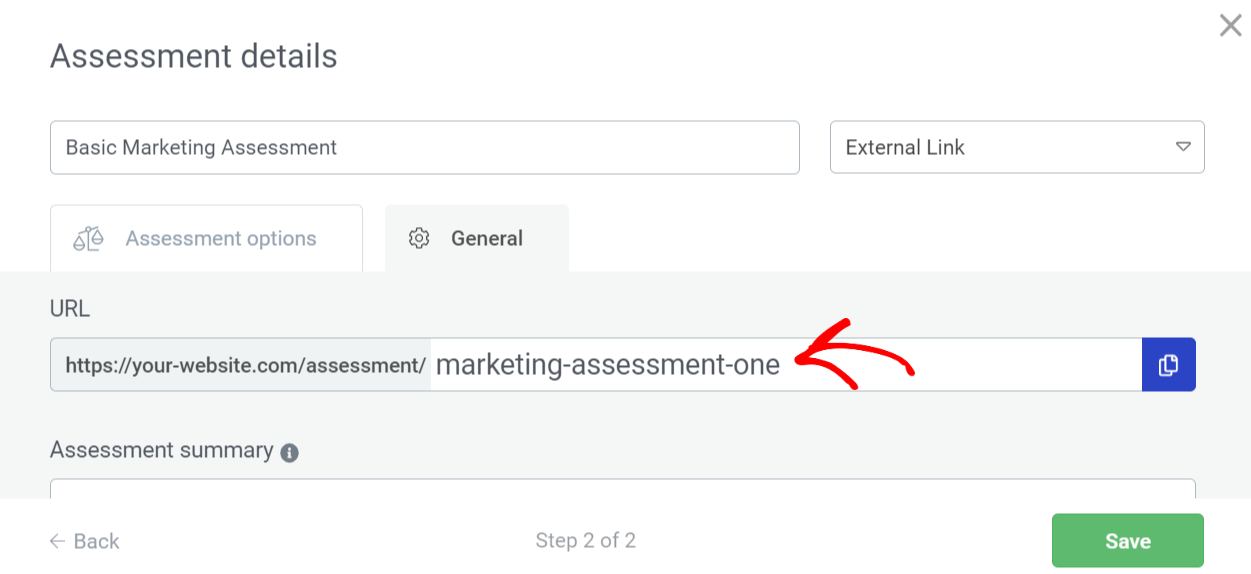
When you scroll further, you’ll find the following options:
- Assessment Summary: This is a quick description displayed on the course overview page on the front end.
- Allow users to comment on this assessment: Let users comment on the assessment.
- Give users free access to this content: You can decide whether to restrict access to the assessment or let logged-in users access it for free.
- Would you like to add a custom assessment cover image: Has a field where you can upload a cover picture for the assessment that’ll appear on the frontend.
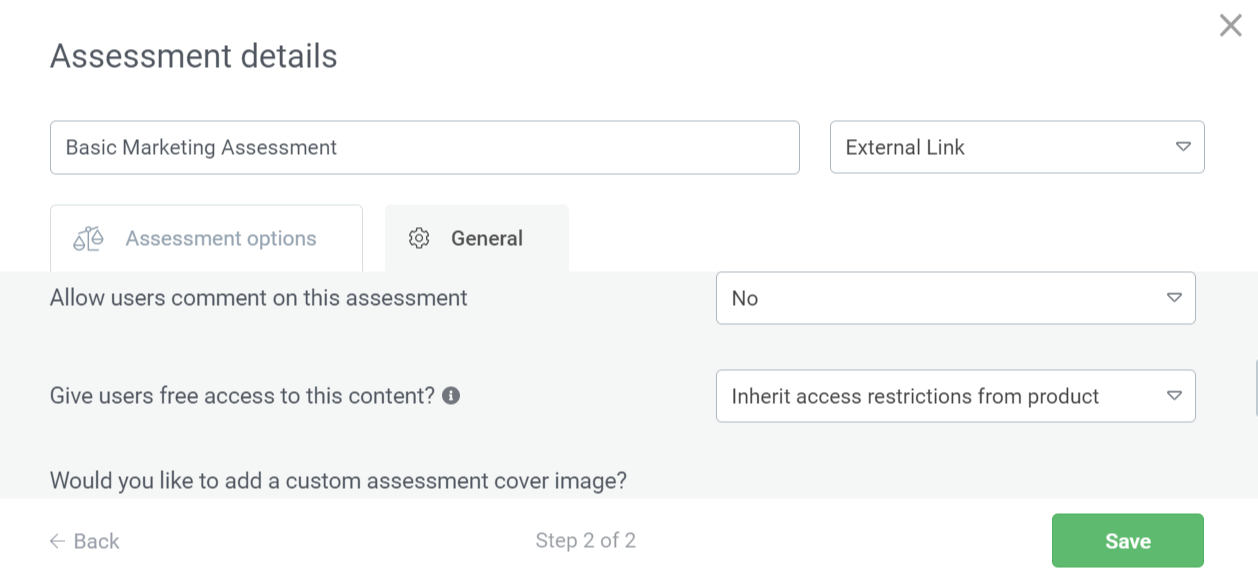
Once you complete the Assessment options and general settings, click the Save button to add the assessment to the course.
We’ve just seen how you can enable and add different types of assessments to your courses using Thrive Apprentice.
Next, if you’d like to edit the page where you ask for a YouTube or External link as an assessment, you’ll need to use Thrive Architect. Here’s a detailed guide about Thrive Architect that’ll help you get used to it.