When you create a Custom Menu for your website using Thrive Architect or Thrive Theme Builder, you have the option of creating a conditional one. What this means is that you are able to create two different variations for it, so that it looks different, depending on whether the person seeing the menu is logged into the website or not.
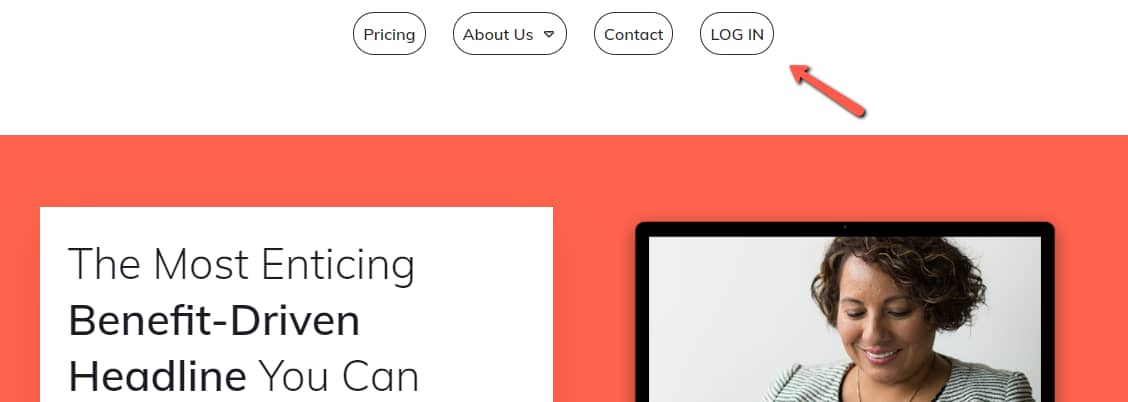
For example, someone that is not logged in on my website might see this when they access one of my pages:

They will see the following menu items:
- Pricing
- About Us
- Contact
- Log In
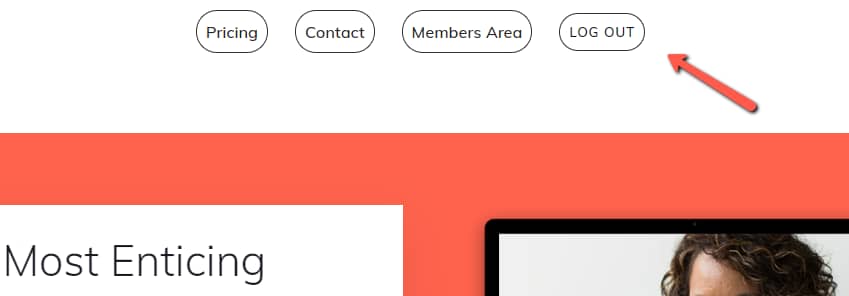
Whereas, once they’ve logged in, some of the menu items they see will remain, but some will change:

A logged-in user will see the following menu items:
- Pricing
- Contact
- Members Area
- Log Out
This article will show you how to achieve that.
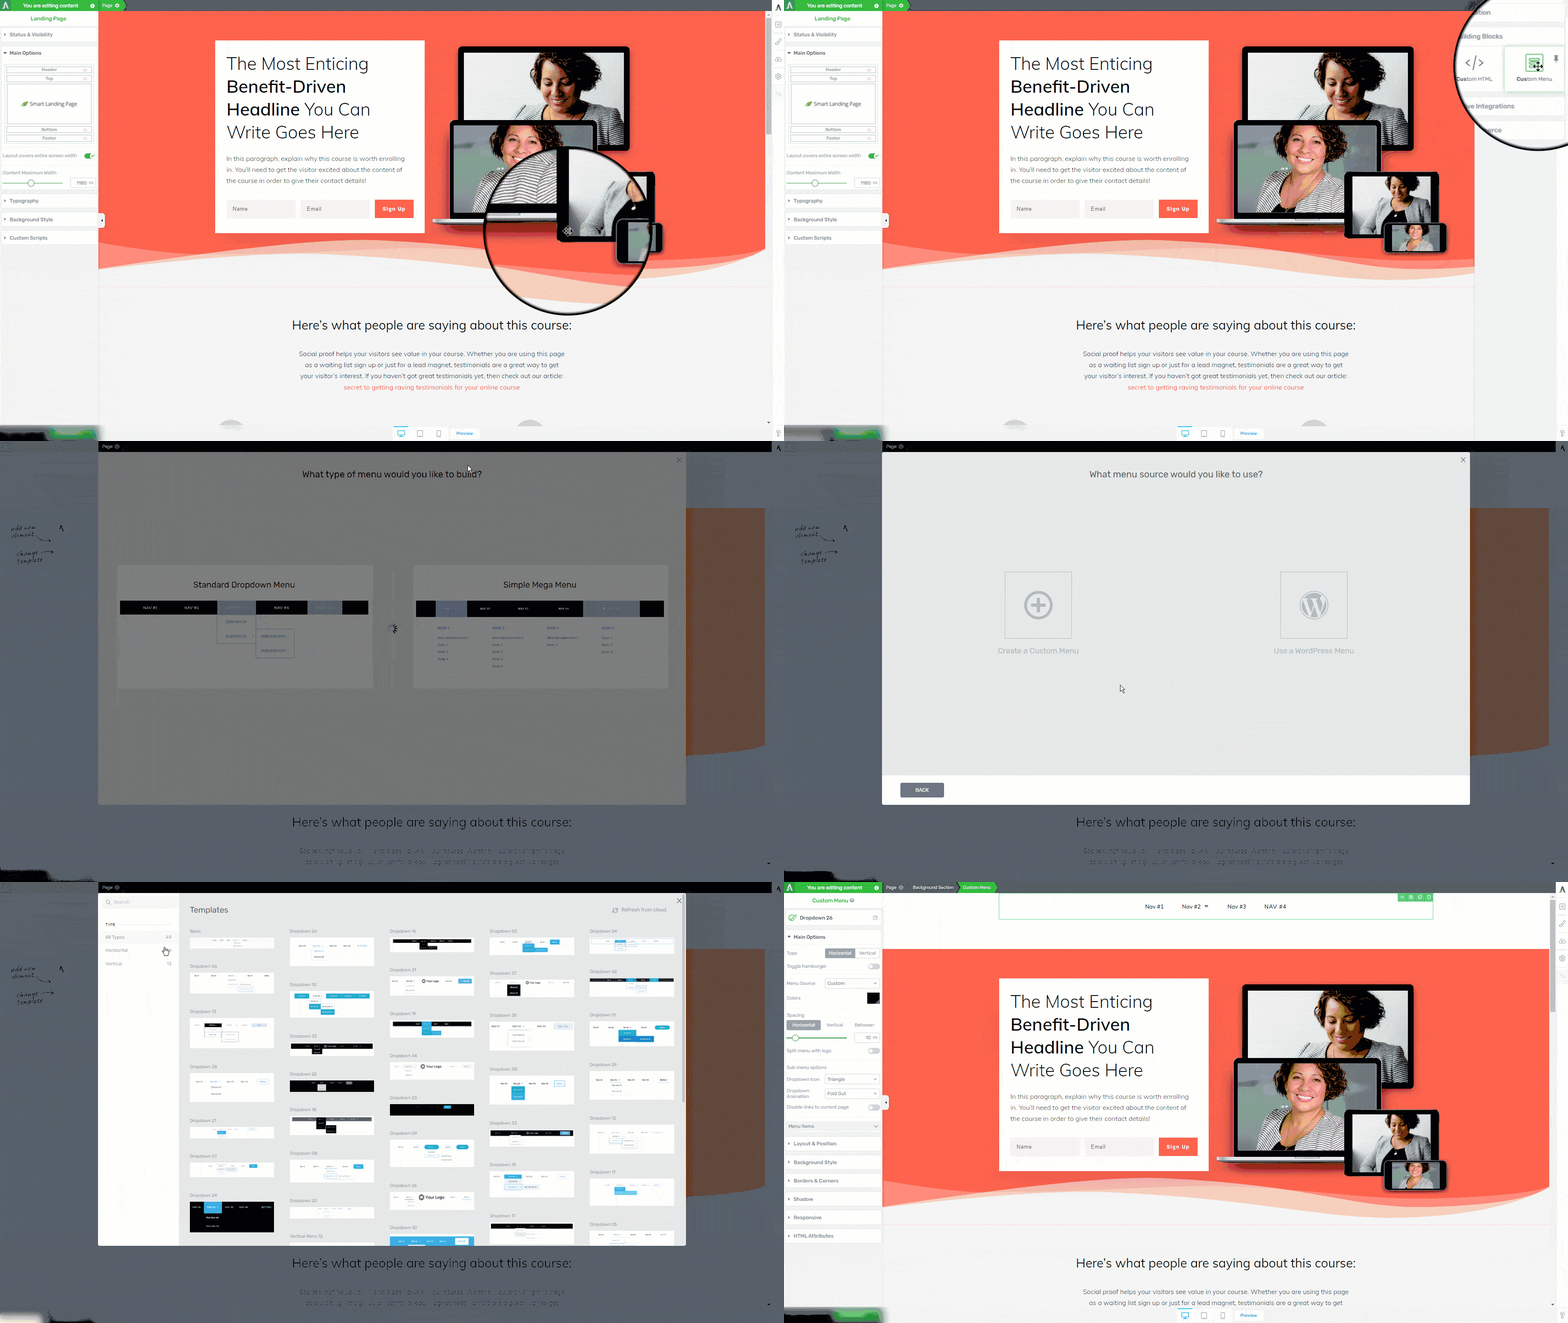
Firstly, you will have to open the page where you want to add the menu using the Thrive Architect/Thrive Theme Builder editor and add a “Custom Menu” element to it.
You can find the element in the element list, by clicking on the plus sign from the right sidebar:

Then, drag and drop the element to your editor and select the template you wish.
You can then proceed to customize the element and the menu items, and that can be done using all of the available options that have been described in this article.
For you to create a conditional menu, you will need to add all of the menu items that you want the menu to have in both the logged-in and the logged-out states, and then choose when each item should be visible.
For that, make sure you add all of the menu items first:

As you can see in the image above, I have added every item in the “Menu Items” section of the left sidebar. Then, for each item, you are able to decide when it should be displayed, with the help of the “Show When” option.
For each menu item, you can click on the pencil icon to edit it:

A pop-up will open, and you will have the “Show when” option available. Click on the field next to the option, to see all the available choices:

You will notice that, for each menu item, you’re able to choose whether you want it to be shown:
- only when someone is logged in;
- only when someone is logged out;
- always;

Go ahead and make the necessary choice for each menu item. To achieve the result shown at the beginning of the article, I have created the following setup:
|
Menu Item |
Show When |
|
Pricing |
Always |
|
About Us |
Logged Out |
|
Contact |
Always |
|
Members Area |
Logged In |
|
Log In |
Logged Out |
|
Log Out |
Logged In |
Note: Don’t forget that, in order for the “Log In” and “Log Out” buttons of the menu to properly work, you will have to link them to the correspondent pages, so that they will actually allow users to perform the actions.

This is how you can create a menu that will have different menu items, according to the state of the user that visits the page.
Note: To create the menu that will be applied to the entire theme, you can follow the same steps, but you can add the menu to your Thrive Theme Builder “Header Section”, for example. This way, the menu will appear on every page/post on which the templates with that “Header Section” have been applied.
Hopefully, this article was useful to you. You can always check out our knowledge base for more tutorials and articles regarding Thrive Suite products and features.