This feature allows you to configure advanced settings for your Thrive Comments plugin.
If can be easily accessed from the Thrive Comments dashboard:

Once you open this section, you will see three main categories – related to keywords, labels, and page speed optimization:

Automatically link keywords in moderator replies
The first option allows you to automatically link certain words from the moderator replies to a URL or even a page/post from your site:

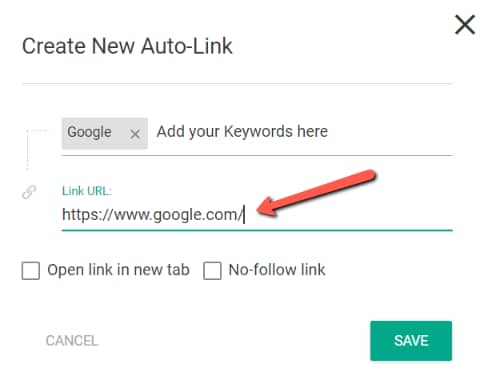
For example, every time the word “Google” is mentioned in a moderator’s reply, it can automatically be linked to “https://google.com“.
To configure this, click on “Add New”:

In the first field, type in the word that you would like to have linked, and then hit “enter”:

Then, in the second field, type in the URL (e.g. https://google.com):

Remember, you can also use the second field to search among the pages/posts from your website:

Below, you can also choose to open the redirect page in a new tab or to make it “no-follow”:

After everything is set up, you can simply click on “Save”:

Here’s how this example will look like on the front-end:

You can add as many linked keywords as you see fit, by clicking on the same “Add New” button. You will be able to view and administrate all of them from the same dashboard:

The following toggle allows you to “Use Thrive Comments generated meta-tags for social sharing”:

These generated meta-tags will automatically appear in the source code of social media share buttons. Remember that they will not appear on the page itself.
This option is turned off by default, but you can activate it, if you want, by using the switch next to the option. Keep in mind that these meta-tags can be generated by other plugins as well, and, if that’s the case, the other tags will show up, too.
The last option from the “User Roles” section allows you to “Load new comments in real time”:

If this feature is enabled a new comment will be visible to the admin, on the front-end, in the very second the user submits it, without having to refresh the page.
If the comment needs to be approved first, it will carry the “This comment is awaiting moderation” message, but will still show up instantaneously.
Customize & translate labels
This feature allows you to bring changes to all the labels that are available on the front-end interface:

To start using the feature, simply click on the “Customize” button:

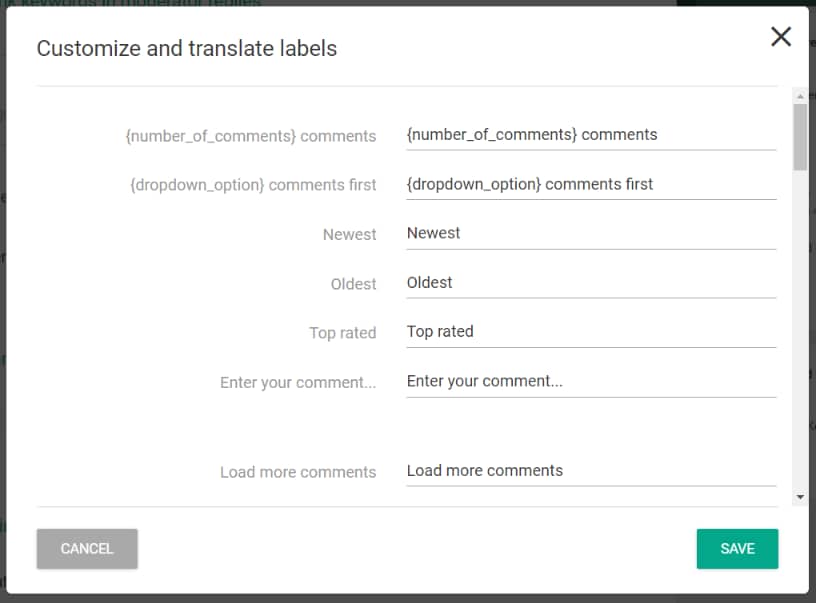
After clicking on the button, a new window will appear, where you can view all the labels that will show up on the front-end interface:

For example, the first label: “{number_of_comments} comments} shows the total number of comments that have been posted on the page/post. It’s also the first label on the front-end, starting from the top of the commenting section:

As you can see, the {number_of_comments} part represents the actual comment count – so, our recommendation is that you only change the last part.
Then, to change a label, all you need to do is click on the field and replace what you see fit:

Then, this is how the label will look like on the front-end:

The same principle can be applied to any of the labels from the list.
Page Speed Optimization
By using this feature, you will be able to improve the speed of the page/post where the comments are displayed:

Starting off with the first option, you can load the comments only when the user scrolls down on the page until he reaches the actual comment section:

This means that the comments will not load when the user opens the page, and the loading speed will be much faster.
The next option applies if you have multiple comments on the page and you have divided them into pages (see the article about General Settings):

If the comments are divided and the option is enabled, then the user can load the next page of comments only by clicking on the “Load more Comments” button:

If the option is disabled, the next page of comments will be loaded automatically.
Last, but not least, you can display the avatar images only when the comment enters viewport:

If this option is enabled, the loading speed for the entire page will be much faster.
These are the basic steps for setting up the “Advanced Settings” in Thrive Comments. If you want to read more about other Thrive Comments settings, make sure to check out our knowledge base archive.