If you’ve inserted links into your page, using Thrive Architect, whether they are static, dynamic, or a jump link, you can easily edit the style of a link and even save it for further use.
If you are not familiar with how to apply a link to your post or page, we have a detailed article about it.
So, here is how you can customize a link and save its style to use it on other posts and pages as well.
Add the Link
The first thing you need to do is to add a link. As an example, I will add a static link, but keep in mind that everything works exactly the same in the case of a jump link, or a dynamic link as well.
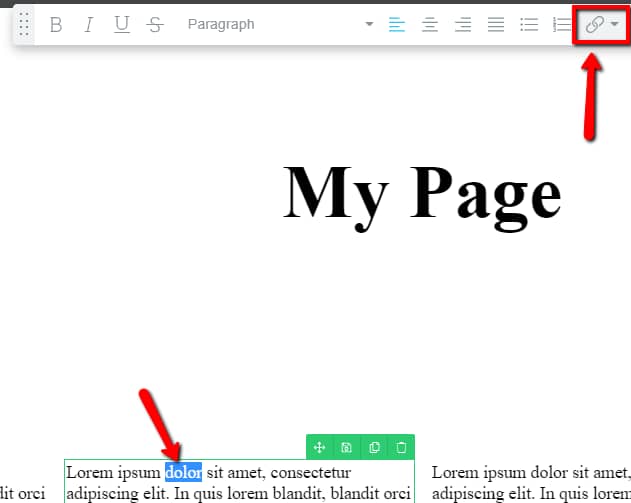
To add the link, click and drag to select the text that you want to link. Then, click on the linking option (chain icon) from the “Panel Options” that appeared on the upper-center part of the editor:
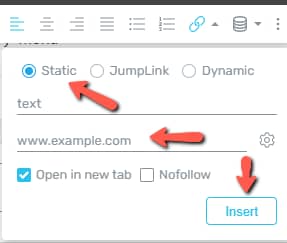
When you click on the icon, a small drop-down menu will open. Here is where you have to choose what kind of link you want to insert, and then add the URL of the link. You can also choose if you want it to open in a new tab, or if you want it to be a “Nofollow” link.
If you need more in-depth details about how to insert the link, you can read this article.
In this case, I will choose a “Static Link”, insert the URL in the “URL field”, and then click on “Insert”:
Your link should be inserted. You can now apply styles and changes to it, in order for it to fit your website.
Link Style Options
After inserting a link, you can easily change and customize the way it looks.
Simply click on the link and you will immediately notice that its options will appear in the left sidebar:
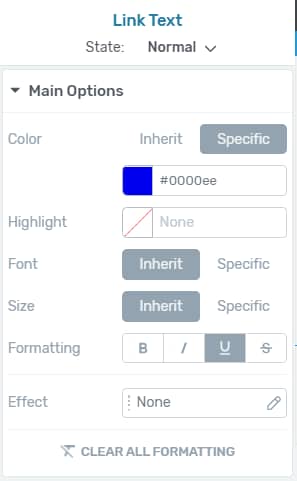
State: Normal
You can customize both the normal and the hover state for the link.
The normal state represents the way you normally see the link. The hover state represents how the link looks like when someone hovers over it.
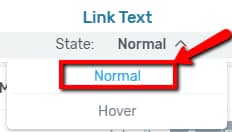
To change the state that you are customizing, go to the very top of the left sidebar and click on the “Normal” field next to “State:”. This will open a drop-down menu, where you can choose the state that you want to modify:
Once you’ve selected the state that you want to edit, you can start using the “Main Options”.
Color
The first option is the “Color” one. Firstly, you can choose between the “Inherit” option and the “Specific” one:

Specific
By default, when you click on the link, the “Specific” option will be selected. This allows you to choose a certain color for the link. Doing this will help the link stand out from the rest of the text.
To do that, click on the color box below the option:

This will open the color picker pop-up. You can manually pick a color using the color picker, or you can enter a HEX/RGB code inside the dedicated field:
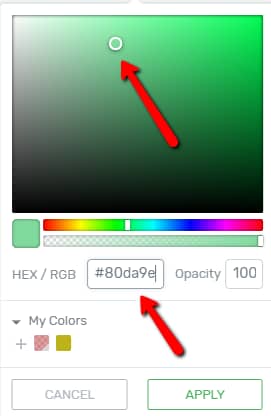
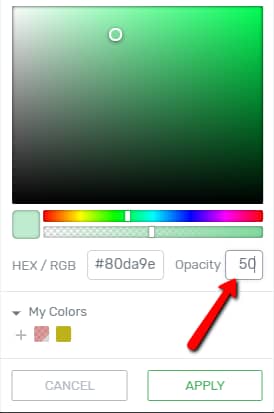
Furthermore, you can also adjust the opacity of the color, by entering a value manually in the “Opacity” field:
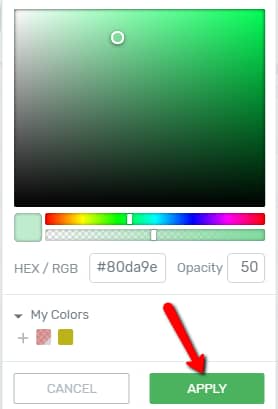
Once you’re done choosing a color, click on the green “Apply” button:
Inherit
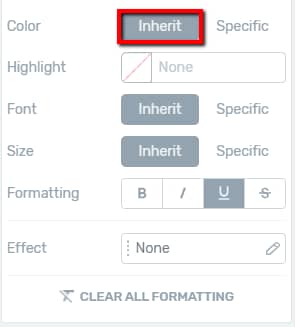
If you choose this option, the color of the link will inherit the color of the text it belongs to. This means the link will have the exact same color as the text surrounding it, so it will not stand out.
The options are the same as the ones you have if you choose “Specific”, except the fact that you cannot choose the color of the link:
Highlight
Next, you can choose a highlight color, if you want the text of your link to be highlighted. To choose a highlight color, click on the color box next to the option:
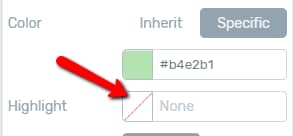
A color pop-up will open. The process of choosing a color is exactly the same as the one described above.
Font
Next, you can choose the font of your link. You can choose again between the two options, “Inherit” or “Specific”:

Inherit
If you choose to use the inherited font, the font of the “Link Text” will inherit the style of the rest of the text it belongs to.
Specific
Choosing the “Specific” option will allow you to customize the font of the link. Once you click on the “Specific” option, click on the field that will appear below it:

This will open the “Source” option:
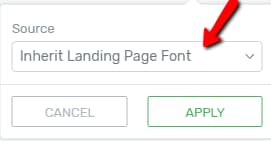
Click on the field in order to select a source (the options are: Google Fonts, Web Safe Fonts, and Inherit Landing Page Fonts).
- Source: Google Fonts
If you choose the “Google Fonts” source, the options below will appear. Click on the field next to the “Font” option to choose a font:
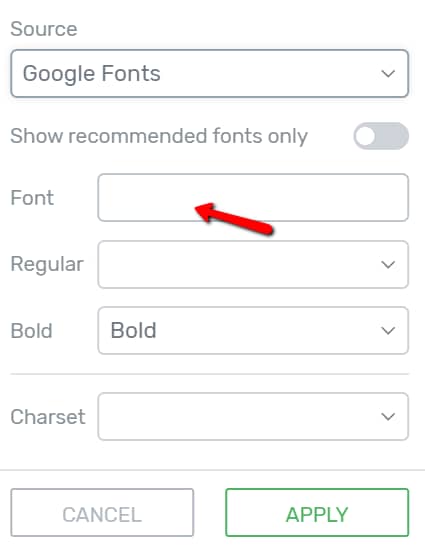
You will notice that a drop-down menu will appear. Scroll down and choose the desired font:

After you choose a certain font, the rest of the fields will auto-fill with the default options of the respective font, that you cannot modify:
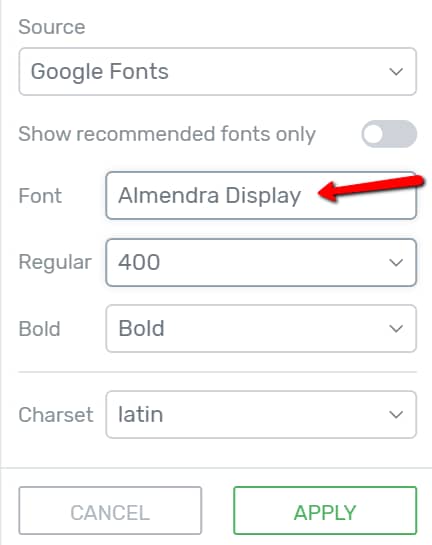
To change the font, delete the one from the “Font” field, and the drop-down with the available fonts will open again, and you can choose another one.
- Source: Web Safe Fonts
The next available source is the “Web Safe Fonts” one. Click on the field next to the “Font” option to choose a font:
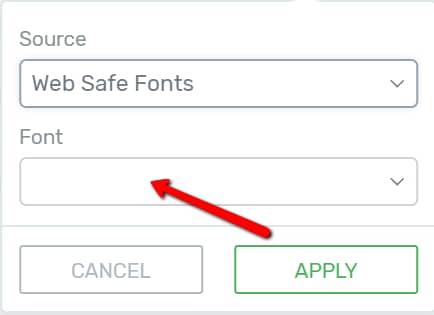
Simply choose the font that best fits your link text from the list of fonts that opens. Don’t forget to click on “Apply” when you’re done:

- Source: Inherit Landing Page Font
If you choose this source, the link text will inherit the font of the landing page that you’ve chosen.
Size
After choosing a suitable font for the link, you can choose its size as well. You also have two available options: “Inherit” and “Specific”.
Inherit
If you choose to use the inherited size, the “Link Text” will inherit the size of the rest of the text it belongs to.
Specific
Choosing this option, you can give your link a custom size, different from the rest of the text. To do that, choose the “Specific” option next to the size option, and either drag the slider from side to side or manually enter a numerical value in the field next to the slider:

Formatting
Next, you can use the “Formatting” option to further customize your link. The four formatting options you can use are:
- Bold: example
- Italic: example
- Underline: example
- Strikethrough: example
To use either one, simply click on one of the four icons:

Effect
Below the formatting option, the next option is the “Effect” one. This means that you can choose an effect for the “Link Text”. To do that, click on the field:

Then, from the drop-down, choose whichever effect best suits your website, and then click on “Apply”:
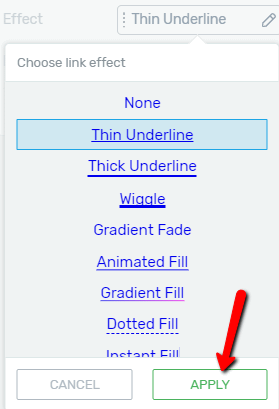
Note: If you have previously selected the “Underline” from the formatting options, then that is considered an effect already. Therefore, the “Thin Underline” effect will automatically appear selected in the “Effect” section.
Effect Color
After you choose an effect, the last option is the “Effect Color” one, which allows you to choose a different color for the effect that you’ve previously applied. To choose a color, click on the box with the color next to the option, in order to open the color picker:

This will open the color pop up, where you can choose the color just like you would do in the case of any other color pop up.
Clear all Formatting

Lastly, you also have the “Clear all Formatting” option. Clicking on it will reset all the options you’ve made to the link and reset it to the default style.
State: Hover
As mentioned before, you can also change the way the link looks in the “Hover” state. In order to change the state, go to the top part of the left sidebar, click on “Normal” and choose “Hover” from the drop-down that opens:
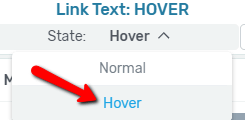
The options are the same as for the “Normal” state, except that you cannot choose an “Effect” for your link.
Panel Options
Besides the options you have on the left sidebar, you can also change the way the link looks like from the “Panel” found in the upper part of your editor:

Styling options
These options are the basic ones that you will find in any text editor. With their help you can easily apply Bold, Italics, Underline or Strike-through to your text. You just have to select the text and click on the desired option:

Style
Next, you can choose a link style that you want to use, update an existing link style or delete one. This is helpful if you want to customize a link and you want to quickly make the other links from your website look the same.
Create a New Link Style
If you want to make your custom link style, you first have to select your link. Then, customize it as you wish, using the left sidebar and the styling options from the panel.
Next, click on the “Default” field in the panel:

Note: If you are customizing a link from a “Landing Page”, then the “Paragraph” field will show “Landing Page Default” instead of “Default”:

A new drop-down menu will open, which will look like this, in case you don’t have any saved link styles yet:

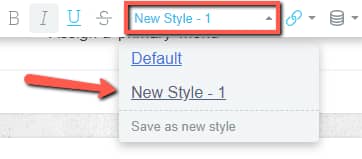
In the drop-down, click on the “Save as new style” button. Once you do that, you have to name the style:
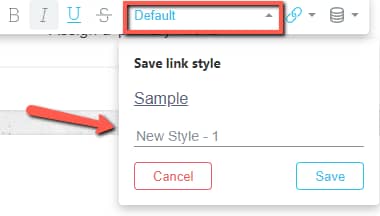
After you do that, click on the “Save” button. Your new style will then appear in the drop-down, and you can use it anywhere on your website:
Apply Link Style
There are two ways in which you can change the style of a link. The first one is to select the respective link and click on the style you want to apply directly from the drop-down menu.
The second way to do that is to click on the “Apply Link Style” button which appears in the new drop-down menu that opens when you hover over the styles:

Update Link Style to Match
In the same drop-down, the next option is “Update Link Style to Match”:
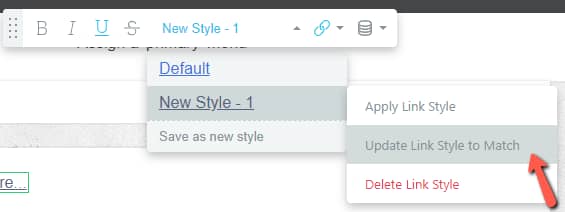
If you choose it, the style will be updated to match the style of the hyperlink that is currently being edited.
Delete Link Style
The last option here is the “Delete Link Style” one:
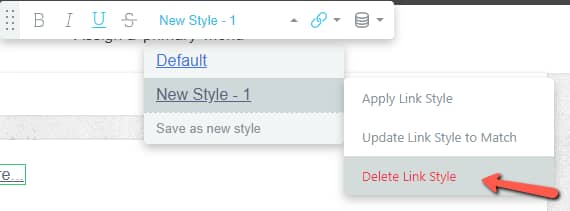
If you choose it, the style will be removed. Therefore, it will go back to the “Landing Page Default” style, in case you are using a Landing Page.
Hyperlink
The next option available in the panel is the “Hyperlink” one:

You’ve used it to insert your link in the beginning, but if you click on it you can edit the URL. This is also where you can delete your hyperlink:
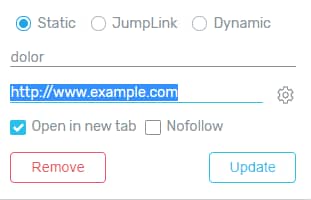
If you need more information about this section, or about how to insert a link, check out this article.
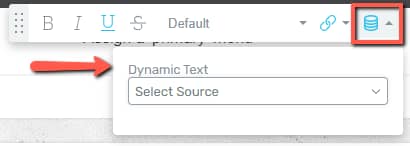
Insert Dynamic Text
Lastly, you can insert a “Dynamic Text” to a link:
If you want to find out how to do that, we have explained everything in this article.
These are all the ways in which you can customize a link, create link styles and apply them throughout your website.
I hope this article was useful for you. If that’s the case, don’t forget to reward our efforts with a smile below 🙂