Besides trigger and display frequency settings, you can also customize the animation settings of lightbox opt-in forms.
To open animation settings, go to the lightbox forms’ individual page – either in 2 Step Lightboxes or inside a Lead Group. This is how the page looks like:

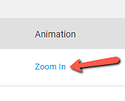
Under “Animation” you can see a text in blue (in the example it is “Zoom in”). Click on this blue text for the animation settings:

This step will open up the animation settings pop-up. Click on the field with the animation, to open a list with all the available ones:
There are several animation options:
-
Instant
-
Zoom In
-
Zoom Out
-
Rotational
-
Slide in from Top
-
Slide in from Bottom
-
Slide in from Left
-
Slide in from Right, etc.
Under the list of animation options that you can choose from the drop-down menu, you can see the preview of each selected animation. This is exactly how your lightbox form will appear on your site:

To apply the chosen animation, click on “Save”:
