|
Please note that due to Google’s latest Core Web Vitals updates, Accelerated Mobile Pages (AMP) are no longer required for you to rank in Google’s search results. |
You can easily set up the AMP (Accelerated Mobile Pages) technology for speed optimization from the Thrive Theme Builder Dashboard.
Firstly, in your Thrive Theme Builder dashboard, access the “Site Speed” section of the left sidebar:

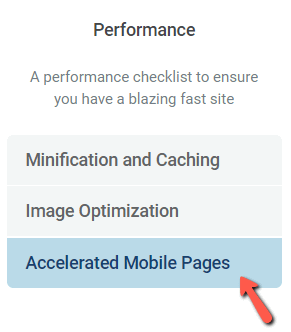
From the page that opens, on the left side, go to “Accelerated Mobile Pages”:

This will open the AMP setup page. Follow these four simple steps to complete the setup:
1. Enable AMP
To enable the AMP, click on the switch next to the “Enable AMP” option:

Then the AMP options will appear, and you can start setting up AMP for your website.
2. Choose the desired content
You have the option of choosing the content types for which you want the AMP to be enabled (for example Posts, Pages, Landing Pages, etc.). Check the desired content from this list:

Choosing a content type for the AMP will mean that the visitors of your website will receive a faster, more optimized mobile version of the respective content type.
When you check an item from the list, a notification will show on the lower side of the page, letting you know that the modifications had been applied, like so:

3. Convert all internal links to AMP URLs
Next, you should choose whether you want internal links to point to AMP URLs. By default, the “Convert all internal links to AMP URLs” option is disabled.
In case you enable it, all of your internal links will automatically point to URLs with AMP content. If you want to enable this, click on the switch next to the option:

Then, you will receive a notification that confirms that the setting has been saved:

4. Install Google Analytics on AMP content
With this next option, you can choose whether you want Google Analytics code implemented on AMP content. This, too, is disabled by default.
If you want to activate it, click on this switch next to the “Install Google Analytics on AMP content” option:

Then the Google Analytics section will appear below the option. This section will contain a field, where you can insert your Google Analytics code:

After inserting the code, make sure to click on the “Save” button below the field, on the right side:

|
Note: After you finish setting up AMP for your chosen content, you can test if it works, using the validator from here: https://search.google.com/test/amp. If everything is alright, then your AMP content is up and running. If not and you will get error notifications, please contact our support team, by opening a support conversation. Then, they will look into the matter as soon as possible. |
Disabling AMP on Individual Pages/Posts
If needed, you are able to disable AMP for individual posts/pages and, this way, you can have the entire page rendered.
If you are looking to do that, here is how:
-
for Thrive Architect created posts/pages
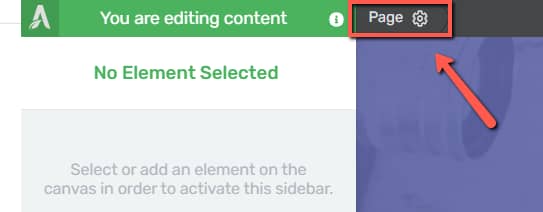
Launch the Thrive Architect editor on the page/post on which you want to disable AMP. Then, click on “Page” or “Post”, in the breadcrumbs:

The available options will appear in the left sidebar, and you will notice the “Advanced Mobile Pages” section. Click on it, to expand it:

And this is where you will see the “Disable AMP for this post” option. Click on the switch next to the option if you want to disable AMP on the page/post:

-
for pages/posts created using Gutenberg
If you’ve not used Thrive Architect for that page/post, you can also disable AMP from the WordPress editor. The option can be found in the “Theme Builder Templates” section:

Once you expand the section, you’ll notice the “Disable AMP for this post” option, which you can check if you want the page/post to not be using this feature:

This is how you can set up Accelerated Mobile Pages with Thrive Theme Builder. For more information about various Thrive Theme Builder features, make sure to check out our tutorial page.
I hope this article was helpful. If so, please make sure to rate it with a smile below 🙂